部署kubernetes1.8.4+contiv高可用集群
原理和架构图参考上一篇,这里只记录操作步骤。由于东西较多,篇幅也会较长。
etcd version: 3.2.11
kube version: 1.8.4
contiv version: 1.1.7
docker version: 17.03.2-ce
OS version: debian stretch
三个ETCD节点(contiv插件也要使用etcd,这里每个节点复用跑2个etcd实例)
192.168.5.84    etcd0,contiv0
192.168.5.85    etcd1,contiv1
192.168.2.77    etcd2,contiv2
两个lvs节点,这里lvs代理了三个服务,分别是apiserver、contiv的netmaster、以及由于contiv不支持配置多个etcd所以代理三个etcd实例提供一个vip出来给contiv服务
192.168.2.56     master
192.168.2.57     backup
4个k8s节点(3个master,1个node)
192.168.5.62     master01
192.168.5.63     master02
192.168.5.107    master03
192.168.5.68     node
1、部署ETCD,由于这几个节点系统版本较低,所以没有使用systemd
a、部署k8s使用的etcd集群,直接使用etcd二进制文件启动即可,启动脚本如下:
# cat etcd-start.sh
#获取IP
localip=`ifconfig em2|grep -w inet| awk '{print $2}'|awk -F: '{print $2}'`
pubip=0.0.0.0
#启动服务
etcd --name etcd0 -data-dir /var/lib/etcd \
  --initial-advertise-peer-urls http://${localip}:2380 \
  --listen-peer-urls http://${localip}:2380 \
  --listen-client-urls http://${pubip}:2379 \
  --advertise-client-urls http://${pubip}:2379 \
  --initial-cluster-token my-etcd-token \
  --initial-cluster etcd0= http://192.168.5.84:2380,etcd1=http://192.168.5.85:2380 ,etcd2=http://192.168.2.77:2380 \
  --initial-cluster-state new >> /var/log/etcd.log 2>&1 &
# cat etcd-start.sh
#获取IP
localip=`ifconfig em2|grep -w inet| awk '{print $2}'|awk -F: '{print $2}'`
pubip=0.0.0.0
#启动服务
etcd --name etcd1 -data-dir /var/lib/etcd \
  --initial-advertise-peer-urls http://${localip}:2380 \
  --listen-peer-urls http://${localip}:2380 \
  --listen-client-urls http://${pubip}:2379 \
  --advertise-client-urls http://${pubip}:2379 \
  --initial-cluster-token my-etcd-token \
  --initial-cluster etcd0= http://192.168.5.84:2380,etcd1=http://192.168.5.85:2380 ,etcd2=http://192.168.2.77:2380 \
  --initial-cluster-state new >> /var/log/etcd.log 2>&1 &
# cat etcd-start.sh
#获取IP
localip=`ifconfig bond0|grep -w inet| awk '{print $2}'|awk -F: '{print $2}'`
pubip=0.0.0.0
#启动服务
etcd --name etcd2 -data-dir /var/lib/etcd \
  --initial-advertise-peer-urls http://${localip}:2380 \
  --listen-peer-urls http://${localip}:2380 \
  --listen-client-urls http://${pubip}:2379 \
  --advertise-client-urls http://${pubip}:2379 \
  --initial-cluster-token my-etcd-token \
  --initial-cluster etcd0= http://192.168.5.84:2380,etcd1=http://192.168.5.85:2380 ,etcd2=http://192.168.2.77:2380 \
  --initial-cluster-state new >> /var/log/etcd.log 2>&1 &
b、部署contiv使用的etcd:
# cat etcd-2-start.sh
#!/bin/bash
#获取IP
localip=`ifconfig em2|grep -w inet| awk '{print $2}'|awk -F: '{print $2}'`
pubip=0.0.0.0
#启动服务
etcd --name contiv0 -data-dir /var/etcd/contiv-data \
  --initial-advertise-peer-urls http://${localip}:6667 \
  --listen-peer-urls http://${localip}:6667 \
  --listen-client-urls http://${pubip}:6666 \
  --advertise-client-urls http://${pubip}:6666 \
  --initial-cluster-token contiv-etcd-token \
  --initial-cluster contiv0= http://192.168.5.84:6667 ,contiv1= http://192.168.5.85:6667 ,contiv2=http://192.168.2.77:6667 \
  --initial-cluster-state new >> /var/log/etcd-contiv.log 2>&1 &
# cat etcd-2-start.sh
#获取IP
localip=`ifconfig em2|grep -w inet| awk '{print $2}'|awk -F: '{print $2}'`
pubip='0.0.0.0'
#启动服务
etcd --name contiv1 -data-dir /var/etcd/contiv-data \
  --initial-advertise-peer-urls http://${localip}:6667 \
  --listen-peer-urls http://${localip}:6667 \
  --listen-client-urls http://${pubip}:6666 \
  --advertise-client-urls http://${pubip}:6666 \
  --initial-cluster-token contiv-etcd-token \
  --initial-cluster contiv0= http://192.168.5.84:6667 ,contiv1= http://192.168.5.85:6667 ,contiv2=http://192.168.2.77:6667 \
  --initial-cluster-state new >> /var/log/etcd-contiv.log 2>&1 &
# cat etcd-2-start.sh
#获取IP
localip=`ifconfig bond0|grep -w inet| awk '{print $2}'|awk -F: '{print $2}'`
pubip=0.0.0.0
#启动服务
etcd --name contiv2 -data-dir /var/etcd/contiv-data \
  --initial-advertise-peer-urls http://${localip}:6667 \
  --listen-peer-urls http://${localip}:6667 \
  --listen-client-urls http://${pubip}:6666 \
  --advertise-client-urls http://${pubip}:6666 \
  --initial-cluster-token contiv-etcd-token \
  --initial-cluster contiv0= http://192.168.5.84:6667 ,contiv1= http://192.168.5.85:6667 ,contiv2=http://192.168.2.77:6667 \
  --initial-cluster-state new >> /var/log/etcd-contiv.log 2>&1 &
c、启动服务,直接执行脚本即可。
# bash etcd-start.sh
# bash etcd-2-start.sh
d、验证集群状态
# etcdctl member list
4e2d8913b0f6d79d, started, etcd2,  http://192.168.2.77:2380 , http://0.0.0.0:2379
7b72fa2df0544e1b, started, etcd0,  http://192.168.5.84:2380 , http://0.0.0.0:2379
930f118a7f33cf1c, started, etcd1,  http://192.168.5.85:2380 , http://0.0.0.0:2379
# etcdctl --endpoints=http://192.168.6.17:6666 member list
21868a2f15be0a01, started, contiv0,  http://192.168.5.84:6667 , http://0.0.0.0:6666
63df25ae8bd96b52, started, contiv1,  http://192.168.5.85:6667 , http://0.0.0.0:6666
cf59e48c1866f41d, started, contiv2,  http://192.168.2.77:6667 , http://0.0.0.0:6666
e、配置lvs代理contiv的etcd,vip为192.168.6.17。这里顺便把其他两个服务的代理配置全部贴上来,实际上仅仅是多了两段配置而已,apiserver的vip为192.168.6.16
# vim vi_bgp_VI1_yizhuang.inc
vrrp_instance VII_1 {
    virtual_router_id 102
    interface eth0
    include /etc/keepalived/state_VI1.conf
    preempt_delay 120
    garp_master_delay 0
    garp_master_refresh 5
    lvs_sync_daemon_interface eth0
    authentication {
        auth_type PASS
        auth_pass opsdk
    }

    virtual_ipaddress {
        #k8s-apiserver
        192.168.6.16

        #etcd
        192.168.6.17
    }
}
这里单独使用了一个state.conf配置文件来区分主备角色,也就是master和backup节点的配置仅有这一部分不同,其他配置可以直接复制过去。
# vim /etc/keepalived/state_VI1.conf
#uy-s-07
     state MASTER
     priority 150
#uy-s-45
#    state BACKUP
#    priority 100
# vim /etc/keepalived/k8s.conf
virtual_server 192.168.6.16 6443 {
    lb_algo rr
    lb_kind DR
    persistence_timeout 0
    delay_loop 20
    protocol TCP

    real_server 192.168.5.62 6443 {
        weight 10
        TCP_CHECK {
            connect_timeout 10
        }
    }

    real_server 192.168.5.63 6443 {
        weight 10
        TCP_CHECK {
            connect_timeout 10
        }
    }

    real_server 192.168.5.107 6443 {
        weight 10
        TCP_CHECK {
            connect_timeout 10
        }
    }
}

virtual_server 192.168.6.17 6666 {
    lb_algo rr
    lb_kind DR
    persistence_timeout 0
    delay_loop 20
    protocol TCP

    real_server 192.168.5.84 6666 {
        weight 10
        TCP_CHECK {
            connect_timeout 10
        }
    }

    real_server 192.168.5.85 6666 {
        weight 10
        TCP_CHECK {
            connect_timeout 10
        }
    }

    real_server 192.168.2.77 6666 {
        weight 10
        TCP_CHECK {
            connect_timeout 10
        }
    }
}

virtual_server 192.168.6.16 9999 {
    lb_algo rr
    lb_kind DR
    persistence_timeout 0
    delay_loop 20
    protocol TCP

    real_server 192.168.5.62 9999 {
        weight 10
        TCP_CHECK {
            connect_timeout 10
        }
    }

    real_server 192.168.5.63 9999 {
        weight 10
        TCP_CHECK {
            connect_timeout 10
        }
    }

    real_server 192.168.5.107 9999 {
        weight 10
        TCP_CHECK {
            connect_timeout 10
        }
    }
}
为etcd的各real-server设置vip:
# vim /etc/network/interfaces
auto lo:17
iface lo:17 inet static
address 192.168.6.17
netmask 255.255.255.255

# ifconfig lo:17 192.168.6.17 netmask 255.255.255.255 up
为apiserver的各real-server设置vip:
# vim /etc/network/interfaces
auto lo:16
iface lo:16 inet static
address 192.168.6.16
netmask 255.255.255.255

# ifconfig lo:16 192.168.6.16 netmask 255.255.255.255 up
为所有real-server设置内核参数:
# vim /etc/sysctl.conf
net.ipv4.conf.lo.arp_ignore = 1
net.ipv4.conf.lo.arp_announce = 2
net.ipv4.conf.all.arp_ignore = 1
net.ipv4.conf.all.arp_announce = 2
net.ipv4.ip_forward = 1
net.netfilter.nf_conntrack_max = 2048000
启动服务,查看服务状态:
# /etc/init.d/keepalived start
# ipvsadm -ln
IP Virtual Server version 1.2.1 (size=1048576)
Prot LocalAddress:Port Scheduler Flags
  -> RemoteAddress:Port           Forward Weight ActiveConn InActConn
TCP  192.168.6.16:6443 rr
  -> 192.168.5.62:6443            Route   10     1          0
  -> 192.168.5.63:6443            Route   10     0          0
  -> 192.168.5.107:6443           Route   10     4          0
TCP  192.168.6.16:9999 rr
  -> 192.168.5.62:9999            Route   10     0          0
  -> 192.168.5.63:9999            Route   10     0          0
  -> 192.168.5.107:9999           Route   10     0          0
TCP  192.168.6.17:6666 rr
  -> 192.168.2.77:6666            Route   10     24         14
  -> 192.168.5.84:6666            Route   10     22         13
  -> 192.168.5.85:6666            Route   10     18         14
2、部署k8s,由于上篇已经说了详细步骤,这里会略过一些内容
a、安装kubeadm,kubectl,kubelet,由于目前仓库已经更新到最新版本1.9了,所以这里如果要安装低版本需要手动指定版本号
# aptitude install -y kubeadm=1.8.4-00 kubectl=1.8.4-00 kubelet=1.8.4-00
b、使用kubeadm初始化第一个master节点。由于使用的是contiv插件,所以这里可以不设置网络参数podSubnet。因为contiv没有使用controller-manager的subnet-allocating特性,另外,weave也没有使用这个特性。
# cat kubeadm-config.yml
apiVersion: kubeadm.k8s.io/v1alpha1
kind: MasterConfiguration
api:
  advertiseAddress: "192.168.5.62"
etcd:
  endpoints:
  - "http://192.168.5.84:2379"
  - "http://192.168.5.85:2379"
  - "http://192.168.2.77:2379"
kubernetesVersion: "v1.8.4"
apiServerCertSANs:
- uy06-04
- uy06-05
- uy08-10
- uy08-11
- 192.168.6.16
- 192.168.6.17
- 127.0.0.1
- 192.168.5.62
- 192.168.5.63
- 192.168.5.107
- 192.168.5.108
- 30.0.0.1
- 10.244.0.1
- 10.96.0.1
- kubernetes
- kubernetes.default
- kubernetes.default.svc
- kubernetes.default.svc.cluster
- kubernetes.default.svc.cluster.local
tokenTTL: 0s
networking:
  podSubnet: 30.0.0.0/10
执行初始化:
# kubeadm init --config=kubeadm-config.yml
[kubeadm] WARNING: kubeadm is in beta, please do not use it for production clusters.
[init] Using Kubernetes version: v1.8.4
[init] Using Authorization modes: [Node RBAC]
[preflight] Running pre-flight checks
[preflight] WARNING: kubelet service is not enabled, please run 'systemctl enable kubelet.service'
[preflight] Starting the kubelet service
[kubeadm] WARNING: starting in 1.8, tokens expire after 24 hours by default (if you require a non-expiring token use --token-ttl 0)
[certificates] Generated ca certificate and key.
[certificates] Generated apiserver certificate and key.
[certificates] apiserver serving cert is signed for DNS names [uy06-04 kubernetes kubernetes.default kubernetes.default.svc kubernetes.default.svc.cluster.local uy06-04 uy06-05 uy08-10 uy08-11 kubernetes kubernetes.default kubernetes.default.svc kubernetes.default.svc.cluster kubernetes.default.svc.cluster.local] and IPs [10.96.0.1 192.168.5.62 192.168.6.16 192.168.6.17 127.0.0.1 192.168.5.62 192.168.5.63 192.168.5.107 192.168.5.108 30.0.0.1 10.244.0.1 10.96.0.1]
[certificates] Generated apiserver-kubelet-client certificate and key.
[certificates] Generated sa key and public key.
[certificates] Generated front-proxy-ca certificate and key.
[certificates] Generated front-proxy-client certificate and key.
[certificates] Valid certificates and keys now exist in "/etc/kubernetes/pki"
[kubeconfig] Wrote KubeConfig file to disk: "admin.conf"
[kubeconfig] Wrote KubeConfig file to disk: "kubelet.conf"
[kubeconfig] Wrote KubeConfig file to disk: "controller-manager.conf"
[kubeconfig] Wrote KubeConfig file to disk: "scheduler.conf"
[controlplane] Wrote Static Pod manifest for component kube-apiserver to "/etc/kubernetes/manifests/kube-apiserver.yaml"
[controlplane] Wrote Static Pod manifest for component kube-controller-manager to "/etc/kubernetes/manifests/kube-controller-manager.yaml"
[controlplane] Wrote Static Pod manifest for component kube-scheduler to "/etc/kubernetes/manifests/kube-scheduler.yaml"
[init] Waiting for the kubelet to boot up the control plane as Static Pods from directory "/etc/kubernetes/manifests"
[init] This often takes around a minute; or longer if the control plane images have to be pulled.
[apiclient] All control plane components are healthy after 28.502953 seconds
[uploadconfig] Storing the configuration used in ConfigMap "kubeadm-config" in the "kube-system" Namespace
[markmaster] Will mark node uy06-04 as master by adding a label and a taint
[markmaster] Master uy06-04 tainted and labelled with key/value: node-role.kubernetes.io/master=""
[bootstraptoken] Using token: 0c8921.578cf94fe0721e01
[bootstraptoken] Configured RBAC rules to allow Node Bootstrap tokens to post CSRs in order for nodes to get long term certificate credentials
[bootstraptoken] Configured RBAC rules to allow the csrapprover controller automatically approve CSRs from a Node Bootstrap Token
[bootstraptoken] Configured RBAC rules to allow certificate rotation for all node client certificates in the cluster
[bootstraptoken] Creating the "cluster-info" ConfigMap in the "kube-public" namespace
[addons] Applied essential addon: kube-dns
[addons] Applied essential addon: kube-proxy

Your Kubernetes master has initialized successfully!

To start using your cluster, you need to run (as a regular user):

  mkdir -p $HOME/.kube
  sudo cp -i /etc/kubernetes/admin.conf $HOME/.kube/config
  sudo chown $(id -u):$(id -g) $HOME/.kube/config

You should now deploy a pod network to the cluster.
Run "kubectl apply -f [podnetwork].yaml" with one of the options listed at:
  http://kubernetes.io/docs/admin/addons/

You can now join any number of machines by running the following on each node
as root:

  kubeadm join --token 0c8921.578cf94fe0721e01 192.168.5.62:6443 --discovery-token-ca-cert-hash sha256:58cf1826d49e44fb6ff1590ddb077dd4e530fe58e13c1502ec07ce41ba6cc39e
c、验证通过证书是否能访问到API(这里每个节点都务必验证一下,证书问题会导致各种其它问题)
# cd /etc/kubernetes/pki/
# curl --cacert ca.crt --cert apiserver-kubelet-client.crt --key apiserver-kubelet-client.key https://192.168.5.62:6443
d、让master节点参与调度
# kubectl taint nodes --all node-role.kubernetes.io/master-
e、安装contiv
下载安装包并解压
# curl -L -O https://github.com/contiv/install/releases/download/1.1.7/contiv-1.1.7.tgz
# tar xvf contiv-1.1.7.tgz
修改yaml文件
# cd contiv-1.1.7/
# vim install/k8s/k8s1.6/contiv.yaml

1、修改ca路径,并将k8s的ca复制到该路径下
    "K8S_CA": "/var/contiv/ca.crt"
2、修改netmaster的部署类型,把ReplicaSet改为DaemonSet(实现netmaster的高可用),这里使用了nodeSeletor,需要把三个master都打上master标签
    nodeSelector:
        node-role.kubernetes.io/master: ""
3、注释掉replicas指令
另外需要注意的是:
- 将/var/contiv/目录下证书文件复制到三个master节点,netmaster pod需要挂载使用这些证书文件
- 除了第一个节点外,需要为其他每个节点创建/var/run/contiv/目录,netplugin会生成两个socket文件,如果不手动创建目录,则无法生成socket
Contiv提供了一个安装脚本,执行脚本安装:
# ./install/k8s/install.sh -n 192.168.6.16 -w routing -s etcd://192.168.6.17:6666
Installing Contiv for Kubernetes
secret "aci.key" created
Generating local certs for Contiv Proxy
Setting installation parameters
Applying contiv installation
To customize the installation press Ctrl+C and edit ./.contiv.yaml.
Extracting netctl from netplugin container
dafec6d9f0036d4743bf4b8a51797ddd19f4402eb6c966c417acf08922ad59bb
clusterrolebinding "contiv-netplugin" created
clusterrole "contiv-netplugin" created
serviceaccount "contiv-netplugin" created
clusterrolebinding "contiv-netmaster" created
clusterrole "contiv-netmaster" created
serviceaccount "contiv-netmaster" created
configmap "contiv-config" created
daemonset "contiv-netplugin" created
daemonset "contiv-netmaster" created
Creating network default:contivh1
daemonset "contiv-netplugin" deleted
clusterrolebinding "contiv-netplugin" configured
clusterrole "contiv-netplugin" configured
serviceaccount "contiv-netplugin" unchanged
clusterrolebinding "contiv-netmaster" configured
clusterrole "contiv-netmaster" configured
serviceaccount "contiv-netmaster" unchanged
configmap "contiv-config" unchanged
daemonset "contiv-netplugin" created
daemonset "contiv-netmaster" configured
Installation is complete
=========================================================

Contiv UI is available at https://192.168.6.16:10000
Please use the first run wizard or configure the setup as follows:
 Configure forwarding mode (optional, default is routing).
 netctl global set --fwd-mode routing
 Configure ACI mode (optional)
 netctl global set --fabric-mode aci --vlan-range <start>-<end>
 Create a default network
 netctl net create -t default --subnet=<CIDR> default-net
 For example, netctl net create -t default --subnet=20.1.1.0/24 -g 20.1.1.1 default-net

=========================================================
这里使用了三个参数:
-n 表示netmaster的地址。为了实现高可用,这里我起了三个netmaster,然后用lvs代理三个节点提供vip
-w 表示转发模式
-s 表示外部etcd地址,如果指定了外部etcd则不会创建etcd容器,而且无需手动处理。
另外,contiv是自带UI的,监听10000端口,上面安装完成后有提示,可以通过UI来管理网络。默认账号和密码是admin/admin。
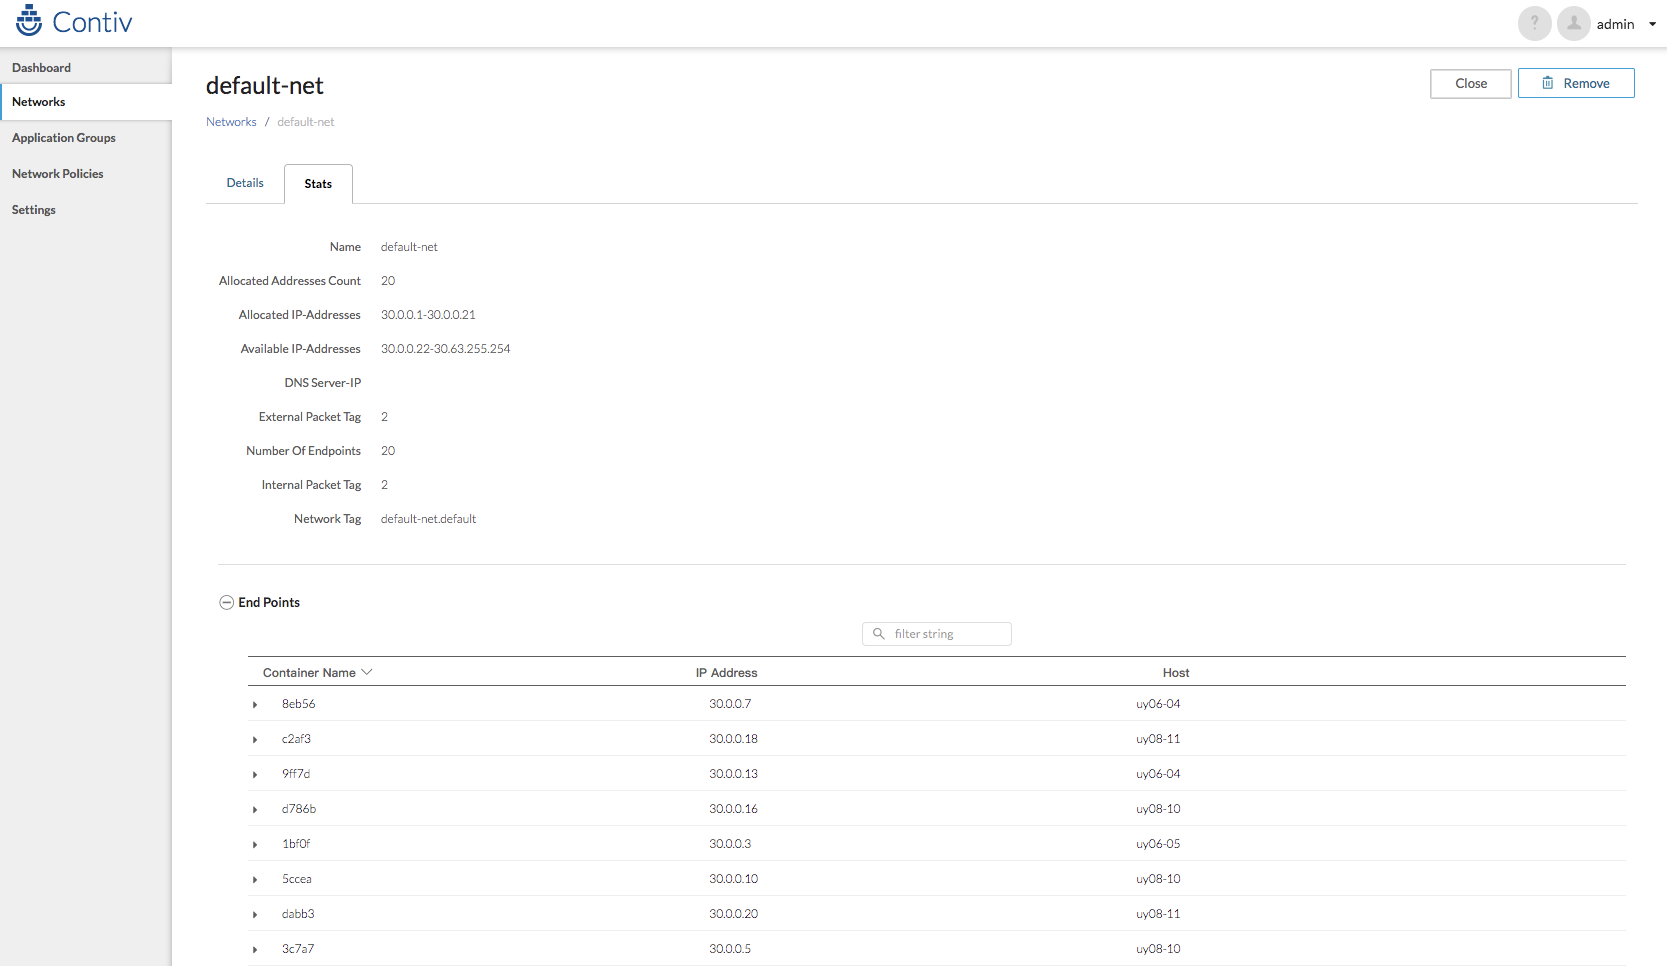
不过,如果你知道要做什么的话,用命令会更方便快捷。
创建一个subnet:
# netctl net create -t default --subnet=30.0.0.0/10 -g 30.0.0.1 default-net
# netctl network ls
Tenant   Network      Nw Type  Encap type  Packet tag  Subnet        Gateway    IPv6Subnet  IPv6Gateway  Cfgd Tag
------   -------      -------  ----------  ----------  -------       ------     ----------  -----------  ---------
default  contivh1     infra    vxlan       0           132.1.1.0/24  132.1.1.1
default  default-net  data     vxlan       0           30.0.0.0/10   30.0.0.1
创建好网络之后,这时kube-dns pod就能拿到IP地址并运行起来了。
f、部署另外两个master节点
将第一个节点的配置文件和证书全部复制过来:
# scp -r 192.168.5.62:/etc/kubernetes/* /etc/kubernetes/
为新的master节点生成新的证书:
# cat uy06-05.sh
#!/bin/bash

#apiserver-kubelet-client
openssl genrsa -out apiserver-kubelet-client.key 2048
openssl req -new -key apiserver-kubelet-client.key -out apiserver-kubelet-client.csr -subj "/O=system:masters/CN=kube-apiserver-kubelet-client"
openssl x509 -req -set_serial $(date +%s%N) -in apiserver-kubelet-client.csr -CA ca.crt -CAkey ca.key -out apiserver-kubelet-client.crt -days 365 -extensions v3_req -extfile apiserver-kubelet-client-openssl.cnf

#controller-manager
openssl genrsa -out controller-manager.key 2048
openssl req -new -key controller-manager.key -out controller-manager.csr -subj "/CN=system:kube-controller-manager"
openssl x509 -req -set_serial $(date +%s%N) -in controller-manager.csr -CA ca.crt -CAkey ca.key -out controller-manager.crt -days 365 -extensions v3_req -extfile controller-manager-openssl.cnf

#scheduler
openssl genrsa -out scheduler.key 2048
openssl req -new -key scheduler.key -out scheduler.csr -subj "/CN=system:kube-scheduler"
openssl x509 -req -set_serial $(date +%s%N) -in scheduler.csr -CA ca.crt -CAkey ca.key -out scheduler.crt -days 365 -extensions v3_req -extfile scheduler-openssl.cnf

#admin
openssl genrsa -out admin.key 2048
openssl req -new -key admin.key -out admin.csr -subj "/O=system:masters/CN=kubernetes-admin"
openssl x509 -req -set_serial $(date +%s%N) -in admin.csr -CA ca.crt -CAkey ca.key -out admin.crt -days 365 -extensions v3_req -extfile admin-openssl.cnf

#node
openssl genrsa -out $(hostname).key 2048
openssl req -new -key $(hostname).key -out $(hostname).csr -subj "/O=system:nodes/CN=system:node:$(hostname)" -config kubelet-openssl.cnf
openssl x509 -req -set_serial $(date +%s%N) -in $(hostname).csr -CA ca.crt -CAkey ca.key -out $(hostname).crt -days 365 -extensions v3_req -extfile kubelet-openssl.cnf
这里生成了四套证书,使用的openssl配置文件其实是相同的:
[ v3_req ]
# Extensions to add to a certificate request
keyUsage = critical, digitalSignature, keyEncipherment
extendedKeyUsage = clientAuth
用新的证书替换旧证书,这几套证书只有apiserver-kubelet-client的证书是路径引用的,其他的都是直接引用的证书加密过的内容:
#!/bin/bash

VIP=192.168.5.62
APISERVER_PORT=6443
HOSTNAME=$(hostname)
CA_CRT=$(cat ca.crt |base64 -w0)
CA_KEY=$(cat ca.key |base64 -w0)
ADMIN_CRT=$(cat admin.crt |base64 -w0)
ADMIN_KEY=$(cat admin.key |base64 -w0)
CONTROLLER_CRT=$(cat controller-manager.crt |base64 -w0)
CONTROLLER_KEY=$(cat controller-manager.key |base64 -w0)
KUBELET_CRT=$(cat $(hostname).crt |base64 -w0)
KUBELET_KEY=$(cat $(hostname).key |base64 -w0)
SCHEDULER_CRT=$(cat scheduler.crt |base64 -w0)
SCHEDULER_KEY=$(cat scheduler.key |base64 -w0)

#admin
sed -e "s/VIP/$VIP/g" -e "s/APISERVER_PORT/$APISERVER_PORT/g" -e "s/CA_CRT/$CA_CRT/g" -e "s/ADMIN_CRT/$ADMIN_CRT/g" -e "s/ADMIN_KEY/$ADMIN_KEY/g" admin.temp > admin.conf
cp -a admin.conf /etc/kubernetes/admin.conf

#kubelet
sed -e "s/VIP/$VIP/g" -e "s/APISERVER_PORT/$APISERVER_PORT/g" -e "s/HOSTNAME/$HOSTNAME/g" -e "s/CA_CRT/$CA_CRT/g" -e "s/CA_KEY/$CA_KEY/g" -e "s/KUBELET_CRT/$KUBELET_CRT/g" -e "s/KUBELET_KEY/$KUBELET_KEY/g" kubelet.temp > kubelet.conf
cp -a kubelet.conf /etc/kubernetes/kubelet.conf

#controller-manager
sed -e "s/VIP/$VIP/g" -e "s/APISERVER_PORT/$APISERVER_PORT/g" -e "s/CA_CRT/$CA_CRT/g" -e "s/CONTROLLER_CRT/$CONTROLLER_CRT/g" -e "s/CONTROLLER_KEY/$CONTROLLER_KEY/g" controller-manager.temp > controller-manager.conf
cp -a controller-manager.conf /etc/kubernetes/controller-manager.conf

#scheduler
sed -e "s/VIP/$VIP/g" -e "s/APISERVER_PORT/$APISERVER_PORT/g" -e "s/CA_CRT/$CA_CRT/g" -e "s/SCHEDULER_CRT/$SCHEDULER_CRT/g" -e "s/SCHEDULER_KEY/$SCHEDULER_KEY/g" scheduler.temp > scheduler.conf
cp -a scheduler.conf /etc/kubernetes/scheduler.conf

#manifest kube-apiserver-client
cp -a apiserver-kubelet-client.key /etc/kubernetes/pki/
cp -a apiserver-kubelet-client.crt /etc/kubernetes/pki/
另外,由于contiv的netmaster使用了nodeSelector,这里记得要把这两个新部署master节点也打上master角色标签。默认情况下,新加入集群的节点是没有角色标签的。
# kubectl label node uy06-05 node-role.kubernetes.io/master=
# kubectl label node uy08-10 node-role.kubernetes.io/master=
替换证书之后,还要将集群中所有需要访问apiserver的地方修改为vip,以及修改advertise-address为本机地址,修改本地配置之后记得重启kubelet服务。
# sed -i "s@192.168.5.62@192.168.6.16@g" admin.conf
# sed -i "s@192.168.5.62@192.168.6.16@g" controller-manager.conf
# sed -i "s@192.168.5.62@192.168.6.16@g" kubelet.conf
# sed -i "s@192.168.5.62@192.168.6.16@g" scheduler.conf
# kubectl edit cm cluster-info -n kube-public
# kubectl edit cm kube-proxy -n kube-system
# vim manifests/kube-apiserver.yaml
--advertise-address=192.168.5.63
# systemctl restart kubelet
g、验证,尝试通过vip请求apiserver将node节点加入到集群中。
# kubeadm join --token 0c8921.578cf94fe0721e01 192.168.6.16:6443 --discovery-token-ca-cert-hash sha256:58cf1826d49e44fb6ff1590ddb077dd4e530fe58e13c1502ec07ce41ba6cc39e
[kubeadm] WARNING: kubeadm is in beta, please do not use it for production clusters.
[preflight] Running pre-flight checks
[preflight] WARNING: kubelet service is not enabled, please run 'systemctl enable kubelet.service'
[discovery] Trying to connect to API Server "192.168.6.16:6443"
[discovery] Created cluster-info discovery client, requesting info from "https://192.168.6.16:6443"
[discovery] Requesting info from "https://192.168.6.16:6443" again to validate TLS against the pinned public key
[discovery] Cluster info signature and contents are valid and TLS certificate validates against pinned roots, will use API Server "192.168.6.16:6443"
[discovery] Successfully established connection with API Server "192.168.6.16:6443"
[bootstrap] Detected server version: v1.8.4
[bootstrap] The server supports the Certificates API (certificates.k8s.io/v1beta1)

Node join complete:
* Certificate signing request sent to master and response
  received.
* Kubelet informed of new secure connection details.

Run 'kubectl get nodes' on the master to see this machine join.
h、至此,整个kubernetes集群搭建完成。
# kubectl get no
NAME      STATUS    ROLES     AGE       VERSION
uy06-04   Ready     master    1d        v1.8.4
uy06-05   Ready     master    1d        v1.8.4
uy08-10   Ready     master    1d        v1.8.4
uy08-11   Ready     <none>    1d        v1.8.4
# kubectl get po --all-namespaces
NAMESPACE     NAME                                    READY     STATUS    RESTARTS   AGE
development   snowflake-f88456558-55jk8               1/1       Running   0          3h
development   snowflake-f88456558-5lkjr               1/1       Running   0          3h
development   snowflake-f88456558-mm7hc               1/1       Running   0          3h
development   snowflake-f88456558-tpbhw               1/1       Running   0          3h
kube-system   contiv-netmaster-6ctqj                  3/3       Running   0          6h
kube-system   contiv-netmaster-w4tx9                  3/3       Running   0          3h
kube-system   contiv-netmaster-wrlgc                  3/3       Running   0          3h
kube-system   contiv-netplugin-nbhkm                  2/2       Running   0          6h
kube-system   contiv-netplugin-rf569                  2/2       Running   0          3h
kube-system   contiv-netplugin-sczzk                  2/2       Running   0          3h
kube-system   contiv-netplugin-tlf77                  2/2       Running   0          5h
kube-system   heapster-59ff54b574-jq52w               1/1       Running   0          3h
kube-system   heapster-59ff54b574-nhl56               1/1       Running   0          3h
kube-system   heapster-59ff54b574-wchcr               1/1       Running   0          3h
kube-system   kube-apiserver-uy06-04                  1/1       Running   0          7h
kube-system   kube-apiserver-uy06-05                  1/1       Running   0          5h
kube-system   kube-apiserver-uy08-10                  1/1       Running   0          3h
kube-system   kube-controller-manager-uy06-04         1/1       Running   0          7h
kube-system   kube-controller-manager-uy06-05         1/1       Running   0          5h
kube-system   kube-controller-manager-uy08-10         1/1       Running   0          3h
kube-system   kube-dns-545bc4bfd4-fcr9q               3/3       Running   0          7h
kube-system   kube-dns-545bc4bfd4-ml52t               3/3       Running   0          3h
kube-system   kube-dns-545bc4bfd4-p6d7r               3/3       Running   0          3h
kube-system   kube-dns-545bc4bfd4-t8ttx               3/3       Running   0          3h
kube-system   kube-proxy-bpdr9                        1/1       Running   0          3h
kube-system   kube-proxy-cjnt5                        1/1       Running   0          5h
kube-system   kube-proxy-l4w49                        1/1       Running   0          7h
kube-system   kube-proxy-wmqgg                        1/1       Running   0          3h
kube-system   kube-scheduler-uy06-04                  1/1       Running   0          7h
kube-system   kube-scheduler-uy06-05                  1/1       Running   0          5h
kube-system   kube-scheduler-uy08-10                  1/1       Running   0          3h
kube-system   kubernetes-dashboard-5c54687f9c-ssklk   1/1       Running   0          3h
production    frontend-987698689-7pc56                1/1       Running   0          3h
production    redis-master-5f68fbf97c-jft59           1/1       Running   0          3h
production    redis-slave-74855dfc5-2bfwj             1/1       Running   0          3h
production    redis-slave-74855dfc5-rcrkm             1/1       Running   0          3h
staging       cattle-5f67c7948b-2j8jf                 1/1       Running   0          2h
staging       cattle-5f67c7948b-4zcft                 1/1       Running   0          2h
staging       cattle-5f67c7948b-gk87r                 1/1       Running   0          2h
staging       cattle-5f67c7948b-gzhc5                 1/1       Running   0          2h
# kubectl get cs
NAME                 STATUS    MESSAGE              ERROR
scheduler            Healthy   ok
controller-manager   Healthy   ok
etcd-2               Healthy   {"health": "true"}
etcd-0               Healthy   {"health": "true"}
etcd-1               Healthy   {"health": "true"}
# kubectl cluster-info
Kubernetes master is running at https://192.168.6.16:6443
Heapster is running at https://192.168.6.16:6443/api/v1/namespaces/kube-system/services/heapster/proxy
KubeDNS is running at https://192.168.6.16:6443/api/v1/namespaces/kube-system/services/kube-dns/proxy

补充:
默认情况下,kubectl没有权限查看pod的日志,授权方法:
# vim kubelet.rbac.yaml
# This role allows full access to the kubelet API
apiVersion: rbac.authorization.k8s.io/v1
kind: ClusterRole
metadata:
  name: kubelet-api-admin
  labels:
    kubernetes.io/cluster-service: "true"
    addonmanager.kubernetes.io/mode: Reconcile
rules:
- apiGroups:
  - ""
  resources:
  - nodes/proxy
  - nodes/log
  - nodes/stats
  - nodes/metrics
  - nodes/spec
  verbs:
  - "*"

---
apiVersion: rbac.authorization.k8s.io/v1
kind: ClusterRoleBinding
metadata:
  name: my-apiserver-kubelet-binding
roleRef:
  apiGroup: rbac.authorization.k8s.io
  kind: ClusterRole
  name: kubelet-api-admin
subjects:
- apiGroup: rbac.authorization.k8s.io
  kind: User
  name: kube-apiserver-kubelet-client
# kubectl apply -f kubelet.rbac.yaml

 浙公网安备 33010602011771号