二、后端接受Get请求和Post请求(学徒版)
前言:公司最近需要开发一个系统,用来动态修改数据库中的数据,然后自定义udf函数上传到blink上,去定时调度任务去读取修改的数据。来实现自定义动态计算当前范围数据。因为之前并没有接触过springboot,所以从头开始进行学习,以下分享因为时间原因仅限解决问题,没有研究深入,以后有时间会深入探讨。大神请路过即可~如有指教不胜感激
第一步:自定义controller类:
 1 package com.example.step11;
 2
 3 import org.springframework.web.bind.annotation.*;
 4
 5 import java.util.*;
 6
 7 @RestController
 8 @RequestMapping(value="/users")  //通过这里配置使下面的所有映射都在/users下
 9 public class UserController {
10     //创建线程安全的map结构   先写=后边的会报错,必须先给个名字
11     static Map<Long, User> users = Collections.synchronizedMap(new HashMap<Long, User>());
12
13     //get请求
14     @GetMapping("/")
15     public List<User> getUserList(){
16         ArrayList<User> users = new ArrayList<>(UserController.users.values());
17         return  users;
18     }
19
20     //get请求,只传入id
21     @GetMapping("/{id}")
22     public String getUser(@PathVariable String id) {
23         // url中的id可通过@PathVariable绑定到函数的参数中
24         //url访问http://localhost:8080/users/1
25         //http://localhost:8080/users/1/?id=100
26         long newid = Long.valueOf(id);
27         System.out.println(newid);
28         return "success";
29
30     }
31
32     //get请求,传入user对象插入数据
33     @PostMapping("/post")
34     public String outuser(@RequestBody User user) {
35         // url中的id可通过@PathVariable绑定到函数的参数中
36         System.out.println(user.toString());
37         return "success";
38     }
39 }
第二步:测试请求
测试Get请求:
如果是需要发送get请求,则在网页上直接输入url即可:
测试上述 @GetMapping("/{id}")方法:
//url中的id可通过@PathVariable绑定到函数的参数中
http://localhost:8080/users/1
http://localhost:8080/users/1/?id=100
测试Post请求
因为@RequestBody需要传入json参数,如果url传入参数的话,会自动转义。所以无法传输到后端我们想要传入的数据;
这里推荐一个软件postman,我也是刚开始使用,下载下自己点击下就会简单使用了,可以自己发送post请求。这里使用方法不多介绍,因为我也是刚使用,不是很了解
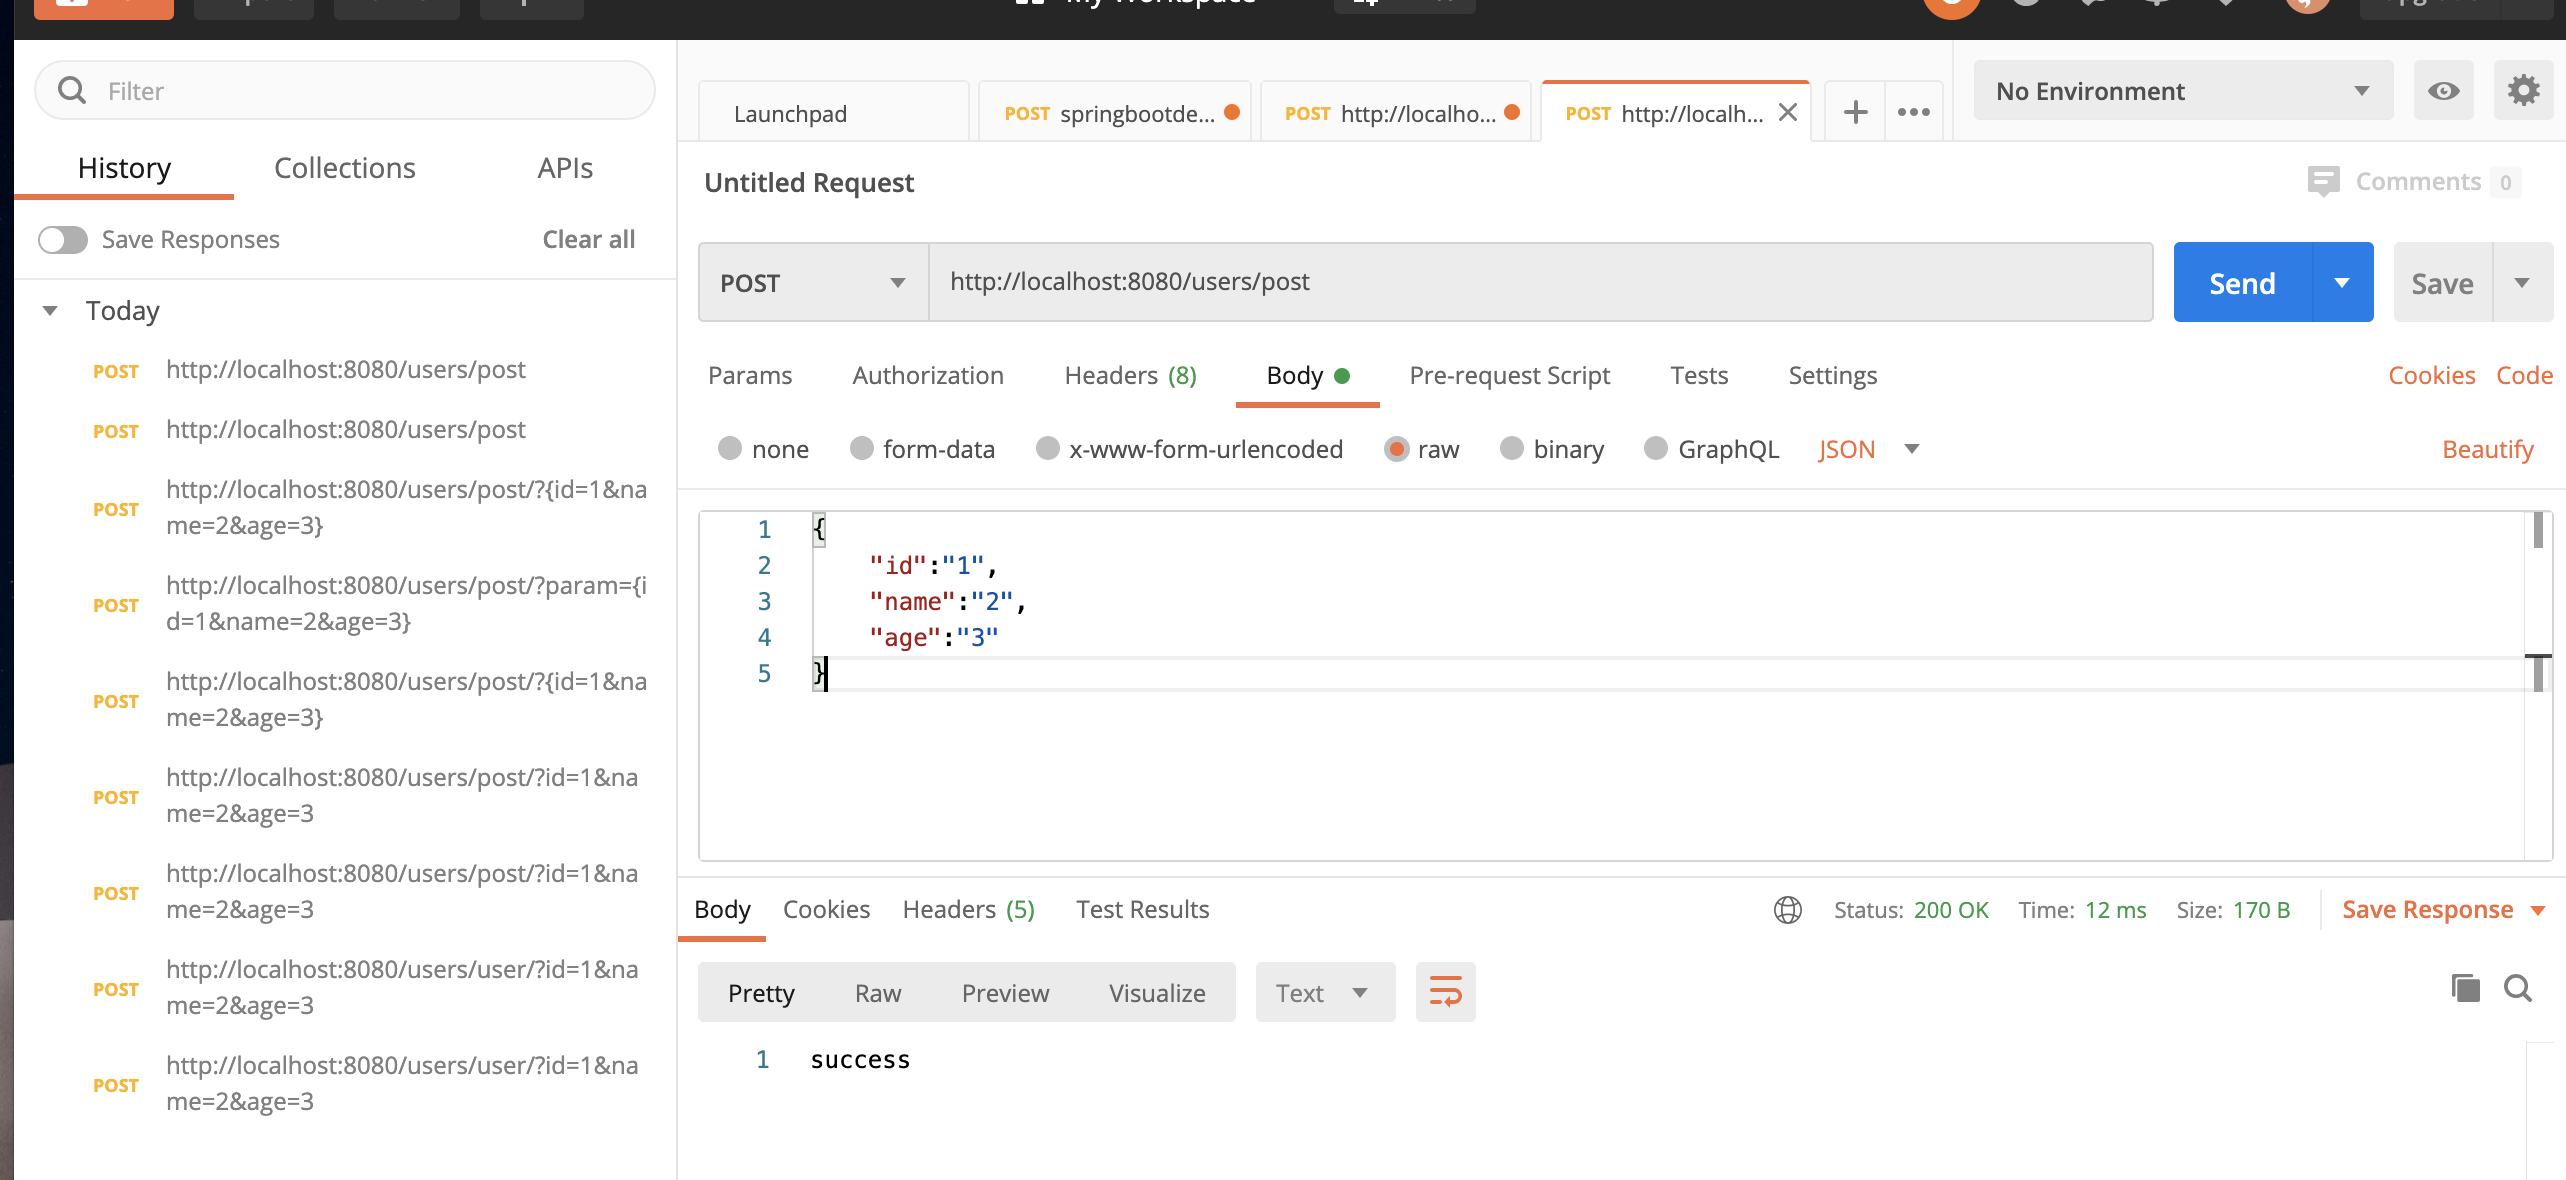
出现如上success即可传送成功,后端springboot也成功打印


 浙公网安备 33010602011771号