pytorch安装
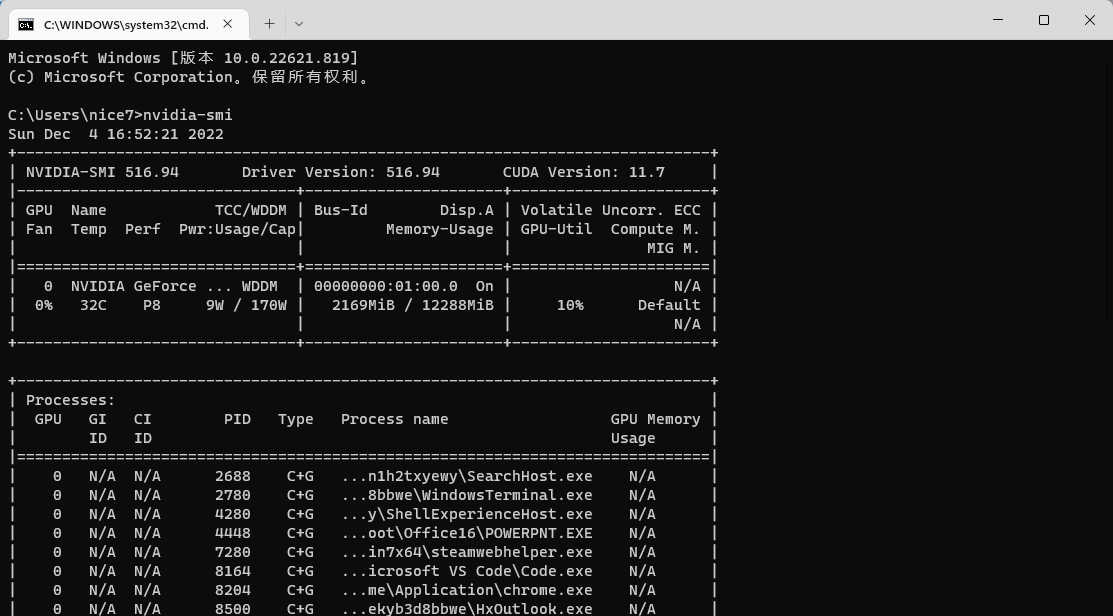
1、查看本机的CUDA版本
cmd命令行输入nvidia-smi,在第一行最右边可以看到CUDA的版本号
2、安装Pytroch
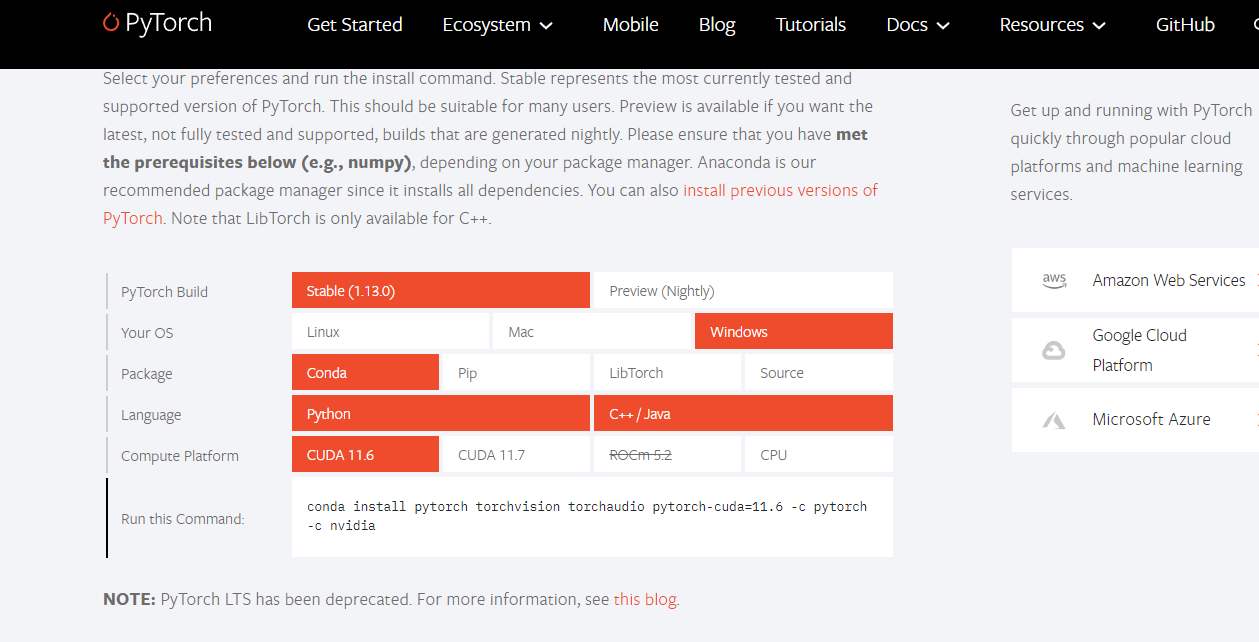
这里进行Pytorch版本的选择,首先我选择的是Stable稳定版,然后OS是Windows系统,Package包就使用Conda,Language肯定选Python,最后的Compute Platform就根据大家的需求来定了。大家如果想在自己电脑(具有NVIDIA显卡)上跑通代码,就选CUDA,如果不需要在自己电脑上跑(在服务器上跑)或者没有独立显卡,就选CPU。
2、conda创建虚拟环境
# 创建
conda create --prefix=h:/**** python=3.7
# 进入虚拟环境
activate h:/****
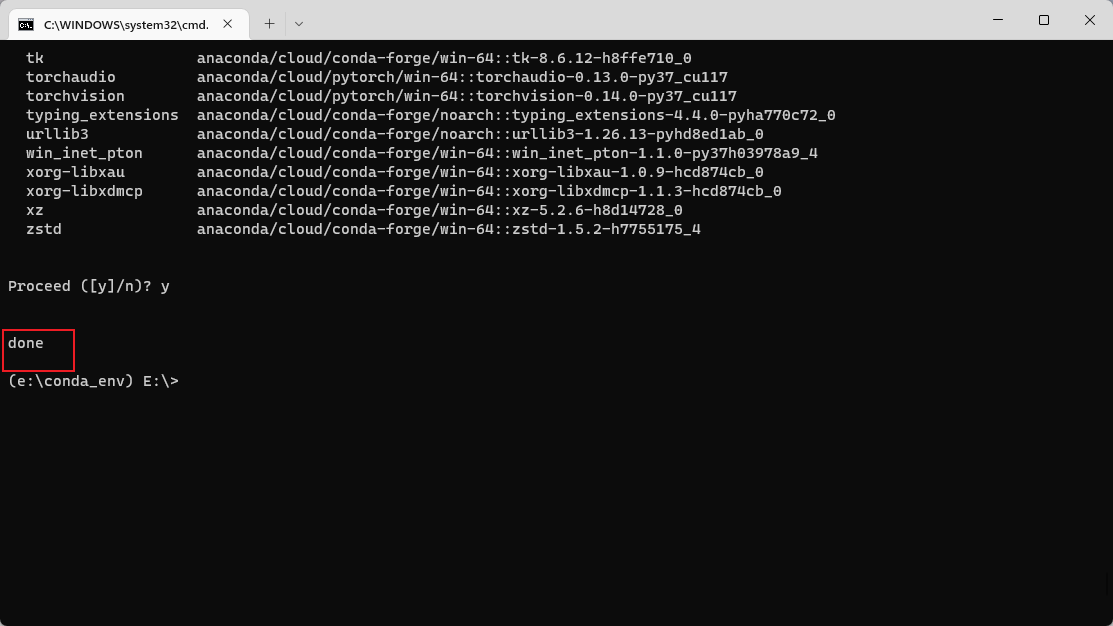
粘贴上面复制的安装命令
conda 安装一直卡在 Solving environment:
编辑 C:\Users\nice7.condarc
channels:
  - https://mirrors.tuna.tsinghua.edu.cn/anaconda/cloud/pytorch/
  - https://mirrors.tuna.tsinghua.edu.cn/anaconda/cloud/menpo/
  - https://mirrors.tuna.tsinghua.edu.cn/anaconda/cloud/bioconda/
  - https://mirrors.tuna.tsinghua.edu.cn/anaconda/cloud/msys2/
  - https://mirrors.tuna.tsinghua.edu.cn/anaconda/cloud/conda-forge/
  - https://mirrors.tuna.tsinghua.edu.cn/anaconda/pkgs/main/
  - https://mirrors.tuna.tsinghua.edu.cn/anaconda/pkgs/free/
  - https://mirrors.tuna.tsinghua.edu.cn/anaconda/cloud/conda-forge
show_channel_urls: true
安装成功会显示 done
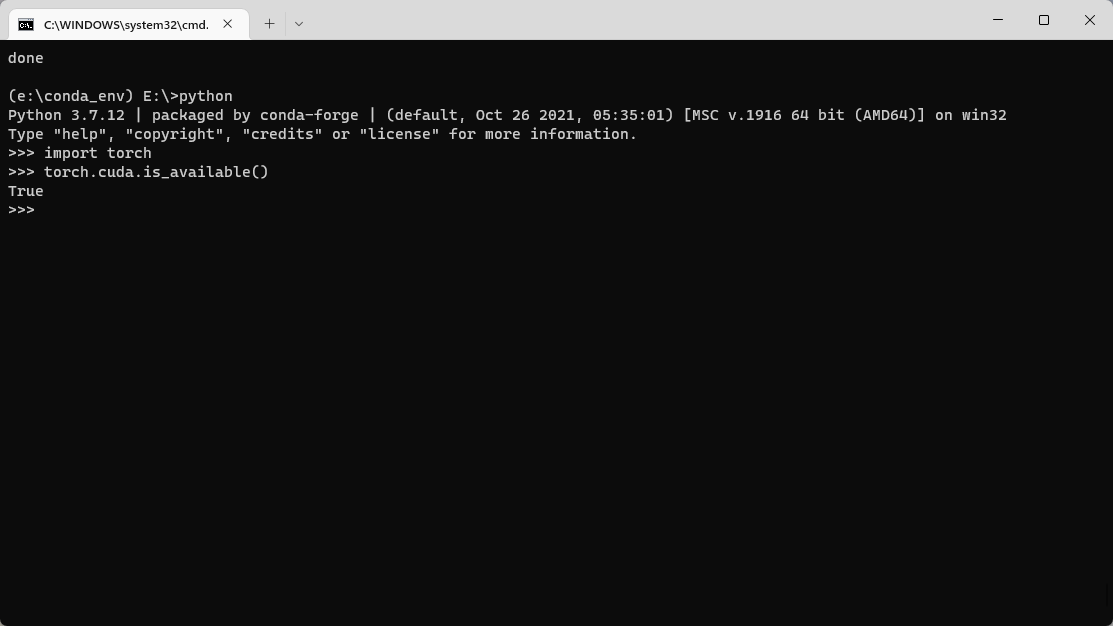
测试
[WinError 126] 找不到指定的模块。 Error loading "e:\conda_env\lib\site-packages\torch\lib\caffe2_nvrtc.dll" or one of its dependencies.
pip 换源
pip config set global.index-url https://pypi.tuna.tsinghua.edu.cn/simple
#  豆瓣镜像源
```python
pip config set global.index-url https://pypi.douban.com/simple/
VScode 中使用
terminal.integrated.shell
VScode 中使用的还是默认的Powershell
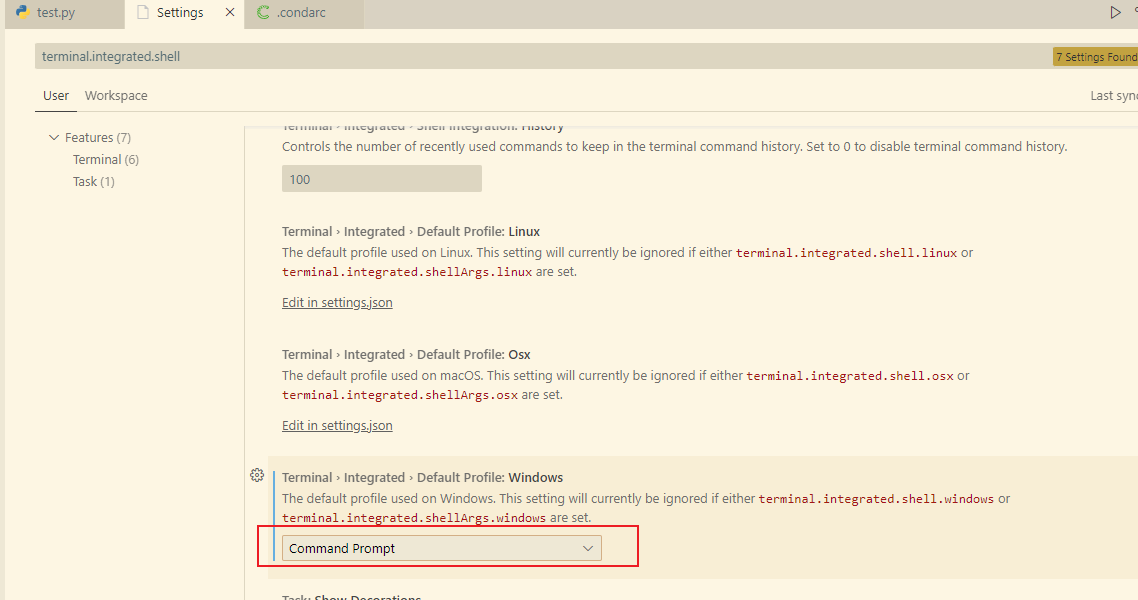
设置后运行python文件时可有效激活所选的虚拟环境
 posted on

 浙公网安备 33010602011771号