
分布式锁实践
安装工具
正常是需要在linux安装redis(官方推荐),为了方便在开发环境中,使用windows版本的redis
GitHub - redis-windows/redis-windows: Redis 6.0.20 6.2.14 7.0.15 for Windows
下载release版本,
根据readme,在服务中注册,并启动redis:redis-windows/README.zh_CN.md at main · redis-windows/redis-windows · GitHub
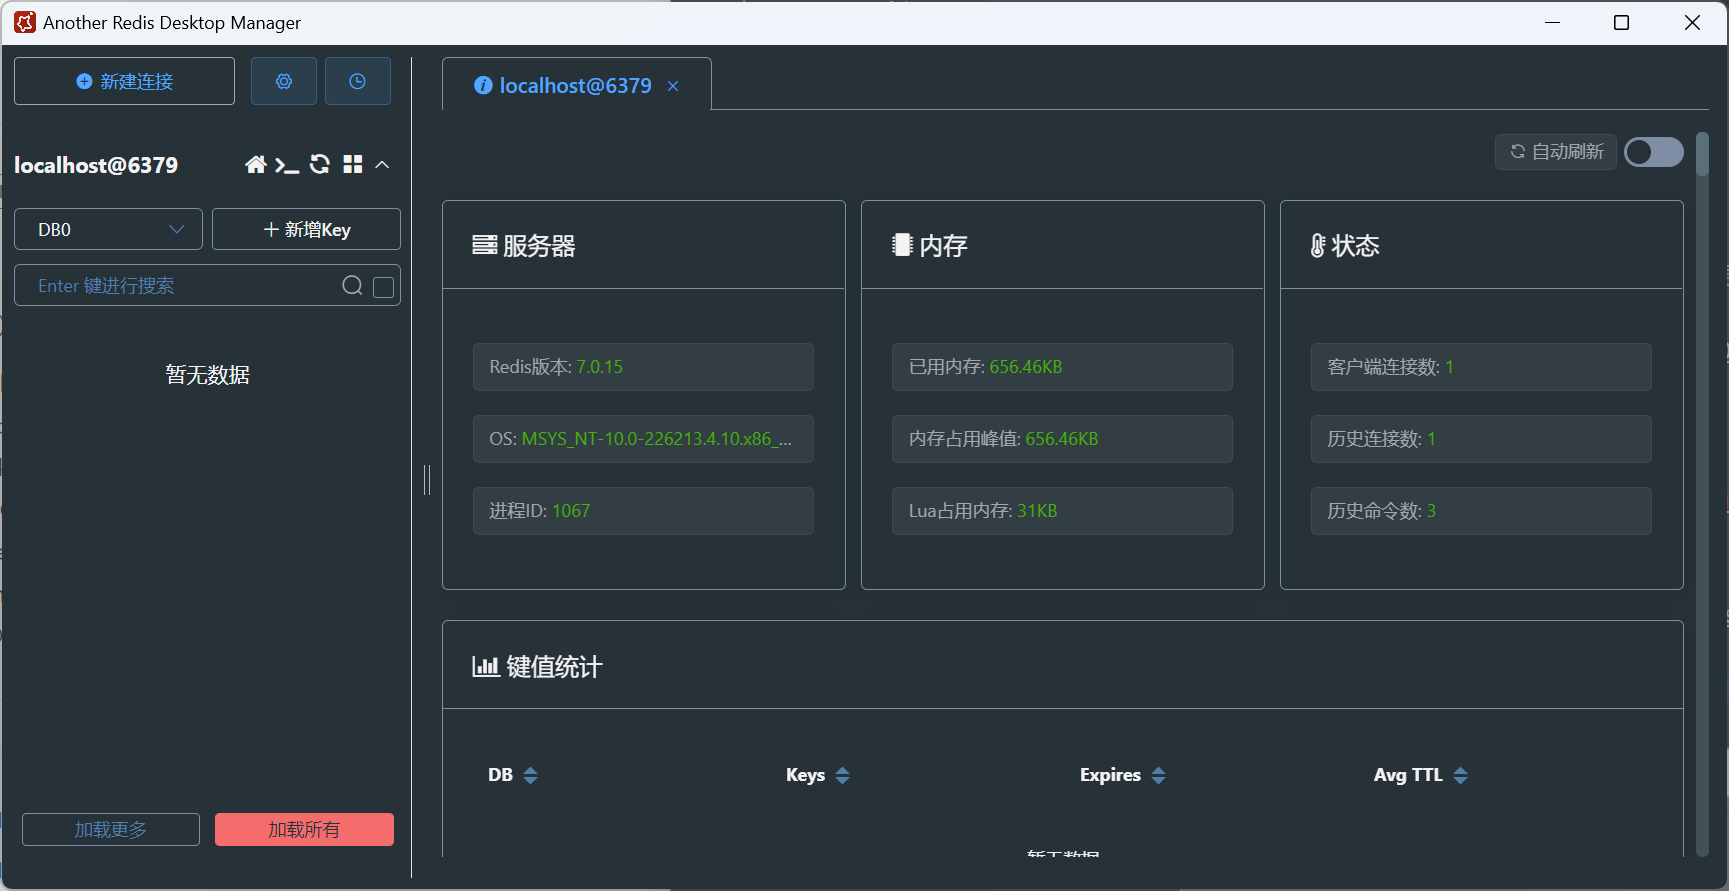
下载windows下的redis管理可视化工具Releases · qishibo/AnotherRedisDesktopManager · GitHub

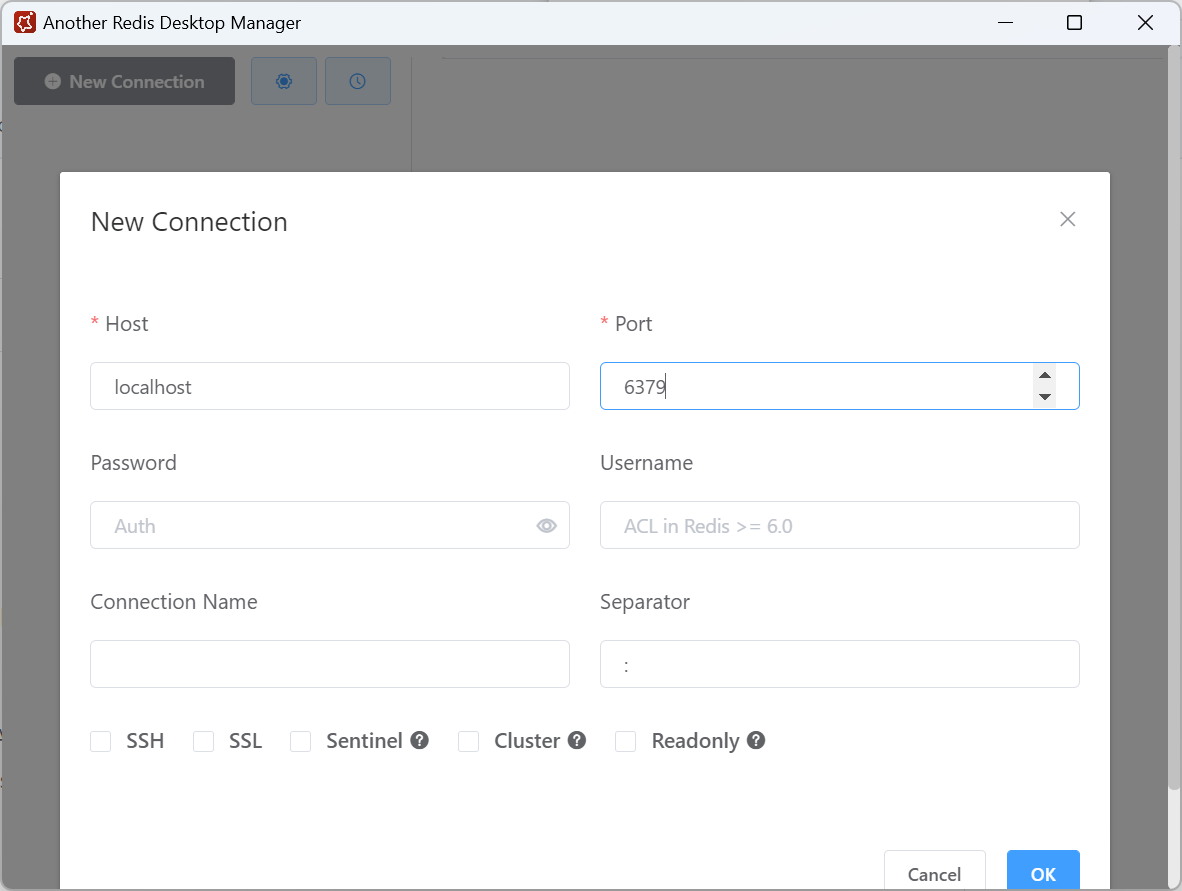
那么,开始代码环节
代码实践
导入依赖
        <dependency>
            <groupId>org.springframework.boot</groupId>
            <artifactId>spring-boot-starter-data-redis</artifactId>
        </dependency>

        <dependency>
            <groupId>redis.clients</groupId>
            <artifactId>jedis</artifactId>
        </dependency>
配置
工具类
因为是工具类,所以并不想将他强依赖于IOC,所以这里使用beanFactory来对他进行bean的加载。
package com.example.redisdemo.config;


import com.example.redisdemo.utils.RedisLockUtil;

import org.springframework.context.annotation.Bean;
import org.springframework.data.redis.core.RedisTemplate;
import org.springframework.stereotype.Component;

@Component
public class BeanFactory {

    @Bean
    public RedisLockUtil redisLockUtil(RedisTemplate<String, String> redisTemplate) {
        return new RedisLockUtil(redisTemplate);
    }
}
package com.example.redisdemo.utils;

import lombok.extern.slf4j.Slf4j;
import org.springframework.beans.factory.annotation.Autowired;
import org.springframework.data.redis.connection.RedisConnection;
import org.springframework.data.redis.connection.RedisConnectionFactory;
import org.springframework.data.redis.connection.RedisStringCommands;
import org.springframework.data.redis.connection.ReturnType;
import org.springframework.data.redis.core.RedisConnectionUtils;
import org.springframework.data.redis.core.RedisTemplate;
import org.springframework.data.redis.core.StringRedisTemplate;
import org.springframework.data.redis.core.types.Expiration;
import org.springframework.stereotype.Component;

import java.nio.charset.Charset;
import java.util.UUID;
import java.util.concurrent.TimeUnit;

import javax.annotation.Resource;

@Slf4j
public class RedisLockUtil {

    private RedisTemplate<String,String> redisTemplate;

    /**
     * 解锁脚本,原子操作
     */
    private static final String unlockScript =
            "if redis.call(\"get\",KEYS[1]) == ARGV[1]\n"
                    + "then\n"
                    + "    return redis.call(\"del\",KEYS[1])\n"
                    + "else\n"
                    + "    return 0\n"
                    + "end";

    public RedisLockUtil(RedisTemplate<String,String> redisTemplate) {
        this.redisTemplate = redisTemplate;
    }

    public RedisLockUtil() {
    }


    /**
     * 加锁,有阻塞
     * @param name
     * @param expire
     * @param timeout
     * @return
     */
    public String lock(String name, long expire, long timeout){
        long startTime = System.currentTimeMillis();
        String token;
        do{
            token = tryLock(name, expire);
            if(token == null) {
                if((System.currentTimeMillis()-startTime) > (timeout-50))
                    break;
                try {
                    Thread.sleep(50); //try 50 per sec
                } catch (InterruptedException e) {
                    e.printStackTrace();
                    return null;
                }
            }
        }while(token==null);

        return token;
    }


    /**
     * 加锁,无阻塞
     * @param name
     * @param expire
     * @return
     */
    public String tryLock(String name, long expire) {
        String token = UUID.randomUUID().toString();
        RedisConnectionFactory factory = redisTemplate.getConnectionFactory();
        RedisConnection conn = factory.getConnection();
        try{
            Boolean result = conn.set(name.getBytes(Charset.forName("UTF-8")), token.getBytes(Charset.forName("UTF-8")),
                    Expiration.from(expire, TimeUnit.MILLISECONDS), RedisStringCommands.SetOption.SET_IF_ABSENT);
            if(result!=null && result)
                return token;
        }finally {
            RedisConnectionUtils.releaseConnection(conn, factory);
        }
        return null;
    }

    /**
     * 解锁
     * @param name
     * @param token
     * @return
     */
    public boolean unlock(String name, String token) {
        byte[][] keysAndArgs = new byte[2][];
        keysAndArgs[0] = name.getBytes(Charset.forName("UTF-8"));
        keysAndArgs[1] = token.getBytes(Charset.forName("UTF-8"));
        RedisConnectionFactory factory = redisTemplate.getConnectionFactory();
        RedisConnection conn = factory.getConnection();
        try {
            Long result = (Long)conn.scriptingCommands().eval(unlockScript.getBytes(Charset.forName("UTF-8")), ReturnType.INTEGER, 1, keysAndArgs);
            if(result!=null && result>0)
                return true;
        }finally {
            RedisConnectionUtils.releaseConnection(conn, factory);
        }

        return false;
    }

}
尝试获取锁
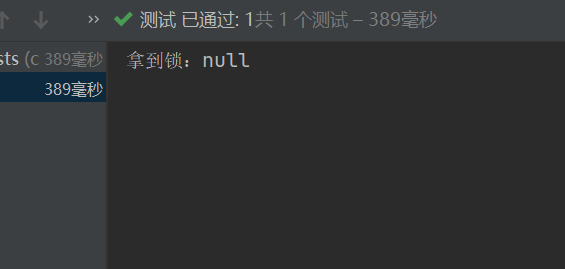
    @Test
    void redisLockTest() {
        String token = redisLockUtil.tryLock("fuwu:123", 1000);
        System.out.println("拿到锁:"+token);
    }

此时已有锁,尝试再次执行
token返回为null,说明获取锁失败。使用10个线程进行等待尝试,看是否能够实现交替进入业务。
多线程竞争
package com.example.redisdemo;

import javax.annotation.Resource;

import com.example.redisdemo.utils.RedisLockUtil;

import org.junit.jupiter.api.Test;
import org.springframework.boot.test.context.SpringBootTest;
import org.springframework.data.redis.core.ValueOperations;

@SpringBootTest
class RedisDemoApplicationTests {
    @Resource
    RedisLockUtil redisLockUtil;

    @Test
    void redisLockTest() throws InterruptedException {
        System.out.println();
        String name = "RedisLockTest";
        for (int i = 0; i < 10; i++) {
            int finalI = i;
            new Thread(()->{
                System.out.println("业务编号:" + finalI + "开始执行,尝试获取锁...");
                String token = redisLockUtil.lock(name, 60, 60 * 1000);
                try {
                    Thread.sleep(50);
                } catch (InterruptedException e) {
                    throw new RuntimeException(e);
                }
                System.out.println(finalI+" 拿到锁:"+token);
                System.out.println("业务执行中...");
                System.out.println("业务执行完成\n开始解锁中...");
                if (redisLockUtil.unlock(name, token)) {
                    System.out.println("token:"+ token +" 解锁成功");
                }
            }).start();
        }
        Thread.sleep(10000);
    }

}
输出
业务编号:0开始执行,尝试获取锁...
业务编号:8开始执行,尝试获取锁...
业务编号:3开始执行,尝试获取锁...
业务编号:4开始执行,尝试获取锁...
业务编号:2开始执行,尝试获取锁...
业务编号:5开始执行,尝试获取锁...
业务编号:6开始执行,尝试获取锁...
业务编号:1开始执行,尝试获取锁...
业务编号:7开始执行,尝试获取锁...
业务编号:9开始执行,尝试获取锁...
9 拿到锁:a3059978-efff-4f06-847f-a21a0fd6a6dc
业务执行中...
业务执行完成
开始解锁中...
token:a3059978-efff-4f06-847f-a21a0fd6a6dc 解锁成功
1 拿到锁:7aba4b40-77f1-448f-bbc3-60b0991d8b8d
业务执行中...
业务执行完成
开始解锁中...
token:7aba4b40-77f1-448f-bbc3-60b0991d8b8d 解锁成功
3 拿到锁:df582f8a-3791-431c-8732-d64cb897dd47
业务执行中...
业务执行完成
开始解锁中...
token:df582f8a-3791-431c-8732-d64cb897dd47 解锁成功
7 拿到锁:c771321a-707a-4b1d-8023-732b991cf9b1
业务执行中...
业务执行完成
开始解锁中...
token:c771321a-707a-4b1d-8023-732b991cf9b1 解锁成功
0 拿到锁:ba041359-e7ef-4ed7-a59c-8d95e2b5b31d
业务执行中...
业务执行完成
开始解锁中...
token:ba041359-e7ef-4ed7-a59c-8d95e2b5b31d 解锁成功
5 拿到锁:78f5eee0-e182-48fa-be70-09f1ec0853e4
业务执行中...
业务执行完成
开始解锁中...
token:78f5eee0-e182-48fa-be70-09f1ec0853e4 解锁成功
4 拿到锁:3f821c1e-8c23-4062-8290-d184bd8b09ee
业务执行中...
业务执行完成
开始解锁中...
token:3f821c1e-8c23-4062-8290-d184bd8b09ee 解锁成功
2 拿到锁:f861db53-f7cf-48e8-95ec-b08e86b26273
业务执行中...
业务执行完成
开始解锁中...
token:f861db53-f7cf-48e8-95ec-b08e86b26273 解锁成功
8 拿到锁:0b50aa0b-3a72-47be-b62a-bb1ac50693b7
业务执行中...
业务执行完成
开始解锁中...
token:0b50aa0b-3a72-47be-b62a-bb1ac50693b7 解锁成功
6 拿到锁:5524fe2a-1967-453e-a86e-bf35a49de5d9
业务执行中...
业务执行完成
开始解锁中...
token:5524fe2a-1967-453e-a86e-bf35a49de5d9 解锁成功
可以看到,锁的获取都是串行的,说明该锁在多线程的情况下,能保持作用
使用setNX + lua脚本解锁作为分布式锁解决方案的小结
首先,代码简单,代码简单意味着可维护性高,并且出了问题十分好定位。
但是其实仅实现了较为简单的功能,仅使用lua脚本解决了在解锁的时候,获取锁的值跟目前线程持有锁的值对比,然后对比成功再删除,且该操作是原子性的,防止A线程在获取自己的锁的value的时候刚好超时,B线程进来获取到锁了,然后A线程把B线程的锁给嘎了这种场景。
但是,A线程在正常运行的情况下,真的有必要释放锁吗?虽然我们设置了过期时间是为了防止A线程因为宕机,或者业务太长执行了太长时间了,导致一系列问题。但是如果是A线程跟B线程一起执行的话,势必会导致各种问题呢?那么A线程就得保持住自己的锁,不让B进来,为了防止宕机问题,那么过期时间必然是要设置的,所以此时需要续命了,如果A线程还在执行,那么给他续个时间。这种系统的复杂度还是较高的,为了防止各种奇奇怪怪的BUG,我们这引入redisson来实现,redisson提供了看门狗机制,10s检查一下A线程是否还活着,如果活着,给它续一次命,看门狗是单独的线程。
因此,下面开始编写redisson来实现分布式锁的写法。
Redisson实现分布式锁
        <dependency>
            <groupId>org.redisson</groupId>
            <artifactId>redisson</artifactId>
            <version>2.7.0</version>
        </dependency>
    @Bean(name = "Redisson")
    public Redisson redisson() {
        Config config = new Config();
        config.useSingleServer()
                .setAddress("localhost:6379");
//        config.useClusterServers()
//                // 集群状态扫描间隔时间,单位是毫秒
//                .setScanInterval(2000)
//                //cluster方式至少6个节点(3主3从,3主做sharding,3从用来保证主宕机后可以高可用)
//                .addNodeAddress("redis://127.0.0.1:6379" )
//                .addNodeAddress("redis://127.0.0.1:6380")
//                .addNodeAddress("redis://127.0.0.1:6381")
//                .addNodeAddress("redis://127.0.0.1:6382")
//                .addNodeAddress("redis://127.0.0.1:6383")
//                .addNodeAddress("redis://127.0.0.1:6384");
        return (Redisson) Redisson.create(config);
    }

    @Bean(name = "RedisLockUtilForRedisson")
    public RedisLockUtilForRedisson redisLockUtil(Redisson redisson) {
        return new RedisLockUtilForRedisson(redisson);
    }
package com.example.redisdemo.utils;

import java.util.concurrent.TimeUnit;

import jodd.datetime.TimeUtil;
import org.redisson.Redisson;
import org.redisson.api.RLock;
import org.redisson.spring.cache.RedissonSpringCacheManager;

public class RedisLockUtilForRedisson {
    public RedisLockUtilForRedisson() {
    }

    private Redisson redisson;

    public RedisLockUtilForRedisson(Redisson redisson) {
        this.redisson = redisson;
    }

    public boolean acquire(String key) {
        RLock lock = redisson.getLock(key);
        lock.lock(1,TimeUnit.MINUTES);
        return true;
    }

}
如果指定了过期时间,那么不会进入到scheduleExpirationRenewal,不会续命,使用默认时间30s会自动续命,续命的检查时间为 30s / 3 = 10s
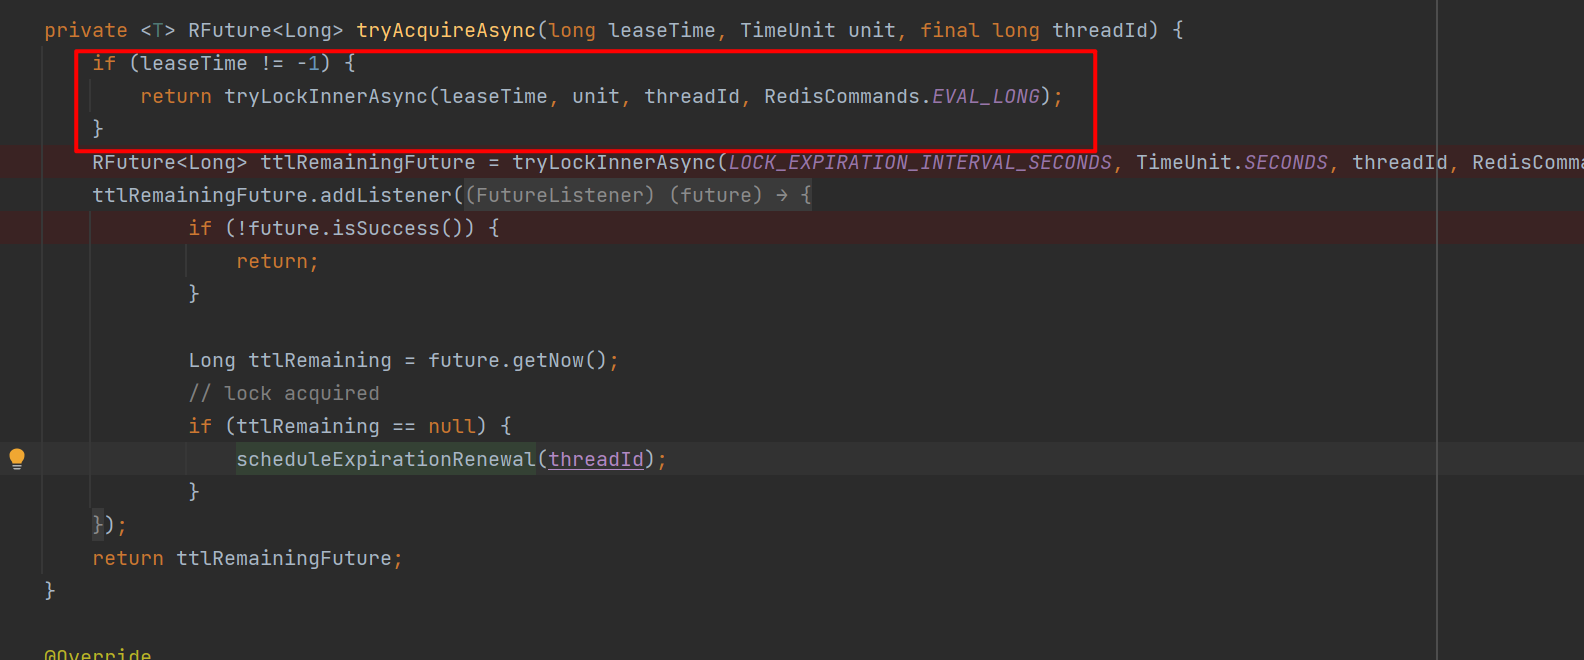
其他unlock、tryLock等自行看源码即可,较于自己实现,仅免去了写lua脚本,实现原理类似。
 posted on

 浙公网安备 33010602011771号