
QML-ListView
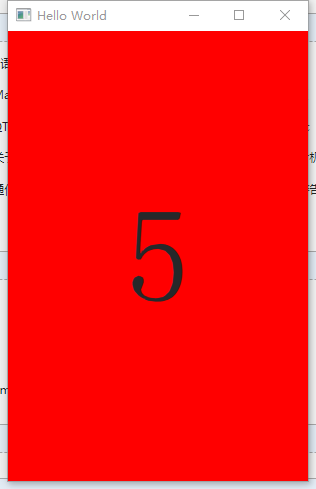
1、例子1
import QtQuick 2.7
import QtQuick.Controls 2.0
import QtQuick.Layouts 1.0
import QtQuick.Window 2.2

Window {
    visible: true
    width: 300
    height: 450
    title: qsTr("Hello World")

    ListView{
        id:listView
        anchors.fill: parent
        model: 10
        snapMode: ListView.SnapOneItem
        orientation:ListView.Horizontal
        delegate: Rectangle{
              width: listView.width
              height: listView.height
              color: index%2 ? "red":"yellow"
              Label{
                  anchors.centerIn: parent
                  font.pointSize: 100
                  text: index
              }
        }
    }
}
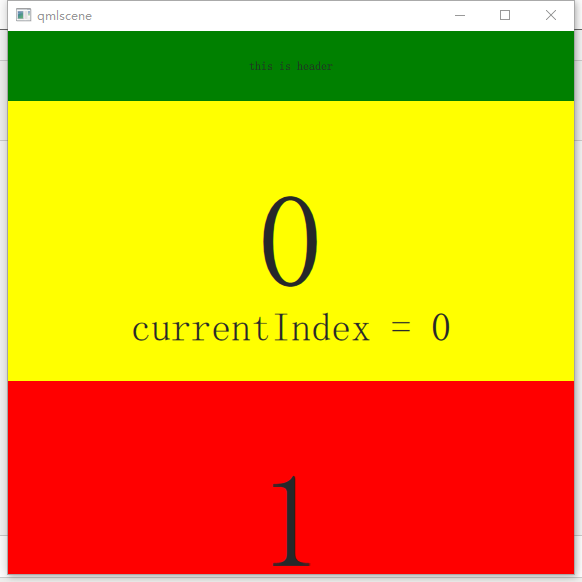
2、例子2
import QtQuick 2.7
import QtQuick.Controls 2.0
import QtQuick.Layouts 1.0
import QtQuick.Window 2.2
ListView{
    id:listView
    anchors.fill: parent
    model: 10
    headerPositioning: ListView.PullBackHeader

    header: Rectangle{
        width: listView.width
        height: 70
        color: "green"
        Label{
            anchors.centerIn: parent
            text: "this is header"
        }
    }

    onCurrentIndexChanged: {
        console.log("current index = ",currentIndex)
    }

    delegate: Rectangle{
        width: listView.width
        height: 280
        color: index%2 ? "red":"yellow"
        Label{
            id:txt
            anchors.centerIn: parent
            font.pointSize: 100
            text: index
        }
        Label{
            anchors.top: txt.bottom
            font.pointSize: 30
            text: "currentIndex = " + listView.currentIndex
            anchors.horizontalCenter: parent.horizontalCenter
        }
    }
}
3、例子3
 ListView {
            id: listView
            clip: true
            width: parent.width-1;
            height: parent.height;
            spacing :0
            highlight: Rectangle {
                width: listView.width
                height: 40
                color: "lightsteelblue"
                radius: 5
                Behavior on y {
                    SpringAnimation {
                        spring: 3
                        damping: 0.2
                    }
                }
            }
            highlightFollowsCurrentItem: true
            focus: true
            delegate: Rectangle {
                property color tempcolor: "transparent"
                color: tempcolor
                width: listView.width
                height: 40
                Row {
                    id: row1
                    anchors.fill: parent
                    spacing: 10
                    anchors.leftMargin: 10
                    Rectangle {
                        width: 30
                        height: 30
                        color: colorCode
                        radius: width/2;
                        anchors.verticalCenter: parent.verticalCenter

                    }
                    Text {
                        text: name
                        anchors.verticalCenter: parent.verticalCenter
                        font.bold: true
                        font.pointSize: listView.currentIndex == index ? 14 : 11
                        color: "white"
                    }
                }
                MouseArea{
                    anchors.fill: parent
                    hoverEnabled: true
                    onClicked: {
                        listView.currentIndex = index;
                    }
                    onEntered: {
                        tempcolor = "#a7e094"
                    }

                    onExited: {
                        tempcolor = "transparent"
                    }
                }
            }
            model: ListModel {
                ListElement {
                    name: "综合方舱门"
                    colorCode: "green"
                }

                ListElement {
                    name: "网络交换机"
                    colorCode: "red"
                }

                ListElement {
                    name: "设备"
                    colorCode: "green"
                }

                ListElement {
                    name: "设备"
                    colorCode: "green"
                }
                ListElement {
                    name: "设备"
                    colorCode: "green"
                }

                ListElement {
                    name: "设备"
                    colorCode: "green"
                }

                ListElement {
                    name: "设备"
                    colorCode: "green"
                }

                ListElement {
                    name: "设备"
                    colorCode: "green"
                }
                ListElement {
                    name: "设备"
                    colorCode: "green"
                }

                ListElement {
                    name: "设备"
                    colorCode: "green"
                }

                ListElement {
                    name: "设备"
                    colorCode: "green"
                }

                ListElement {
                    name: "设备"
                    colorCode: "green"
                }
                ListElement {
                    name: "设备"
                    colorCode: "green"
                }

                ListElement {
                    name: "设备"
                    colorCode: "green"
                }

                ListElement {
                    name: "设备"
                    colorCode: "green"
                }

                ListElement {
                    name: "设备"
                    colorCode: "green"
                }

            }
        }
        Rectangle {
            width: 1;
            height: parent.height;
            color: "gray";
            anchors.right: parent.right;
        }
    }

4、例子4

动态生成一个界面,控制器颜色和文字内容【不能动态增加减少】
①、创建QAbstractListModel子类
paralistmodel.h
#ifndef PARALISTMODEL_H #define PARALISTMODEL_H #include <QAbstractListModel> struct ParaModel { ParaModel() { paraName = ""; crState = ""; } //核心属性 QString paraName; QString crState; }; class ParaListModel : public QAbstractListModel { Q_OBJECT public: ParaListModel(QObject* parent = 0); enum Roles//qml用来识别别名的规则 { paraNameRole = Qt::UserRole + 1, colorRole }; void addModel(const ParaModel &deviceList);//C++设置值 void update(int index, const ParaModel ¶Model);//C++更新 void clear();//清空 protected: int rowCount(const QModelIndex &parent = QModelIndex()) const;//qml内部调用,不用多管直接重写即可 QVariant data(const QModelIndex &index, int role = Qt::DisplayRole) const;//qml内部调用,不用多管直接重写即可 QHash<int, QByteArray> roleNames() const;//qml内部调用,不用多管直接重写即可 private: QList<ParaModel> m_data; }; #endif // PARALISTMODEL_H
paralistmodel.cpp
#include "paralistmodel.h" ParaListModel::ParaListModel(QObject *parent) : QAbstractListModel(parent) { } void ParaListModel::addModel(const ParaModel ¶Model) { beginInsertRows(QModelIndex(), rowCount(), rowCount()); m_data << paraModel; endInsertRows(); } int ParaListModel::rowCount(const QModelIndex &parent) const { Q_UNUSED(parent); return m_data.count(); } QVariant ParaListModel::data(const QModelIndex &index, int role) const { if (index.row() < 0 || index.row() >= m_data.count()) return QVariant(); const ParaModel ¶Model = m_data[index.row()]; switch (role) { case paraNameRole: return paraModel.paraName; break; case colorRole: return paraModel.crState; break; default: break; } return QVariant(); } void ParaListModel::update(int index, const ParaModel ¶Model) { if (index < 0 || index >= m_data.count()) return; ParaModel &srcModel = m_data[index]; if(paraModel.paraName != "") { srcModel.paraName = paraModel.paraName; } if(paraModel.crState != "") { srcModel.crState = paraModel.crState; } } void ParaListModel::clear() { m_data.clear(); } //qml通过这里的QByteArray来访问数据 //首先qml输入"value"知道其role为roles[valueRole],然后把valueRole输入到data函数返回真实值 QHash<int, QByteArray> ParaListModel::roleNames() const { QHash<int, QByteArray> roles; roles[paraNameRole] = "paraName"; roles[colorRole] = "crState"; return roles; }
②、创建PredictPara.qml,用于对listview的显示
import QtQuick 2.0

Rectangle {
    id: root;
    width: 300;
    height: 400;
//    color: "#222648";//背景色
    color: Qt.rgba(0,0,0,0)
    ListView {
        anchors.fill: parent;
        model: ParaListModel;
        delegate: delegate_list
        spacing: 0;
    }
    //委托
    Component {
        id: delegate_list;
        Rectangle {
            id: rect;
            width: root.width;
            height: 40;
            color: Qt.rgba(0,0,0,0)
            Rectangle {
                id: round;
                width: 30;
                height: width;
                radius: width/2;
                color: crState;
                anchors.verticalCenter: parent.verticalCenter;
                anchors.left: parent.left;
                anchors.leftMargin: 40;
            }

            Text {
                id: para_name;
                text: paraName;
                font.pixelSize: 20;
                anchors.centerIn: parent;
                color: crState;
                horizontalAlignment: Text.AlignLeft;
            }
            Rectangle {
                width: parent.width;
                height: 1;
                color: "green";
                anchors.bottom: parent.bottom;
            }
        }
    }

}
标红的两个属性就是来自于c++类里的属性
③、main.cpp里设置上下文属性
void main_fun()
{
    QUrl source("qrc:/qml/PredictPara.qml");
    ui->quickWidget_predict_para->setResizeMode(QQuickWidget::SizeRootObjectToView);
    ui->quickWidget_predict_para->setSource(source);
    ui->quickWidget_predict_para->setAttribute(Qt::WA_AlwaysStackOnTop);
    ui->quickWidget_predict_para->setClearColor(QColor(Qt::transparent));

    int paraCount = paras.size();
    QStringList paraInfoList;
    QString paraName;
    BIT_State_Type cv;
    std::pair<QString, QString> paraStatePair;
    ParaListModel modelList;
    for(int i=0;i<3;++i){
        ParaModel model;
        model.paraName =  "name_1";
        model.crState = "#ff0000";
        modelList.addModel(model);
    }
    ui->quickWidget_predict_para->rootContext()->setContextProperty("ParaListModel", &modelList);
}
PS:
1、设置选中颜色
Component {
        id: tabDelegate
        Rectangle{
            width: 150
            height: 30
            color: tabs.currentIndex === index ? "green" :"red"
        }
}
2、点击子项切换当前项
Component {
    id: tabDelegate
    Rectangle {
        width: 150
        height: 30
        onClicked: {
            tabs.currentIndex = index
        }
    }
}
3、切换动画
/*  populate
 *  populate指定一个过度动画,在listView第一次实例化或者因为Model变化而需要创建Item时应用
 *  下面就是产生一个渐变效果
 */
populate: Transition{
    NumberAnimation{
        property: "opacity"
        from: 0
        to: 1.0
        duration: 100
    }
}//populate Transition is end

add: Transition {
    ParallelAnimation{
        NumberAnimation{
            property: "opacity"
            from: 0
            to : 1.0
            duration: 100
        }
        NumberAnimation{
            property: "x"
            from: 0
            duration:  100
        }
    }
}// add transition is end

/*  displaced属性
 *  此属性用于指定通用的、由于model变化导致Item位移时的动画效果,还有removeDisplaced、moveDisplaced
 *  如果同时指定了displaced 和xxxDisplaced,那么xxxDisplaced生效
 */
displaced: Transition {
    SpringAnimation{
        property: "x"
        spring: 3
        damping: 0.1
        epsilon: 0.25
    }
}

remove: Transition {
    SequentialAnimation{
        NumberAnimation{
            property: "x"
            to: 0
            duration: 100
        }
        NumberAnimation{
            property: "opacity"
            to:0
            duration: 100
        }
    }
}//remove Transition is end
参考:
https://www.cnblogs.com/SaveDictator/p/8192517.html
https://www.cnblogs.com/linuxAndMcu/p/13597128.html
长风破浪会有时,直挂云帆济沧海!
可通过下方链接找到博主
https://www.cnblogs.com/judes/p/10875138.html
