flutter的RenderBox使用&原理浅析
本文基于1.12.13+hotfix.8版本源码分析。
一、RenderBox的用法
1、RenderBox的使用基本流程
在flutter中,我们最常接触的,莫过于各种各样的widget了,但是,实际负责渲染的RenderObject是很少接触的(它们之间的关联可以看看闲鱼的这篇文章:https://www.yuque.com/xytech/flutter/tge705)。而作为一名天天向上的程序员,我们自然要去学习一下它的原理,做到知其然且知其所以然。本文会先来看看RenderBox的用法,以此抛砖引玉,便于后面继续深入flutter的绘制原理。
使用RenderBox进行绘制,我们需要做三件事:
(1)测量
第一步,我们需要确定视图大小,并赋值给父类的size属性。测量有两种情况,第一种是size由自身决定,第二种是由parent决定。
首先,由自身决定size的情况,需要在performLayout方法中完成测量,通过父类的constraints可得到满足约束的值:
  @override
  void performLayout() {
    size = Size(
      constraints.constrainWidth(200),
      constraints.constrainHeight(200),
    );
  }
第二种情况,size由parent决定,这种情况下视图大小应该完全通过parent提供的constraints测量,不存在其它因素。这种情况下,只要parent的约束不发生变化,就不会重新测量。
这种情况需要重写sizedByParent并返回true,然后在performResize中完成测量。
  @override
  void performResize() {
    size = constraints.biggest;
  }

  @override
  bool get sizedByParent => true;
看到这里,你可能会疑惑了,这两个方法什么时候会被调用?顺序是怎样的?答案在RenderObject的layout方法中:
  void layout(Constraints constraints, { bool parentUsesSize = false }) {
    //计算relayoutBoundary
    ......
    //layout
    _constraints = constraints;
    if (sizedByParent) {
        performResize();
    }
    performLayout();
    ......
  }
}
(2)绘制
RenderBox的绘制与android原生的view绘制非常相似,同样是Paint+Canvas的组合,而且api也非常接近,会非常容易上手。
  @override
  void paint(PaintingContext context, Offset offset) {
    Paint paint = Paint()
      ..color = _color
      ..style = PaintingStyle.fill;
    context.canvas.drawRect(
        Rect.fromLTRB(
          0,
          0,
          size.width,
          size.height,
        ),
        paint);
  }
这样是不是就万事大吉了呢?如果通过上面的代码进行绘制,你会发现,不管在外层怎么设置位置,绘制出来的矩形都是固定在屏幕左上角的!怎么回事?
这里就是flutter中绘制与android的最大不同:在这里绘制的坐标系是全局坐标系,即原点在屏幕左上角,而非视图左上角。
细心的同学可能已经发现,paint方法中还有一个offset参数,这就是经过parent的约束后,当前视图的偏移量,绘制时应该将它考虑进去:
  @override
  void paint(PaintingContext context, Offset offset) {
    Paint paint = Paint()
      ..color = _color
      ..style = PaintingStyle.fill;
    context.canvas.drawRect(
        Rect.fromLTRB(
          offset.dx,
          offset.dy,
          offset.dx + size.width,
          offset.dy + size.height,
        ),
        paint);
  }
(3)更新
在flutter中,是由Widget的配置发生变更而引起的rebuild,而这就是我们要实现的第三步:当视图属性发生变更时,标记重新布局或重新绘制,当屏幕刷新时就会做相应的刷新。
这里涉及到两个方法:markNeedsLayout、markNeedsPaint。顾名思义,前者标记重布局,后者标记重绘。
我们需要做的,就是根据属性的影响范围,在更新属性时,调用合适的标记方法,例如color变化时调用markNeedsPaint,width变化时调用markNeedsLayout。另外,两者都需要更新的情况下,只调用markNeedsLayout即可,不需要两个方法都调。
  set width(double width) {
    if (width != _width) {
      _width = width;
      markNeedsLayout();
    }
  }

  set color(Color color) {
    if (color != _color) {
      _color = color;
      markNeedsPaint();
    }
  }
2、RenderObjectWidget
(1)简介
上面讲了一大堆RenderBox的用法,但是,这玩意儿怎么用到我们熟知的Widget里面去?
按照正常流程,我们得实现一个Element和一个Widget,然后在Widget中创建Element,在Element中创建和更新RenderObject,另外还得管理一大堆状态,处理非常繁琐。所幸flutter为我们封装了这一套逻辑,即RenderObjectWidget。
相信看到这里的同学都对StatelessWidget和StatefulWidget不会陌生,但其实,StatelessWidget和StatefulWidget仅负责属性、生命周期等的管理,在它们的build方法实现中都会创建RenderObjectWidget,通过它来实现与RenderObject的关联。
举个栗子,我们经常使用的Image是个StatefulWidget,对应的state的build方法中实际返回了一个RawImage对象,而这个RawImage是继承自LeafRenderObjectWidget的,这正是RenderObjectWidget的一个子类;再比如Text,它build方法中创建的RichText是继承自MultiChildRenderObjectWidget,这同样是RenderObjectWidget的一个子类。
我们再看看RenderObjectWidget顶部的注释即可明白:
RenderObjectWidgets provide the configuration for [RenderObjectElement]s,
which wrap [RenderObject]s, which provide the actual rendering of the
application.
大概意思就是RenderObject才是实际负责渲染应用的,而RenderObjectWidget提供包装了RenderObject的配置,方便我们使用。
另外,flutter还分别实现了几个子类,进一步封装了RenderObjectWidget,它们分别是LeafRenderObjectWidget、SingleChildRenderObjectWidget、MultiChildRenderObjectWidget。其中,LeafRenderObjectWidget是叶节点,不含子Widget;SingleChildRenderObjectWidget仅有一个child;而MultiChildRenderObjectWidget则是含有children列表。这几个子类根据child的情况分别创建了对应的Element,所以通过这几个子类,我们只需要关注RenderObject的创建和更新。
(2)用法
以最简单的LeafRenderObjectWidget为例,我们需要实现createRenderObject、updateRenderObject两个方法:
  class CustomRenderWidget extends LeafRenderObjectWidget {
  CustomRenderWidget({
    this.width = 0,
    this.height = 0,
    this.color,
  });

  final double width;
  final double height;
  final Color color;

  @override
  RenderObject createRenderObject(BuildContext context) {
    return CustomRenderBox(width, height, color);
  }

  @override
  void updateRenderObject(BuildContext context, RenderObject renderObject) {
    CustomRenderBox renderBox = renderObject as CustomRenderBox;
    renderBox
      ..width = width
      ..height = height
      ..color = color;
  }
}
3、非容器控件的hitTest
通过上面的内容,我们已经可以实现自定义控件并用到界面开发中,但是距离一个完整的控件还差最后一步:命中测试。当用户使用手势,flutter会将手势信息交由控件进行检查是否命中。
RenderBox中命中测试的方法有仨:hitTest、hitTestSelf、hitTestChildren,其中hitTest默认实现是调用另外两个方法的:
  bool hitTest(BoxHitTestResult result, { @required Offset position }) {
    if (_size.contains(position)) {
      // 从这里也能看到,当命中children时,不会再进行自身的命中测试
      if (hitTestChildren(result, position: position) || hitTestSelf(position)) {
        result.add(BoxHitTestEntry(this, position));
        return true;
      }
    }
    return false;
  }
所以重写命中测试方法有两个方案,一是重写hitTest,这种方法需要将命中测试的信息加到BoxHitTestResult中;二是重写hitTestSelf和hitTestChildren,这种方法就简单地返回是否命中即可。
非容器类型的控件,只需要重写hitTestSelf,返回true即命中,例如RawImage中:
  @override
  bool hitTestSelf(Offset position) => true;
二、容器类型的RenderBox
1、介绍
在绘制篇中,我们已经了解到如何使用RenderObjectWidget和RenderBox进行基础的绘制,在本篇中,我们将继续学习RenderBox如何管理子对象。首先,我们来看看RenderBox顶部的一段注释:
For render objects with children, there are four possible scenarios:
* A single [RenderBox] child. In this scenario, consider inheriting from
  [RenderProxyBox] (if the render object sizes itself to match the child) or
  [RenderShiftedBox] (if the child will be smaller than the box and the box
  will align the child inside itself).
* A single child, but it isn't a [RenderBox]. Use the
  [RenderObjectWithChildMixin] mixin.
* A single list of children. Use the [ContainerRenderObjectMixin] mixin.
* A more complicated child model.
从上面我们可以了解到,带有子对象的情况有四种:
(1)子对象只有一个,并且是RenderBox的子类。如果当前视图需要根据子对象调整大小,则继承RenderProxyBox;如果子对象小于当前视图,且在当前视图内部对齐,则继承RenderShiftedBox(想一下Align会好理解一点);
(2)子对象只有一个,且非RenderBox子类,这种情况使用RenderObjectWithChildMixin;
(3)有多个子对象则使用ContainerRenderObjectMixin;
(4)更复杂的情况。
第四种情况是要用非链表的children结构时需要考虑的,比如children要用map或list等结构,这种情况需要继承RenderObject去实现一套绘制协议,我们这里暂且先不讨论。
而前三种情况其实注释里的描述不够明确,其实情况只有两种,第一是带有单一的child,第二是带有一个children列表,上面的第一第二两种情况其实可以合并为一种,为什么这么说呢?看下去吧~
2、单个子对象
(1)RenderProxyBox
这种情况其实就是当前容器没有跟大小相关的属性,size由子类决定,具体逻辑flutter已经在RenderProxyBoxMixin实现了,我们来看看:
  void performLayout() {
    if (child != null) {
      child.layout(constraints, parentUsesSize: true);
      size = child.size;
    } else {
      performResize();
    }
  }
逻辑非常简单,如果有child,则直接使用child的size;如果没有,就走performResize,而这里并没有实现performResize,即走RenderBox的默认实现,取约束的最小值:
  void performResize() {
    size = constraints.smallest;
    assert(size.isFinite);
  }
而绘制方法中,通过PaintingContext的paintChild方法,即可绘制child:
  @override
  void paint(PaintingContext context, Offset offset) {
    if (child != null)
      context.paintChild(child, offset);
  }
(2)RenderShiftedBox
这种情况则与RenderProxyBox相反,即当前容器有跟大小相关的属性,比如padding。接下来就以非常常见的Padding为例,看看RenderPadding的布局方法:
  @override
  void performLayout() {
    // 将padding的值按照语言方向解析
    _resolve();
    assert(_resolvedPadding != null);
    if (child == null) {
      // 如果没有child,就按照垂直、水平方向的padding值计算得出size
      size = constraints.constrain(Size(
        _resolvedPadding.left + _resolvedPadding.right,
        _resolvedPadding.top + _resolvedPadding.bottom,
      ));
      return;
    }
    // 如果有child,则将当前约束减去padding值以后,再传给child进行测量
    final BoxConstraints innerConstraints = constraints.deflate(_resolvedPadding);
    child.layout(innerConstraints, parentUsesSize: true);

    // 测量完毕以后,计算出坐标偏移量,提供给child绘制时使用
    // parentData是RenderObject的属性,提供给父布局使用,用来存取child在父布局中的一些信息,包括位置等
    final BoxParentData childParentData = child.parentData;
    childParentData.offset = Offset(_resolvedPadding.left, _resolvedPadding.top);

    // 最后得出大小是padding加上child的大小
    size = constraints.constrain(Size(
      _resolvedPadding.left + child.size.width + _resolvedPadding.right,
      _resolvedPadding.top + child.size.height + _resolvedPadding.bottom,
    ));
  }
可以看到,这里有三个关键步骤:第一,根据属性将约束减去需要额外占用的宽高,然后传给child进行测量;第二,测量完毕后计算出child需要用到的绘制偏移量;第三,根据属性和child的size得出总宽高。
另外,RenderShiftedBox的paint方法逻辑与RenderProxyBox稍微有点不同,会对offset进行处理:
  @override
  void paint(PaintingContext context, Offset offset) {
    if (child != null) {
      final BoxParentData childParentData = child.parentData;
      context.paintChild(child, childParentData.offset + offset);
    }
  }
(3)RenderObjectWithChildMixin
回到上面的问题,为什么说RenderBox和非RenderBox的单一子对象是一样的呢?其实,RenderProxyBox和RenderShiftedBox是专门为RenderBox的子类再封装了一层便于使用,它们本身还是with了RenderObjectWithChildMixin:
class RenderProxyBox extends RenderBox with RenderObjectWithChildMixin<RenderBox>, RenderProxyBoxMixin<RenderBox> {
  /// 略
}

abstract class RenderShiftedBox extends RenderBox with RenderObjectWithChildMixin<RenderBox> {
  /// 略
}
经过前面的分析,我们知道RenderProxyBox和RenderShiftedBox只负责测量和绘制,那么RenderObjectWithChildMixin是做什么的呢?借助Android Studio的Structure窗口,我们可以看到:
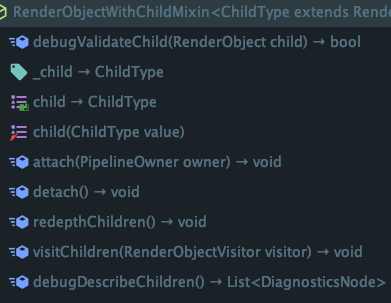
除去debug的方法以外,这个类方法并不多。以attach为例:
  @override
  void attach(PipelineOwner owner) {
    super.attach(owner);
    if (_child != null)
      _child.attach(owner);
  }
代码很少,就是在上层attach过来时,再attach自己的child,这里就涉及到渲染树的知识点,这又是另一个话题了,现在我也还没看到这里,后续我们再来分析这玩意儿~
一言蔽之,RenderObjectWithChildMixin实现了与渲染树相关的child的管理。
(4)SingleChildRenderObjectWidget
同样,定义完RenderBox以后,需要在一个Widget中进行创建,单个child的情况我们可以使用SingleChildRenderObjectWidget,与LeafRenderObjectWidget不同的地方在于需要在构造函数将child传入:
class CustomRenderWidget extends SingleChildRenderObjectWidget {
  CustomRenderWidget(Widget child) : super(child: child);
}
3、多个子对象
(1)ContainerRenderObjectMixin
相对于上面只有单个child的情况,多个子对象的情况稍微复杂一点,但也只是一点,其实区别不太大。同样,关于与渲染树相关的子对象管理,flutter也是提供了一个ContainerRenderObjectMixin,这里我们就不再分析它的原理了,只需要注意一个地方,当RenderBox被创建时,需要调一下addAll方法将children加入:
  RenderListBody({
    List<RenderBox> children,
    AxisDirection axisDirection = AxisDirection.down,
  }) : assert(axisDirection != null),
       _axisDirection = axisDirection {
    // 把children交给ContainerRenderObjectMixin管理
    addAll(children);
  }
(2)ContainerParentDataMixin
另外,ContainerDefaultsMixin指定了使用的ParentData必须是ContainerParentDataMixin的子类。ContainerParentDataMixin并不复杂,它的作用仅仅是实现了双向链表结构的ParentData:
mixin ContainerParentDataMixin<ChildType extends RenderObject> on ParentData {
  ChildType previousSibling;
  ChildType nextSibling;
}
指定了ParentData的类型后,还需要在RenderBox的setupParentData检查child使用的data类型是否符合,不符合则重新创建并替换:
  @override
  void setupParentData(RenderObject child) {
    super.setupParentData(child);
    if (child.parentData is! MultiChildLayoutParentData) {
      child.parentData = MultiChildLayoutParentData();
    }
  }
(3)案例源码分析
下面我们再以RenderStack为例,看看它的测量(函数写得有点长,但分段看挺容易理解的):
  @override
  void performLayout() {
    // 根据textDirection解析alignment
    _resolve();
    assert(_resolvedAlignment != null);
    _hasVisualOverflow = false;
    bool hasNonPositionedChildren = false;

    // 如果没有子对象,stack会充满父布局
    if (childCount == 0) {
      size = constraints.biggest;
      assert(size.isFinite);
      return;
    }

    double width = constraints.minWidth;
    double height = constraints.minHeight;

    // 根据fit属性调整约束
    BoxConstraints nonPositionedConstraints;
    assert(fit != null);
    switch (fit) {
      case StackFit.loose:
        nonPositionedConstraints = constraints.loosen();
        break;
      case StackFit.expand:
        nonPositionedConstraints = BoxConstraints.tight(constraints.biggest);
        break;
      case StackFit.passthrough:
        nonPositionedConstraints = constraints;
        break;
    }
    assert(nonPositionedConstraints != null);

    // 遍历所有没有通过Positioned指定位置或大小的子对象,进行布局
    RenderBox child = firstChild;
    while (child != null) {
      final StackParentData childParentData = child.parentData;

      if (!childParentData.isPositioned) {
        hasNonPositionedChildren = true;

        // 这种情况通过根据fit转换后的约束测量子对象
        child.layout(nonPositionedConstraints, parentUsesSize: true);

        // 测量完以后对比大小取最大值
        final Size childSize = child.size;
        width = math.max(width, childSize.width);
        height = math.max(height, childSize.height);
      }

      child = childParentData.nextSibling;
    }

    if (hasNonPositionedChildren) {
      // 如果存在没用Positioned指定位置或大小的子对象,则取这些子对象的最大size(上面测量后得到的)
      size = Size(width, height);
      assert(size.width == constraints.constrainWidth(width));
      assert(size.height == constraints.constrainHeight(height));
    } else {
      // 否则充满父布局
      size = constraints.biggest;
    }

    assert(size.isFinite);

    // 遍历计算约束、offset
    child = firstChild;
    while (child != null) {
      final StackParentData childParentData = child.parentData;

      if (!childParentData.isPositioned) {

        // 没指定位置或大小,则根据alignment来计算offset
        childParentData.offset = _resolvedAlignment.alongOffset(size - child.size);

      } else {
        BoxConstraints childConstraints = const BoxConstraints();

        if (childParentData.left != null && childParentData.right != null)
          // 指定了left和right,根据stack的宽度算出child的宽度
          childConstraints = childConstraints.tighten(width: size.width - childParentData.right - childParentData.left);
        else if (childParentData.width != null)
          // 这里直接指定了宽度
          childConstraints = childConstraints.tighten(width: childParentData.width);

        // 跟上面逻辑一样
        if (childParentData.top != null && childParentData.bottom != null)
          childConstraints = childConstraints.tighten(height: size.height - childParentData.bottom - childParentData.top);
        else if (childParentData.height != null)
          childConstraints = childConstraints.tighten(height: childParentData.height);

        // 测量child
        child.layout(childConstraints, parentUsesSize: true);

        // 计算offset
        double x;
        if (childParentData.left != null) {
          x = childParentData.left;
        } else if (childParentData.right != null) {
          x = size.width - childParentData.right - child.size.width;
        } else {
          x = _resolvedAlignment.alongOffset(size - child.size).dx;
        }

        if (x < 0.0 || x + child.size.width > size.width)
          // 标记溢出,在paint的时候会用
          _hasVisualOverflow = true;

        double y;
        if (childParentData.top != null) {
          y = childParentData.top;
        } else if (childParentData.bottom != null) {
          y = size.height - childParentData.bottom - child.size.height;
        } else {
          y = _resolvedAlignment.alongOffset(size - child.size).dy;
        }

        if (y < 0.0 || y + child.size.height > size.height)
          _hasVisualOverflow = true;

        childParentData.offset = Offset(x, y);
      }

      assert(child.parentData == childParentData);
      child = childParentData.nextSibling;
    }
  }
抽丝剥茧以后,不难理解,其实多个子对象和单个子对象本质上是一样的,提供子对象约束让它进行测量,然后根据测量结果决定自己的size,最后再计算子对象绘制的offset。就这样~
最后再看看绘制方法:
  @protected
  void paintStack(PaintingContext context, Offset offset) {
    // 其它情况则直接使用RenderBoxContainerDefaultsMixin提供的默认绘制方法
    defaultPaint(context, offset);
  }

  @override
  void paint(PaintingContext context, Offset offset) {
    // 处理方式为clip时,溢出部分裁减掉,_hasVisualOverflow在上面计算offset时进行了标记
    if (_overflow == Overflow.clip && _hasVisualOverflow) {
      context.pushClipRect(needsCompositing, offset, Offset.zero & size, paintStack);
    } else {
      paintStack(context, offset);
    }
  }
4、getXxxIntrinsicXxx和computeXxxIntrinsicXxx的作用、用法
细心的同学可能会发现,实现了performLayout的类中都重写了一系列compute开头的方法,另外也会有些地方调用了getMaxIntrinsicWidth等几个"get系列"的方法。从名字上看,这几个方法分别是用来计算和获取最大最小宽高的,但按照我们前面的说法,直接在performLayout或performResize中通过constrains计算宽高也可以,那么这几个方法有什么作用?跟我们前面的做法又有什么区别呢?别着急,接下来我们就来解开这些疑惑。
根据getMinIntrinsicWidth方法的注释,可以得出几个要点:
(1)getMinIntrinsicWidth用来获取能够完整绘制所有内容的最小宽度;
(2)这个方法是给父布局使用的,如果父布局调用了某个child的这个方法,当child调用markNeedsLayout时,父布局也会被通知刷新;
(3)这个方法的算法复杂的是O(N^2),所以非必要的情况不要用它;
(4)不要重写这个方法,有需要的话重写computeMinIntrinsicWidth。
结合这些说明,情况基本明确了。compute系列的方法是需要重写,并计算返回相应的大小;而get系列的方法则是提供给父布局使用,让父布局能够在child测量前就知道child的size。这么实现的原因是规避android原生那种measure两次的问题,详情可以看看闲鱼这篇文章:https://zhuanlan.zhihu.com/p/90195812
5、容器类控件的hitTest
相对于非容器类的控件,容器控件的命中测试需要额外考虑child的命中情况,结合上述内容,我们只需要实现hitTestChildren即可,不过需要注意一点,这个方法接收的postion需要是相对于当前控件的(即原点在当前控件左上角),在对child进行命中测试前,我们需要把position转成原点在child左上角的相对坐标位置。 HitTestResult类提供的一些方法会帮助我们完成这个转换。我们来看看RenderBoxContainerDefaultsMixin中的默认实现:
  bool defaultHitTestChildren(BoxHitTestResult result, { Offset position }) {
    ChildType child = lastChild;
    while (child != null) {
      final ParentDataType childParentData = child.parentData;

      // addWithPaintOffset会将根据offset将position转换成child的相对位置
      final bool isHit = result.addWithPaintOffset(
        offset: childParentData.offset,
        position: position,
        hitTest: (BoxHitTestResult result, Offset transformed) {
          // 这里的offset已经经过转换
          return child.hitTest(result, position: transformed);
        },
      );
      if (isHit)
        return true;
      child = childParentData.previousSibling;
    }
    return false;
  }
举个栗子,一个宽高为200的正方形容器中,装有一个宽高为100的小正方形,小正方形位于容器右下角:
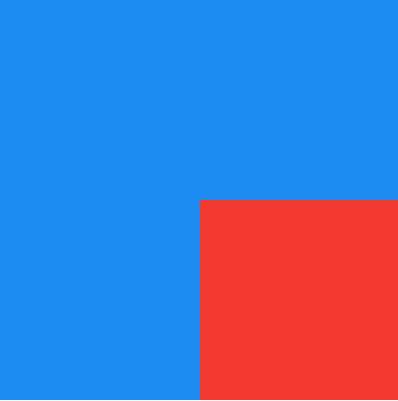
这个时候childParentData中offset是(100,100),假设点击到正方形容器的左上角,那么容器的hitTestChildren方法拿到的position为(0,0),经过转换后,小正方形的hitTest方法中拿到的postion就应该是(-100, -100)。
本文作学习交流用,如有错误,欢迎指正!

 浙公网安备 33010602011771号