14.Nginx反向代理
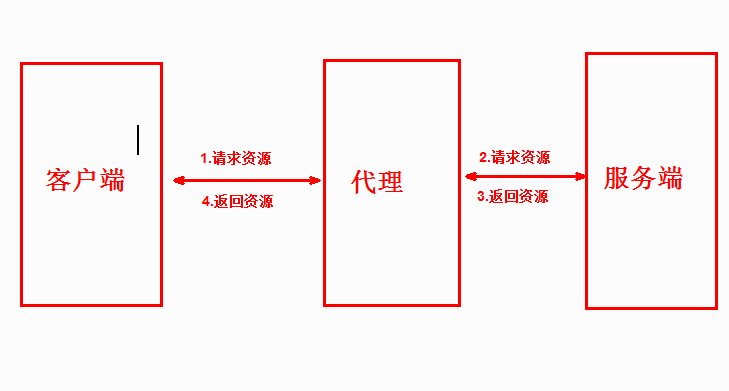
什么是代理
类似于中介,代购
互联网请求里面,客户端往往无法直接向服务端发起请求,那么就需要用到代理服务,来实现客户端和服务通信,如所示
Nginx代理服务常见模式
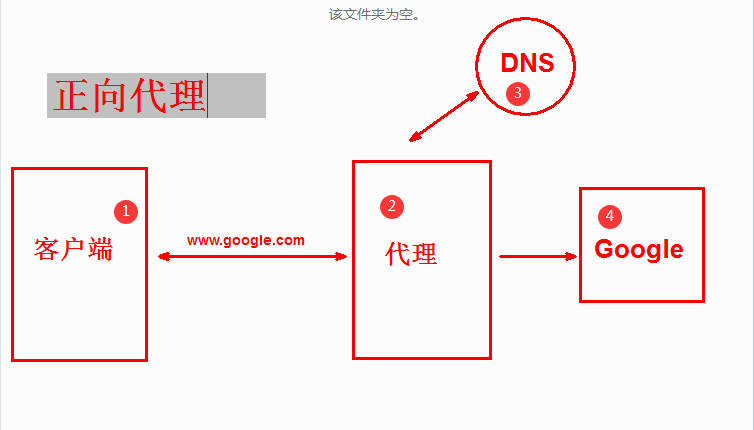
Nginx作为代理服务,按照应用场景模式进行总结,代理分为正向代理、反向代理
1.区别
# 正向代理:由内向外。代替,效率低,代替局域网内pc,请求外部应用服务,代理对象为客户端,为客户端服务
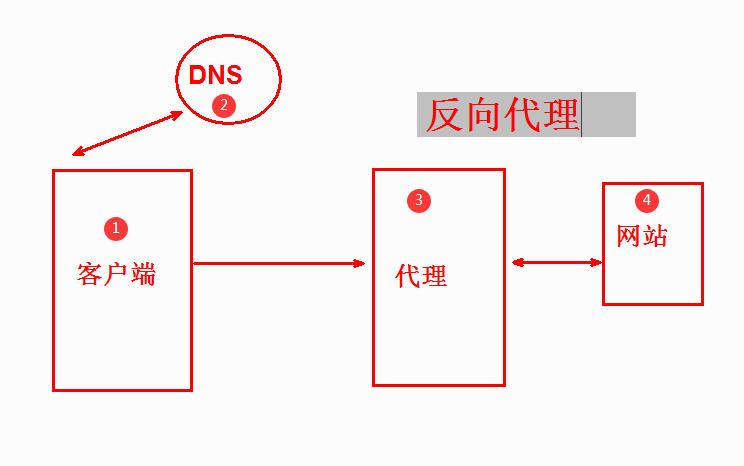
# 反向代理:由外向内,代替,效率低,代替外部的用户请求内部的应用服务器,代理对象对服务端,为服务端服务
2. 正向代理,(内部上网)客户端<—>代理->服务端
3. 反向代理,用于公司集群架构中,客户端->代理<—>服务端
4.常见反向代理软件
Nginx、Tengine
Apache HTTP Server
Varnish cache
Squid Cache
Traffic Server
HAProxy
YXORP
Polipo
Privoxy
IIS
Nginx代理服务支持协议
支持的协议
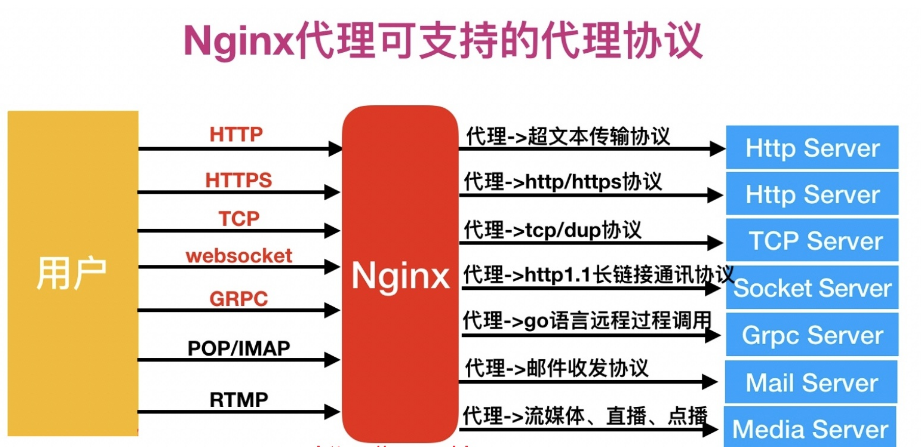
常用的反向代理协议
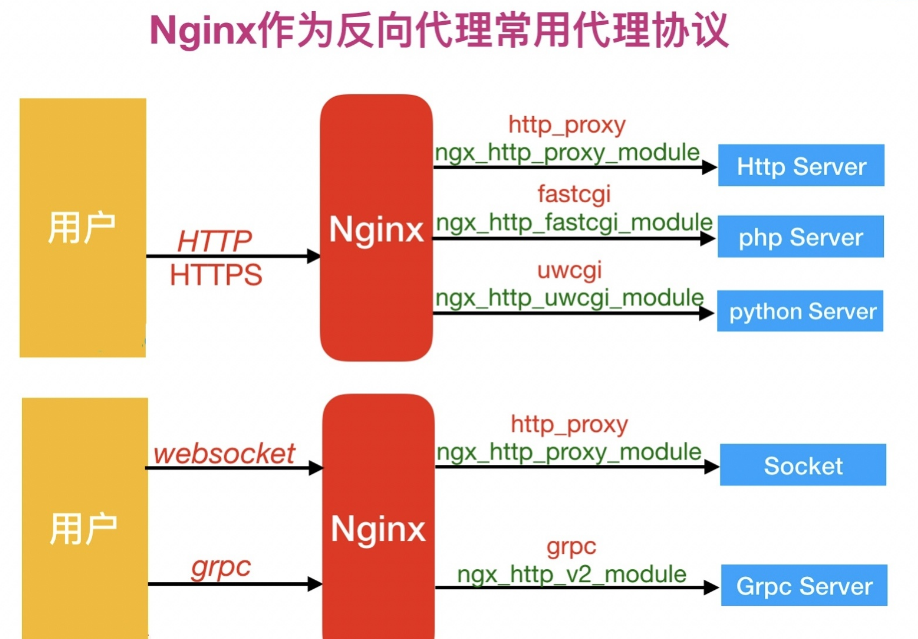
模块总结
反向代理模式与Nginx代理模块总结如表格所示
| 反向代理模式 | Nginx配置模块 |
|---|---|
| http、websocket、https | ngx_http_proxy_module |
| fastcgi | ngx_http_fastcgi_module |
| uwsgi | ngx_http_uwsgi_module |
| grpc | ngx_http_v2_module |
Nginx反向代理配置
语法:
Syntax:    proxy_pass URL;
Default:    —
Context:    location, if in location, limit_except

http://localhost:8000/uri/
http://192.168.56.11:8000/uri/
http://unix:/tmp/backend.socket:/uri/
基本配置
# 1.下载nginx
[root@lb01 ~]# yum install -y nginx
# 2.编辑配置文件
[root@lb01 ~]# vim /etc/nginx/conf.d/proxy.conf
server {
listen 80;
server_name www.wp.com.com;
location / {
# 代理后端的机器
proxy_pass http://10.0.0.7:80;
# 客户端的请求头部信息,带着域名来找我,我也带着域名去找下一级
proxy_set_header Host $host;
# 显示客户端的真实ip
proxy_set_header X-Forwarded-For $proxy_add_x_forwarded_for;
}
}
# 3.启动nginx并加入开机自启
[root@lb01 ~]# systemctl start nginx
[root@lb01 ~]# systemctl enable nginx
# 4.检查配置文件并重新加载配置文件
[root@lb01 ~]# nginx -t
[root@lb01 ~]# nginx -s reload
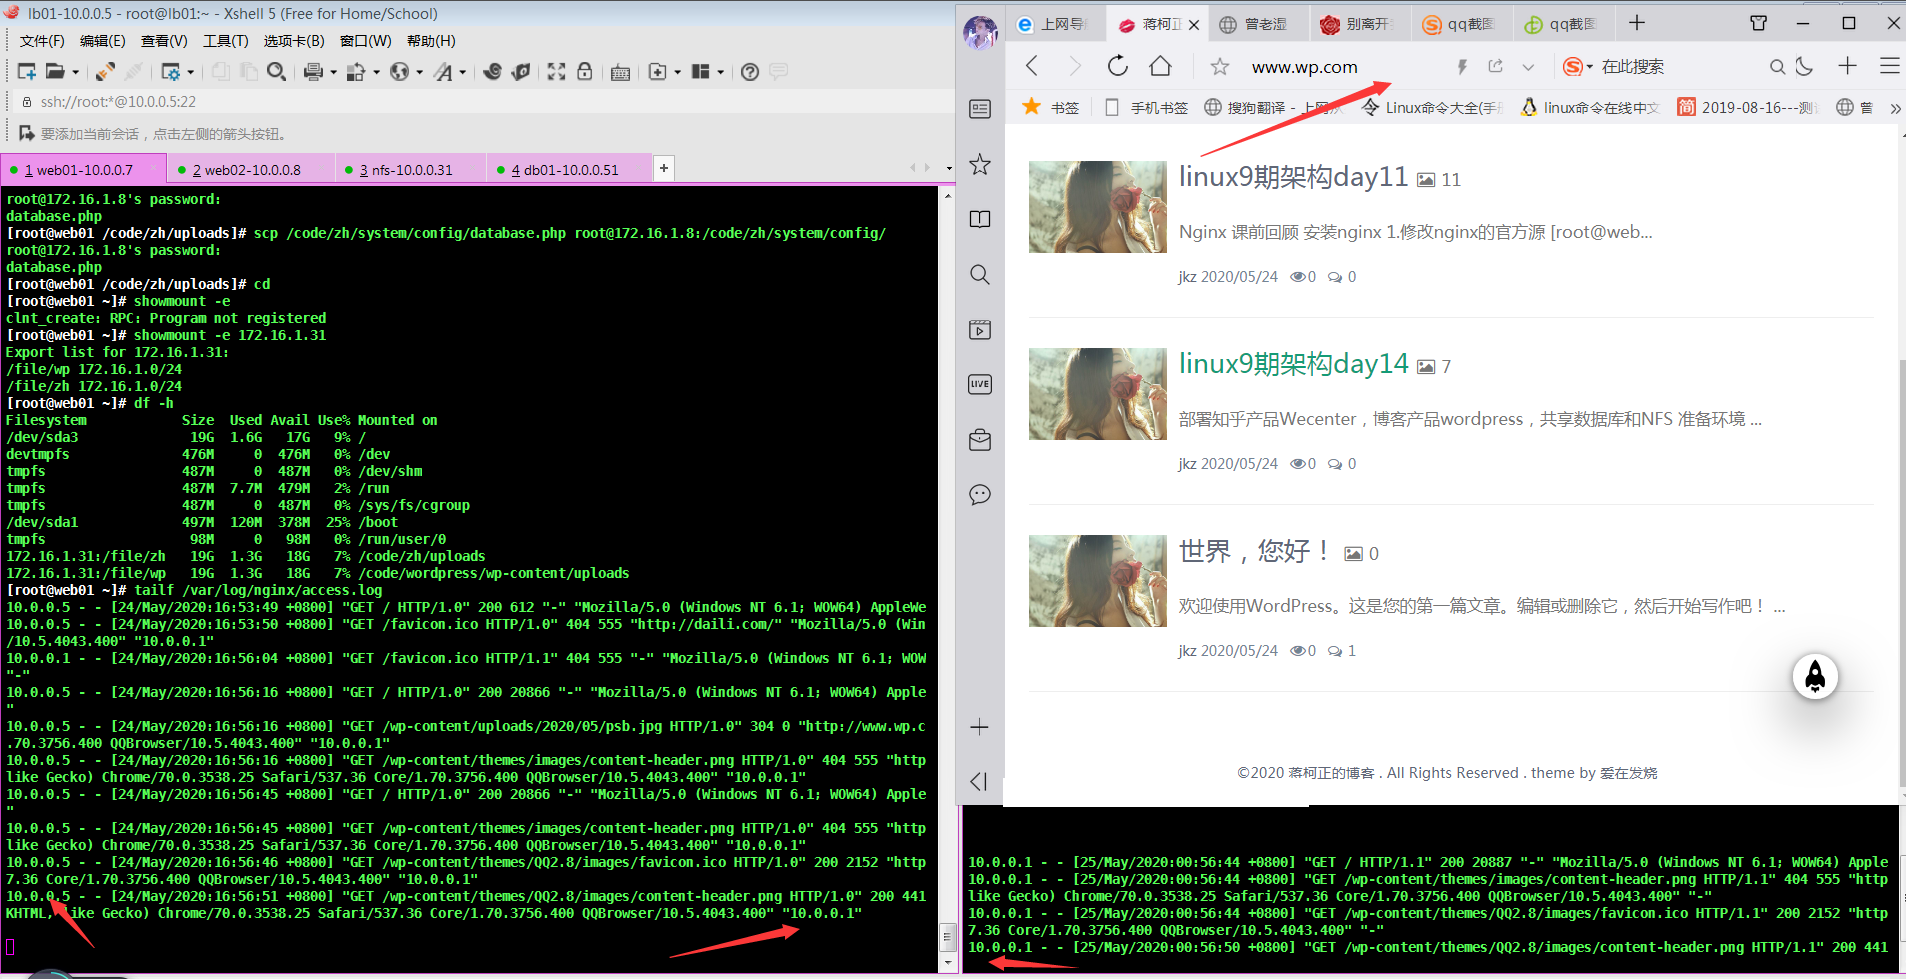
# 5.域名解析10.0.0.6,注释10.0.0.7
访问网站 www.wp.com
多加一层代理lb02
# 1.下载nginx
[root@lb02 ~]# yum install -y nginx
# 2.编辑配置文件
[root@lb02 ~]# vim /etc/nginx/conf.d/proxy.conf
server {
listen 80;
server_name www.wp.com.com;
location / {
# 代理后端的机器
proxy_pass http://10.0.0.5:80;
# 客户端的请求头部信息,带着域名来找我,我也带着域名去找下一级
proxy_set_header Host $host;
# 显示客户端的真实ip
proxy_set_header X-Forwarded-For $proxy_add_x_forwarded_for;
}
}
# 3.启动nginx并加入开机自启
[root@lb02 ~]# systemctl start nginx
[root@lb02 ~]# systemctl enable nginx
# 4.检查配置文件并重新加载配置文件
[root@lb02 ~]# nginx -t
[root@lb02 ~]# nginx -s reload
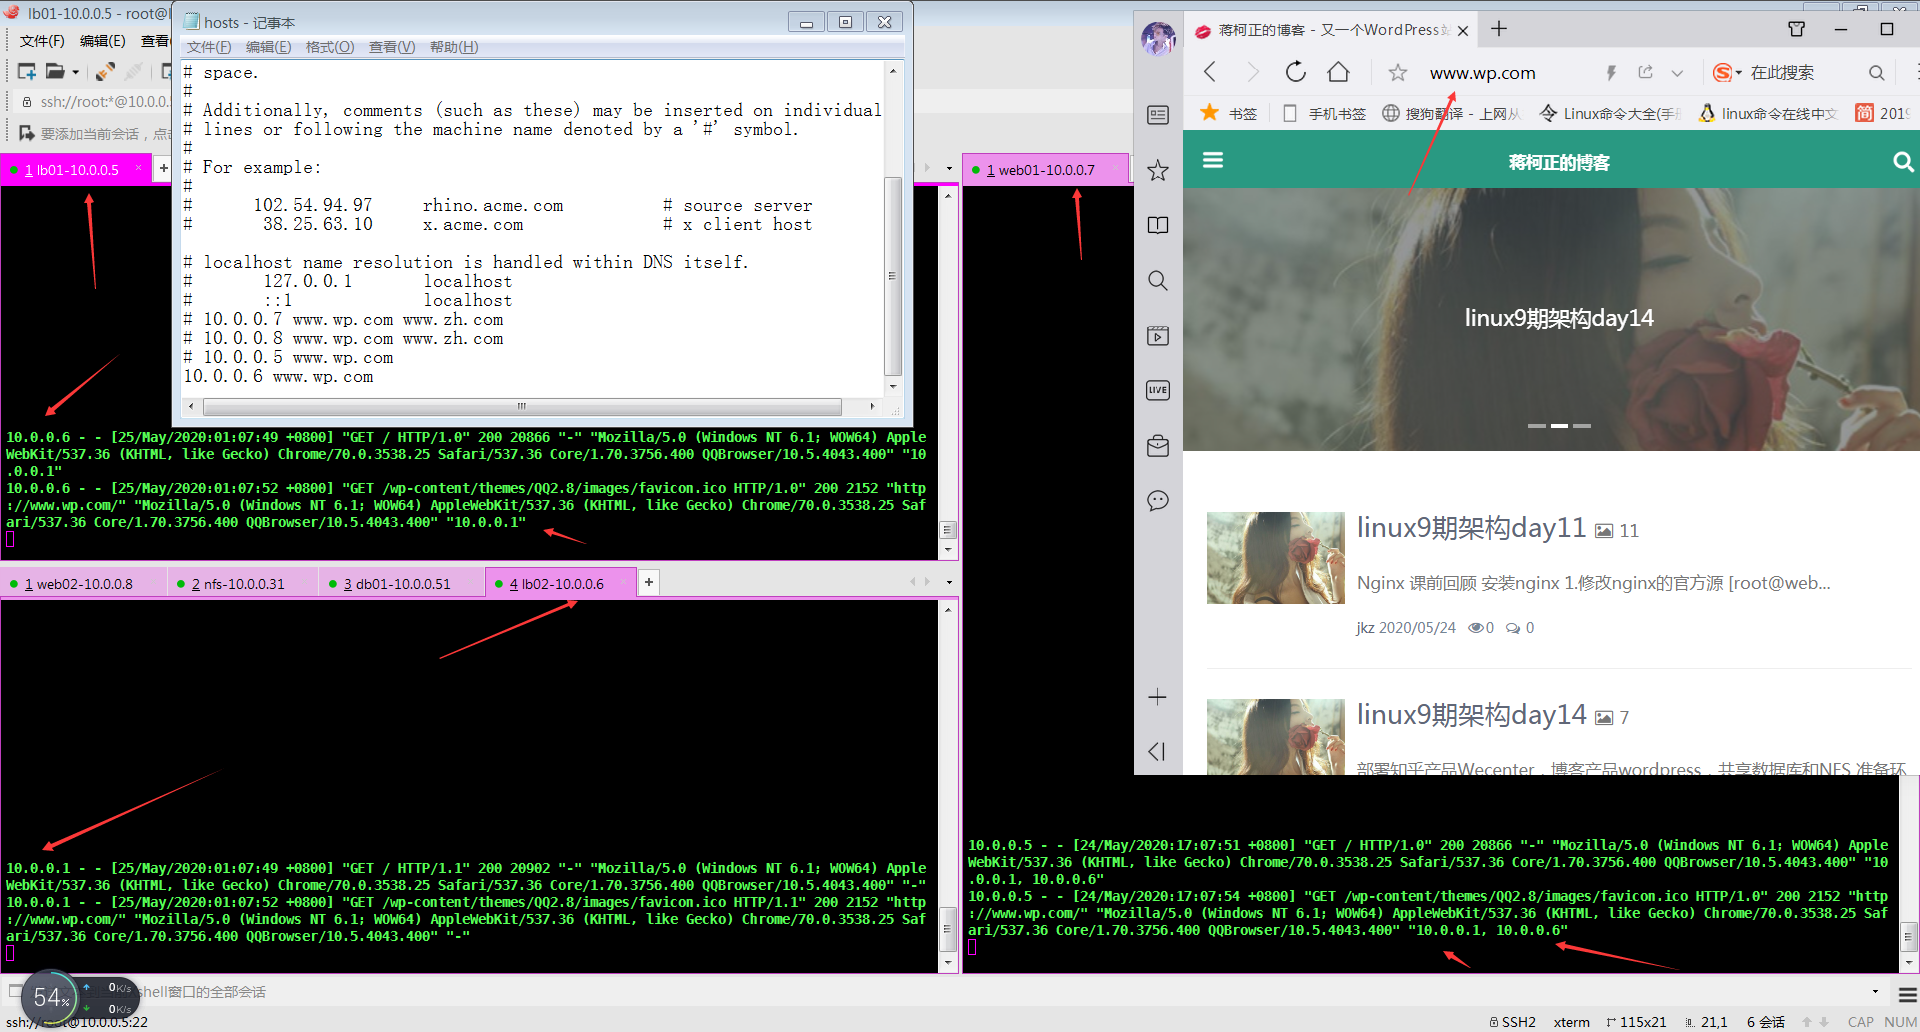
# 5.域名解析10.0.0.6,注释10.0.0.5
访问网站 www.wp.com

 浙公网安备 33010602011771号