
Cesium之原生控件
 记述Cesium的原生控件
1. 控件概述
Cesium的开始,基本上是从new一个Viewer开始
// ...
<div id="cesiumContainer"></div>
<script>
    const viewer = new Cesium.Viewer('cesiumContainer')
</script>
// ...
Cesium初始化时配置原生控件也是在Viewer的构造函数里配置的,有关控件的配置参数可以参考下面的表格,表格来源:Viewer - Cesium Documentation
| Name | Type | Attributes | Default | Description |
|---|---|---|---|---|
animation |
boolean | true | If set to false, the Animation widget will not be created. | |
baseLayerPicker |
boolean | true | If set to false, the BaseLayerPicker widget will not be created. | |
fullscreenButton |
boolean | true | If set to false, the FullscreenButton widget will not be created. | |
vrButton |
boolean | false | If set to true, the VRButton widget will be created. | |
geocoder |
boolean | Array | true | If set to false, the Geocoder widget will not be created. | |
homeButton |
boolean | true | If set to false, the HomeButton widget will not be created. | |
infoBox |
boolean | true | If set to false, the InfoBox widget will not be created. | |
sceneModePicker |
boolean | true | If set to false, the SceneModePicker widget will not be created. | |
selectionIndicator |
boolean | true | If set to false, the SelectionIndicator widget will not be created. | |
timeline |
boolean | true | If set to false, the Timeline widget will not be created. | |
navigationHelpButton |
boolean | true | If set to false, the navigation help button will not be created. | |
projectionPicker |
boolean | false | If set to true, the ProjectionPicker widget will be created. |
不防把这些控件都显示出来看看:
<!DOCTYPE html>
<html lang="en">

<head>
  <meta charset="utf-8">
  <!-- Include the CesiumJS JavaScript and CSS files -->
  <script src="https://cesium.com/downloads/cesiumjs/releases/1.114/Build/Cesium/Cesium.js"></script>
  <link href="https://cesium.com/downloads/cesiumjs/releases/1.114/Build/Cesium/Widgets/widgets.css" rel="stylesheet">
</head>

<body>
  <div id="cesiumContainer"></div>
  <script type="module">
    // Your access token can be found at: https://ion.cesium.com/tokens.
    // Replace `your_access_token` with your Cesium ion access token.

    // Cesium.Ion.defaultAccessToken = 'your_access_token';

    // Initialize the Cesium Viewer in the HTML element with the `cesiumContainer` ID.
    const viewer = new Cesium.Viewer('cesiumContainer', {
      animation: true,
      baseLayerPicker: true,
      fullscreenButton: true,
      vrButton: true,
      geocoder: true,
      homeButton: true,
      infoBox: true,
      sceneModePicker: true,
      selectionIndicator: false,
      timeline: true,
      navigationHelpButton: true,
      projectionPicker: true
    });
  </script>
  </div>
</body>

</html>
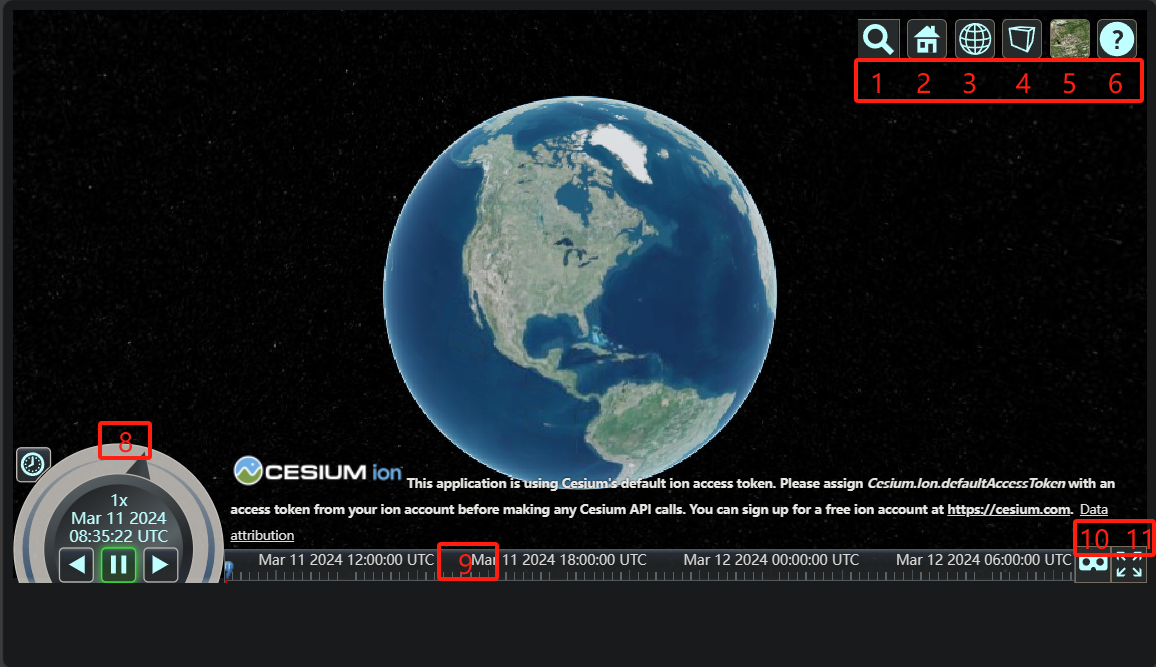
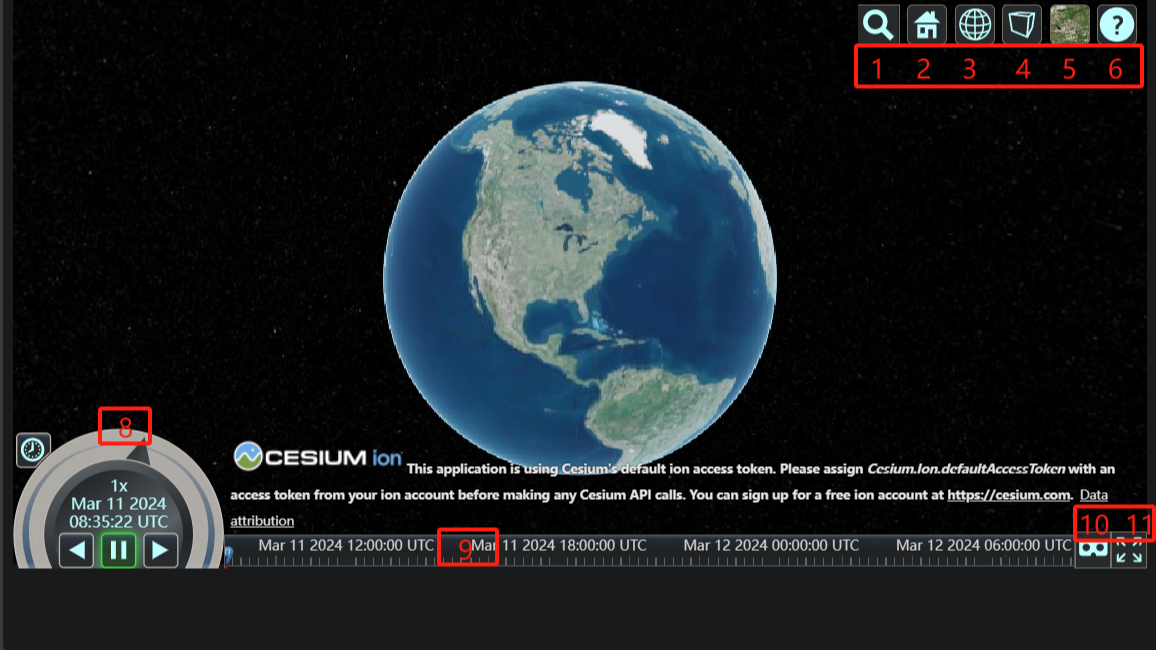
上图中所显示的,就是Cesium原生自带的控件,分别是:
| 名字 | 图中序号 |
|---|---|
animation |
8 |
baseLayerPicker |
5 |
fullscreenButton |
11 |
vrButton |
10 |
geocoder |
1 |
homeButton |
2 |
sceneModePicker |
3 |
projectionPicker |
4 |
timeline |
9 |
navigationHelpButton |
6 |
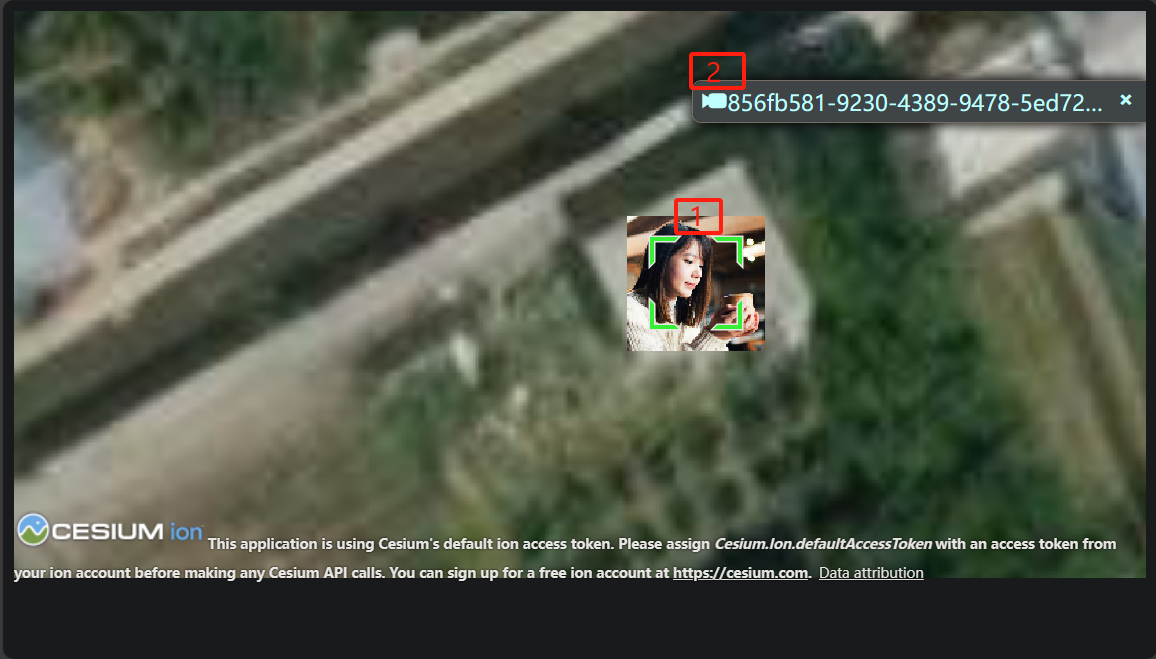
除了上述控件外,还有selectionIndicator和infoBox图中没有显示,下图中的 1 和 2 分别就是selectionIndicator和infoBox
2. 控件构造
根据Viewer的初始化函数,可以到对应的Cesium源码找到相关控件的代码,这里以 NavigationHelpButton 为例
首先是Viewer的构造函数里:
// Navigation Help Button
let navigationHelpButton;
if (
    !defined(options.navigationHelpButton) ||
    options.navigationHelpButton !== false
) {
    let showNavHelp = true;
	// ...
    navigationHelpButton = new NavigationHelpButton({
        container: toolbar,
        instructionsInitiallyVisible: defaultValue(
            options.navigationInstructionsInitiallyVisible,
            showNavHelp
        ),
    });
}
- 很简单,就是根据Viewer的配置觉得是否创建
进入到NavigationHelpButton.js里:
function NavigationHelpButton(options) {

  const container = getElement(options.container);

  const viewModel = new NavigationHelpButtonViewModel();
  // ...
  const clickInstructions = document.createElement("div");
  clickInstructions.className =
    "cesium-click-navigation-help cesium-navigation-help-instructions";
  clickInstructions.setAttribute(
    "data-bind",
    'css: { "cesium-click-navigation-help-visible" : !_touch}'
  );
  clickInstructions.innerHTML = `\
            <table>\
                <tr>\
                    <td><img src="${buildModuleUrl(
                      "Widgets/Images/NavigationHelp/MouseLeft.svg"
                    )}" width="48" height="48" /></td>\
                    <td>\
                        <div class="cesium-navigation-help-pan">Pan view</div>\
                        <div class="cesium-navigation-help-details">Left click + drag</div>\
                    </td>\
                </tr>\
                <tr>\
                    <td><img src="${buildModuleUrl(
                      "Widgets/Images/NavigationHelp/MouseRight.svg"
                    )}" width="48" height="48" /></td>\
                    <td>\
                        <div class="cesium-navigation-help-zoom">Zoom view</div>\
                        <div class="cesium-navigation-help-details">Right click + drag, or</div>\
                        <div class="cesium-navigation-help-details">Mouse wheel scroll</div>\
                    </td>\
                </tr>\
                <tr>\
                    <td><img src="${buildModuleUrl(
                      "Widgets/Images/NavigationHelp/MouseMiddle.svg"
                    )}" width="48" height="48" /></td>\
                    <td>\
                        <div class="cesium-navigation-help-rotate">Rotate view</div>\
                        <div class="cesium-navigation-help-details">Middle click + drag, or</div>\
                        <div class="cesium-navigation-help-details">CTRL + Left/Right click + drag</div>\
                    </td>\
                </tr>\
            </table>`;

  instructionContainer.appendChild(clickInstructions);
  // ...

  knockout.applyBindings(viewModel, wrapper);

  this._container = container;
  this._viewModel = viewModel;
  this._wrapper = wrapper;

  this._closeInstructions = function (e) {
    if (!wrapper.contains(e.target)) {
      viewModel.showInstructions = false;
    }
  };

  if (FeatureDetection.supportsPointerEvents()) {
    document.addEventListener("pointerdown", this._closeInstructions, true);
  } else {
    document.addEventListener("mousedown", this._closeInstructions, true);
    document.addEventListener("touchstart", this._closeInstructions, true);
  }
}
- 可以看到这里主要就是编写UI部分的代码并且绑定点击事件,代码里面提到的
NavigationHelpButtonViewModel是一种基于knockout.js实现的ViewModel(可以类比于Vue的ViewModel)
查看整个NavigationHelpButton的目录:
> ls NavigationHelpButton

    目录: \cesium\packages\widgets\Source\NavigationHelpButton

Mode                 LastWriteTime         Length Name
----                 -------------         ------ ----
-a----         2023/12/4     11:57           1055 lighter.css
-a----         2023/12/4     11:57           2130 NavigationHelpButton.css
-a----         2023/12/4     11:57          10807 NavigationHelpButton.js
-a----         2023/12/4     11:57           1906 NavigationHelpButtonViewModel.js
可以看到NavigationHelpButton控件主要由ViewModel、类函数NavigationHelpButton.js、相关CSS构成
作为使用Cesium的开发者,能不能自定义控件并添加到Cesium中呢?
从上面的介绍来看,并不容易,Cesium并没有提供一个扩展接口给开发者统一管理控件

 浙公网安备 33010602011771号