
Linux下安装PHP7.1并做关联APACHE处理
1.复制php压缩包到/usr/local/src
2.解压
tar -zxvf php-7.1.2.tar.gz
3.编译安装(请先安装apache和mysql)
./configure --prefix=/usr/local/php7 \
 --with-apxs2=/usr/local/apache2/bin/apxs \
 --with-curl \
 --with-freetype-dir \
 --with-gd \
 --with-gettext \
 --with-iconv-dir \
 --with-kerberos \
 --with-libdir=lib64 \
 --with-libxml-dir \
 --with-mysqli \
 --with-openssl \
 --with-pcre-regex \
 --with-pdo-mysql \
 --with-pdo-sqlite \
 --with-pear \
 --with-png-dir \
 --with-xmlrpc \
 --with-xsl \
 --with-zlib \
 --enable-fpm \
 --enable-bcmath \
 --enable-libxml \
 --enable-inline-optimization \
 --enable-gd-native-ttf \
 --enable-mbregex \
 --enable-mbstring \
 --enable-opcache \
 --enable-pcntl \
 --enable-shmop \
 --enable-soap \
 --enable-sockets \
 --enable-sysvsem \
 --enable-xml \
 --enable-zip \
 --enable-maintainer-zts
核心就是配置关联
--with-apxs2=/usr/local/apache2/bin/apxs
4.如果有编译错误
yum安装
yum -y install libjpeg libjpeg-devel libpng libpng-devel freetype freetype-devel libxml2 libxml2-devel pcre-devel openssl openssl-devel curl-devel libxslt-devel
5.make && make install
make && make install
如果有残留make clean一下
make clean
make
make install
[root@localhost php-7.1.2]# make install
Installing PHP SAPI module:       apache2handler
/usr/local/apache2/build/instdso.sh SH_LIBTOOL='/usr/local/apr/build-1/libtool' libphp7.la /usr/local/apache2/modules
/usr/local/apr/build-1/libtool --mode=install install libphp7.la /usr/local/apache2/modules/
libtool: install: install .libs/libphp7.so /usr/local/apache2/modules/libphp7.so
libtool: install: install .libs/libphp7.lai /usr/local/apache2/modules/libphp7.la
chmod 755 /usr/local/apache2/modules/libphp7.so
[activating module `php7' in /etc/httpd/httpd.conf]
Installing shared extensions:     /usr/local/php7/lib/php/extensions/no-debug-zts-20160303/
Installing PHP CLI binary:        /usr/local/php7/bin/
Installing PHP CLI man page:      /usr/local/php7/php/man/man1/
Installing phpdbg binary:         /usr/local/php7/bin/
Installing phpdbg man page:       /usr/local/php7/php/man/man1/
Installing PHP CGI binary:        /usr/local/php7/bin/
Installing PHP CGI man page:      /usr/local/php7/php/man/man1/
Installing build environment:     /usr/local/php7/lib/php/build/
Installing header files:           /usr/local/php7/include/php/
Installing helper programs:       /usr/local/php7/bin/
  program: phpize
  program: php-config
Installing man pages:             /usr/local/php7/php/man/man1/
  page: phpize.1
  page: php-config.1
Installing PEAR environment:      /usr/local/php7/lib/php/
[PEAR] Archive_Tar    - already installed: 1.4.0
[PEAR] Console_Getopt - already installed: 1.4.1
[PEAR] Structures_Graph- already installed: 1.1.1
[PEAR] XML_Util       - already installed: 1.3.0
[PEAR] PEAR           - already installed: 1.10.1
Wrote PEAR system config file at: /usr/local/php7/etc/pear.conf
You may want to add: /usr/local/php7/lib/php to your php.ini include_path
/opt/php-7.1.2/build/shtool install -c ext/phar/phar.phar /usr/local/php7/bin
ln -s -f phar.phar /usr/local/php7/bin/phar
Installing PDO headers:           /usr/local/php7/include/php/ext/pdo/
6.apache与php的关联
PHP安装成功后会在apache的modules目录下生成一个libphp.so动态库文件,在apache的配置文件httpd.conf里自动增加一行。
vi /etc/httpd/httpd.conf
LoadModule php7_module modules/libphp7.so
在Apache的配置文件httpd.conf的<IfModule mime_module></IfModule>块里增加一行
AddType application/x-httpd-php .php
配置index.php为默认执行的文件
<IfModule dir_module>
    DirectoryIndex index.html index.php
</IfModule>
7.重启apache
可能会出现 Could not reliably determine the server's fully qualified domain name
解决方案:
用记事本打开 httpd.conf
将里面的 #ServerName localhost:80 注释去掉即可。
再执行 httpd
然后可以通过浏览器访问 http://localhost:80 ,如果页面显示 “It works!” ,即表示apache已安装并启动成功。
8.查看phpinfo()
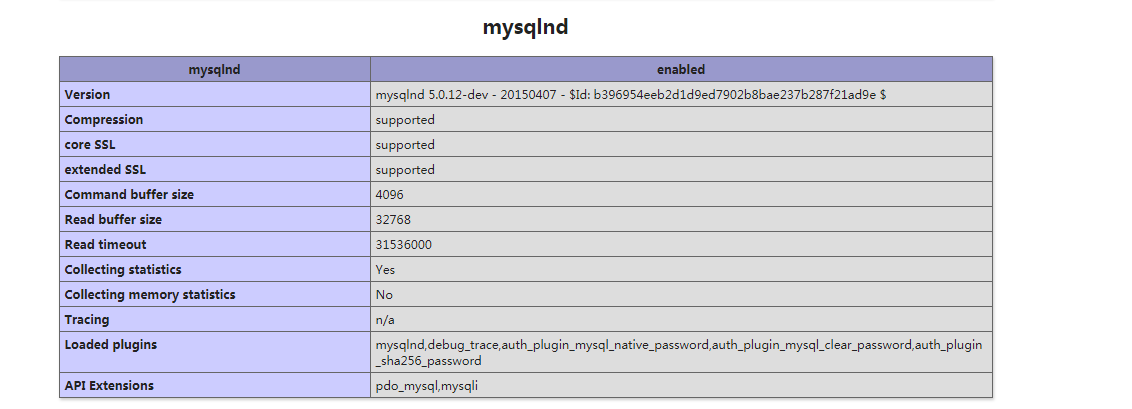
这些都是php支持mysql的模块,不需要跟具体的mysql关联。
9.写代码查看sql连接
$conn=mysqli_connect("127.0.0.1","root","123456");
if($conn){
	echo"ok";
}else{
	echo"error";
}
附上yum一些指令,避免yum的mysql的干扰!
查询yum的安装包

    yum list installed

查看具体的包信息

    yum info mysql

移除mysql

    yum remove mysql-libs.x86_64

不会影响到自己编译的mysql

 浙公网安备 33010602011771号