Redis 主从复制、读写分离(基于docker)
Redis 主从复制、读写分离(基于docker)
sentinel.conf
sentinel monitor mymaster 172.19.0.11 6379 1 #主库容器启动时指定
sentinel auth-pass mymaster 123456
requirepass 123456
daemonize yes
redis.conf主,可写
# bind 127.0.0.1
protected-mode yes #关闭保护模式
logfile "redis.log" #自定义日志名称
requirepass 123456 #密码
appendonly yes #开启AOF持久化
redis.conf从,只读
# bind 127.0.0.1
protected-mode yes
logfile "redis.log"
requirepass 123456
appendonly yes
replicaof 172.19.0.11 6379  #监听主机地址端口,主从复制,该地址为启动容器时指定
masterauth 123456
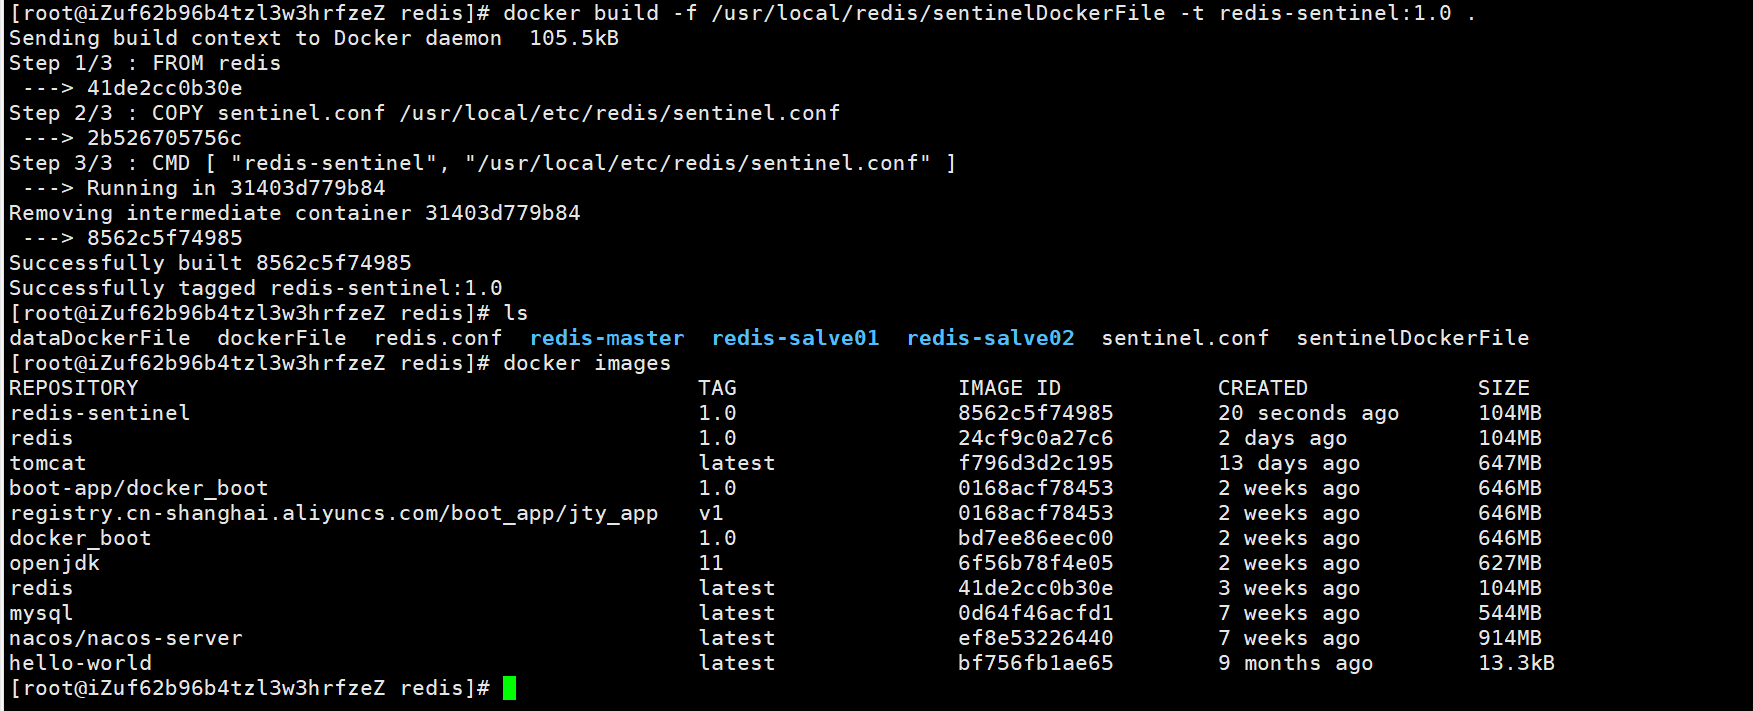
编写dockerFile生成sentinel镜像
FROM redis
COPY sentinel.conf /usr/local/etc/redis/sentinel.conf
CMD [ "redis-sentinel", "/usr/local/etc/redis/sentinel.conf" ]
docker build -f /usr/local/redis/sentinelDockerFile -t redis-sentinel:1.0 .制作镜像
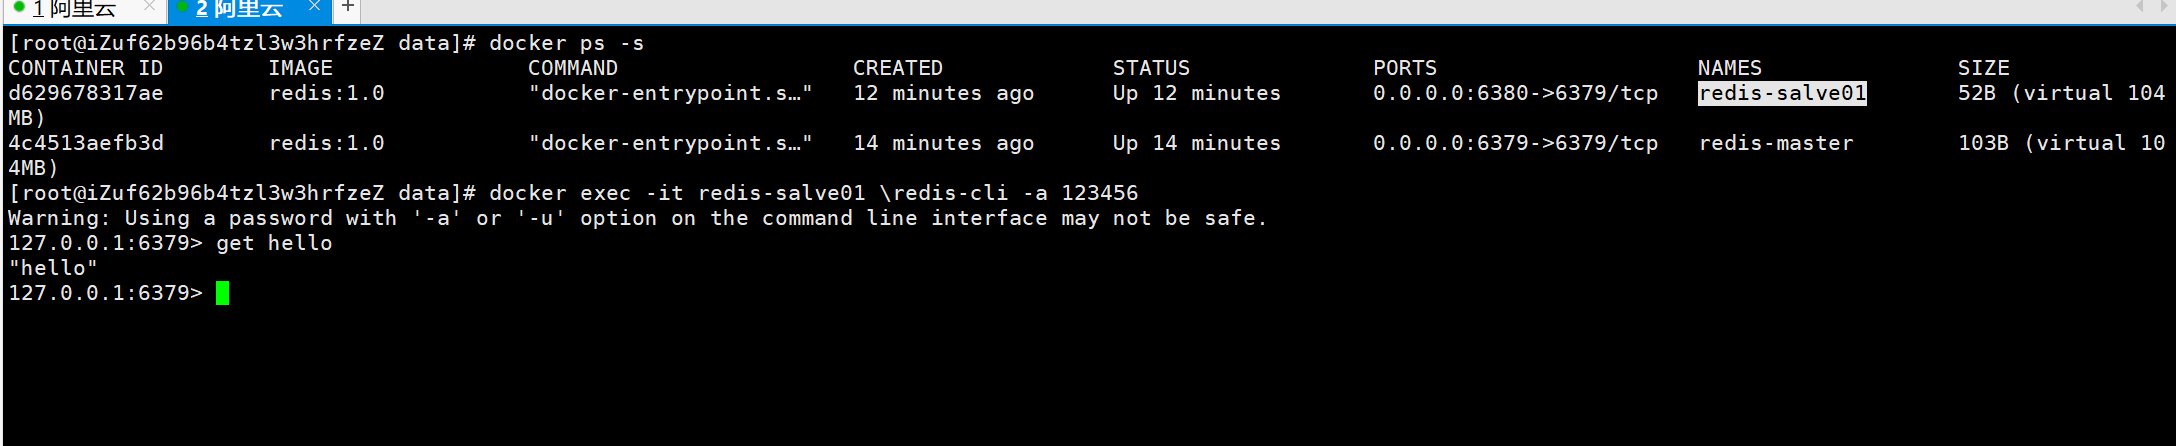
启动一主2从容器
#首先创建好/usr/etc/redis/conf/redis-master/redis.conf挂载文件,自动生成的为目录

#创建自定义网络(或使用host模式),不然同机器容器间不能通信,从redis库连接不上主redis,会报Error condition on socket for SYNC: Operation now in progress
docker network create --driver bridge --subnet 172.19.0.0/16 redis_network
#主Redis 容器
docker run -d -p 6379:6379 --network redis_network --ip 172.19.0.11 -v /usr/etc/redis/conf/redis-master/redis.conf:/usr/local/etc/redis/redis.conf -v /usr/local/redis/redis-master/data:/data --name redis-master redis:1.0
#从Redis 容器
docker run -d -p 6380:6379 --network redis_network --ip 172.19.0.12 -v /usr/etc/redis/conf/redis-salve01/redis.conf:/usr/local/etc/redis/redis.conf -v /usr/local/redis/redis-salve01/data:/data --name redis-salve01 redis:1.0
#从Redis 容器
docker run -d -p 6381:6379 --network redis_network --ip 172.19.0.13 -v /usr/etc/redis/conf/redis-salve02/redis.conf:/usr/local/etc/redis/redis.conf -v /usr/local/redis/redis-salve02/data:/data --name redis-salve02 redis:1.0

主Redis地址

测试

同样方式启动另外一个从Redis
启动sentinel容器
#注意:-rwxrwxrwx 1 root root 10925 Sep 29 22:17 sentinel.conf  该文件权限需要其它用户可写chmod 777 sentinel.conf,否则容器起不起来
docker run -d -p 6383:26379 --network redis_network --ip 172.19.0.14 -v /usr/etc/redis/conf/redis-sentinel/sentinel.conf:/usr/local/etc/redis/sentinel.conf -v /usr/local/redis/redis-sentinel/data:/data --name redis-sentinel01 redis-sentinel:1.0
查看sentinel.conf

停止redis-master容器,redis-salve02容器成为主库,sentinel.conf配置文件中从库地址更新
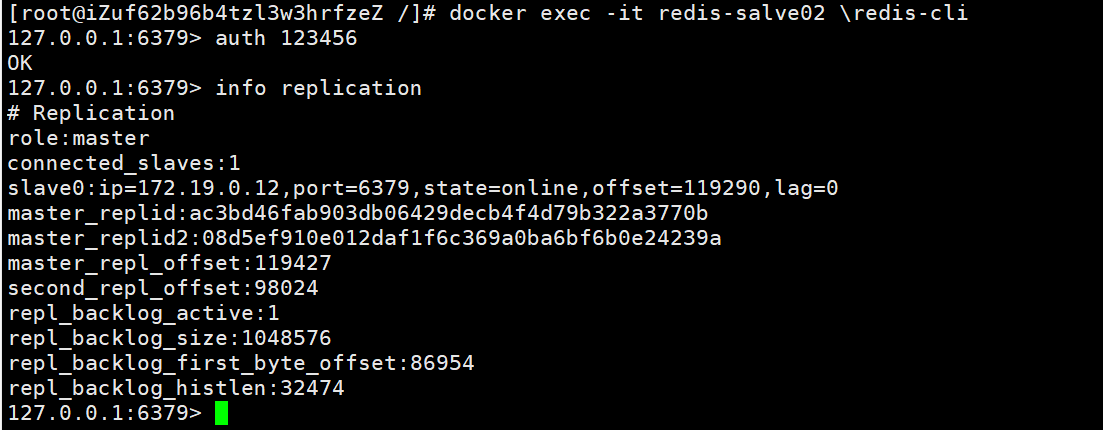

相关命令
info Replication
info sentinel
上述方式只能本机连接,其他机器无法访问,可使用host网络模式启动docker容器
#配置文件中的地址需改成服务器外网地址,如 sentinel monitor mymaster 106.xx.xxx.229 6379 1、replicaof 106.xx.xxx.229 6379
#配置文件中的端口需根据自己需求改成不同的端口,host模式容器跟宿主机共享网络端口。
docker run -d  --network host -v /usr/etc/redis/conf/redis-master/redis.conf:/usr/local/etc/redis/redis.conf -v /usr/local/redis/redis-master/data:/data --name redis-master redis:1.0

docker run -d --network host -v /usr/etc/redis/conf/redis-salve01/redis.conf:/usr/local/etc/redis/redis.conf -v /usr/local/redis/redis-salve01/data:/data --name redis-salve01 redis:1.0

docker run -d --network host -v /usr/etc/redis/conf/redis-salve02/redis.conf:/usr/local/etc/redis/redis.conf -v /usr/local/redis/redis-salve02/data:/data --name redis-salve02 redis:1.0

docker run -d --network host -v /usr/etc/redis/conf/redis-sentinel01/sentinel.conf:/usr/local/etc/redis/sentinel.conf -v /usr/local/redis/redis-sentinel01/data:/data --name redis-sentinel01 redis-sentinel:1.0

docker run -d --network host -v /usr/etc/redis/conf/redis-sentinel02/sentinel.conf:/usr/local/etc/redis/sentinel.conf -v /usr/local/redis/redis-sentinel02/data:/data --name redis-sentinel02 redis-sentinel:1.0

 浙公网安备 33010602011771号