Vue作用域插槽个人简单理解 slot-scope&v-slot 的使用方法
slot-scope:废弃方法
v-slot:2.6.0 新增
1.先看看slot-scope的使用方法
子组件 ChildCom.vue:
<template>
  <div>
  <header>header</header>
    <main>
      <slot>  // 这是一个默认插槽,父组件调用子组件时默认显示的内容
        <p>{{ content }}</p>
      </slot>
    </main>
    <footer>footer</footer>
  </div>
</template>

<script>
export default {
  name: 'childCom',
  data() {
    return {
      content: '子组件子组件子组件',
    msg: '今天周五,明天放假'
    }
  }
}

</script>
父组件 FatherCom.vue:
<template>
  <div>
    <childCom></childCom>
  </div>
</template>

<script>
import childCom '@/components/ChildCom.vue' // 引用子组件
export default {
  name: 'fatherCom',
  components: {
    childCom // 注册子组件
    }
}
</script>
若父组件单纯引入子组件,不添加自定义内容;
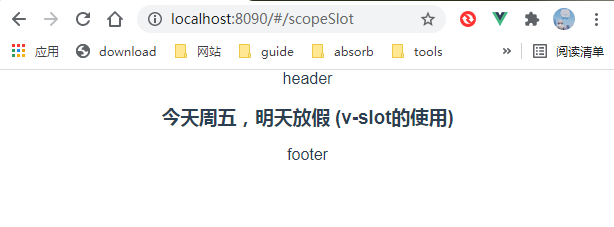
此时的页面效果是这样子的,显示子组件默认插槽的内容。

父组件如何拿到子组件childCom data里的msg值?
第一步:在默认插槽里绑定一个变量子组件里把msg(值)抛出去
<main>
    <slot :childMsg="msg">  // 把msg以childMsg的变量名抛出去 (childMsg根据自己喜好来命名,可随意命名)
      <p>{{ content }}</p>
    </slot>
</main>
第二步:父组件声明一个字段(对象)用来接收数据
<template>
  <div>
    <childCom>
      <template slot-scope="recieveData"> // recieveData根据自己的喜好命名,可随意命名
        <h1>{{ recieveData.childMsg}} 父组件父组件</h1> // 输出子组件传过来的msg值
      </template>
    </childCom>
  </div>>
</template>
页面效果:

子组件用来传递的变量 & 父组件接收的变量都是任意取的,如下:

(PS:若为具名插槽泽添加对应的name属性就好
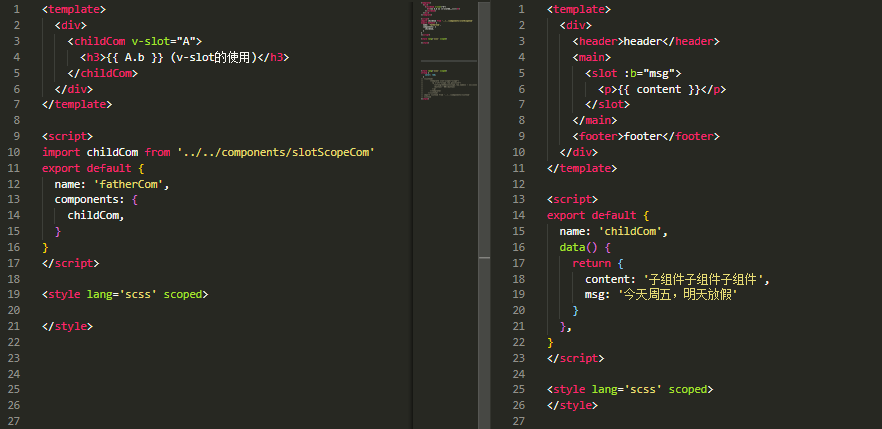
2.新语法v-slot的用法 - v-slot:插槽名[="接收子组件值的变量名"]
v-slot的出现是为了省去冗长的 template、slot-scope 写法
(v-slot:default 指定默认插槽,可以简写为v-slot
That's all, 更详细的使用方式可以参考下官网(缩写、解构赋值)
实战例子讲解:Vue作用域插槽实战例子

 浙公网安备 33010602011771号