

web自动化工具-playwright
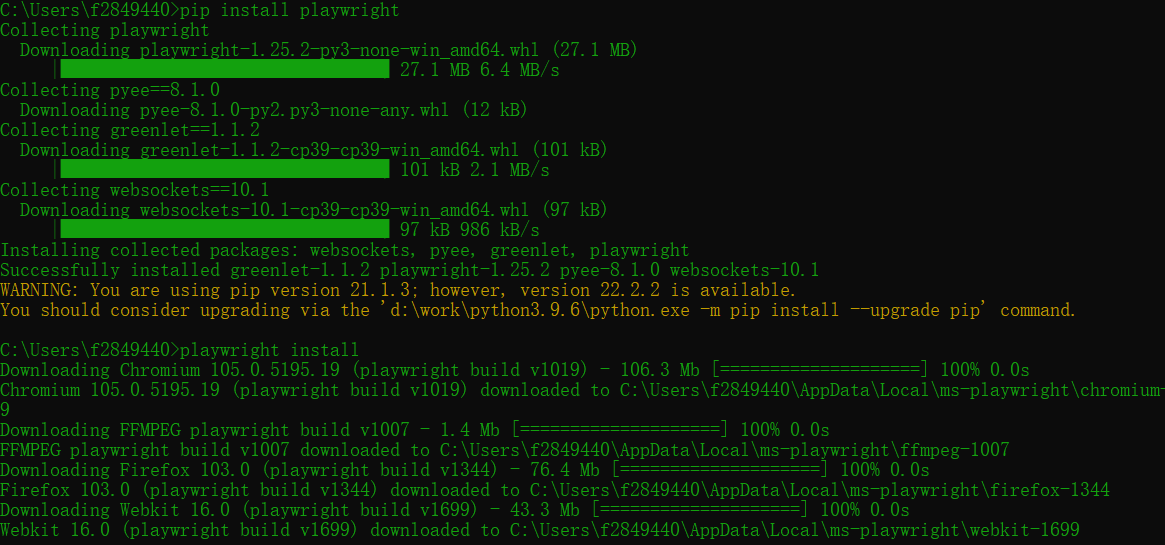
一、playwright安装:
pip install playwright
playwright install
二、脚本录制:

在窗口输入playwright codegen命令后,会自动打开一个浏览器窗口和录屏工具
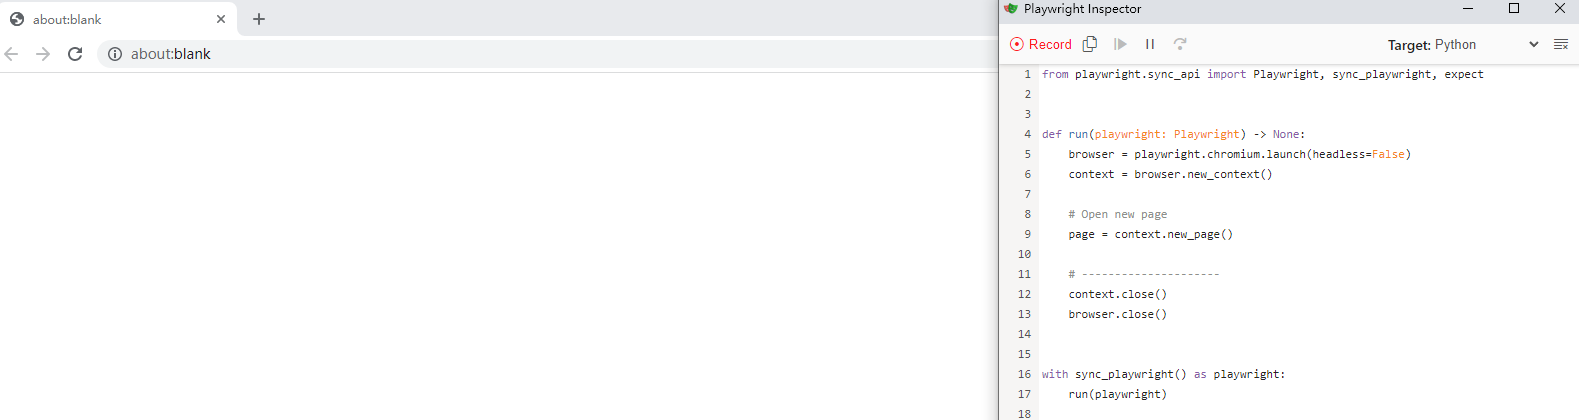
在浏览器中输入要测试的网址,即可开始进行录制
点击copy图标,复制代码即可使用已经录制的代码
录制一个打开百度网站,搜索playwright的demo
from playwright.sync_api import Playwright, sync_playwright, expect

def run(playwright: Playwright) -> None:
    browser = playwright.chromium.launch(headless=False)
    context = browser.new_context()

    # Open new page
    page = context.new_page()

    # Go to https://www.baidu.com/
    page.goto("https://www.baidu.com/")

    # Click input[name="wd"]
    page.locator("input[name=\"wd\"]").click()

    # Fill input[name="wd"]
    page.locator("input[name=\"wd\"]").fill("playwright")

    # Click text=百度一下
    page.locator("text=百度一下").click()

    context.close()
    browser.close()


with sync_playwright() as playwright:
    run(playwright)
将录制的这段代码复制到pycharm中运行
三、常用的元素操作:
1.处理iFrame、文件上传 ( 先定位iframe,然后通过set_input_files上传图片)
# 进入iframe 上传图片
self.page.frame_locator('//*[@id="layui-layer-iframe1"]').locator('//*[@id="filePicker"]/div[2]/input') \
    .set_input_files(r'D:\playwright.png')

self.page.wait_for_timeout(3000)
# 图片上传完成后 确认上传按钮还在iframe中 则需要再次定位iframe
self.page.frame_locator('//*[@id="layui-layer-iframe1"]').locator(
    '//*[@id="uploader"]/div[1]/div[3]/div[3]').click()
self.page.click('//div[@class="save_s"]/input')
2.处理下拉列表框
        # 处理下拉框--select_option  //*[@id="province"]--省份的元素定位 28240--省份对应的value值
        self.page.select_option('//*[@id="province"]', '28240')
        self.page.select_option('//*[@id="city"]', '28558')
        self.page.select_option('//*[@id="district"]', '28560')
        self.page.fill('//input[@name="address"]', '180号')
        self.page.click('//*[@id="address_submit"]')
3.根据条件定位元素
 # 根据收货人名称来删除地址 收货人名称test1
   self.page.click('//span[text()="test1"]/../..//a[text()="删除"]')
4.处理获取元素文本内容
# 搜索商品用例(处理获取元素文本内容)
    def test_searchGoods(self):
        self.page.fill('//*[@id="q"]', '手机')
        self.page.click('//*[@id="sourch_form"]/a')
        # 点击搜索后必须要加等待,否则无法定位出所有的商品的元素
        self.page.wait_for_timeout(3000)
        goods = self.page.query_selector_all('//div[@class="shop-list-splb p"]//div[@class="shop_name2"]/a')

        for shop in goods:
            print(shop.text_content())
5.鼠标悬停
self.page.hover('text=我的购物车')
四.使用数据驱动实现用例参数化
1.使用@pytest.mark.parametrize装饰器
2.使用yaml配置文件
# 数据驱动 方式1:
@pytest.mark.parametrize('username,password,verify', [
    ('13800138006', '123456', '123456'),
    ('13800138007', '123456', '123456')
])
def test_login(self, username, password, verify):
    self.context = self.browser.new_context(no_viewport=True)
    self.page = self.context.new_page()
    self.page.goto("http://testingedu.com.cn:8000/Home/user/login.html")

    # 登录
    self.page.fill('//*[@id="username"]', username)
    self.page.fill('//*[@id="password"]', password)
    self.page.fill('//*[@id="verify_code"]', verify)
    self.page.click('//a[@class="J-login-submit"]')
    self.page.wait_for_timeout(3000)
   # 数据驱动 方式2: 使用yaml文件
    with open(r'D:\work\pythonCode\playwright\userData.yaml', encoding='utf-8') as f:
        userData = yaml.load(f.read(), Loader=yaml.FullLoader)
        print(userData)

    @pytest.mark.parametrize('username,password,verify', userData)
    def test_login(self, username, password, verify):
        self.context = self.browser.new_context(no_viewport=True)
        self.page = self.context.new_page()
        self.page.goto("http://testingedu.com.cn:8000/Home/user/login.html")

        # 登录
        self.page.fill('//*[@id="username"]', username)
        self.page.fill('//*[@id="password"]', password)
        self.page.fill('//*[@id="verify_code"]', verify)
        self.page.click('//a[@class="J-login-submit"]')
        self.page.wait_for_timeout(3000)
userData.yaml
- ['13800138006','123456','123456']
- ['13800138006','123457','123456']
五.框架优化:pytest+playwright+allure+yaml
import os
import shutil

import allure
import pytest
import yaml
from playwright.sync_api import sync_playwright


@allure.feature('playwright测试报告')
class TestDemo3:
    playwright = None
    browser = None
    context = None
    page = None

    def setup_class(self):
        self.playwright = sync_playwright().start()
        # 设置浏览器窗口最大化
        self.browser = self.playwright.chromium.launch(headless=False, args=["--start-maximized"])
        self.context = self.browser.new_context(no_viewport=True)
        self.page = self.context.new_page()

    def teardown_class(self):
        self.browser.close()
        self.playwright.stop()

    # 读取yaml文件
    # f = open(r'D:\work\pythonCode\playwright\testCases.yaml', encoding='utf-8') 在工程目录下直接写.\testCases.yaml就可以
    f = open(r'.\testCases.yaml', encoding='utf-8')
    case_dict = yaml.safe_load(f)
    print(case_dict)

    def run_step(self, func, value):
        func(*value)

    def run_case(self, testCases):
        allure.title(testCases['title'])
        allure.description(testCases['description'])
        cases = testCases['cases']
        try:
            for case in cases:
                func = self.page.__getattribute__(case['method'])
                print('case.values()----')
                print(case.values())
                value = list(case.values())
                print('value------')
                print(value)
                with allure.step(case['name']):
                    self.run_step(func, value[2:])
        except Exception:
            allure.attach(self.page.screenshot(), '用例报错图', allure.attachment_type.PNG)
            pytest.fail('用例执行失败')
        self.page.wait_for_timeout(1000)
        allure.attach(self.page.screenshot(), '用例执行图', allure.attachment_type.PNG)

    @allure.story('登录测试用例')
    @pytest.mark.parametrize('testCases', case_dict['loginPage'])
    def test_login(self, testCases):
        self.run_case(testCases)
        print('testCases------------------')
        print(testCases)
        self.page.wait_for_timeout(3000)


if __name__ == '__main__':
    # 使用shutil删除文件夹
    shutil.rmtree('./temp')
    shutil.rmtree('./report')
    # 使用 os.system 删除文件夹 windows:rd /s/q  mac:rm -rf
    # os.system('rd /s/q temp')
    # os.system('rd /s/q report')
    pytest.main(['-s', 'demo3.py', '--alluredir', './temp'])
    os.system('allure generate ./temp -o ./report --clean')
testCases.yaml
loginPage:
  - title: 登录失败
    description: 密码错误
    cases:
      - name: 打开登录页面
        method: goto
        url: http://testingedu.com.cn:8000/Home/user/login.html

      - name: 输入用户名
        method: fill
        selector: //*[@id="username"]
        value: '13800138006'

      - name: 输入密码
        method: fill
        selector: //*[@id="password"]
        value: '1234567'

      - name: 输入验证码
        method: fill
        selector: //*[@id="verify_code"]
        value: '123456'

      - name: 点击提交
        method: click
        selector: //a[@class="J-login-submit"]

  - title: 登录成功
    description: 账号密码验证码正确
    cases:
      - name: 打开登录页面
        method: goto
        url: http://testingedu.com.cn:8000/Home/user/login.html

      - name: 输入用户名
        method: fill
        selector: //*[@id="username"]
        value: '13800138006'

      - name: 输入密码
        method: fill
        selector: //*[@id="password"]
        value: '123456'

      - name: 输入验证码
        method: fill
        selector: //*[@id="verify_code"]
        value: '123456'

      - name: 点击提交
        method: click
        selector: //a[@class="J-login-submit"]
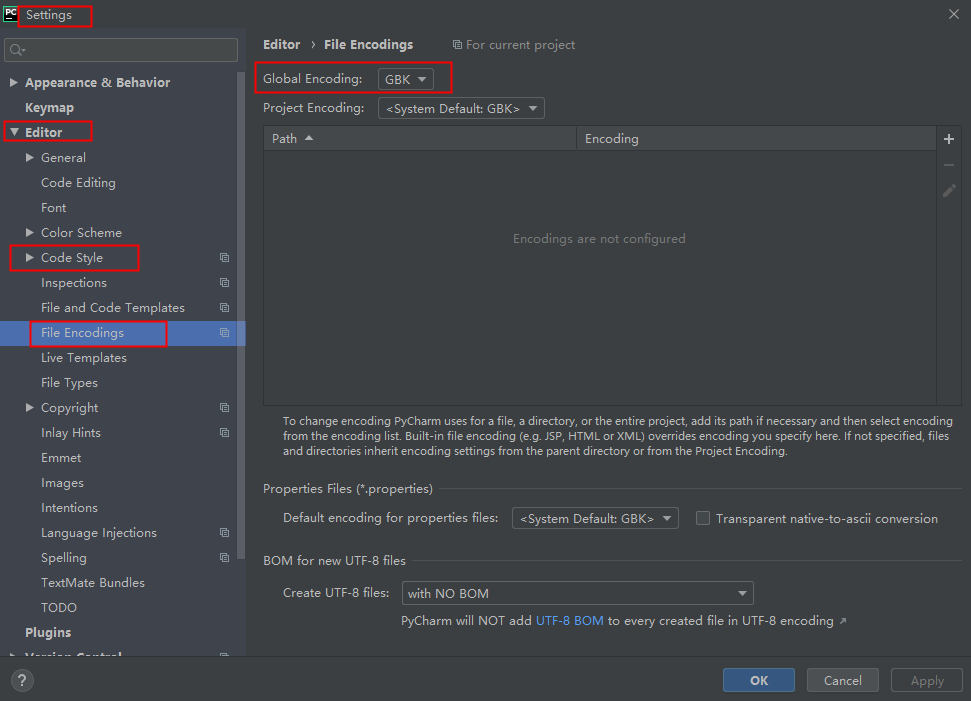
解决pycharm中 os.system()打印乱码问题:

 浙公网安备 33010602011771号