阿波罗配置中心部署及配置
服务端:
wget https://codeload.github.com/ctripcorp/apollo/tar.gz/v0.10.2
mv ./v0.10.2 v0.10.2.tar.gz
下载包我是放在home目录的。
直接拿出目录下的sql
/home/apollo-0.10.2/scripts/sql
修改脚本
vim /home/apollo-0.10.2/scripts/build.sh
配置好相应的db信息。
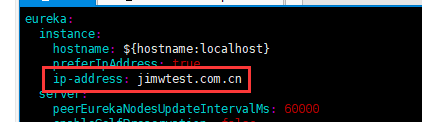
以及配置好dev_meta 。注:此项如果是服务器是内网的,则需要对该服务器进行相应的hosts修改
hosts:ip jimwtest.com.cn
dev_meta =jimwtest.com.cn
需要对configservice adminservice
也是需要改
其实如果是有外网公开,则是不用配置那么复杂,根据文档配置即可,因为公司内部服务器比较特殊,因此需要进行改造一下。不影响代码使用。
此前执行完成之后,则执行build.sh
脚本生成后。需要对configservice adminservice portal生成的target中的
apollo-xxx-0.10.2-github.zip 拷贝到比较清晰的目录。比如放置home/Apollo一一解压出来。
执行对应的scripts 的start.sh脚本即可
如果启动的不是root权限,则需要在opt/logs中新建3个目录:
100003171 100003172 100003173 授权给相应的用户使用
最后还需要对client生成的包上传到相应的maven环境中
客户端:
pom包:
<dependency>
    <groupId>com.ctrip.framework.apollo</groupId>
    <artifactId>apollo-client</artifactId>
    <version>0.10.2</version>
</dependency>

<dependency>
    <groupId>com.ctrip.framework.apollo</groupId>
    <artifactId>apollo-core</artifactId>
    <version>0.10.2</version>
</dependency>
我是直接用xml注入的形式使用Apollo的
 1 <?xml version="1.0" encoding="UTF-8"?>
 2 <beans xsi:schemaLocation="http://www.springframework.org/schema/beans
 3       http://www.springframework.org/schema/beans/spring-beans-4.0.xsd
 4       http://www.ctrip.com/schema/apollo http://www.ctrip.com/schema/apollo.xsd "
 5       xmlns:apollo="http://www.ctrip.com/schema/apollo"
 6       xmlns:aop="http://www.springframework.org/schema/aop"
 7       xmlns:task="http://www.springframework.org/schema/task"
 8       xmlns:tx="http://www.springframework.org/schema/tx"
 9       xmlns:context="http://www.springframework.org/schema/context"
10       xmlns:xsi="http://www.w3.org/2001/XMLSchema-instance"
11       xmlns="http://www.springframework.org/schema/beans">
12
13    <!-- 配置读取 -->
14    <apollo:config/>
15    <import resource="classpath:spring-context.xml"/>
16    <import resource="classpath:spring-jedis.xml"/>
17
18 </beans>
之前application.properties的引用,可以说基本可以依赖于阿波罗使用了
测试是否有效。记得value有${}才能够拿到配置的数据
 1 package com.dragonpass.visa.modules.common;
 2
 3 import com.ctrip.framework.apollo.spring.annotation.EnableApolloConfig;
 4 import lombok.Data;
 5 import org.springframework.beans.factory.annotation.Value;
 6 import org.springframework.cloud.context.config.annotation.RefreshScope;
 7 import org.springframework.stereotype.Component;
 8
 9 /**
10  *
11  * 功能描述:测试阿波罗配置中心数据
12  *
13  * @author  jimw 创建时间: 2018-8-6
14  *
15  */
16 @Component
17 @EnableApolloConfig
18 @RefreshScope
19 @Data
20 public class TestConfig {
21
22     @Value(" ${server.port}")
23     private String port;
24
25 }
参考文档:
https://github.com/ctripcorp/apollo/wiki/%E5%88%86%E5%B8%83%E5%BC%8F%E9%83%A8%E7%BD%B2%E6%8C%87%E5%8D%97
建议先从单机入手,然后再分布式部署

 浙公网安备 33010602011771号