SpringBoot应用配置常用相关视图解析器
SpringBoot的自动装配装配了视图解析器了吗?
我们可以看到SpringBoot自动装配的WebMvcAutoConfiguration类中,装配了以下关于ViewResolver(视图解析器)的类。可以看到SpringBoot已经自动装配了InternalResourceViewResolver类,又是通过外部资源配置的方式来配置此视图解析器this.mvcProperties.getView().getPrefix(),所以我们可以在application.properties文件配置此视图解析器用于解析JSP。
	@Bean
		@ConditionalOnMissingBean
		public InternalResourceViewResolver defaultViewResolver() {
			InternalResourceViewResolver resolver = new InternalResourceViewResolver();
			resolver.setPrefix(this.mvcProperties.getView().getPrefix());
			resolver.setSuffix(this.mvcProperties.getView().getSuffix());
			return resolver;
		}
SpringBoot使用JSP
SpringBoot在自动装配的时候默认就已经将JSP的视图解析器InternalResourceViewResolver装配。所以我们只需要进行配置使用即可。在SpringBoot中使用JSP比较麻烦一点,或许是我的个人理解存在什么误区,如果有朋友知道更好的配置方法,请留言给我。
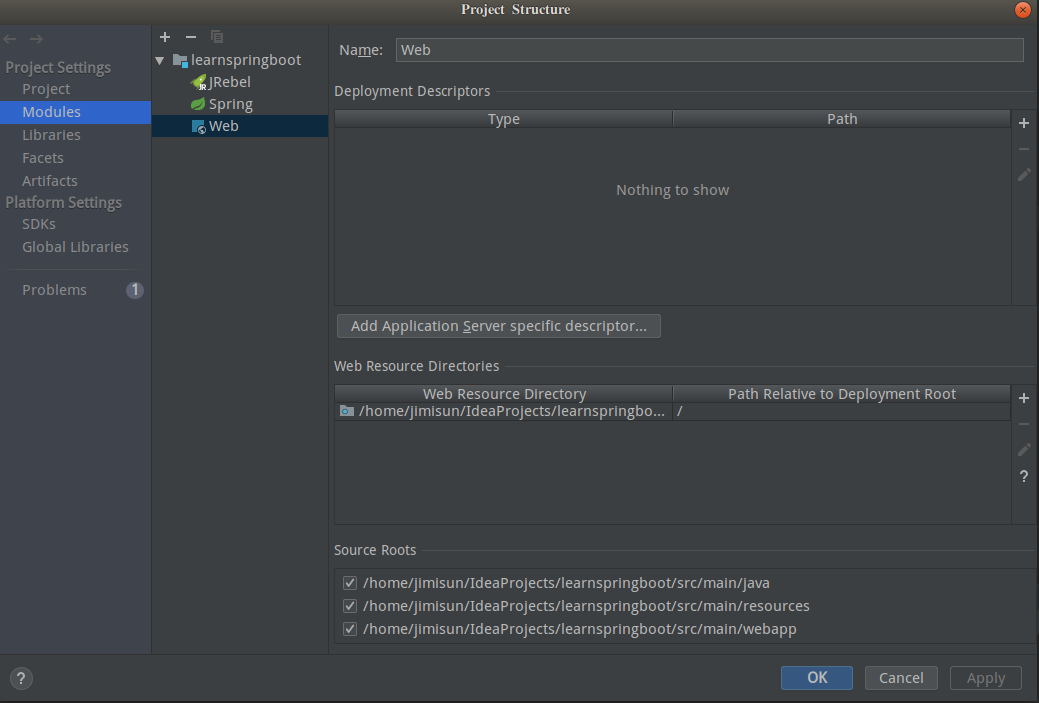
第一步:创建自定义webapp目录,如下所示

第二步:将此文件夹配置成项目的WEB模块
第三步:导入JSP相关依赖
  <dependency>
            <groupId>org.apache.tomcat.embed</groupId>
            <artifactId>tomcat-embed-jasper</artifactId>
            <scope>provided</scope>
        </dependency>
        <dependency>
            <groupId>javax.servlet</groupId>
            <artifactId>jstl</artifactId>
        </dependency>
第四步:在SpringBoot的属性文件application.properties中配置JSP的路由
spring.mvc.view.prefix=/
spring.mvc.view.suffix=.jsp
第五步:修改Maven的pom.xml文件打包方式改成war(默认打包Jar,打包Jar包的方式使用Idea启动是没什么问题,如果单独运行Jar包就找不到JSP文件,如果改成War包即可)
<packaging>war</packaging>

SpringBoot中使用Thymeleaf
SpringBoot官方是推荐使用thymeleaf作为优选的视图解析器,所以SpringBoot对Thymeleaf的支持非常好,这里仅仅演示SpringBoot如何选用Thymeleaf作用默认视图解析器。
第一步:导入Thymeleaf的依赖
      <dependency>
            <groupId>org.springframework.boot</groupId>
            <artifactId>spring-boot-starter-thymeleaf</artifactId>
        </dependency>
第二步:创建存放Thymeleaf模板文件夹,在Resources目录下创建templates目录

这个文件夹的名字可不是我么随便命名的啊,是SpringBoot在自动装配Thymeleaf视图解析器的时候就已经预定义好了,我们看一下它的定义源码。
@ConfigurationProperties(prefix = "spring.thymeleaf")
public class ThymeleafProperties {

	private static final Charset DEFAULT_ENCODING = StandardCharsets.UTF_8;

	public static final String DEFAULT_PREFIX = "classpath:/templates/";

	public static final String DEFAULT_SUFFIX = ".html";
	}
SpringBoot中使用Freemark
第一步:导入Maven依赖
<dependency>
            <groupId>org.springframework.boot</groupId>
            <artifactId>spring-boot-starter-freemarker</artifactId>
        </dependency>
第二步:创建存放Freemark模板文件夹,在Resources目录下创建templates目录
@ConfigurationProperties(prefix = "spring.freemarker")
public class FreeMarkerProperties extends AbstractTemplateViewResolverProperties {

	public static final String DEFAULT_TEMPLATE_LOADER_PATH = "classpath:/templates/";

	public static final String DEFAULT_PREFIX = "";

	public static final String DEFAULT_SUFFIX = ".ftl";
	}
我们可以看到SpringBoot在自动装配Freemarker视图解析器默认是将模板文件放在classpath:/templates/路径内,我们同样可以在SpringBoot的配置文件中自行配置。
小提示:我在写Freemark视图解析器的时候并没有将第一个JSP内部资源解析器给删除掉,所以他们是并存的,所以我们可以知道SpringBoot在装配他们的时候给予设定了优先级顺序。从下图可以看到他们的优先级顺序;Freemarker>Thymeleaf>InternalResourceViewResolver`

该教程所属Java工程师之SpringBoot系列教程,本系列相关博文目录 Java工程师之SpringBoot系列教程前言&目录

 浙公网安备 33010602011771号