
linus系统下使用hexo搭建个人博客
最近在搭建自己的个人网站,准备在上面内置一个博客模块,把之前或者以后杂七杂八的总结都放里边。
大致查了一下在WordPress和Hexo间选用了Hexo,体量较小一点。
先贴上Hexo的官方文档:Hexo安装文档
首先在使用Hexo之前需要在服务器上安装
安装git
我们需要首先在系统中安装git,hexo主题基本都托管在github上,使用git版本管理工具可以很方便地下载更换主题。此外最后我们也可以将博客托管在github并使用Github Pages服务,实现远程访问。
关于git的安装我们可以直接使用命令:
sudo apt-get install git
安装后使用 git --version 查看是否成功。
接下来需要对我们的git进行配置。
git config --global user.name "Your Name"
git config --global user.email "youremail@domain.com"
关于SSH Keys的添加我们放在后面来说。
安装Node
对于node的安装我们最好使用node的版本管理工具nvm,但是通过官方文档里的连接下载时出现了错误,后来用了git clone的方法安装成功:
git clone http://github.com/creationix/nvm.git .nvm
安装完成后输入
nvm -v
可以在窗口中打印出
Node Version Manager

Note: <version> refers to any version-like string nvm understands. This includes:
  - full or partial version numbers, starting with an optional "v" (0.10, v0.1.2, v1)
  - default (built-in) aliases: node, stable, unstable, iojs, system
  - custom aliases you define with `nvm alias foo`

 Any options that produce colorized output should respect the `--no-colors` option.

Usage:
  nvm --help                                Show this message
  nvm --version                             Print out the latest released version of nvm
  nvm install [-s] <version>                Download and install a <version>, [-s] from source. Uses .nvmrc if available
    --reinstall-packages-from=<version>     When installing, reinstall packages installed in <node|iojs|node version number>
    --lts                                   When installing, only select from LTS (long-term support) versions
    --lts=<LTS name>                        When installing, only select from versions for a specific LTS line
  nvm uninstall <version>                   Uninstall a version
  nvm uninstall --lts                       Uninstall using automatic LTS (long-term support) alias `lts/*`, if available.
  nvm uninstall --lts=<LTS name>            Uninstall using automatic alias for provided LTS line, if available.
  nvm use [--silent] <version>              Modify PATH to use <version>. Uses .nvmrc if available
    --lts                                   Uses automatic LTS (long-term support) alias `lts/*`, if available.
    --lts=<LTS name>                        Uses automatic alias for provided LTS line, if available.
  nvm exec [--silent] <version> [<command>] Run <command> on <version>. Uses .nvmrc if available
    --lts                                   Uses automatic LTS (long-term support) alias `lts/*`, if available.
    --lts=<LTS name>                        Uses automatic alias for provided LTS line, if available.
  nvm run [--silent] <version> [<args>]     Run `node` on <version> with <args> as arguments. Uses .nvmrc if available
    --lts                                   Uses automatic LTS (long-term support) alias `lts/*`, if available.
    --lts=<LTS name>                        Uses automatic alias for provided LTS line, if available.
  nvm current                               Display currently activated version
  nvm ls                                    List installed versions
  nvm ls <version>                          List versions matching a given <version>
  nvm ls-remote                             List remote versions available for install
    --lts                                   When listing, only show LTS (long-term support) versions
  nvm ls-remote <version>                   List remote versions available for install, matching a given <version>
    --lts                                   When listing, only show LTS (long-term support) versions
    --lts=<LTS name>                        When listing, only show versions for a specific LTS line
  nvm version <version>                     Resolve the given description to a single local version
  nvm version-remote <version>              Resolve the given description to a single remote version
    --lts                                   When listing, only select from LTS (long-term support) versions
    --lts=<LTS name>                        When listing, only select from versions for a specific LTS line
  nvm deactivate                            Undo effects of `nvm` on current shell
  nvm alias [<pattern>]                     Show all aliases beginning with <pattern>
  nvm alias <name> <version>                Set an alias named <name> pointing to <version>
  nvm unalias <name>                        Deletes the alias named <name>
  nvm reinstall-packages <version>          Reinstall global `npm` packages contained in <version> to current version
  nvm unload                                Unload `nvm` from shell
  nvm which [<version>]                     Display path to installed node version. Uses .nvmrc if available
  nvm cache dir                             Display path to the cache directory for nvm
  nvm cache clear                           Empty cache directory for nvm

Example:
  nvm install v0.10.32                  Install a specific version number
  nvm use 0.10                          Use the latest available 0.10.x release
  nvm run 0.10.32 app.js                Run app.js using node v0.10.32
  nvm exec 0.10.32 node app.js          Run `node app.js` with the PATH pointing to node v0.10.32
  nvm alias default 0.10.32             Set default node version on a shell

Note:
  to remove, delete, or uninstall nvm - just remove the `$NVM_DIR` folder (usually `~/.nvm`)
表示安装成功
接下来我们就可以使用npm直接安装node:
nvm install stable
nvm会自动下载最新的稳定版node,完成后验证node和附带安装的npm的版本号:
$ node -v
v7.6.0$ npm -v
4.1.2
证明已经安装成功。
安装Hexo
但是在接下来使用npm安装hexo时遇到了问题:
npm install -g hexo-cli
试了几次一直提示node npm未获得许可:
sh: 1: node: Permission denied

> hexo-util@0.6.0 postinstall /root/.nvm/versions/node/v7.6.0/lib/node_modules/hexo-cli/node_modules/hexo-util
> npm run build:highlight

sh: 1: npm: Permission denied
/root/.nvm/versions/node/v7.6.0/lib
└── (empty)

npm WARN optional SKIPPING OPTIONAL DEPENDENCY: fsevents@^1.0.0 (node_modules/hexo-cli/node_modules/chokidar/node_modules/fsevents):
npm WARN notsup SKIPPING OPTIONAL DEPENDENCY: Unsupported platform for fsevents@1.1.1: wanted {"os":"darwin","arch":"any"} (current: {"os":"linux","arch":"x64"})
npm WARN optional SKIPPING OPTIONAL DEPENDENCY: dtrace-provider@0.8.0 (node_modules/hexo-cli/node_modules/dtrace-provider):
npm WARN optional SKIPPING OPTIONAL DEPENDENCY: dtrace-provider@0.8.0 install: `node scripts/install.js`
npm WARN optional SKIPPING OPTIONAL DEPENDENCY: spawn ENOENT
npm ERR! Linux 3.13.0-86-generic
npm ERR! argv "/root/.nvm/versions/node/v7.6.0/bin/node" "/root/.nvm/versions/node/v7.6.0/bin/npm" "install" "-g" "hexo-cli"
npm ERR! node v7.6.0
npm ERR! npm  v4.1.2
npm ERR! file sh
npm ERR! code ELIFECYCLE
npm ERR! errno ENOENT
npm ERR! syscall spawn

npm ERR! hexo-util@0.6.0 postinstall: `npm run build:highlight`
npm ERR! spawn ENOENT
npm ERR!
npm ERR! Failed at the hexo-util@0.6.0 postinstall script 'npm run build:highlight'.
npm ERR! Make sure you have the latest version of node.js and npm installed.
npm ERR! If you do, this is most likely a problem with the hexo-util package,
npm ERR! not with npm itself.
npm ERR! Tell the author that this fails on your system:
npm ERR!     npm run build:highlight
npm ERR! You can get information on how to open an issue for this project with:
npm ERR!     npm bugs hexo-util
npm ERR! Or if that isn't available, you can get their info via:
npm ERR!     npm owner ls hexo-util
npm ERR! There is likely additional logging output above.

npm ERR! Please include the following file with any support request:
npm ERR!     /root/software/node/npm-debug.log
在网上查了解决方案说权限问题的提示用 sudo npm install 试试,但是也不行,自己本来也是用root账号操作的,最后在一篇博文里找到了解决方法,博文链接
npm config set user 0
npm config set unsafe-perm true
查看安装结果:
root@iZ28zkldm3zZ:~/software/node# hexo -v
hexo-cli: 1.0.2
os: Linux 3.13.0-86-generic linux x64
http_parser: 2.7.0
node: 7.6.0
v8: 5.5.372.40
uv: 1.11.0
zlib: 1.2.11
ares: 1.10.1-DEV
modules: 51
openssl: 1.0.2k
icu: 58.2
unicode: 9.0
cldr: 30.0.3
tz: 2016j
接下来可以进行一些初始化操作
安装 Hexo 完成后,请执行下列命令,Hexo 将会在指定文件夹中新建所需要的文件。
(<folder>替换为需要在里面新建文件的文件夹路径)
hexo init <folder>
cd <folder>
npm install
新建完成后,指定文件夹的目录如下:
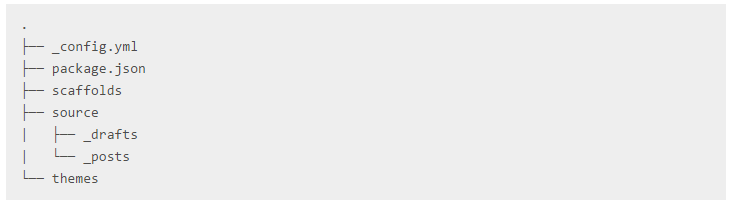
新建完成后使用命令启动本地测试
hexo s
因为是阿里云的云服务器,所以在浏览器中输入 http://服务器IP:4000/ 可进入Hello World 页面
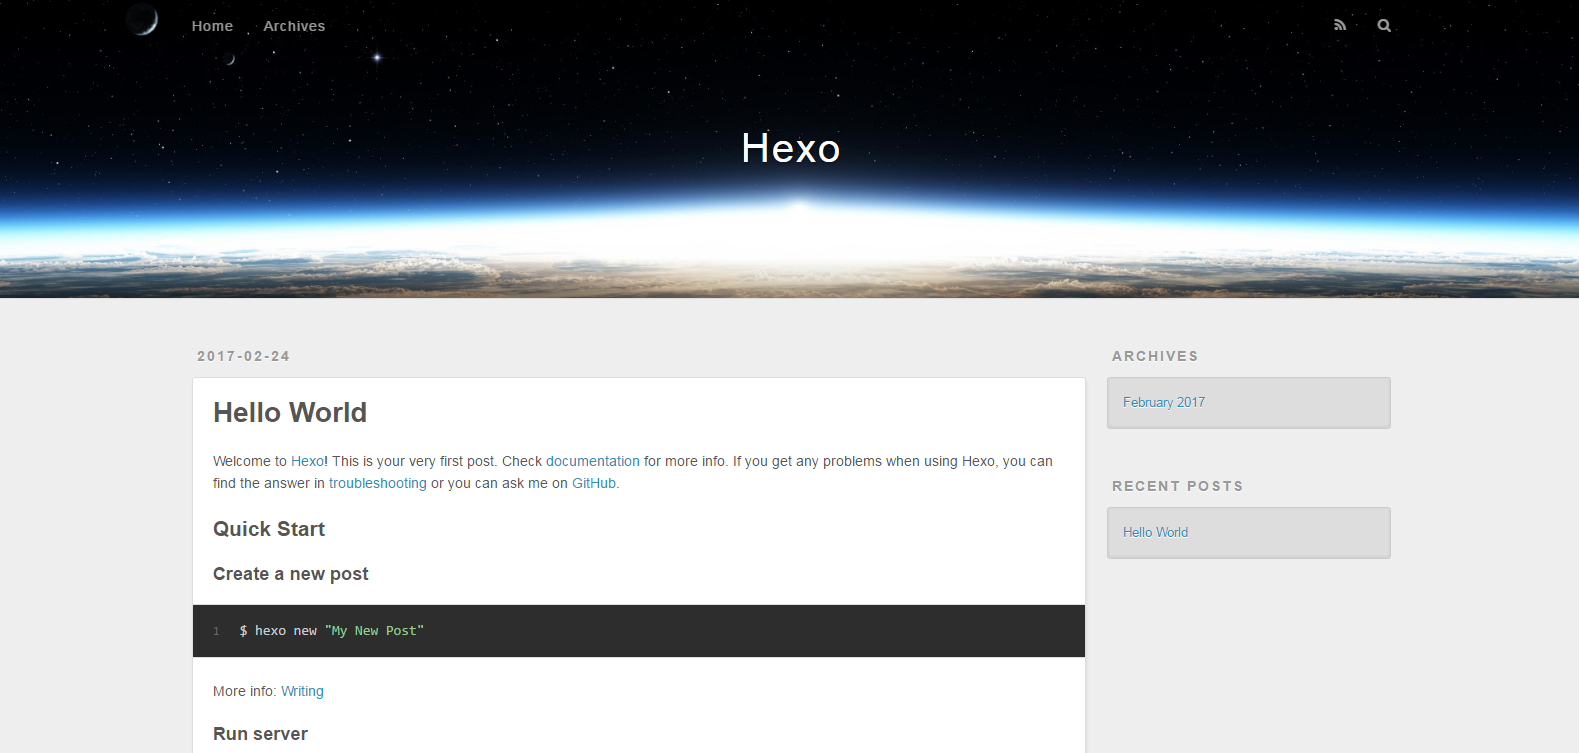
预览完成后可按 Ctrl+C 退出,自己有遇到过预览过程中 Putty 意外退出的情况,这时候可以查看占用4000端口的进程,记下 PID 之后杀掉进程就可以。
更换主题
hexo默认的是内置的 landscape 主题,我们可以在官方主题列表中找到想引用的主题样式

我尝试过 Next:https://github.com/iissnan/hexo-theme-next 和 Yilia:https://github.com/litten/hexo-theme-yilia ,最后选择了yilia,github里有预览博客地址,可以先看一下效果。
选择好需要的主题后(接下来都用yilia为例),我们复制好主题的地址

随后转到hexo目录下执行clone命令:
git clone https://github.com/litten/hexo-theme-yilia.git themes/yilia
后面的字段是主题的存放地址。等待克隆完成,再打开 hexo/_config.yml 找到如下字段:
# Extensions
## Plugins: https://hexo.io/plugins/
## Themes: https://hexo.io/themes/
theme: yilia
exclude_generator:
将theme修改为我们刚刚下载的主题名称,保存退出,使用 hexo s 命令预览效果。
主题个性化配置
修改为我们需要的主题之后,可以对主题的默认配置进行修改。
cd themes/yilia
转到主题资源文件目录,这个就是我们下载的主题资源包。打开_config.yml,在里面可以对主题进行个性化配置


# Header

menu:
  主页: /
  随笔: /tags/随笔/

# SubNav
subnav:
  github: "#"
  weibo: "#"
  rss: "#"
  zhihu: "#"
  #qq: "#"
  #weixin: "#"
  #jianshu: "#"
  #douban: "#"
  #mail: "mailto:litten225@qq.com"
  #facebook: "#"
  #google: "#"
  #twitter: "#"
  #linkedin: "#"

rss: /atom.xml

# 是否需要修改 root 路径
# 如果您的网站存放在子目录中,例如 http://yoursite.com/blog,
# 请将您的 url 设为 http://yoursite.com/blog 并把 root 设为 /blog/。
root:

# Content

# 文章太长,截断按钮文字
excerpt_link: more
# 文章卡片右下角常驻链接,不需要请设置为false
show_all_link: '展开全文'
# 数学公式
mathjax: false
# 是否在新窗口打开链接
open_in_new: false

# 打赏
# 请在需要打赏的文章的md文件头部,设置属性reward: true

# 打赏基础设定:0-关闭打赏; 1-文章对应的md文件里有reward:true属性,才有打赏; 2-所有文章均有打赏
reward_type: 2
# 打赏wording
reward_wording: '谢谢你请我吃糖果'
# 支付宝二维码图片地址,跟你设置头像的方式一样。比如:/assets/img/alipay.jpg
alipay:
# 微信二维码图片地址
weixin:

# Miscellaneous
baidu_analytics: ''
google_analytics: ''
favicon: /favicon.png

#你的头像url
avatar:

#是否开启分享
share_jia: true

#是否开启多说评论,填写你在多说申请的项目名称 duoshuo: duoshuo-key
#若使用disqus,请在博客config文件中填写disqus_shortname,并关闭多说评论
duoshuo: false

# 样式定制 - 一般不需要修改,除非有很强的定制欲望…
style:
  # 头像上面的背景颜色
  header: '#4d4d4d'
  # 右滑板块背景
  slider: 'linear-gradient(200deg,#a0cfe4,#e8c37e)'

# slider的设置
slider:
  # 是否默认展开tags板块
  showTags: false

# 智能菜单
# 如不需要,将该对应项置为false
# 比如
#smart_menu:
#  friends: false
smart_menu:
  innerArchive: '所有文章'
  friends: '友链'
  aboutme: '关于我'

friends:
  友情链接1: http://localhost:4000/
  友情链接2: http://localhost:4000/
  友情链接3: http://localhost:4000/
  友情链接4: http://localhost:4000/
  友情链接5: http://localhost:4000/
  友情链接6: http://localhost:4000/

aboutme: 很惭愧<br><br>只做了一点微小的工作<br>谢谢大家
作者对配置项基本都做了注释,也很好理解,我们修改对应的条目就可以。随后保存看看预览效果。
Github Pages托管
Github Pages服务可以给我们提供一个静态网页的托管,以便远程浏览我们的博客内容。
首先我们需要在本机生成一个公钥以便跟github建立安全连接,使用命令:
$ ssh-keygen -t rsa -C "youremail@domain.com"
这里的邮箱就是我们安装git时配置的邮箱,随后复制公钥内容:
vim ~/.ssh/id_rsa.pub
全选后按 P 键复制,登陆github,进入Settings->SSH and GPG keys->New SSH key->粘贴
随后进入系统测试连接是否成功:
ssh -T git@github.com
根据提示输入yes,如果成功建立连接就可以进行接下来的操作了。
接下来我们使用我们需要在github上创建一个仓库repository,注意仓库名称必须为 【page名称】.github.io ,后面的.github.io必须保留
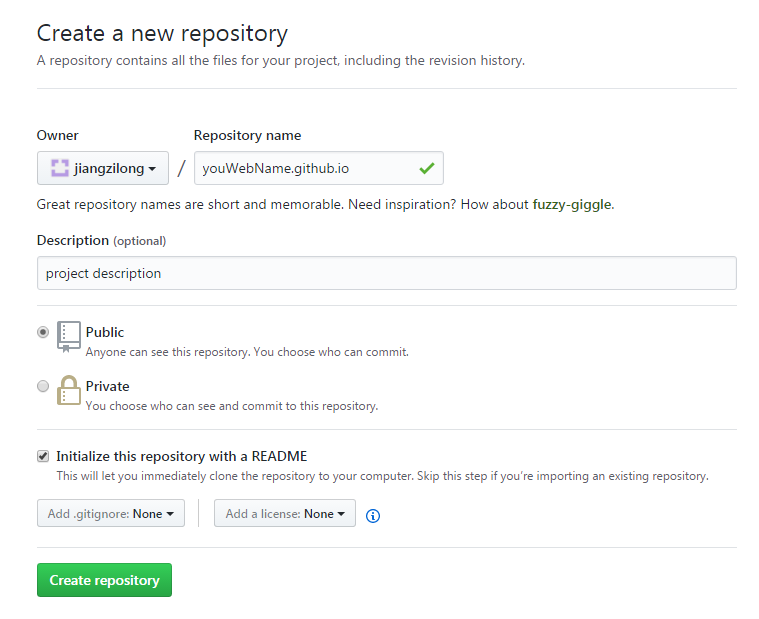
新建好我们的仓库之后就可以从本地用git将资源推送到github上。
因为博客是作为我个站的一部分,所以区分了 主页和博客主页 ,不需要可以删除即可。
之后进入阿里云申请一个域名,设置域名解析将映射IP填写为我们创建的Github Pages的IP即可(这个IP我们可以通过 ping 命令获得),之后我们就可以通过我们的域名访问博客啦~
欢迎大家光临我的博客哦^_^

 浙公网安备 33010602011771号