ASP.NET Core3.1使用Identity Server4建立Authorization Server-1
前言
网上关于Identity Server4的资料有挺多的,之前是一直看杨旭老师的,最近项目中有使用到,在使用.NET Core3.1的时候有一些不同。所以在此记录一下。
预备知识: https://www.cnblogs.com/cgzl/p/9405796.html
本文内容参考
如杨旭老师所说,官方文档真的很详细,有时间建议大家看下官方文档。
建立Authorization Server
建立ASP.Net Core项目使用空模板。
项目建立之后,运行方式改为使用控制台运行而不是IIS Express,以便查看各种debug信息。
这个已成为习惯,也是学习杨老师的,确实比较方便,当然如果不喜欢可以不设置,只需要端口号配置的时候对应好就可以的。

修改后文件代码为:
{
  "profiles": {
    "IdentityServer4.AuthServer": {
      "commandName": "Project",
      "launchBrowser": true,
      "applicationUrl": "http://localhost:5000",
      "environmentVariables": {
        "ASPNETCORE_ENVIRONMENT": "Development"
      }
    }
  }
}
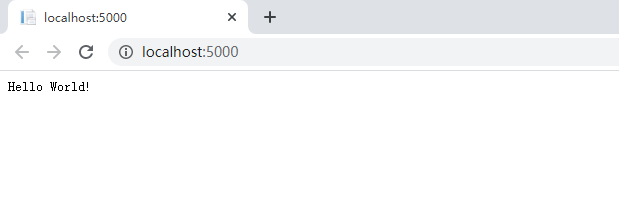
端口号为5000,此时运行程序,会显示出Hello World!,默认的,没有修改。
安装Identity Server4

点击安装就好啦。
配置Identity Server4
API和客户端
API的配置和之前有所不同,之前是
ApiResources,现在分为ApiResources和ApiScopes,后续会说到。
using IdentityServer4.Models;
using IdentityServer4.Test;
using System.Collections.Generic;

namespace IdentityServer4.AuthServer.Configuration
{
    public class InMemoryConfiguration
    {
        /// <summary>
        /// Api Scopes
        /// </summary>
        /// <returns></returns>
        public static IEnumerable<ApiScope> ApiScopes()
        {
            return new List<ApiScope>
            {
                new ApiScope("scope1","scope1")
            };
        }
        /// <summary>
        /// ApiResources
        /// </summary>
        /// <returns></returns>
        public static IEnumerable<ApiResource> ApiResources()
        {
            return new[]
            {
                new ApiResource
                {
                    Name = "api1",
                    DisplayName = "My Api1",
                    Scopes = { "scope1" }
                }
            };
        }
        /// <summary>
        /// Clients
        /// </summary>
        /// <returns></returns>
        public static IEnumerable<Client> Clients()
        {
            return new[]
            {
                new Client
                {
                    ClientId = "client",
                    AllowedGrantTypes = GrantTypes.ResourceOwnerPasswordAndClientCredentials,
                    ClientSecrets =
                    {
                        new Secret("secret".Sha256())
                    },
                    AllowedScopes = { "scope1" }
                }
            };
        }
        /// <summary>
        /// Users
        /// </summary>
        /// <returns></returns>
        public static IEnumerable<TestUser> Users()
        {
            return new[]
            {
                new TestUser
                {
                    SubjectId = "1",
                    Username = "mail@qq.com",
                    Password = "password"
                }
            };
        }
    }
}
ApiScopes: 这个应该怎么翻译我也不清楚,API范围?如果没理解错的话,就是给之前的ApiResources进行了一个分组。授权的时候会验证Scope。
ApiResources:比如官网的第一个demo,可能会有疑问,你怎么知道我是api1呢?其实,就没有验证,只要有授权码就可以访问的。如果说,我只要api1的话,那就用到ApiResources了,生产环境中,也必然是需要用到的。
加载资源和客户端
修改Startup.cs
public void ConfigureServices(IServiceCollection services)
{
    services.AddIdentityServer()
        .AddDeveloperSigningCredential()
        .AddTestUsers(InMemoryConfiguration.Users().ToList())
        .AddInMemoryClients(InMemoryConfiguration.Clients())
        .AddInMemoryApiScopes(InMemoryConfiguration.ApiScopes())
        .AddInMemoryApiResources(InMemoryConfiguration.ApiResources());
}
当然,也需要app.UseIdentityServer();
首次启动时,Identity Server4将创建一个开发人员签名密钥,该文件名为
tempkey.rsa。不必将该文件签入源代码管理中,如果不存在该文件将被重新创建。也就是AddDeveloperSigningCredential()。 这个方法只适合用于Identity Server4在单个机器运行, 如果是生产环境你得使用AddSigningCredential()这个方法.
运行一下,发现并没有什么改变,不过打开:http://localhost:5000/.well-known/openid-configuration,则应该看到所谓的发现文档。发现文档是身份服务器中的标准端点。客户端和API将使用发现文档来下载必要的配置数据。

获取Token
打开Postman,按照配置的输入然后试一下
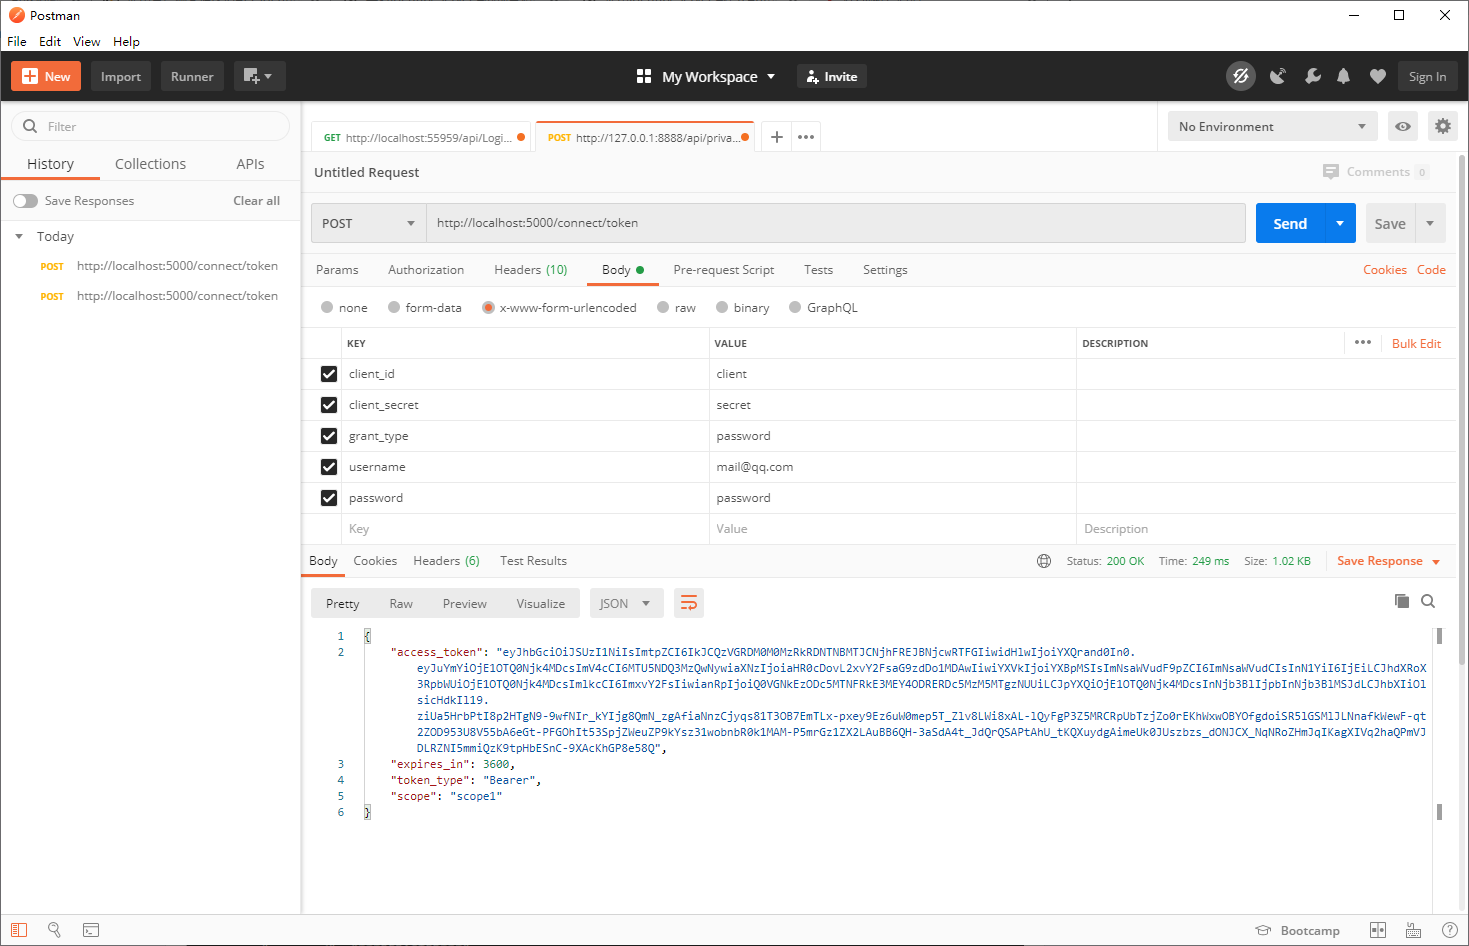
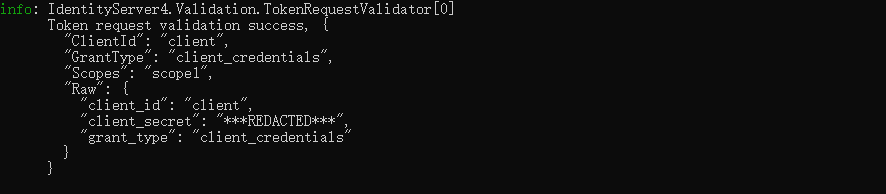
获取到Token,控制台输出如下:
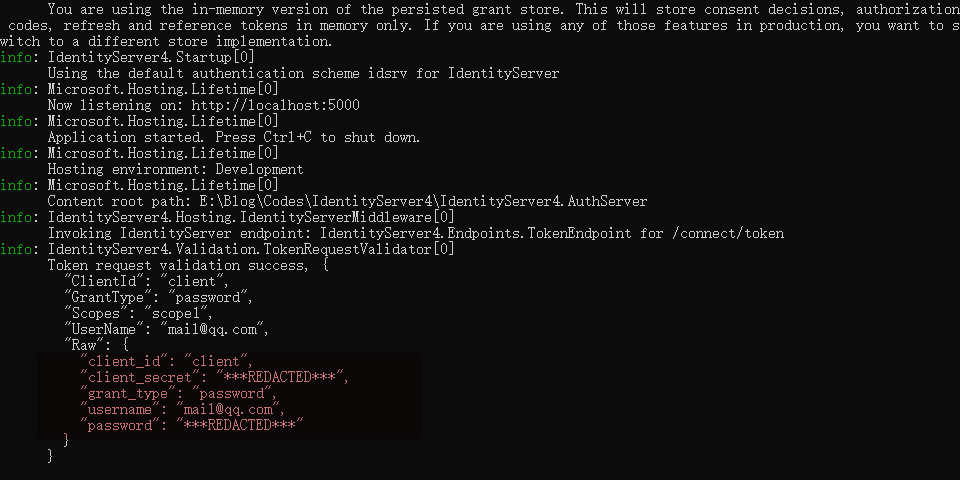
这里是有用户的信息的,但是我们可以把用户信息去掉,然后GrantType改为client_credentials,我们设置的是 ResourceOwnerPasswordAndClientCredentials 这个GrantType,所以使用用户名密码以及使用ClientCredentials都可以。
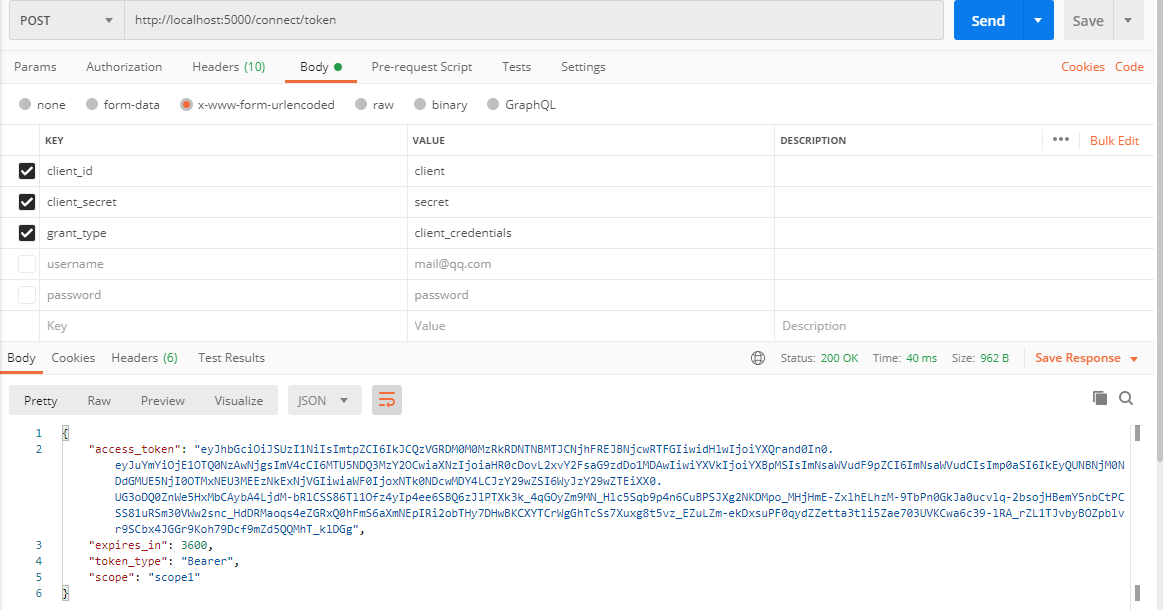
不过此时控制台会有区别,没有用户信息了。
美化美化UI
Identity Server 4 提供了一套QuickStart UI
https://github.com/IdentityServer/IdentityServer4.Quickstart.UI
此存储库包含UI所需的控制器,模型,视图和CSS文件。只需下载/克隆并将其复制到Web项目中即可。
打开项目根目录,运行Powershell,然后输入命令:
iex ((New-Object System.Net.WebClient).DownloadString('https://raw.githubusercontent.com/IdentityServer/IdentityServer4.Quickstart.UI/main/getmain.ps1'))

不过可能你会遇到我前三次那种错误,嗯,访问不了,那就全局或者先下载下来人工粘贴过去吧~
好了以后我们的项目是酱紫的:
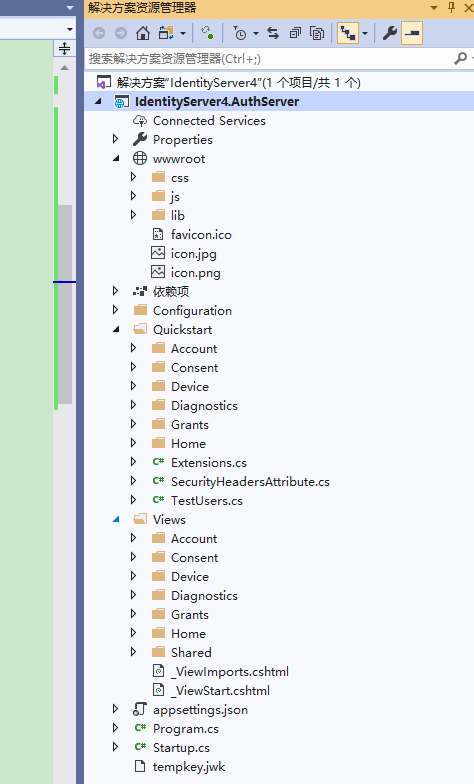
由于有wwwroot下很多静态文件, 所以asp.net core 需要启用服务静态文件的功能: 修改Startup的Configure方法
先看修改前的样子吧
        public void Configure(IApplicationBuilder app, IWebHostEnvironment env)
        {
            if (env.IsDevelopment())
            {
                app.UseDeveloperExceptionPage();
            }

            app.UseIdentityServer();

            app.UseRouting();

            app.UseEndpoints(endpoints =>
            {
                endpoints.MapGet("/", async context =>
                {
                    await context.Response.WriteAsync("Hello World!");
                });
            });
        }
修改后
        public void Configure(IApplicationBuilder app, IWebHostEnvironment env)
        {
            if (env.IsDevelopment())
            {
                app.UseDeveloperExceptionPage();
            }

            app.UseIdentityServer();

            app.UseStaticFiles();

            app.UseRouting();

            app.UseAuthorization();

            app.UseEndpoints(endpoints =>
            {
                endpoints.MapControllerRoute(
                   name: "default",
                   pattern: "{controller=Home}/{action=Index}/{id?}"
               );
            });
        }
是不是抛异常了?
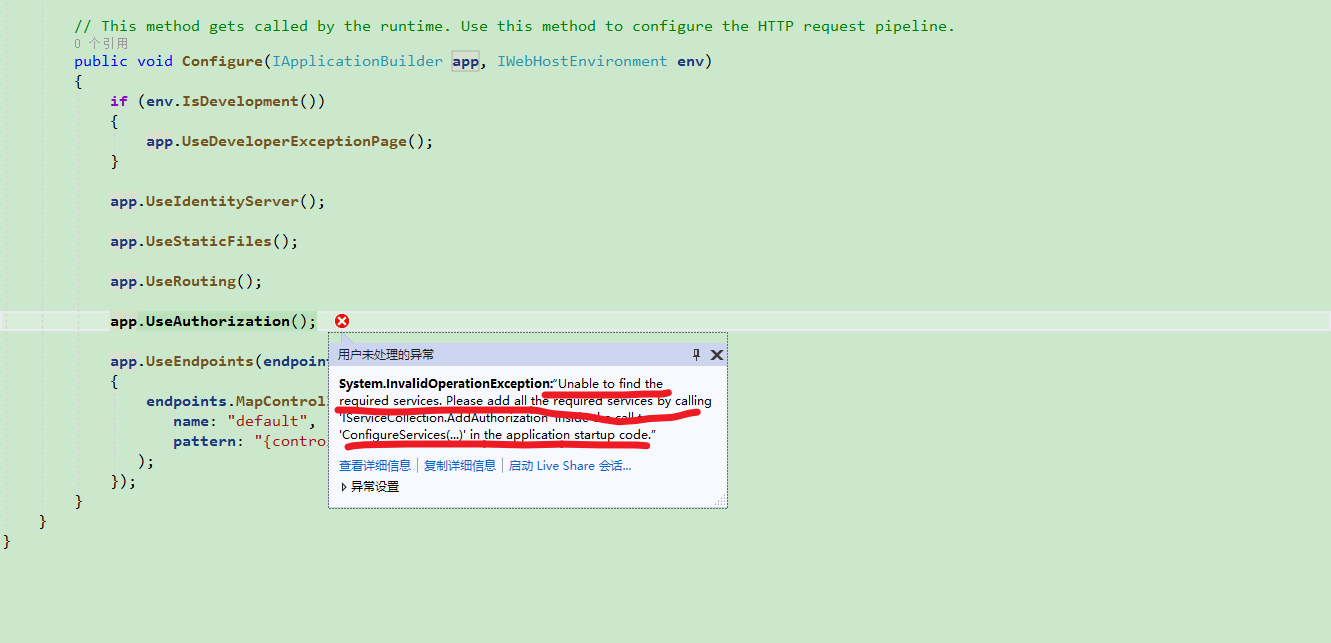
因为我们现在有UI了,所以不要忘记在ConfigureServices里面注册MVC。
        public void ConfigureServices(IServiceCollection services)
        {

            services.AddControllersWithViews();

            services.AddIdentityServer()
              .AddDeveloperSigningCredential()
              .AddTestUsers(InMemoryConfiguration.Users().ToList())
              .AddInMemoryClients(InMemoryConfiguration.Clients())
              .AddInMemoryApiScopes(InMemoryConfiguration.ApiScopes())
              .AddInMemoryApiResources(InMemoryConfiguration.ApiResources());
        }
然后运行一下试试:
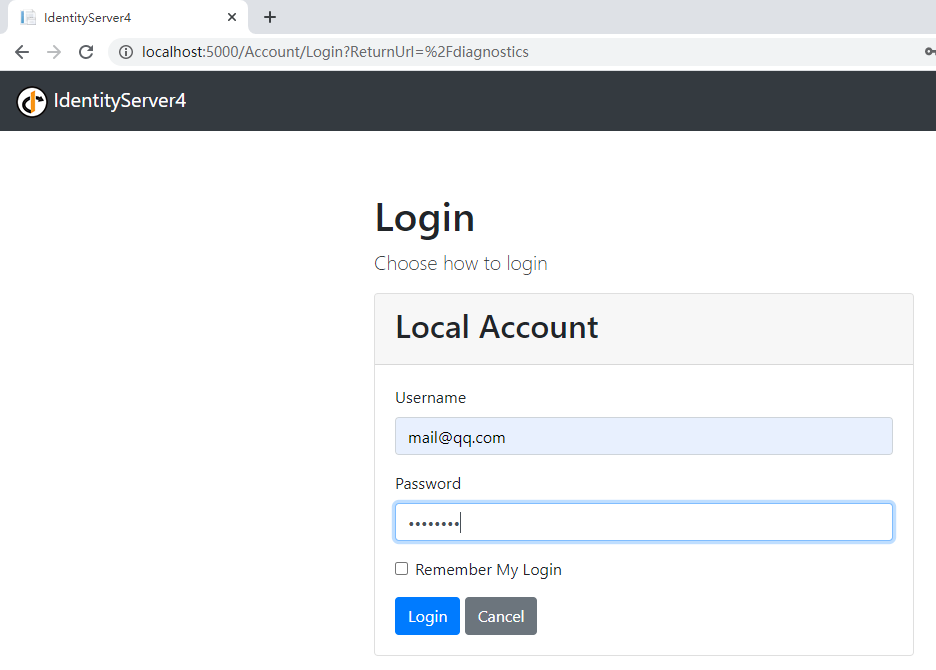
登录一下~
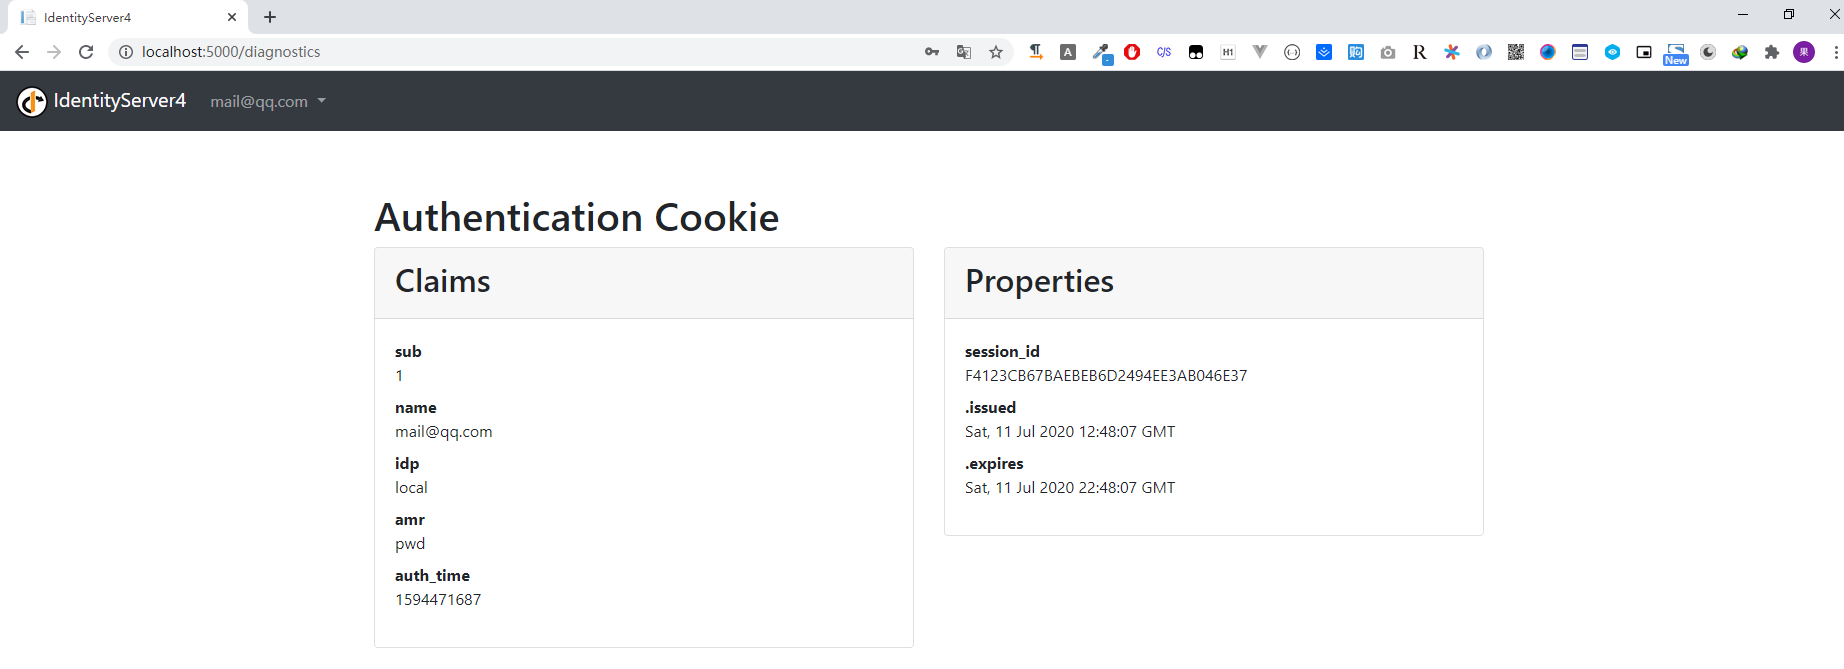
好了,现在我们已经可以登录成功了。
登录界面可以自定义的~,OK,今天就到这里
计划
接下来会说一下
- 建立我们的API项目并使用Token测试接口
- 建立一个MVC客户端项目访问我们的API
- 建立一个JS(Vue)客户端访问我们的API项目
End
推广下自己的公众号一个逗逼的程序员,主要记录自己工作中解决问题的思路分享及学习过程中的笔记。绝对不会程序员贩卖程序员的焦虑来割韭菜。


 浙公网安备 33010602011771号