利用 WSL 在 Windows下打造高效的 Linux 开发环境
WSL-Windows Subsystem for Linux 介绍
The Windows Subsystem for Linux lets developers run Linux environments -- including most command-line tools, utilities, and applications -- directly on Windows, unmodified, without the overhead of a virtual machine.
简单的说 WSL 就是让开发者在 Windows 上无需虚拟机就可以搭建一套 Linux 开发环境。
使用 WSL 的好处是:
- 最主要的一点,你可以快速的开启 Linux 环境,之前我的做法是开启虚拟器,占用资源多而且打开慢。
- 通过 window商店 选择多种 Linux 发行版,目前支持 Ubuntu(16.04 LTS)、openSUSE Leap 42、 SUSE Linux Enterprise Server。
- 使用 Linux 命令行工具处理一些问题,例如 sed, awk 等。
- 使用 Linux 内置包管理器安装一些软件,例如 git redis 等,基本上一条命令就能安装好。
安装 WSL
- 控制面板 -> 程序 -> 启用或关闭 Windows 功能 -> 勾选 适用Linux的Windows子系统 (我是秋季创造者更新版本,我记得之前低版本可能是 beta 版本)
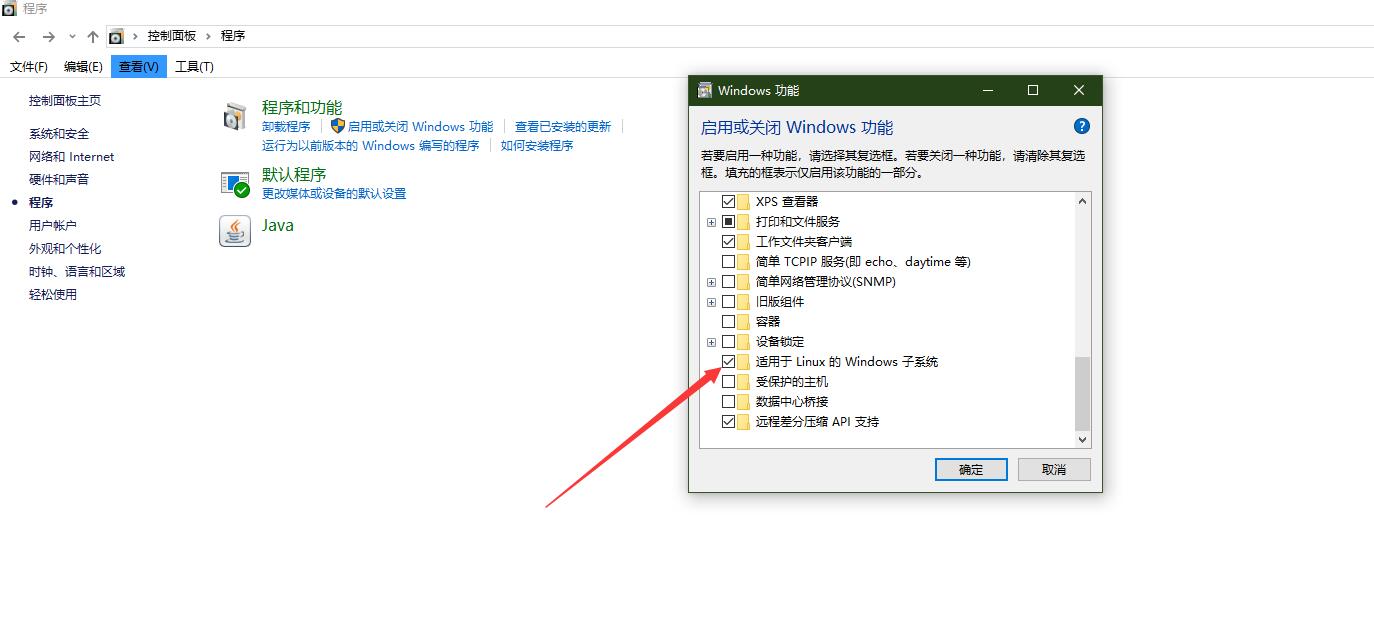
你也可以通过 PowerShell(管理员身份运行) 开启
Enable-WindowsOptionalFeature -Online -FeatureName Microsoft-Windows-Subsystem-Linux
然后按提示重启。
-
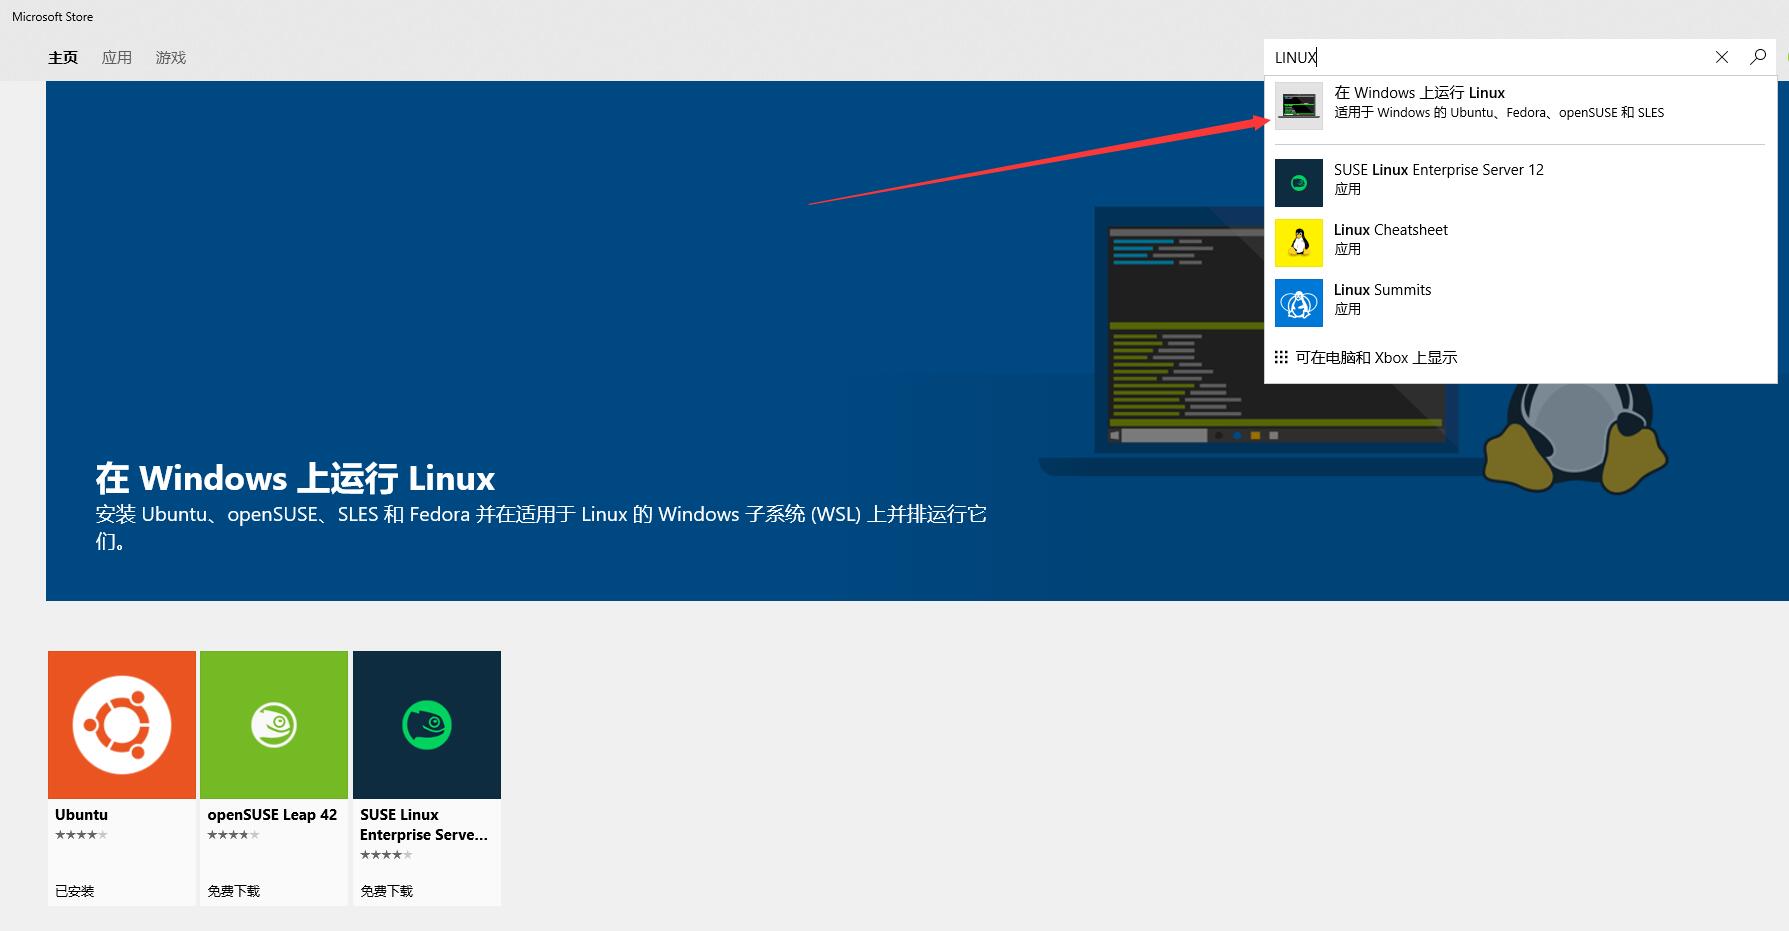
打开 window商店,选择合适的 Linux 发行版安装 (这里搜索Linux 根据下面第一个suggestion 进入),这里我选择了 Ubuntu
-
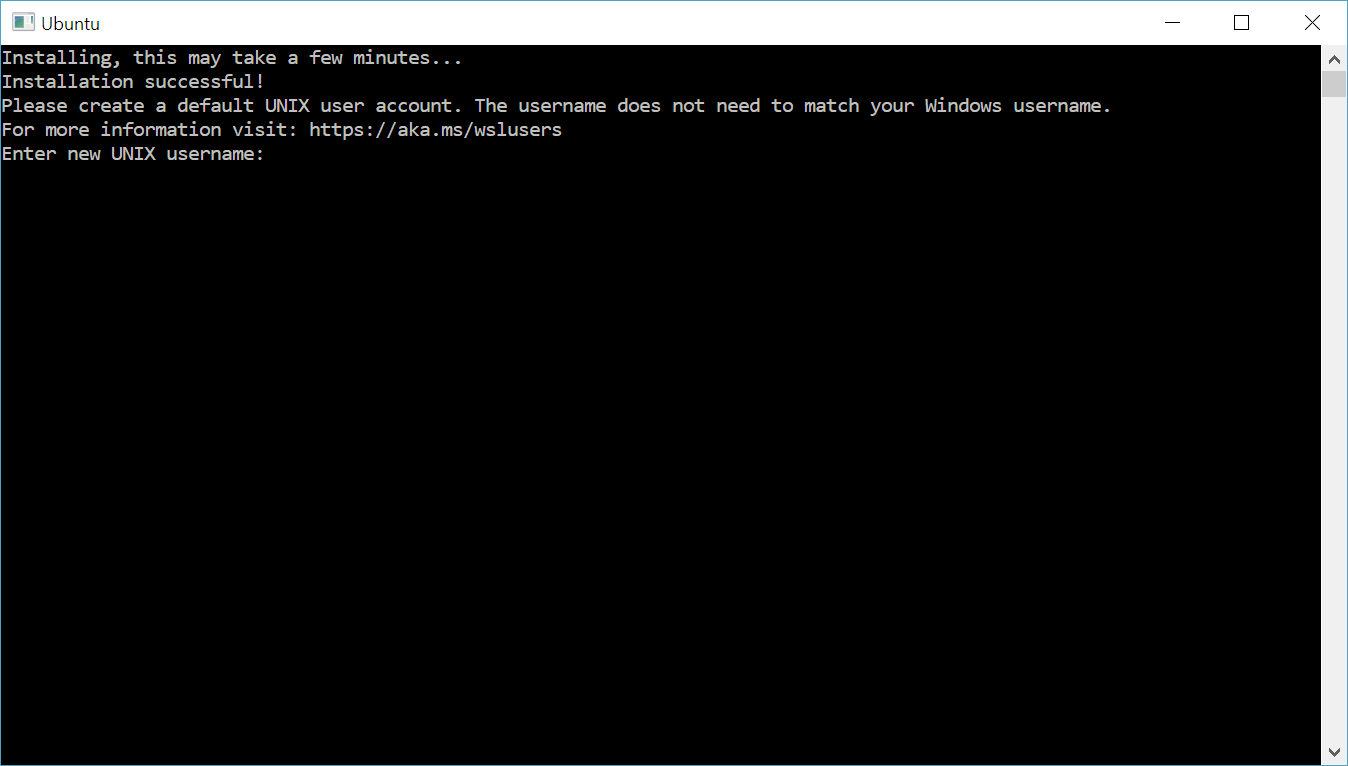
打开 Ubuntu ,第一次需要等待一会,设置账号密码,我这里直接设置成了 root
打造环境
设置右键菜单
新建 txt 文件,输入以下内容:
Windows Registry Editor Version 5.00

[HKEY_LOCAL_MACHINE\SOFTWARE\Classes\Directory\background\shell\lxss_shell]
@="WSL Here"
"Icon"="\"%USERPROFILE%\\icon.ico\""

[HKEY_LOCAL_MACHINE\SOFTWARE\Classes\Directory\background\shell\lxss_shell\command]
@="\"c:\\Windows\\System32\\bash.exe\""
保存 .reg 文件,运行即可。

PS:图标为Windows 商店的图标,我复制了一份放在我的用户目录下 。
设置常用 alias
- vim 打开.bashrc 文件
vim ~/.bashrc
- 因为在 WSL 中 window 的盘符都是挂载在 /mnt 下的,所以设置 alias 有助于你快速的访问 window 目录.
alias cdc='cd /mnt/c/'
alias cdd='cd /mnt/d/'
alias cde='cd /mnt/e/'
我个人常用的 alias
alias tf='tail -500f'
alias hg='history|grep'
alias cls='clear'
alias ssh-a='ssh user@host'
alias untar='sudo tar -xzvf'
apt更换阿里云源
- 备份,养成好习惯,在服务器上操作时记得也要备份哦。
cp /etc/apt/sources.list /etc/apt/sources.list.bak
- vim 编辑 sources.list
vim /etc/apt/sources.list
内容:
deb http://mirrors.aliyun.com/ubuntu/ trusty main restricted universe multiverse
deb http://mirrors.aliyun.com/ubuntu/ trusty-security main restricted universe multiverse
deb http://mirrors.aliyun.com/ubuntu/ trusty-updates main restricted universe multiverse
deb http://mirrors.aliyun.com/ubuntu/ trusty-proposed main restricted universe multiverse
deb http://mirrors.aliyun.com/ubuntu/ trusty-backports main restricted universe multiverse
deb-src http://mirrors.aliyun.com/ubuntu/ trusty main restricted universe multiverse
deb-src http://mirrors.aliyun.com/ubuntu/ trusty-security main restricted universe multiverse
deb-src http://mirrors.aliyun.com/ubuntu/ trusty-updates main restricted universe multiverse
deb-src http://mirrors.aliyun.com/ubuntu/ trusty-proposed main restricted universe multiverse
deb-src http://mirrors.aliyun.com/ubuntu/ trusty-backports main restricted universe multiverse
- 更新软件列表
apt-get update
安装tmux
在日常开发中,我们经常会一边运行程序 一边看错误日志,总觉得窗口不够用,每次都打开一个窗口又觉得麻烦,切换也不是很方便,这时候我们就需要 tmux 帮我们打开多个会话,分割多个窗口。
对于 tmux 不熟的同学,推荐花几分钟看一下tmux的使用方法和个性化配置 这篇文章,我也是看这篇文章学会的。
tmux 安装:
apt-get install tmux -y
安装常用工具
Git
apt-get install git -y
Redis
apt-get install  redis-server -y

service redis

 浙公网安备 33010602011771号