
Hw05-Command-Line-Enviroment
Hw05-Command-Line-Environment
Job Control
- using command
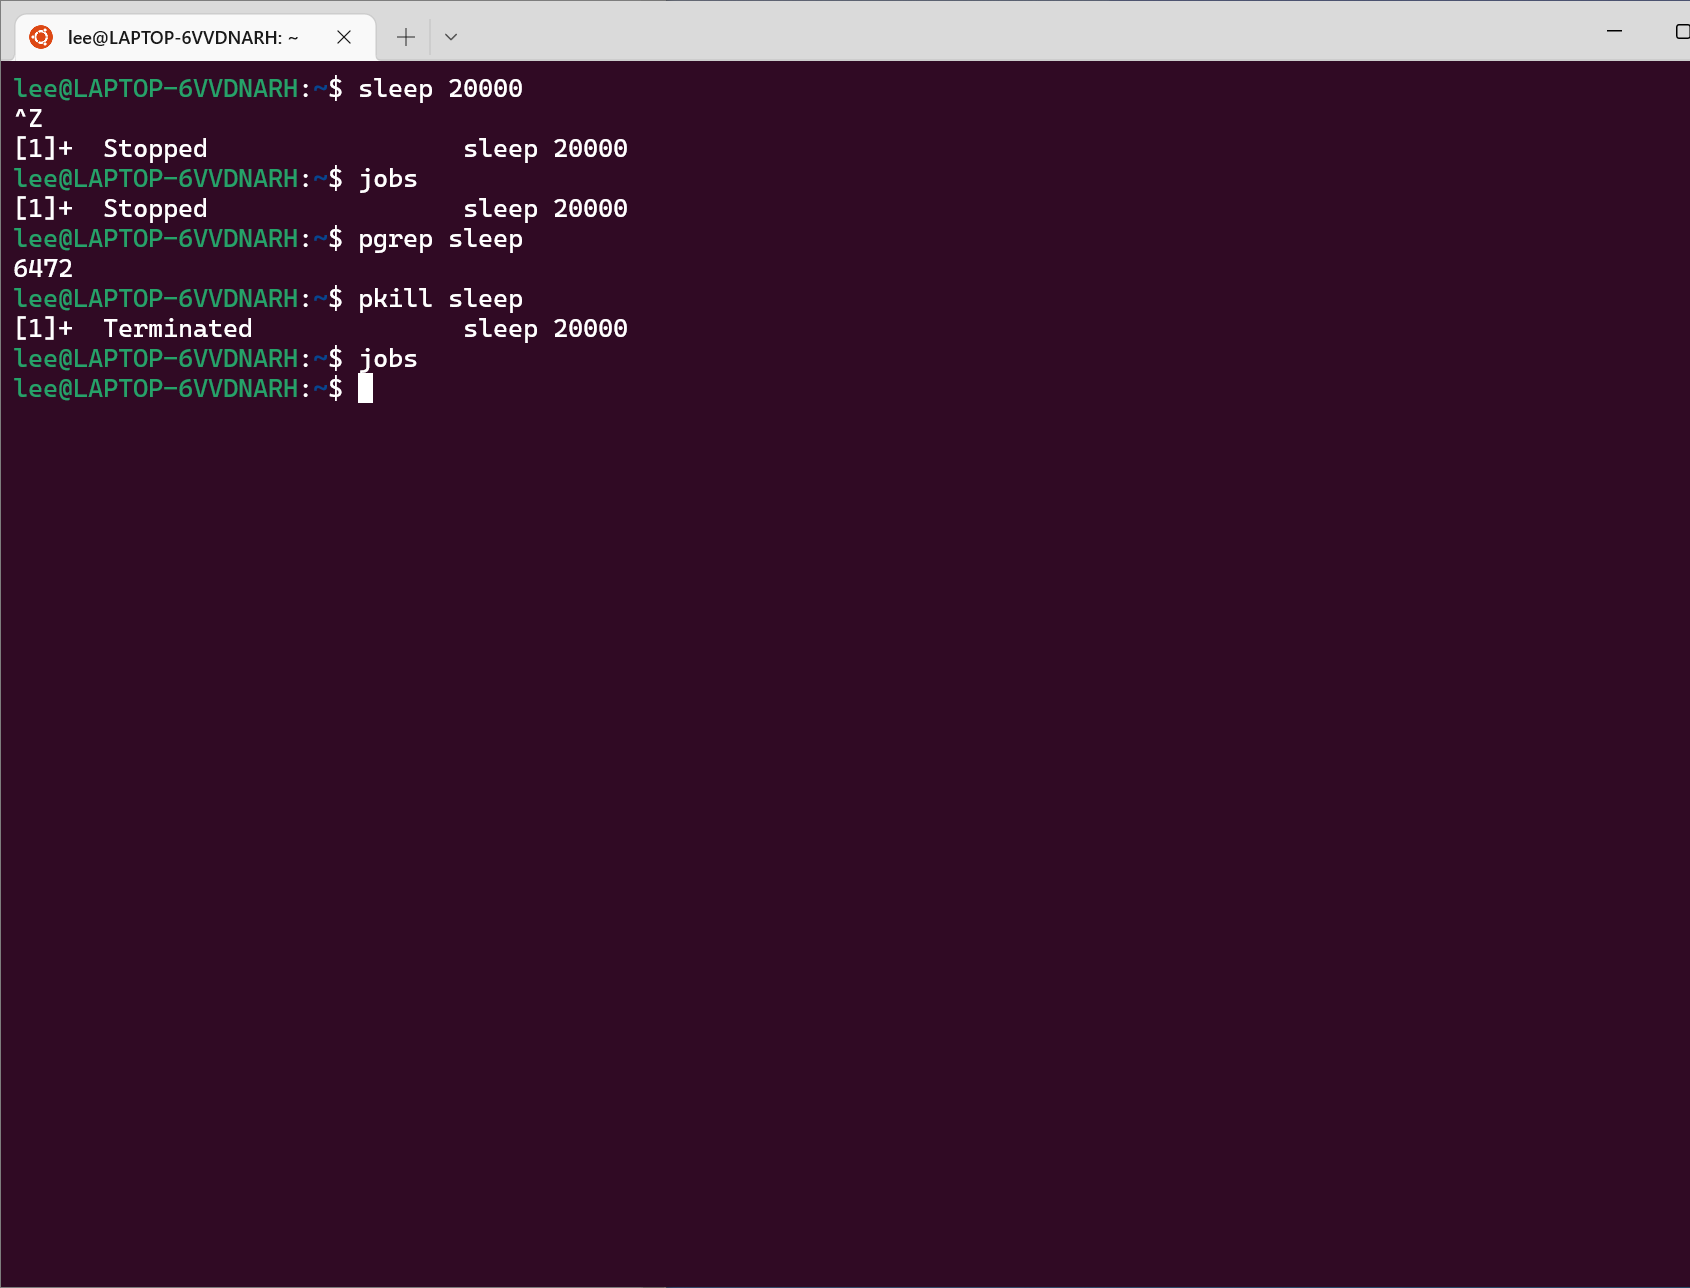
pkillandpgrepto kill the tasks typedsleep 2000
lee@LAPTOP-6VVDNARH:~$ sleep 20000
^Z
[1]+  Stopped                 sleep 20000
lee@LAPTOP-6VVDNARH:~$ jobs
[1]+  Stopped                 sleep 20000
lee@LAPTOP-6VVDNARH:~$ pgrep sleep
6472
lee@LAPTOP-6VVDNARH:~$ pkill sleep
[1]+  Terminated              sleep 20000
lee@LAPTOP-6VVDNARH:~$ jobs
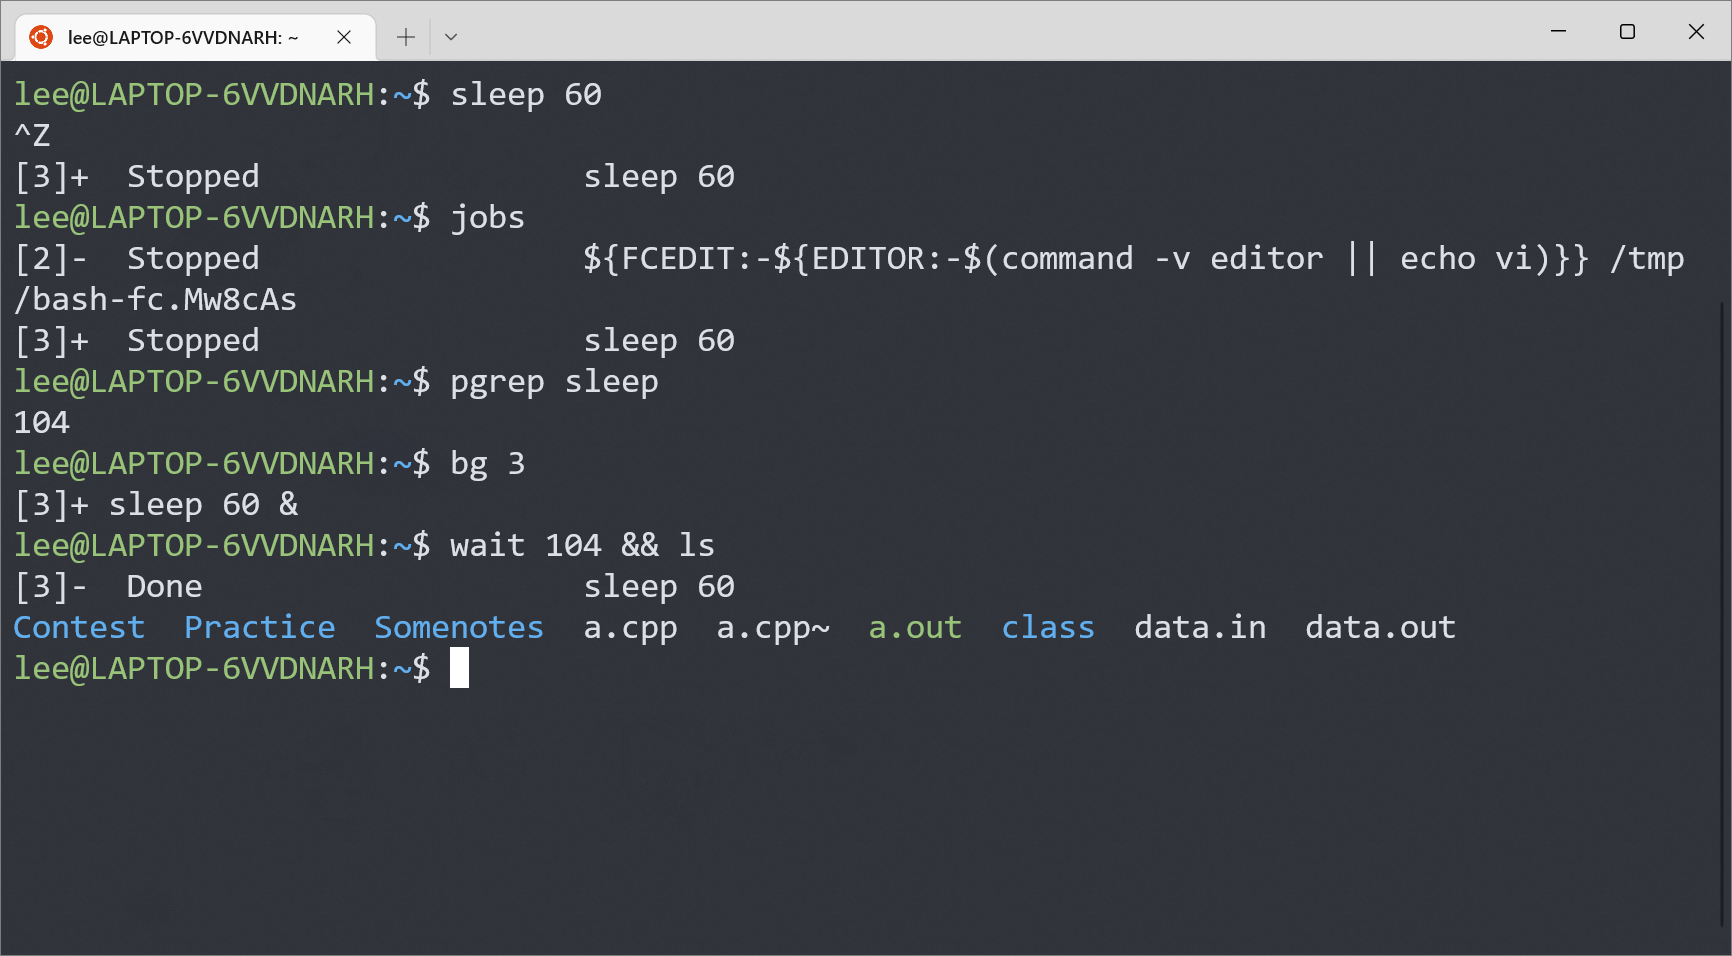
- Say you don’t want to start a process until another completes. How would you go about it? In this exercise, our limiting process will always be
sleep 60 &. One way to achieve this is to use thewaitcommand. Try launching the sleep command and having anlswait until the background process finishes.
Well, I've try these command, but it didn't work in different bash sessions.
kill -0 pid did not return signal, but it will return nonzero status number while the proceed doesn't exist.
It's important that while in bash normally act if the statements is 1
but it will be 0 if you are using command!
In order to do not consume un-nesseary resource, we should sleep 1
#!/bin/bash
pid={$1}

pid_wait(){
        while kill -0 $1
        do
        sleep 1
        done
        ls
}

Aliases
- Create an alias
dcthat resolves tocdfor when you type it wrongly.

alias dc=cd
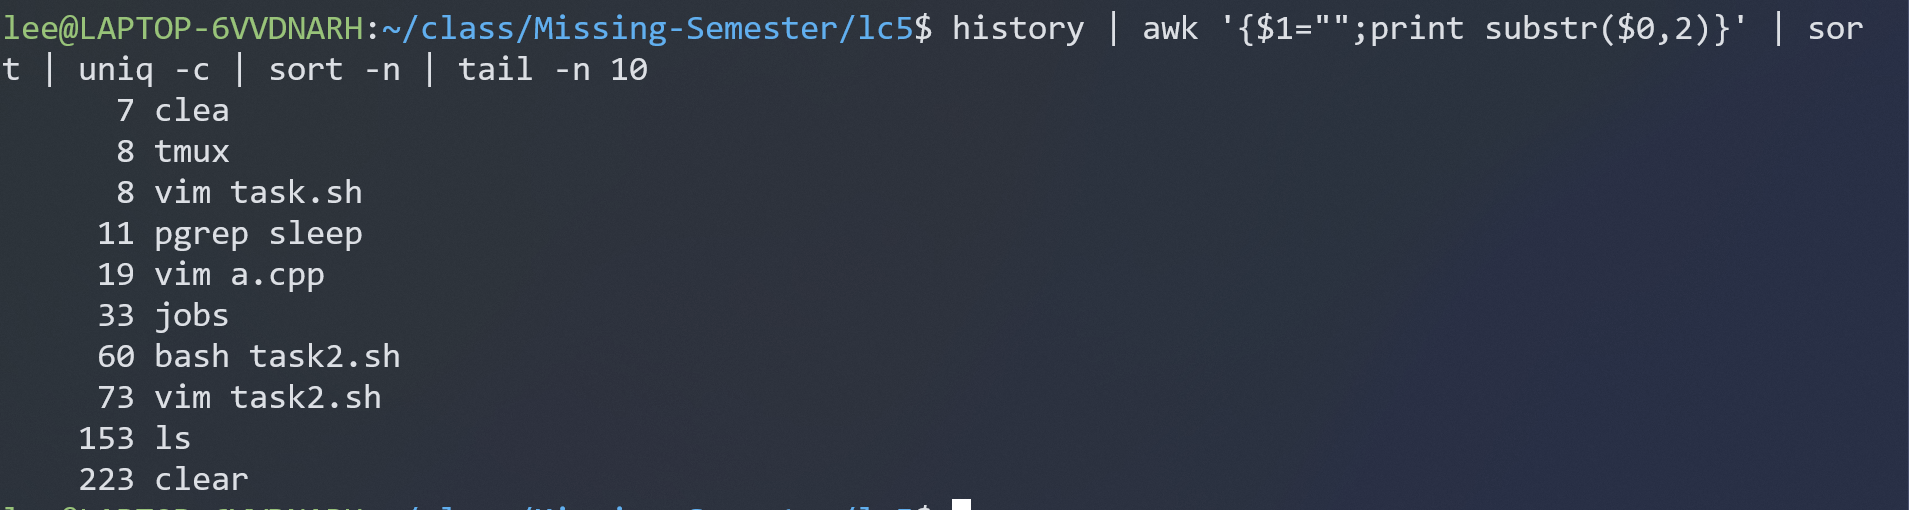
2.Run history | awk '{$1="";print substr($0,2)}' | sort | uniq -c | sort -n | tail -n 10 to get your top 10 most used commands and consider writing shorter aliases for them. Note: this works for Bash; if you’re using ZSH, use history 1 instead of just history.

Dotfiles
-
Create a folder for your dotfiles and set up version control.
mkdir ~/dotfile -
Add a configuration for at least one program, e.g. your shell, with some customization (to start off, it can be something as simple as customizing your shell prompt by setting
$PS1).git init dotfiles
-
Set up a method to install your dotfiles quickly (and without manual effort) on a new machine. This can be as simple as a shell script that calls
ln -sfor each file, or you could use a specialized utility.#!bin/bash files="bashrc vimrc " for files in $files; do ln -s ~/dotfiles/$file ~/.$files doln -swill create a symlinks for you dotfiles that your dotfiles will be well to control also version control
Remote Machines
Install a Linux virtual machine (or use an already existing one) for this exercise. If you are not familiar with virtual machines check out this tutorial for installing one.
- Go to
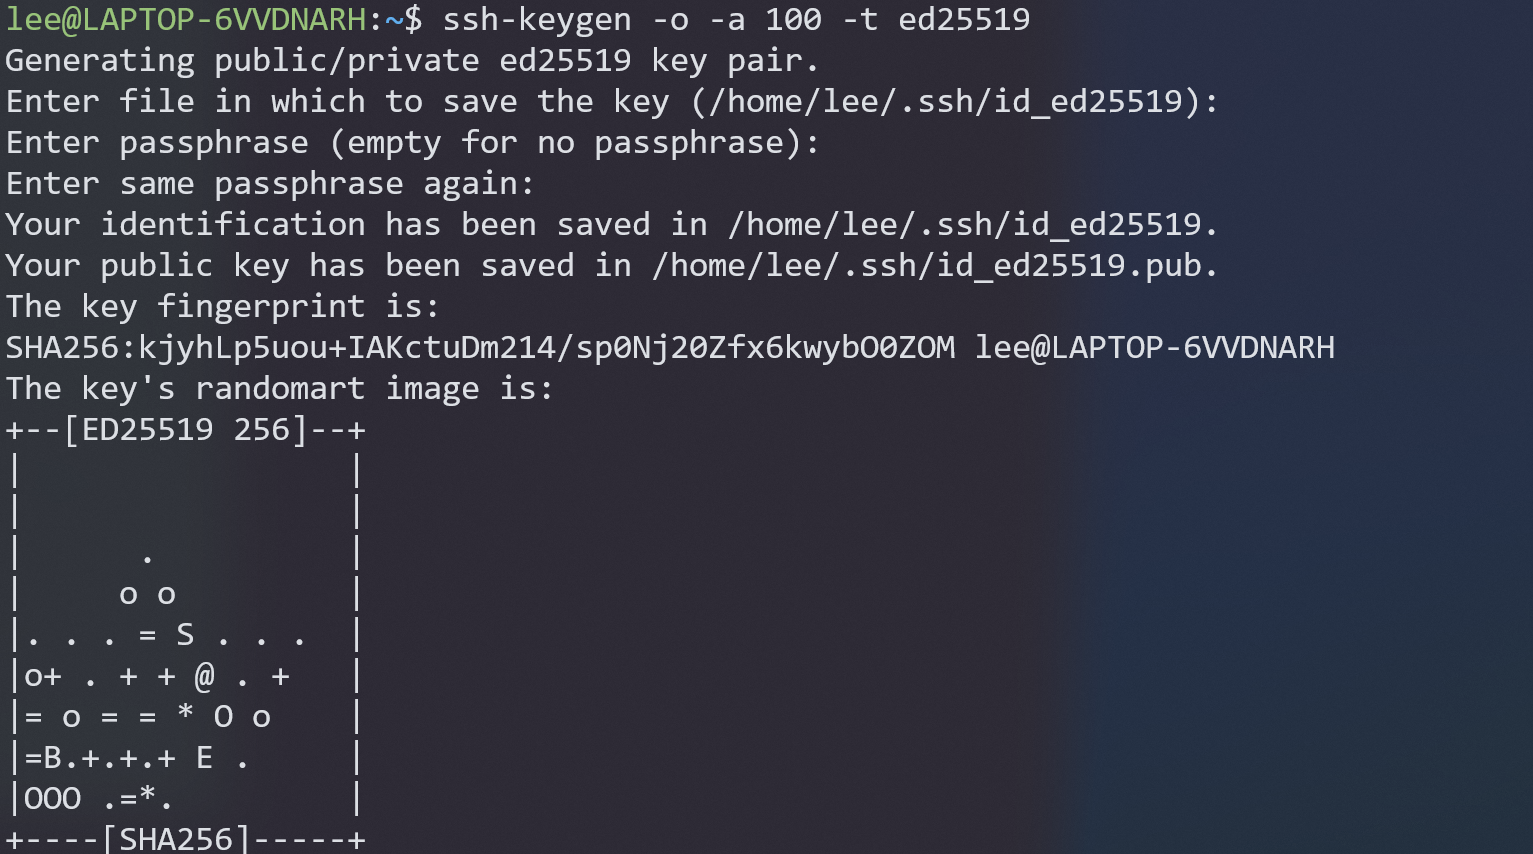
~/.ssh/and check if you have a pair of SSH keys there. If not, generate them withssh-keygen -o -a 100 -t ed25519. It is recommended that you use a password and usessh-agent, more info here.
-
Edit
.ssh/configto have an entry as followsHost vm User username_goes_here HostName ip_goes_here IdentityFile ~/.ssh/id_ed25519 LocalForward 9999 localhost:8888 -
Use
ssh-copy-id vmto copy your ssh key to the server.
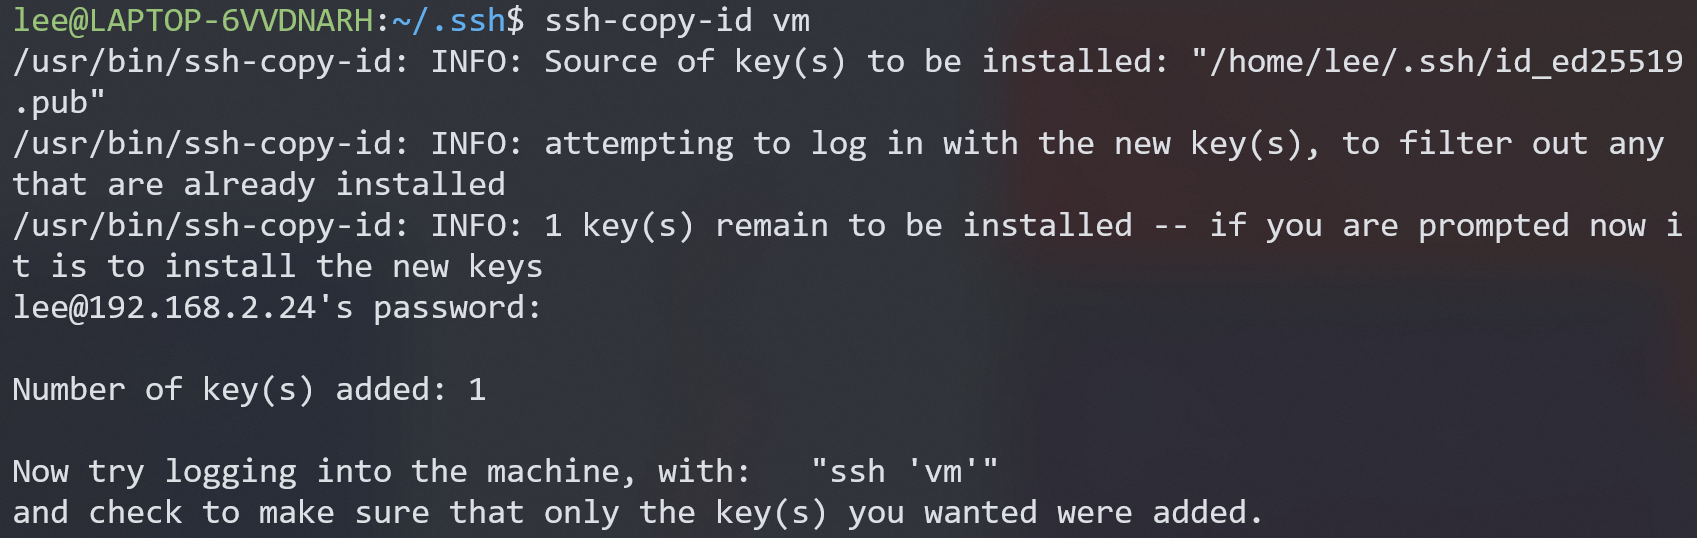
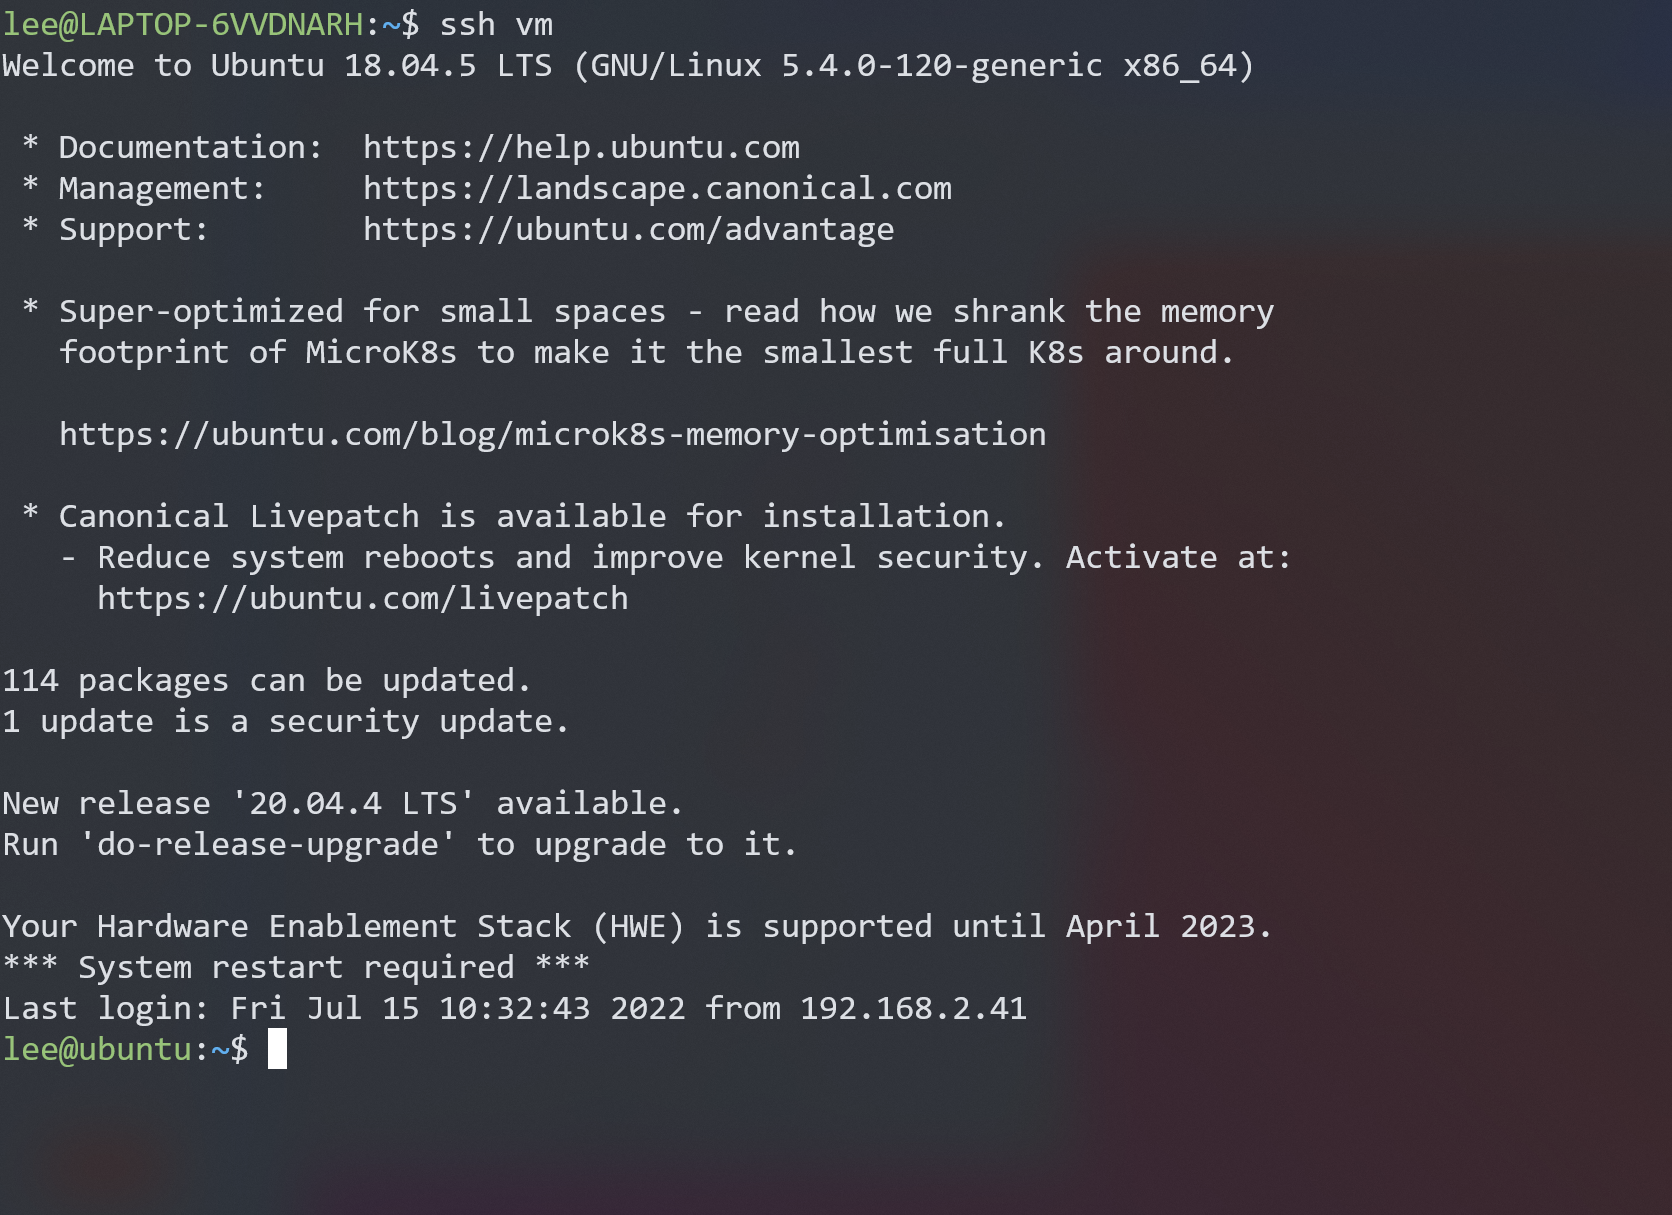
Then, we can use ssh vm directly login the server without password
- Start a webserver in your VM by executing
python -m http.server 8888. Access the VM webserver by navigating tohttp://localhost:9999in your machine.

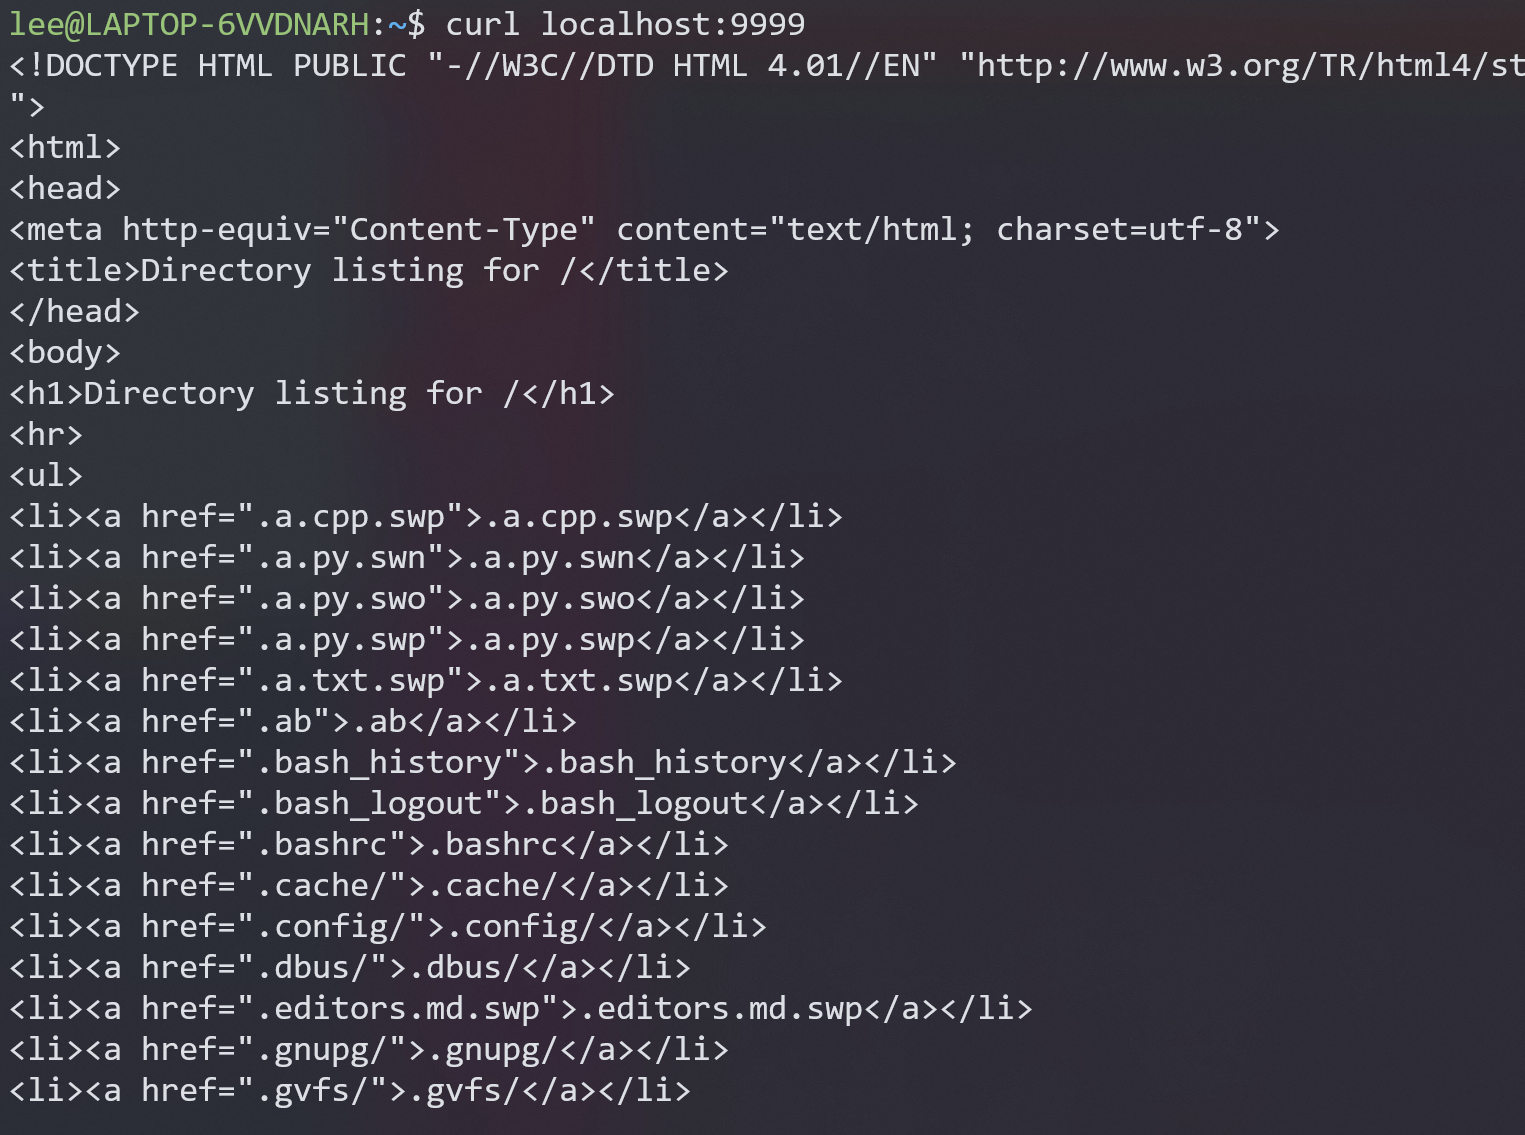
Recently , We use config LocalForward 9999 localhost:8888 to make ssh host 8888 to our laptop 9999
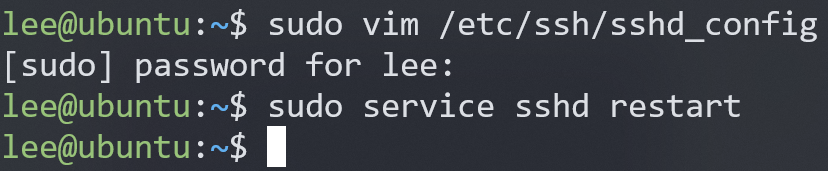
- Edit your SSH server config by doing
sudo vim /etc/ssh/sshd_configand disable password authentication by editing the value ofPasswordAuthentication. Disable root login by editing the value ofPermitRootLogin. Restart thesshservice withsudo service sshd restart. Try sshing in again.
- (Challenge) Install
moshin the VM and establish a connection. Then disconnect the network adapter of the server/VM. Can mosh properly recover from it?
sudo apt install mosh
Well, this answer I did not do that.
- Challenge) Look into what the
-Nand-fflags do insshand figure out a command to achieve background port forwarding.
-N      Do not execute a remote command.  This is useful for just forwarding ports.
-f      Requests ssh to go to background just before command execution.  This is
        useful if ssh is going to ask for passwords or passphrases, but the user
        wants it in the background.  This implies -n.  The recommended way to
        start X11 programs at a remote site is with something like ssh -f host
        xterm.
-L [bind_address:]port:host:hostport
     -L [bind_address:]port:remote_socket
     -L local_socket:host:hostport
     -L local_socket:remote_socket
so the command will be the following
ssh -fN -L 9999:localhost:8888 vm


 浙公网安备 33010602011771号