Spring Boot自动化配置原理
Spring Boot自动化配置的原理:
1.查看@SpringBootApplication的元注解:
@SpringBootConfiguration :表示注解所修饰的类是一个配置类

@ComponentScan:包扫描,作用是扫描Spring Boot启动类相同包中的Bean和子包中的Bean,并将他们交给Spring容器进行管理
@EnableAutoConfiguration:通过@Import注解导入了一个导入器AutoConfigurationImportSelector

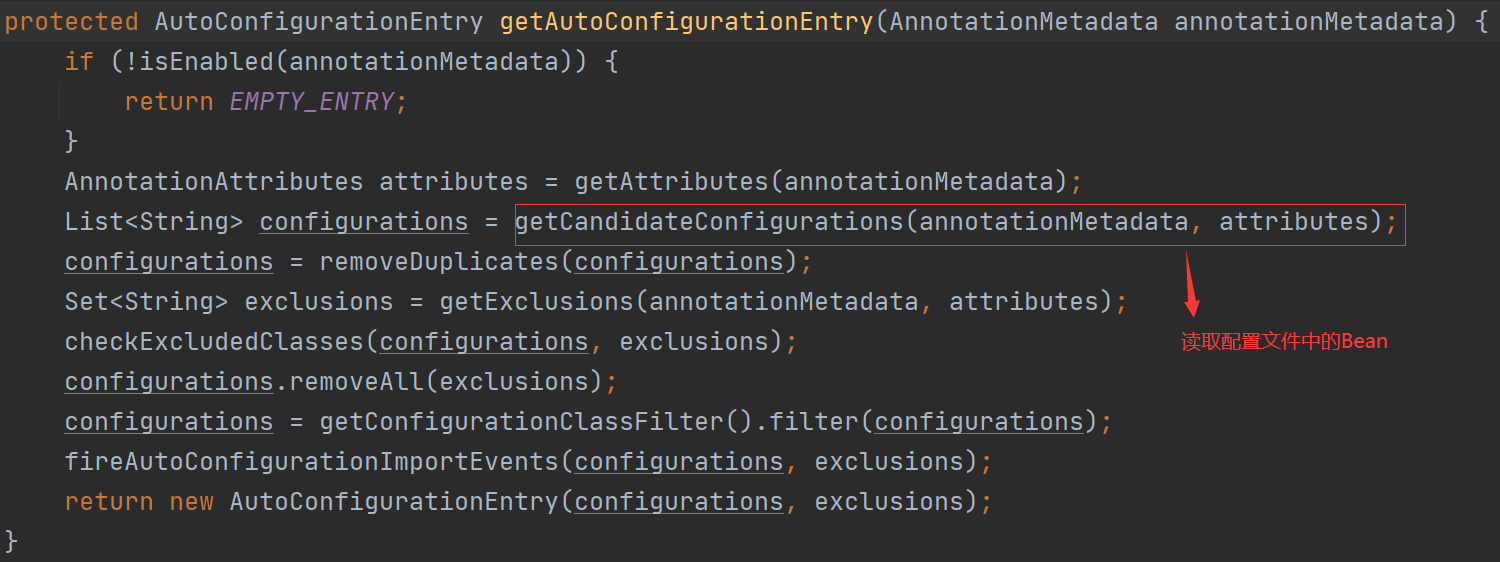
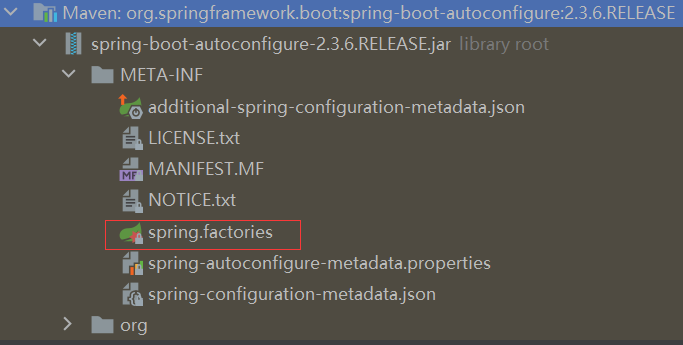
2.在该导入器中读取了spring-boot-autoconfigure包中的META-INF/spring.factories配置文件中的配置类的全类名:

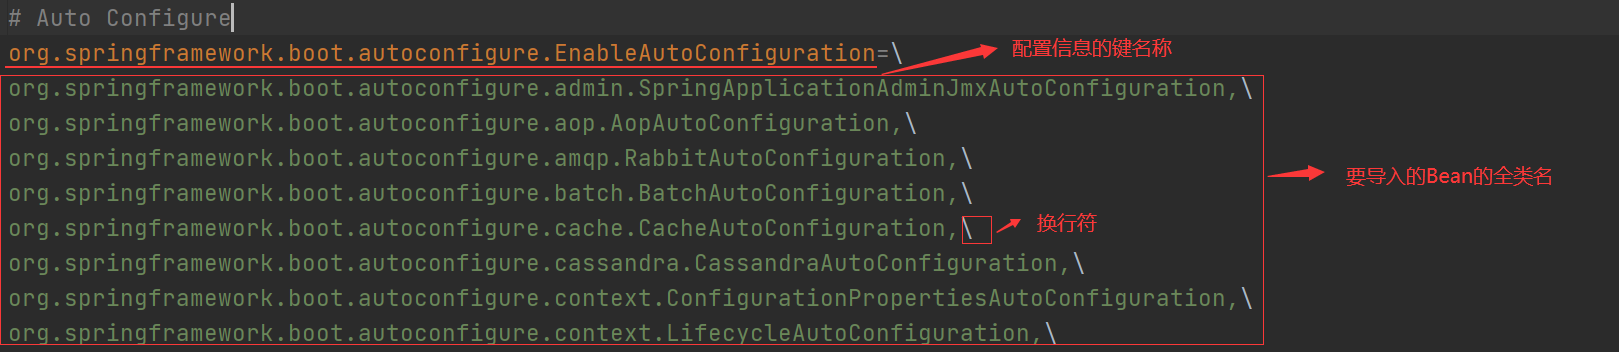
3.在这些配置类中通过@Bean定义了很多bean,并且结合spring所提供的条件注解来决定这个bean配置是否生效:
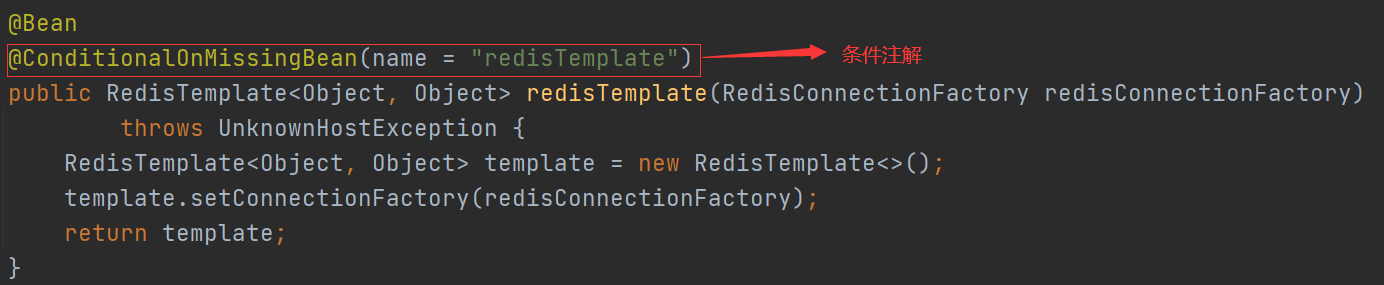
4.Spring Boot中常见的条件注解:
@ConditionalOnBean 在spring容器中配置了特定的Bean时生效
@ConditionalOnMissingBean 在spring容器中没有配置特定的 Bean
@ConditionalOnClass 在Classpath里有指定的类
@ConditionalOnMissingClass 在Classpath 里没有指定的类
@ConditionalOnExpression 给定的 SpringExpressionLanguage(SpEL) 表达式计算结果为 true
@ConditionalOnJava Java 的版本匹配特定值或者一个范围值
@ConditionalOnJndi JNDI 参数必须存在
@ConditionalOnProperty 指定的属性有一个明确的值
@ConditionalOnResource Classpath 里存在指定的资源
@ConditionalOnWebApplication 是一个 Web 应用程序
@ConditionalOnNotWebApplication 不是一个 Web 应用程序
5.@Import
可以将某一个类直接导入到Spring容器中,如果在这个类中通过@Bean注解配置了其他的bean,那么此也会将这个bean导入到Spring容器中
@Import(value = UserServiceImpl.class) //把UserServiceImpl对象交由spring进行管理
点击查看代码
@SpringBootApplication
//@Import(value = UserServiceImpl.class)      //把UserServiceImpl对象交由spring进行管理
//@Import(value = AutoConfiguration.class)
@EnableAutoConfig
public class AutoConfigurationApplication {
    public static void main(String[] args) {
        //返回值表示的是spring容器
        ConfigurableApplicationContext applicationContext = SpringApplication.run(AutoConfigurationApplication.class, args);
        //从spring容器中获取UserService
        UserService userService = applicationContext.getBean(UserService.class);
        //调用UserService的show方法
        userService.show();
        System.out.println("--------------------------------------------------------");
        AutoConfiguration autoConfiguration = applicationContext.getBean(AutoConfiguration.class);
        System.out.println(autoConfiguration);
    }
}
6.自定义注解
点击查看代码
@Retention(RetentionPolicy.RUNTIME)
@Target(ElementType.TYPE)
@Import(value = AutoConfigurationImportSelector.class)
public @interface EnableAutoConfig {}
7.ImportSelector
上述这种方式通过@Import注解仅仅只导入了一个配置类,如果需要再导入其他的配置类就需要再次给@Import注解的value属性进行赋值,这种方式属于硬编码的方式完成批量导入,不利于后期代码的维护。为了提高代码的维护性,在spring boot中为我们提供了一个导入器ImportSelector,可以实现批量导入
ImportSelector:
点击查看代码
public interface ImportSelector {
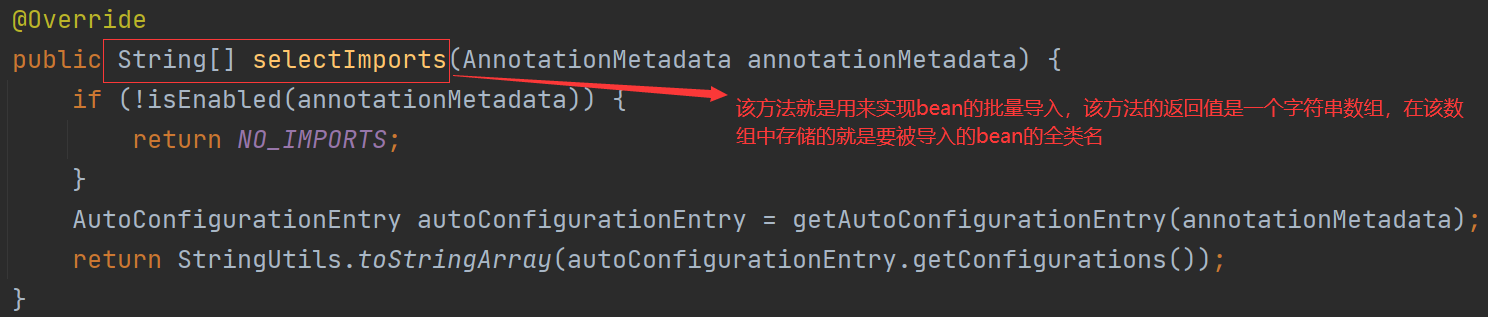
// 该方法就是用来实现bean的批量导入,该方法的返回值是一个字符串数组,在该数组中存储的就是要被导入的bean的全类名
String[] selectImports(AnnotationMetadata importingClassMetadata);
}
自定义导入器:
点击查看代码
public class AutoConfigurationImportSelector implements ImportSelector {
    @Override
    public String[] selectImports(AnnotationMetadata importingClassMetadata) {
        return new String[]{"com.atguigu.auto.config.AutoConfiguration"};
    }
}
代码优化(把被导入的bean的名称定义到一个配置文件中,在导入器类中读取配置文件中的内容实现导入指定的bean):
点击查看代码
public class AutoConfigurationImportSelector implements ImportSelector {
    @Override
    public String[] selectImports(AnnotationMetadata annotationMetadata) {
        try {
            //读取配置文件中的内容
            InputStream inputStream = AutoConfigurationImportSelector.class.getClassLoader().getResourceAsStream("META-INF/spring.factories");
            Properties prop = new Properties();
            prop.load(inputStream);
            //从prop中获取数据
            String value = prop.getProperty("org.springframework.boot.autoconfigure.EnableAutoConfiguration");
            return new String[]{value};
        } catch (IOException e) {
            e.printStackTrace();
        }
        return new String[0];
    }
}
配置文件:
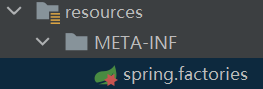
配置文件的内容:
org.springframework.boot.autoconfigure.EnableAutoConfiguration=com.atguigu.config.AutoConfiguration
出处:http://www.cnblogs.com/insilently/
版权:本文版权归作者所有
转载:欢迎转载,但未经作者同意,必须保留此段声明;必须在文章中给出原文连接;否则必追究法律责任

 浙公网安备 33010602011771号