

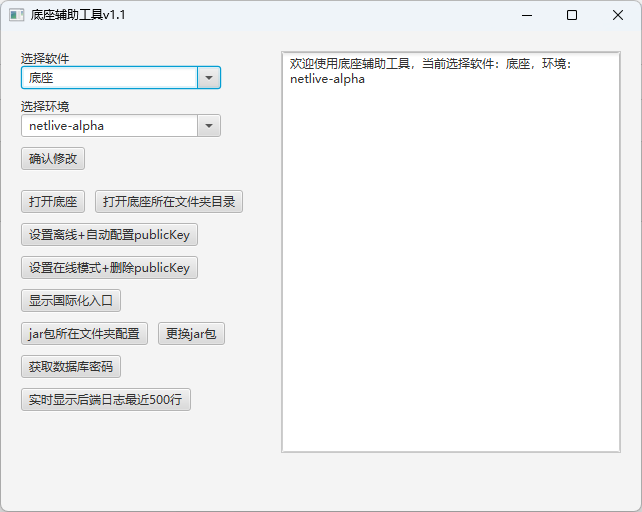
先上功能截图
讲讲第一次使用的体验。
JAVA FX还是非常友好很好使用的
IDEA新建FX项目的时候就能把很多功能都选上。
这些pom是适配了jdk21的,不同版本的fx组件适配jdk也不一样,我是用jdk21开发的
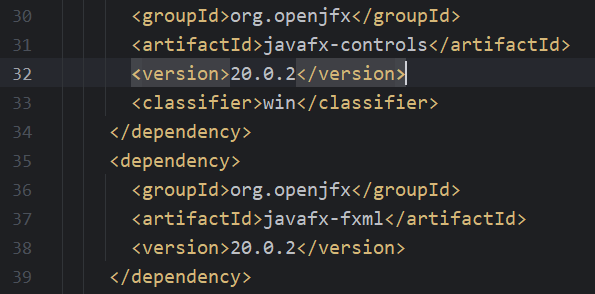
还有项目配置里面这几个要runtime改为compile不然会出现报错

大概控制分为如下

启动类

controller类
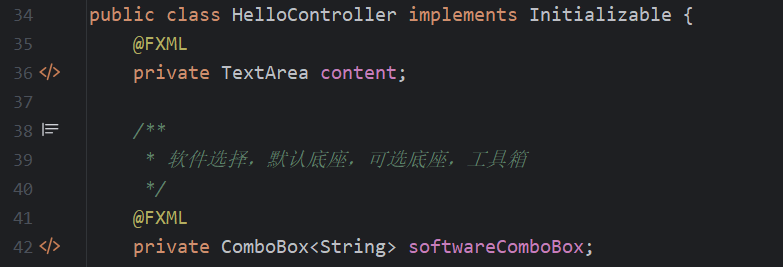
@FXML就是引的组件,其中变量名和对应fxml一致即可
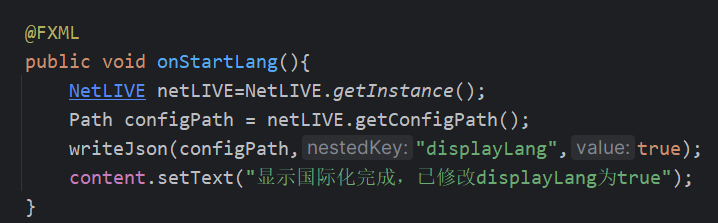
对应的方法名也要加上@FXML,如果是通过onAction跳转过来的
fxml整体如下:
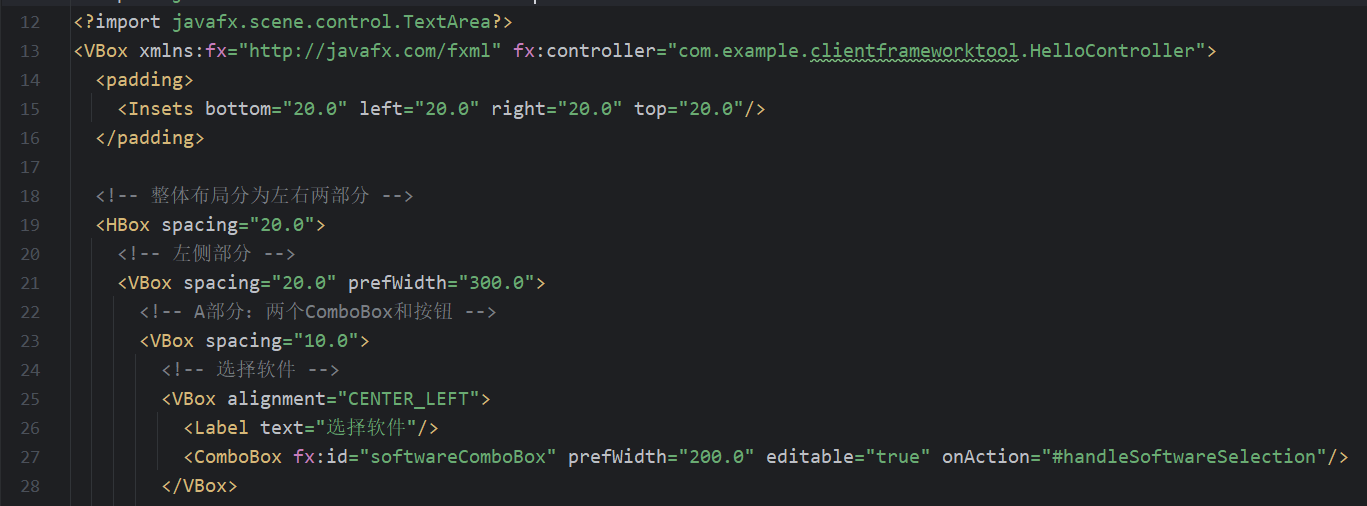
CSS的样式是可以引的,被我删掉了。
还有一些,比如右侧的可复制功能

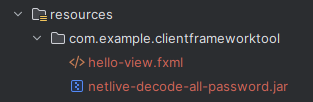
项目读或者取文件是直接从这一层开始的
就这个文件夹下
各种功能的实现基于AI生成,不多赘述了。
讲下如何打包成exe。
首先是直接打成jar包
pom的build如下配置
<build>
    <plugins>
      <plugin>
        <groupId>org.apache.maven.plugins</groupId>
        <artifactId>maven-compiler-plugin</artifactId>
        <version>3.11.0</version>
        <configuration>
          <source>21</source>
          <target>21</target>
        </configuration>
      </plugin>
      <plugin>
        <groupId>org.apache.maven.plugins</groupId>
        <artifactId>maven-jar-plugin</artifactId>
        <version>3.2.0</version>
        <configuration>
          <archive>
            <manifest>
              <mainClass>com.example.clientframeworktool.HelloApplication</mainClass>
            </manifest>
          </archive>
        </configuration>
      </plugin>
      <plugin>
        <groupId>org.apache.maven.plugins</groupId>
        <artifactId>maven-shade-plugin</artifactId>
        <version>3.2.4</version>
        <executions>
          <execution>
            <phase>package</phase>
            <goals>
              <goal>shade</goal>
            </goals>
            <configuration>
              <transformers>
                <transformer implementation="org.apache.maven.plugins.shade.resource.ManifestResourceTransformer">
                  <mainClass>com.example.clientframeworktool.HelloApplication</mainClass>
                </transformer>
              </transformers>
            </configuration>
          </execution>
        </executions>
      </plugin>
      <plugin>
        <groupId>org.openjfx</groupId>
        <artifactId>javafx-maven-plugin</artifactId>
        <version>0.0.8</version>
        <executions>
          <execution>
            <id>default-cli</id>
            <configuration>
              <mainClass>com.example.clientframeworktool.HelloApplication</mainClass>
              <launcher>app</launcher>
              <jlinkZipName>app</jlinkZipName>
              <jlinkImageName>app</jlinkImageName>
              <noManPages>true</noManPages>
              <stripDebug>true</stripDebug>
              <noHeaderFiles>true</noHeaderFiles>
            </configuration>
          </execution>
        </executions>
      </plugin>
    </plugins>
  </build>
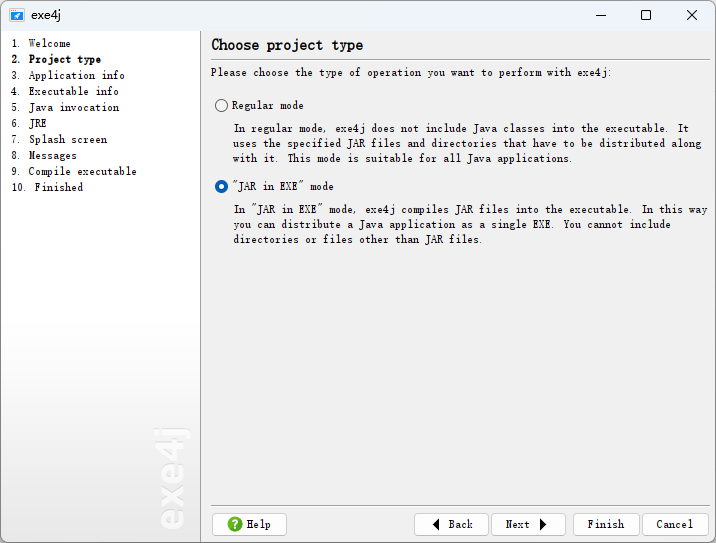
打成jar包以后,使用exe4j打成exe
welcome的时候建议去搜搜license,如果你没有,就会带有exe4j启动的logo
选第二个jar包打成exe
3要自己配置路径和名字
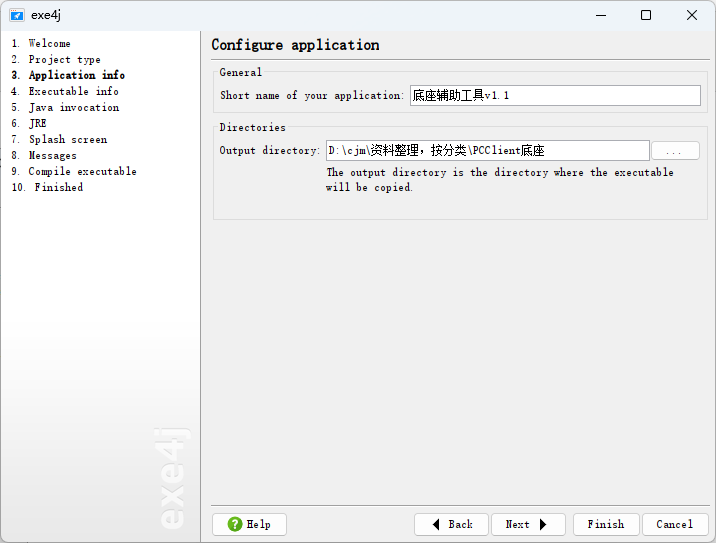
4也要配置名字
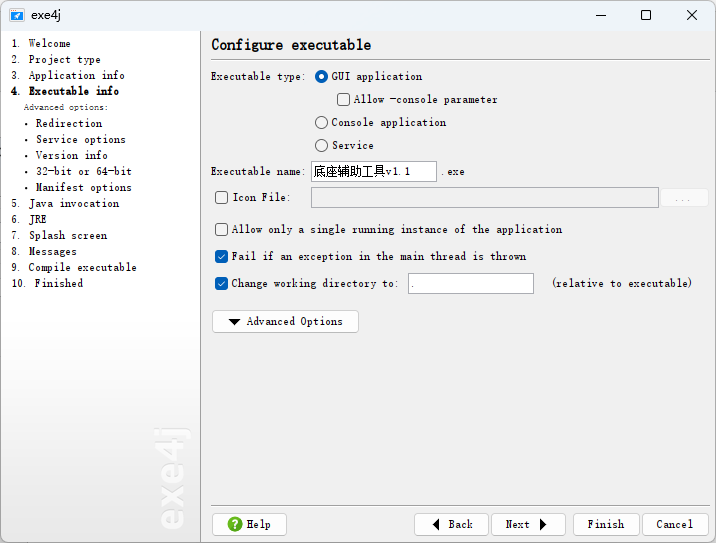
勾选64位

5勾选你的jar包所在位置
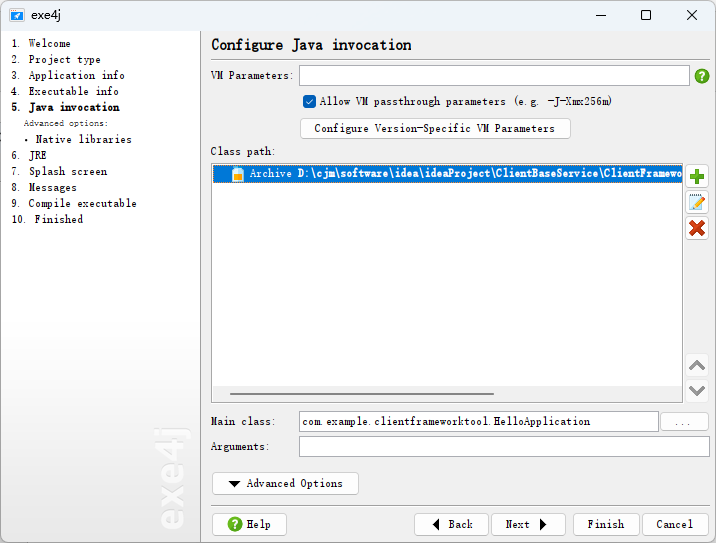
jar选择21
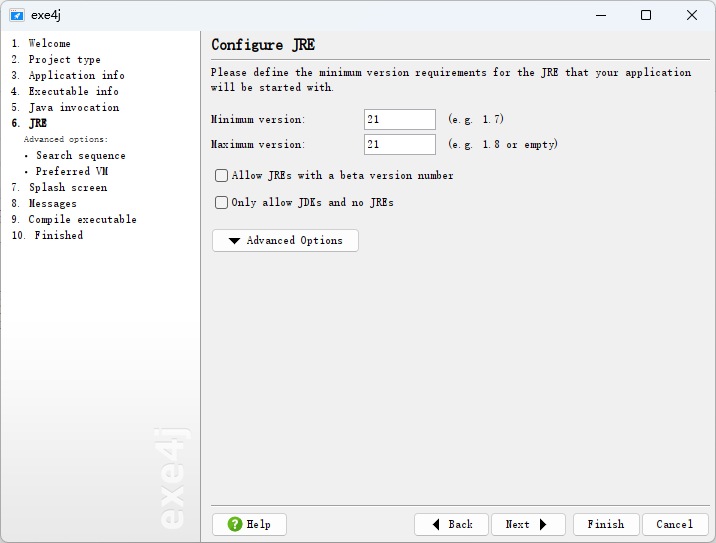
这个在基础上把jdk21的文件夹带上

然后点finish就打包出来了
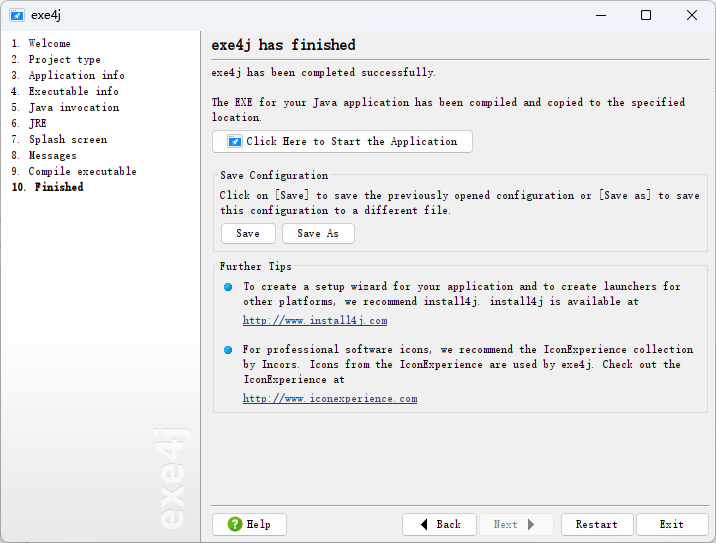
点击click here就能看打包以后的效果了
注意使用时,不用配置那啥exe4j_java_home,只需要配置系统的环境变量
JAVA_HOME是对应jdk21的起始目录就可以了。
有些功能可能需要管理员权限才能打开,有些不用,视情况而定,比如我们底座就没有,网络安全工具箱就有

 浙公网安备 33010602011771号