
在NestJS中使用Prisma开发项目
以下内容来自 prisma 官方油管 教程 的英文 文档。该文章是根据文档教程编写的,只保留了重要的部分。
安装Prisma
在安装 prisma 前请确保你已经创建了一个 nest 项目。
npm install prisma --save-dev
初始化 prisma
npx prisma init
# 或者指定数据库(默认是 postgreSQL)
npx prisma init --datasource-provider mysql
初始化后终端会提示下一步怎么做:

我们按照以上步骤来设置。
先在 .gitignore 中把 .env 添加进去,然后打开根目录下的 .env 文件,更改成我们自己的:
DATABASE_URL="mysql://root:0000@localhost:3306/prisma_test"
添加 model 并 Migrate
在 prisma 中,所有的 model 都必须写在 prisma/schema.prisma 中。我们打开 prisma/schema.prisma 文件,在里面添加编写 以下内容:
model Product {
  id        String   @id @default(cuid())
  createdAt DateTime @default(now())
  updatedAt DateTime @updatedAt

  name        String
  description String?
  price       Decimal
  sku         String  @unique
  published   Boolean @default(false)
}
在编写 model 之前,我们可以先在 vscode 安装 prisma 插件,可以格式化 model 代码。
编写完后还需要让这些 model 与数据库关联起来。目前我们的数据库中的表格还是空的,执行以下命令:
npx prisma migrate dev --name init

我们查看数据库,就会发现里面已经帮我们建好了一个 product 的表格,但是表格里面是没有任何数据的。我们可以编写以下数据导入数据库中。
seed 数据库
创建一个 products.ts 文件,随便放在哪个文件夹下面都可以。我这里就放在根目录:
export const products = [
  {
    name: "SUP Board 12'",
    description: "Inflatable SUP Board 12' in RedOrange.",
    price: 549.99,
    sku: 'sku_supboard_12_red',
    published: true,
  },
  {
    name: "SUP Board 14'",
    description: "Inflatable SUP Board 14' in all new Blue color.",
    price: 629.95,
    sku: 'sku_sup_board14_blue',
    published: true,
  },
  {
    name: "SUP Board 10' Youth",
    description:
      'Short and narrow touring board for children, perfect for fast paddling.',
    price: 550.95,
    sku: 'sku_sup_board10_youth',
    published: true,
  },
  {
    name: "SUP Board 10'",
    description: 'New short and narrow touring board.',
    price: 570,
    sku: 'sku_sup_board10',
    published: false,
  },
  {
    name: 'SUP Glass Paddle',
    price: 79.0,
    sku: 'sku_sup_paddle_glass',
    published: true,
  },
  {
    name: 'SUP Carbon Paddle',
    description: 'Perfect suited for racing.',
    price: 159.49,
    sku: 'sku_sup_paddle_carbon',
    published: true,
  },
  {
    name: 'SUP NEW Carbon Paddle',
    description: 'Lighter than ever.',
    price: 229.0,
    sku: 'sku_sup_paddle_new_carbon',
    published: false,
  },
  {
    name: 'SUP Paddle Kids',
    description: 'Suitable for kids from 7 to 12 years.',
    price: 59.0,
    sku: 'sku_sup_paddle_kids',
    published: true,
  },
  {
    name: 'Dry Bag 10L Red',
    description: '10 Liter dry bag keeping your valuables dry.',
    price: 17.99,
    sku: 'sku_dry_bag_10l_red',
    published: true,
  },
  {
    name: 'Dry Bag 10L Black',
    description: '10 Liter dry bag keeping your valuables dry.',
    price: 15.99,
    sku: 'sku_dry_bag_10l_black',
    published: true,
  },
  {
    name: 'Dry Bag 35L',
    description: '35 Liter dry bag keeping your valuables and clothes dry.',
    price: 23.99,
    sku: 'sku_dry_bag_35l',
    published: true,
  },
  {
    name: 'Dry Bag 100L',
    description: '100 Liter dry bag perfect for long trips.',
    price: 36.99,
    sku: 'sku_dry_bag_100l',
    published: true,
  },
  {
    name: 'Dry Bag 50L',
    description:
      '50 Liter dry bag extra room to carry valuables of your friends.',
    price: 30.99,
    sku: 'sku_dry_bag_50l',
    published: false,
  },
  {
    name: 'Flex Touring Fin Blue',
    price: 26.9,
    sku: 'sku_fin_flex_touring_blue',
    published: true,
  },
  {
    name: 'Touring Fin Red',
    price: 20.9,
    sku: 'sku_fin_touring_red',
    published: false,
  },
];
然后在创建一个 prisma/seed.ts 文件:
import { PrismaClient } from '@prisma/client';
import { products } from '../products';

const prisma = new PrismaClient();

async function main() {
  for (let product of products) {
    await prisma.product.create({
      data: product,
    });
  }
}

main()
  .catch((e) => {
    console.log(e);
    process.exit(1);
  })
  .finally(async () => {
    await prisma.$connect();
  });
打开项目的 package.json 文件,添加以下内容:
"prisma": {
  "seed": "ts-node prisma/seed.ts"
}
上面自定义的命令使用了 ts-node,我们还需要在项目中安装:
npm i -D ts-node typescript @types/node
然后执行以下命令:
npx prisma db seed
只要终端不报错就代表成功。
我们既可以使用数据库可视化软件插件数据,也可以使用以下命令,prisma 会打开一个操作数据库的本地站点:
npx prisma studio

创建 PrismaClient 模块和服务
使用 nest 命令创建:
nest g mo prisma
nest g s prisma
打开 prisma.service.ts 文件,让 PrismaService 继承自 PrismaClient:
import { PrismaClient } from '@prisma/client';
import { Injectable } from '@nestjs/common';

@Injectable()
export class PrismaService extends PrismaClient {
  constructor() {
    super();
  }
}
我们要将该 PrismaModule 设置成全局,并导出 PrismaService:
import { Global, Module } from '@nestjs/common';
import { PrismaService } from './prisma.service';

@Global()
@Module({
  providers: [PrismaService],
  exports: [PrismaService],
})
export class PrismaModule {}
试用 PrismaService
我们试着在 app.controller.ts 中使用 PrismaService:
import { Controller, Get } from '@nestjs/common';
import { AppService } from './app.service';
import { PrismaService } from './prisma/prisma.service';

@Controller()
export class AppController {
  constructor(
    private readonly appService: AppService,
    // 导入 PrismaService
    private readonly prismatService: PrismaService,
  ) {}

  @Get()
  getHello(): string {
    return this.appService.getHello();
  }

  // 查询所有已经初版的物品
  @Get('products')
  findPublishedProducts() {
    return this.prismatService.product.findMany({
      where: { published: true }
    });
  }
}
[ 可选 ] 连接数据库的方法
Prisma 提供两种连接数据库的方法:
- 惰式:第一次请求时连接
- 显式:通过
prisma.$connect()调用,立即响应第一次请求
惰式适用于大多数情况,如果需要立即响应第一个请求,就需要使用 prisma.$connect() ,编写 prisma.service.ts 代码如下:
import { Injectable, OnModuleDestroy, OnModuleInit } from '@nestjs/common';
import { PrismaClient } from '@prisma/client';

@Injectable()
export class PrismaService
  extends PrismaClient
  implements OnModuleInit, OnModuleDestroy
{
  constructor() {
    super();
  }

  async onModuleInit() {
    await this.$connect();
  }

  async onModuleDestroy() {
    await this.$disconnect();
  }
}
使用 REST API
使用 nest 生成 products 的 REST API:
nest g res products
打开 products.service.ts ,导入 PrismaService:
...
import { PrismaService } from 'src/prisma/prisma.service';

@Injectable()
export class ProductsService {
  constructor(private readonly prismaService: PrismaService) {}
  ...
}
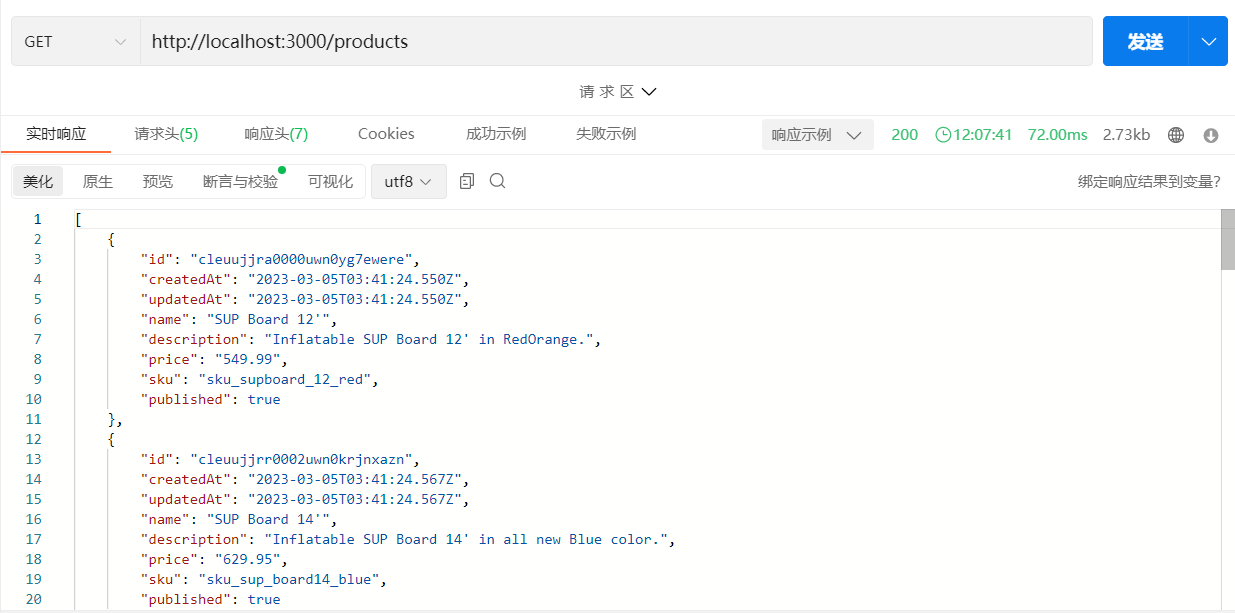
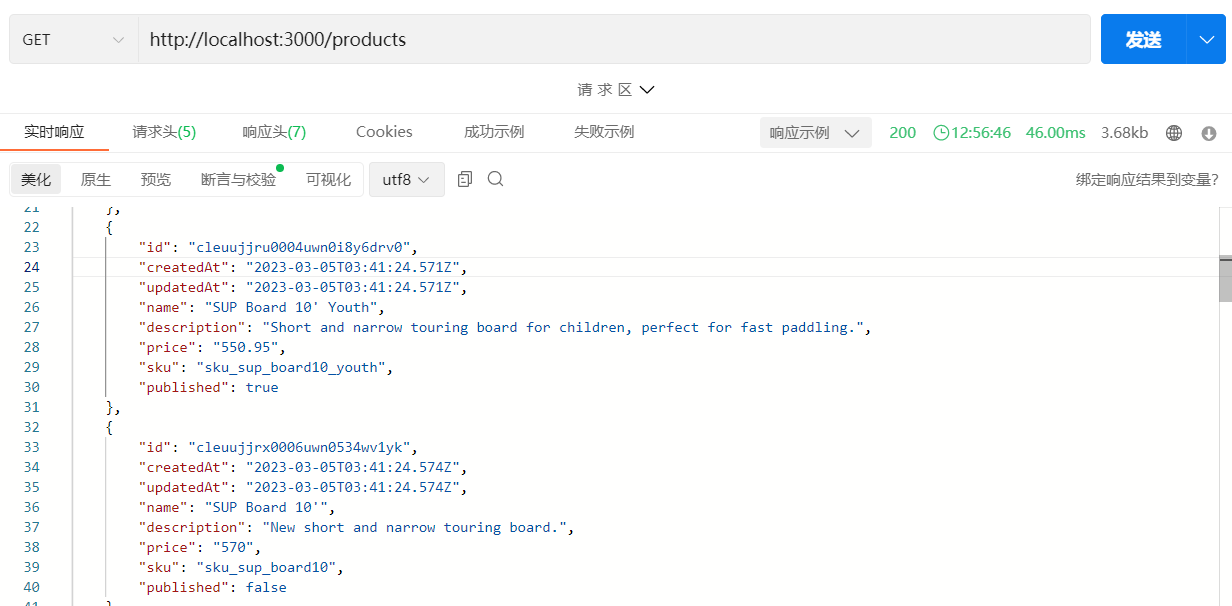
查询
更改 findAll() 方法的代码:
findAll() {
  // findMany 不添加参数查询所有内容
  return this.prismaService.product.findMany();
}
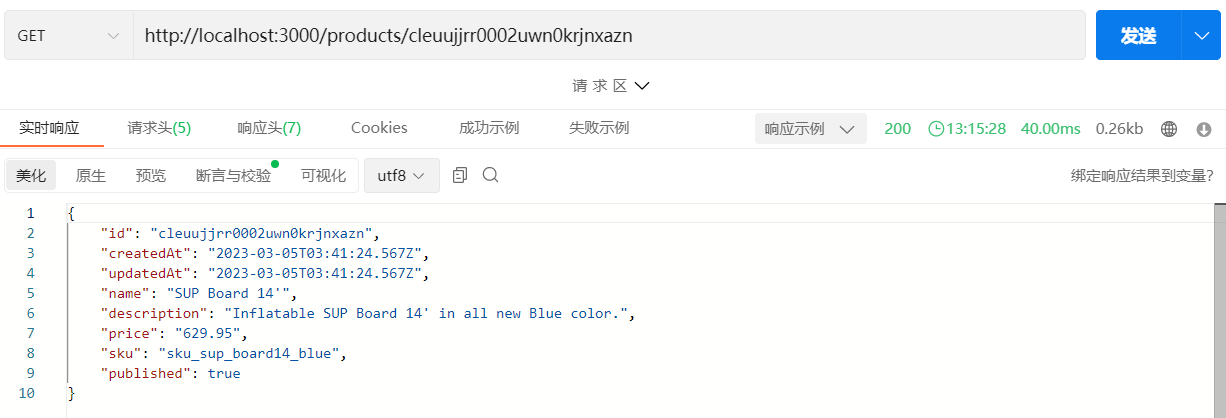
更改 findOne() 方法的代码:
// id 改为 string 类型
findOne(id: string) {
  return this.prismaService.product.findUnique({ where: { id: id } });
}
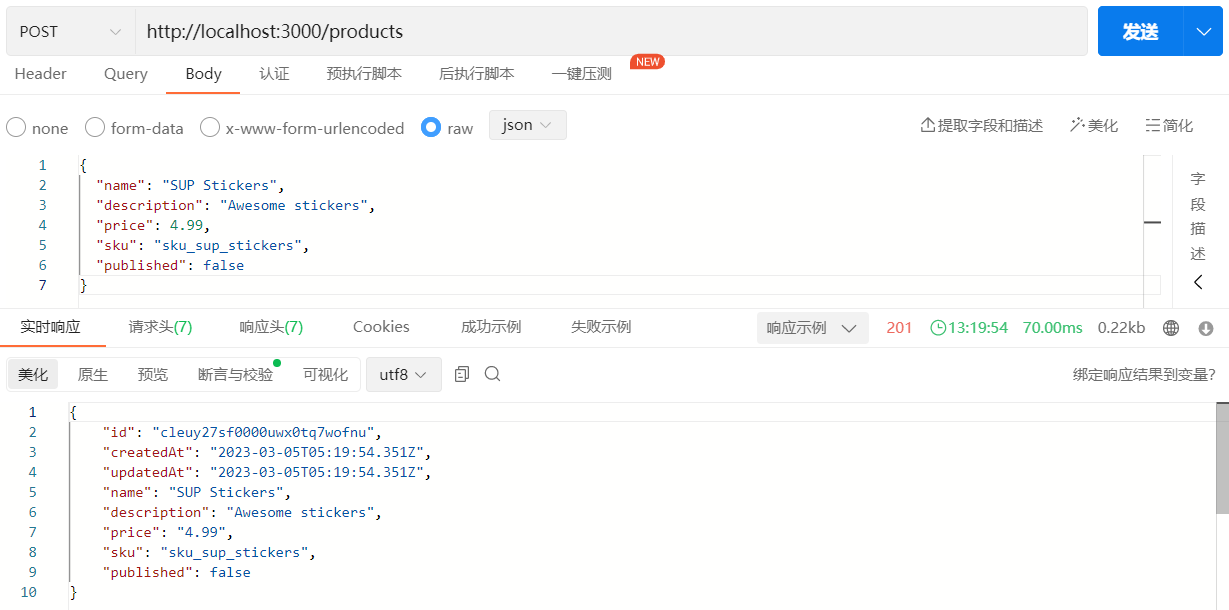
添加
编写 create-product.dto.ts:
export class CreateProductDto {
  name: string;
  description?: string;
  price: number;
  sku: string;
  published?: boolean = false;
}
更改 create() 方法的代码:
create(createProductDto: CreateProductDto) {
  return this.prismaService.product.create({
    data: createProductDto,
  });
}
向该方法传入以下内容:
{
  "name": "SUP Stickers",
  "description": "Awesome stickers",
  "price": 4.99,
  "sku": "sku_sup_stickers",
  "published": false
}
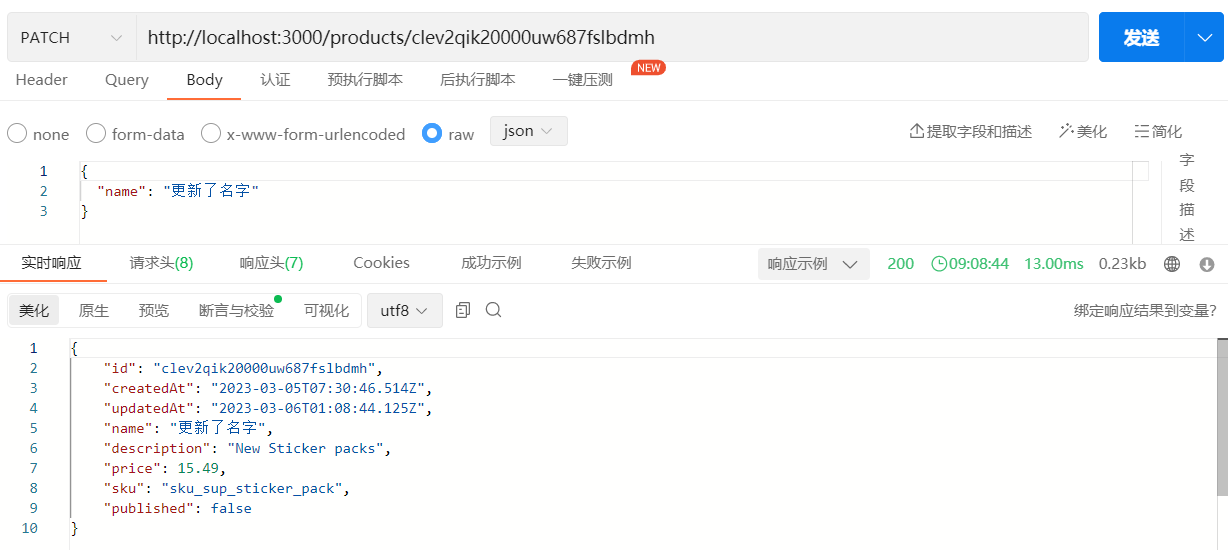
更改
更改 update() 方法的代码:
update(id: string, updateProductDto: UpdateProductDto) {
  return this.prismaService.product.update({
    where: { id: id },
    data: updateProductDto,
  });
}
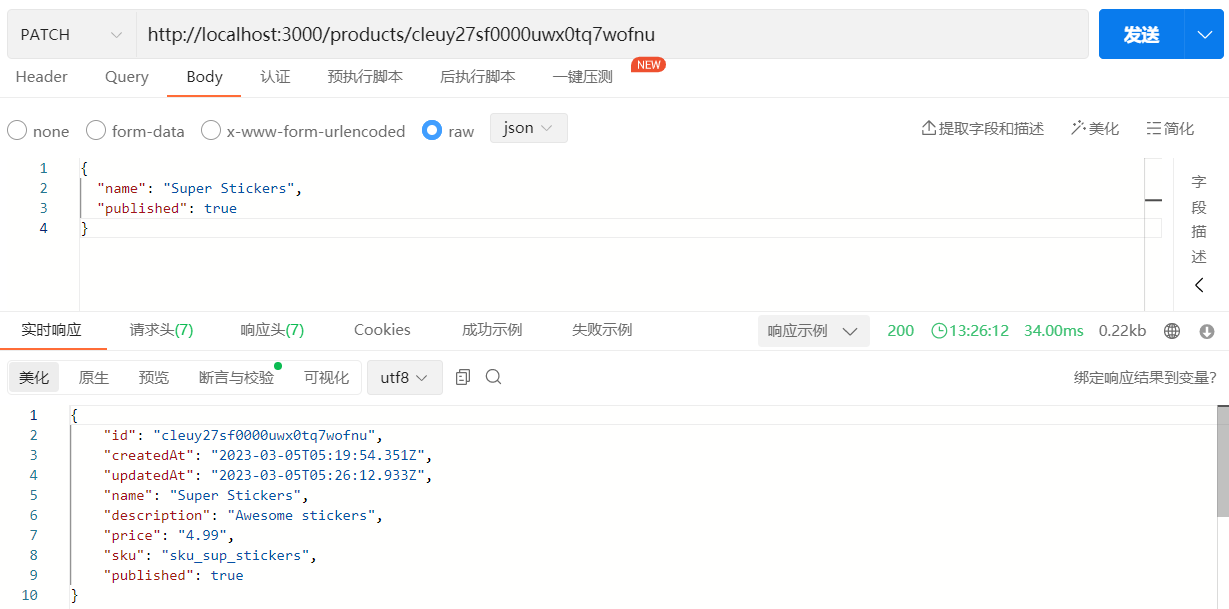
这里直接更改刚才添加的数据,传入的内容如下:
{
  "name": "Super Stickers",
  "published": true
}
删除
更改 remove() 方法的代码:
remove(id: string) {
  return this.prismaService.product.delete({ where: { id: id } });
}

我们调用完该接口后去 Prisma Studio 查看,发现这条数据已经被删除了。
[ 可选 ] 验证和转换
验证
安装验证插件
npm i class-validator class-transformer
在 main.ts 中使用
import { ValidationPipe } from '@nestjs/common';
import { NestFactory } from '@nestjs/core';
import { AppModule } from './app.module';

async function bootstrap() {
  const app = await NestFactory.create(AppModule);
  // 添加下面这行
  app.useGlobalPipes(new ValidationPipe());
  await app.listen(3000);
}
bootstrap();
加入我们传入的参数有以下限制:
name:不能为空,最小长度为 3description:可选,如果设置了最大长度为 150price:最小为 1.0sku:不能为空,最小长度为 5
更改 create-product.dto.ts 代码如下:
import { IsNotEmpty } from 'class-validator';
import {
  IsOptional,
  MaxLength,
  Min,
  MinLength,
} from 'class-validator';

export class CreateProductDto {
  @IsNotEmpty()
  @MinLength(3)
  name: string;

  @IsOptional()
  @MaxLength(150)
  description?: string;

  @Min(1.0)
  price: number;

  @IsNotEmpty()
  @MinLength(5)
  sku: string;

  published?: boolean = false;
}
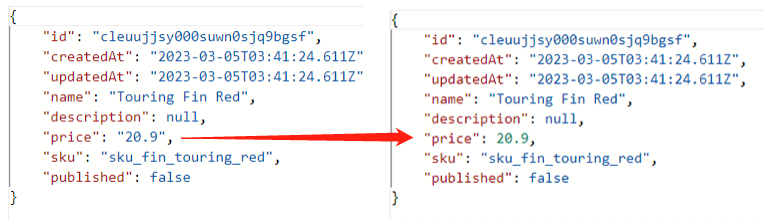
转换
在上面的代码中 price 值以字符串形式返回,但是我们在 schema.prisma 中将其定义为 Decimal,我们需要将它转换为数字。
在 main.st 中使用 ClassSerializerInterceptor:
import { ClassSerializerInterceptor, ValidationPipe } from '@nestjs/common';
import { NestFactory, Reflector } from '@nestjs/core';
import { AppModule } from './app.module';

async function bootstrap() {
  ...
  app.useGlobalInterceptors(new ClassSerializerInterceptor(app.get(Reflector)));
  await app.listen(3000);
}
bootstrap();
对 ProductEntity 的 price 属性应用 @Transform() 装饰器。还必须从 ProductsController 返回 ProductEntity 的实例,否则对象将无法正确序列化。
编写 product.entity.ts 代码如下:
import { Product } from '@prisma/client';
import { Decimal } from '@prisma/client/runtime';
import { Transform } from 'class-transformer';

export class ProductEntity implements Product {
  id: string;
  createdAt: Date;
  updatedAt: Date;
  name: string;
  description: string | null;
  @Transform(({ value }) => value.toNumber())
  price: Decimal;
  sku: string;
  published: boolean;

  constructor(partial: Partial<ProductEntity>) {
    Object.assign(this, partial);
  }
}
在 ProductsControlle 中创建新的 ProductEntity 实例:
@Get(':id')
async findOne(@Param('id') id: string) {
  return new ProductEntity(await this.productsService.findOne(id));
}
更改 product.controller.ts 中所有的返回结果:
import {
  Controller,
  Get,
  Post,
  Body,
  Patch,
  Param,
  Delete,
} from '@nestjs/common';
import { ProductsService } from './products.service';
import { CreateProductDto } from './dto/create-product.dto';
import { UpdateProductDto } from './dto/update-product.dto';
import { ProductEntity } from './entities/product.entity';

@Controller('products')
export class ProductsController {
  constructor(private readonly productsService: ProductsService) {}

  @Post()
  async create(@Body() createProductDto: CreateProductDto) {
    return new ProductEntity(
      await this.productsService.create(createProductDto),
    );
  }

  @Get()
  async findAll() {
    const products = await this.productsService.findAll();
    return products.map((product) => new ProductEntity(product));
  }

  @Get(':id')
  async findOne(@Param('id') id: string) {
    return new ProductEntity(await this.productsService.findOne(id));
  }

  @Patch(':id')
  async update(
    @Param('id') id: string,
    @Body() updateProductDto: UpdateProductDto,
  ) {
    return new ProductEntity(
      await this.productsService.update(id, updateProductDto),
    );
  }

  @Delete(':id')
  async remove(@Param('id') id: string) {
    return new ProductEntity(await this.productsService.remove(id));
  }
}
错误处理
因为上面我们已经把新添加的内容删除了,所以我们传入以下参数调用两次 Post 接口的 create 方法:
{
  "name": "SUP Stickers Pack",
  "description": "New Sticker packs",
  "price": 15.49,
  "sku": "sku_sup_sticker_pack",
  "published": true
}
第二次调用的时候服务器返回以下错误:
{
	"statusCode": 500,
	"message": "Internal server error"
}
创建异常过滤器
使用 nest 创建一个异常过滤器:
nest g f prisma-client-exception
更改 prisma-client-exception.filter.ts 代码如下:
import { ArgumentsHost, Catch } from '@nestjs/common';
import { BaseExceptionFilter } from '@nestjs/core';
import { Prisma } from '@prisma/client';

@Catch(Prisma.PrismaClientKnownRequestError)
export class PrismaClientExceptionFilter extends BaseExceptionFilter {
  catch(exception: Prisma.PrismaClientKnownRequestError, host: ArgumentsHost) {
    super.catch(exception, host);
  }
}
前面返回错误是因为我们在 schema.prisma 中定义了 sku String @unique,而 unique constraint 的错误代码是 P2002。
我们在 prisma-client-exception.filter.ts 中添加如下代码:
import { ArgumentsHost, Catch, HttpStatus } from '@nestjs/common';
import { BaseExceptionFilter } from '@nestjs/core';
import { Prisma } from '@prisma/client';
import { Response } from 'express';

@Catch(Prisma.PrismaClientKnownRequestError)
export class PrismaClientExceptionFilter extends BaseExceptionFilter {
  catch(exception: Prisma.PrismaClientKnownRequestError, host: ArgumentsHost) {
    const ctx = host.switchToHttp();
    const response = ctx.getResponse<Response>();

    switch (exception.code) {
      case 'P2002':
        const status = HttpStatus.CONFLICT;
        const message = exception.message.replace(/\n/g, '');
        response.status(status).json({
          statusCode: status,
          message: message,
        });
        break;
      default:
        // 默认的500错误
        super.catch(exception, host);
        break;
    }
  }
}
应用异常过滤器
在 main.ts 添加以下内容:
import { PrismaClientExceptionFilter } from './prisma-client-exception/prisma-client-exception.filter';
import { ClassSerializerInterceptor, ValidationPipe } from '@nestjs/common';
import { HttpAdapterHost, NestFactory, Reflector } from '@nestjs/core';
import { AppModule } from './app.module';

async function bootstrap() {
  ...
  const { httpAdapter } = app.get(HttpAdapterHost);
  app.useGlobalFilters(new PrismaClientExceptionFilter(httpAdapter));
  await app.listen(3000);
}
bootstrap();
再次发送请求,会获得如下结果:

除了以上错误以外,还有以下会出现的错误:
update和delete的 Record not foundcreate和update的 Value too long for the column
自行查看文档修正。
分页
该内容可以不必阅读,prisma 中的 findMany 支持分页查询功能,使用的是
skip和take两个参数。具体内容可查看 中文文档 或 英文文档。以下方法和官方分页功能区别在于使用的是 ID 分页,如有需求可以参考。
为项目安装 prisma-relay-cursor-connection:
npm i @devoxa/prisma-relay-cursor-connection
该包提供了 findManyCursorConnection,它通过验证连接参数和创建页面响应扩展了 findMany 方法。
连接参数有以下几种:
{}:所有记录{first: number}:前 number 条数据{first: number, after: string}:id 为 string 后的 number 条数据{last: number}:后 number 条数据{last: number, before: string}:id 为 string 前的 number 条数据
在 product.controller.ts 中创建一个新路由(该方法要写在@Get(':id') 前面):
@Get('page')
async findPage() {
	return this.productsService.findPage();
}
在 product.service.ts 编写 findPage 方法:
findPage() {
  return findManyCursorConnection(
    // args 包含 take、skip 和 cursor
    (args) => this.prismaService.product.findMany(args),
    () => this.prismaService.product.count(),
    // 返回所有的 products
    {},
  );
}
通过 published 过滤
在 findMany() 和 count() 中使用 where 来进行过滤:
findPage() {
  const where: Prisma.ProductWhereInput = {
    published: true,
  };
  return findManyCursorConnection(
    (args) =>
      this.prismaService.product.findMany({
        ...args, // 应用分页参数
        where,
      }),
    () =>
      this.prismaService.product.count({
        where, // 应用分页参数
      }),
    {},
  );
}
添加连接参数作为查询参数
创建一个 ConnectionArgs,新建一个 src/page/connection-args.dto.ts 文件,添加如下代码:
export class ConnectionArgs {
  first?: number;
  last?: number;
  after?: string;
  before?: string;
}
在 product.controller.ts 和 product.service.ts 中的 findPage() 方法中添加 ConnectionArgsDto 做为参数:
// product.controller.ts
@Get('page')
async findPage(@Query() connectionArgs: ConnectionArgs) {
  return this.productsService.findPage(connectionArgs);
}
// product.service.ts
findPage(connectionArgs: ConnectionArgs) {
  const where: Prisma.ProductWhereInput = {
    published: true,
  };
  return findManyCursorConnection(
    (args) =>
      this.prismaService.product.findMany({
        ...args,
        where,
      }),
    () =>
      this.prismaService.product.count({
        where,
      }),
    connectionArgs, // 更改这里
  );
}
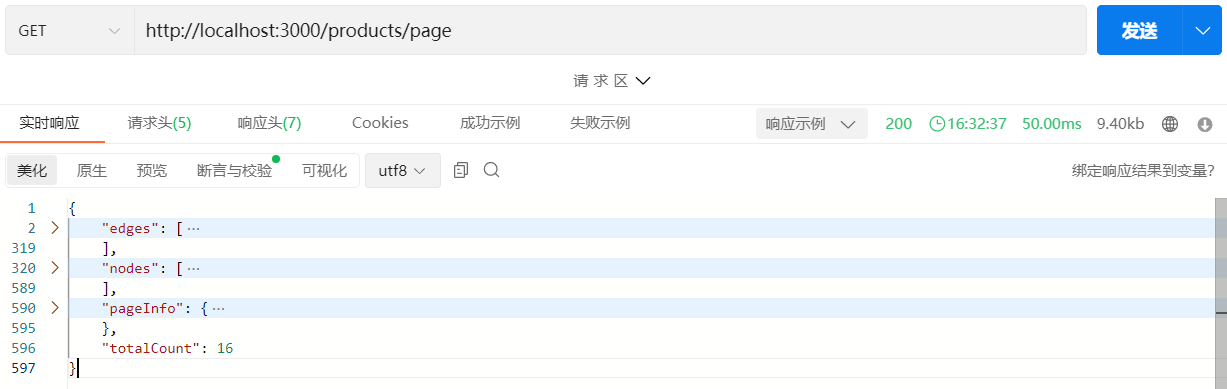
如果我们什么都不填,会返回所有数据。我们把 first 设置为 10 查看一下响应的内容:
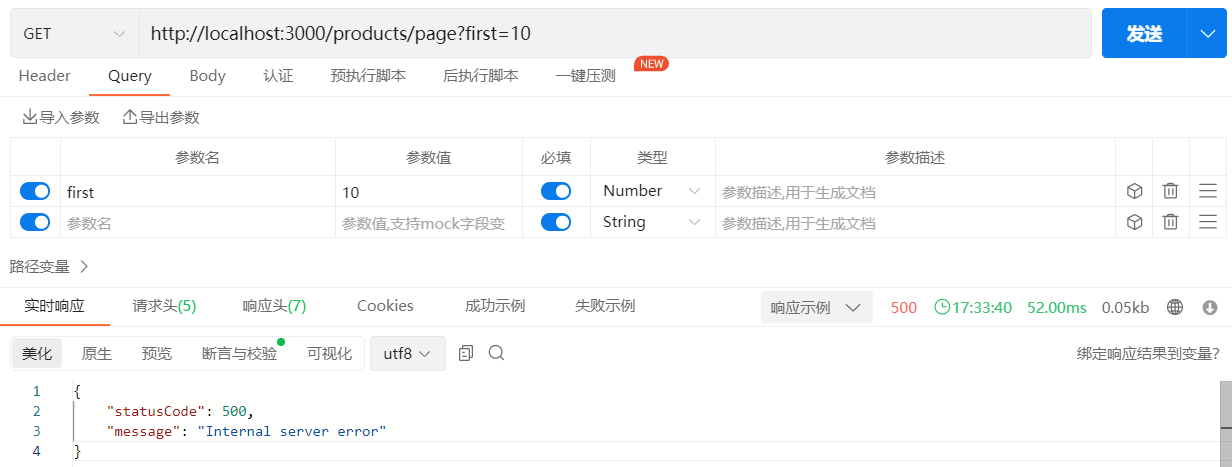
服务器返回 500 错误,我们可以打开终端查看具体错误是什么:
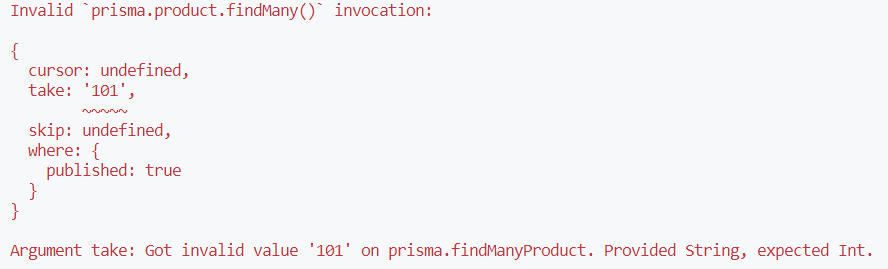
看起来查询参数 first 被解析为 String 而不是 Number。findManyCursorConnection 将 first 加 +1 来知道是否有下一页可用。你可以看到 findMany 接收到的 String 为 101 ('10' + 1 = '101')。
原因是查询参数总是被 Nest 解析为 String。
将查询参数转换为数字
在 Nest 中我们使用 ValidationPipe 来进行转换,一共有以下两种方法:
-
隐式
在 main.ts 中进行设置:
import { PrismaClientExceptionFilter } from './prisma-client-exception/prisma-client-exception.filter'; import { ClassSerializerInterceptor, ValidationPipe } from '@nestjs/common'; import { HttpAdapterHost, NestFactory, Reflector } from '@nestjs/core'; import { AppModule } from './app.module'; async function bootstrap() { const app = await NestFactory.create(AppModule); app.useGlobalPipes( new ValidationPipe({ transform: true, transformOptions: { enableImplicitConversion: true, }, }), ); ... } bootstrap(); -
显式
先在 main.ts 中开启:
import { PrismaClientExceptionFilter } from './prisma-client-exception/prisma-client-exception.filter';
import { ClassSerializerInterceptor, ValidationPipe } from '@nestjs/common';
import { HttpAdapterHost, NestFactory, Reflector } from '@nestjs/core';
import { AppModule } from './app.module';

async function bootstrap() {
  const app = await NestFactory.create(AppModule);
  app.useGlobalPipes(
    new ValidationPipe({
      transform: true,
    }),
  );
  ...
}
bootstrap();
再在需要转换的参数添加
@Type()装饰器:import { Type } from 'class-transformer'; import { IsOptional, IsString, IsNumber } from 'class-validator'; export class ConnectionArgs { @Type(() => Number) first?: number; @Type(() => Number) last?: number; ... }
为 ConnectionArgs 中的所有参数都添加上验证装饰器:
import { IsOptional, IsString, IsNumber } from 'class-validator';

export class ConnectionArgs {
  @IsOptional()
  @IsNumber()
  first?: number;

  @IsOptional()
  @IsNumber()
  last?: number;

  @IsOptional()
  after?: string;

  @IsOptional()
  before?: string;
}
响应类型
在 page 目录中创建一个新的 Page<Record> DTO 类,具有以下属性:
// src/page/edge.dto.ts
export class Edge<Record> {
  cursor: string;
  node: Record;
}
// src/page/page-info.dto.ts
export class PageInfo {
  hasNextPage: boolean;
  hasPreviousPage: boolean;
  startCursor?: string;
  endCursor?: string;
}
// src/page/page.dto.ts
import { Edge } from './edge.dto';
import { PageInfo } from './page-info.dto';

export class Page<Record> {
  edges: Edge<Record>[];
  pageInfo: PageInfo;
  totalCount: number;
}
另外值得一提的是,price 属性是作为页面路由的字符串返回的,因为它不是作为ProductEntity实例返回的。findManyCursorConnection 允许你为获取的记录写一个映射函数。
将产品映射到ProductEntity的实例,并创建返回的Page对象的实例。
先在 src/page/page.dto.ts 中添加以下代码:
...

export class Page<Record> {
  ...
  constructor(partial: Partial<Page<Record>>) {
    Object.assign(this, partial);
  }
}
更改 findPage() 方法中的代码:
async findPage(connectionArgs: ConnectionArgs) {
  const where: Prisma.ProductWhereInput = {
    published: true,
  };
  const productPage = await findManyCursorConnection(
    (args) =>
      this.prismaService.product.findMany({
        ...args,
        where,
      }),
    () =>
      this.prismaService.product.count({
        where,
      }),
    connectionArgs,
    {
      recordToEdge: (record) => ({
        node: new ProductEntity(record),
      }),
    },
  );
  return new Page<ProductEntity>(productPage);
}
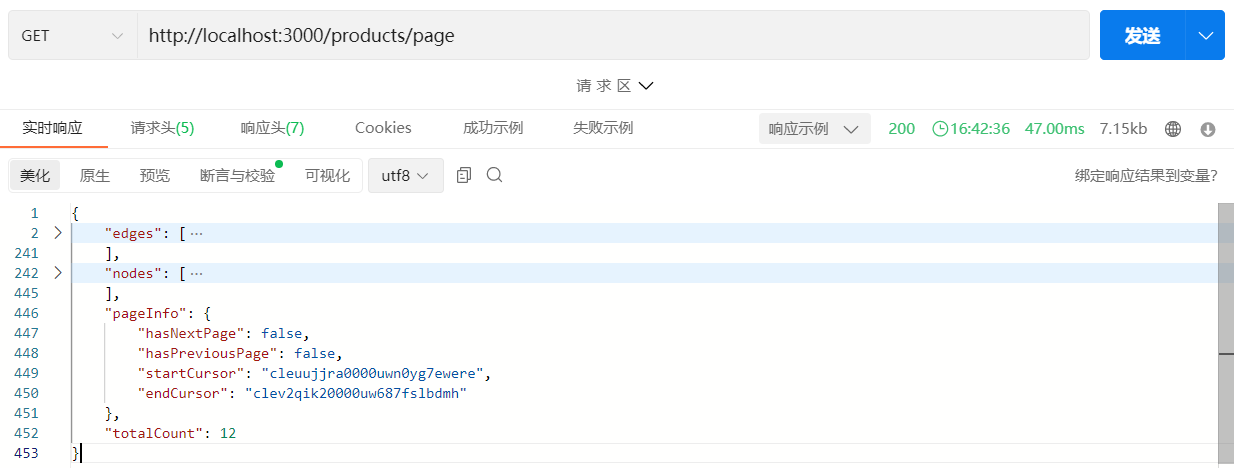
现在我们调用 http://localhost:3000/products/page?first=10 就会获得前 10 条数据,可以自行数一下。
我这里把 first 改成 2 来看下效果:
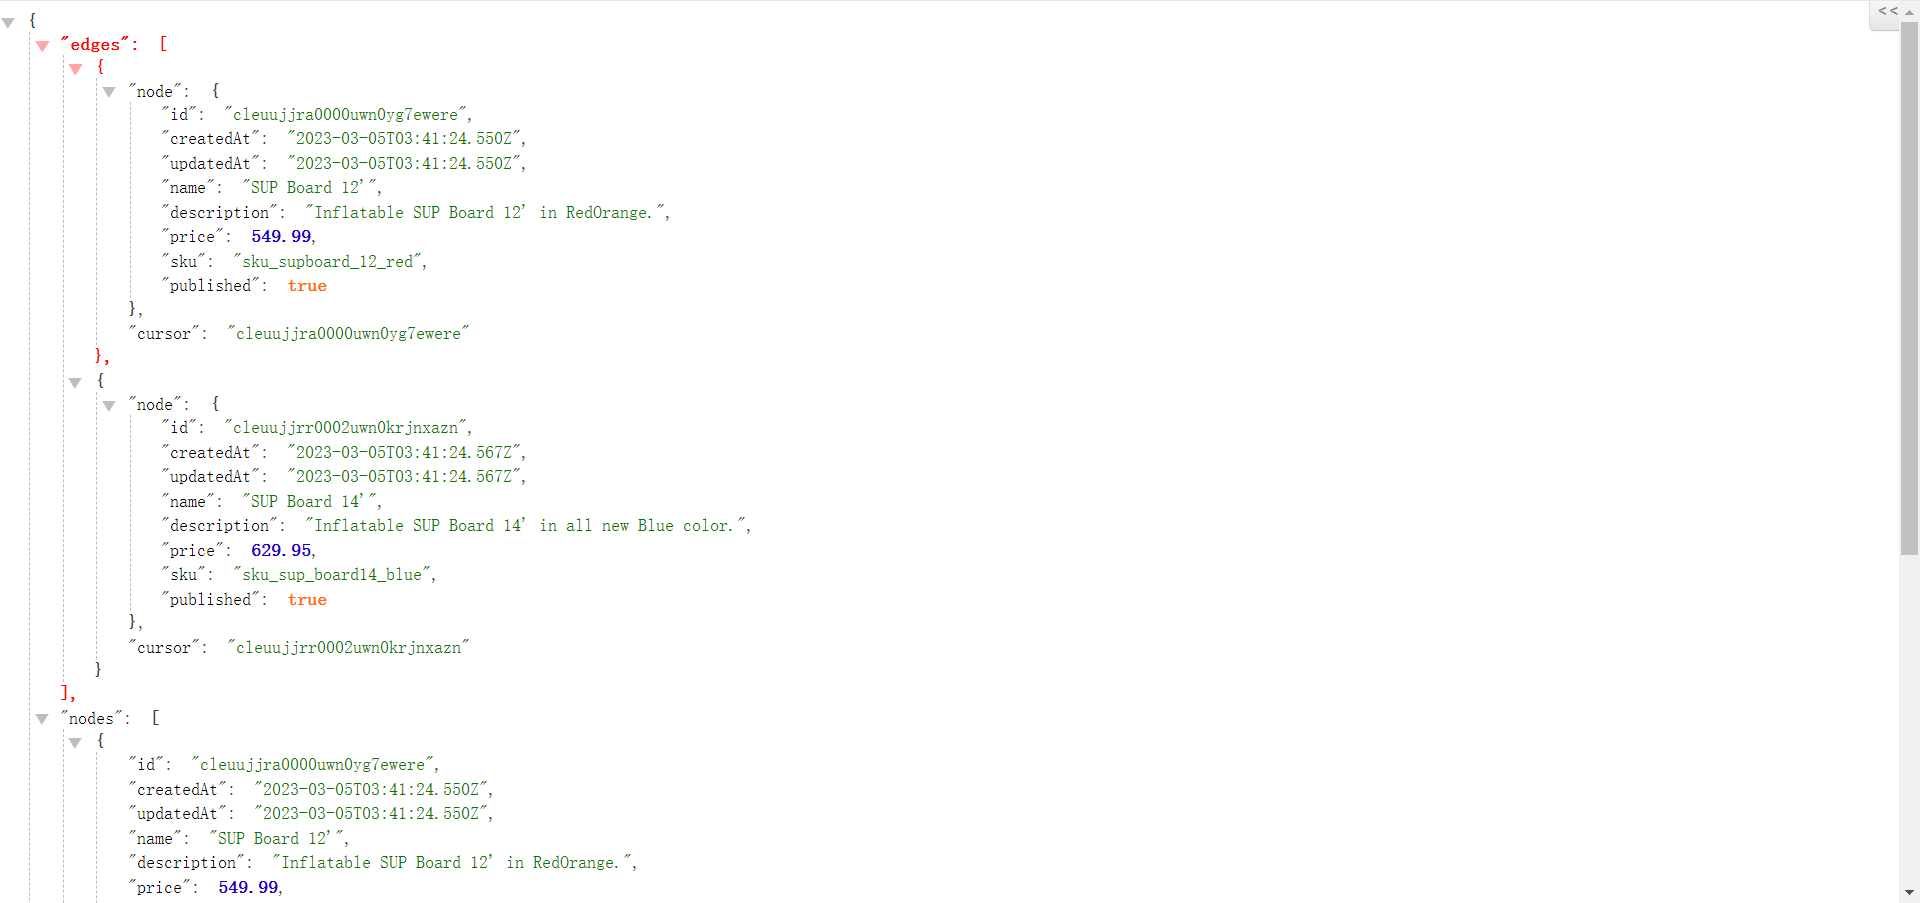
和数据库对照了一下,返回的确实是前 2 条数据。
调用 http://localhost:3000/products/page?first=2&after=cleuujjrr0002uwn0krjnxazn 会返回第3、4条数据。
身份验证
这里使用 passport-jwt 实现 JSON Web Token (JWT) 身份验证。
先安装 passport 包:
npm install --save @nestjs/passport passport @nestjs/jwt passport-jwt
npm install --save-dev @types/passport-jwt
在 schema.prisma 中添加新的 User model:
model User {
  id       String   @id @default(cuid())
  createAt DateTime @default(now())
  updateAt DateTime @updatedAt

  name     String?
  email    String  @unique
  password String
}
执行新的 Prisma Migrate:
npx prisma migrate dev --name user
然后再执行
npx prisma studio
就可以在浏览器查看
生成 auth 资源
使用 Nest 命令生成
nest g res auth
配置 Passport
要使用 Passport,你需要将 PassportModule 和 JwtModule 导入 AuthModule。JWT 令牌需要一个密钥来进行签名和验证。在JwtModule 上配置 secret key 和 60s 过期选项。
在 .env 文件中添加以下内容:
JWT_SECRET = 'prismainnestjs';
在 auth.module.ts 配置:
import { Module } from '@nestjs/common';
import { AuthService } from './auth.service';
import { AuthController } from './auth.controller';
import { JwtModule } from '@nestjs/jwt';
import { PassportModule } from '@nestjs/passport';

@Module({
  imports: [
    PassportModule,
    JwtModule.register({
      secret: process.env.JWT_SECRET,
      signOptions: { expiresIn: '60s' }, // e.g. 7d, 24h
    }),
  ],
  controllers: [AuthController],
  providers: [AuthService],
})
export class AuthModule {}
在新生成的 AuthController 中实现登录路由,该 AuthController 接收用户的登录凭据(电子邮件和密码),并在成功时返回 JWT 访问令牌。
在 auth/dto 下创建 LoginDto,代码如下:
import { IsNotEmpty } from 'class-validator';

export class LoginDto {
  @IsNotEmpty()
  email: string;

  @IsNotEmpty()
  password: string;
}
以 accessToken 作为响应创建身份验证实体。在 auth/entities/auth.entity.ts 在添加如下代码:
import { ApiProperty } from '@nestjs/swagger';

export class Auth {
  @ApiProperty()
  accessToken: string;
}
在 auth.service.ts 和 auth.controller.ts 中创建 login 方法:
// auth.service.ts
import { Injectable } from '@nestjs/common';

@Injectable()
export class AuthService {
  login(email: string, password: string) {}
}
// auth.controller.ts
@Post('login')
login(@Body() { email, password }: LoginDto) {
  return this.authService.login(email, password);
}
实现 AuthService 中 login 的逻辑:
- 注入 PrismaService 和 JwtService
- 获取电子邮件的唯一用户,如果电子邮件未使用,则抛出
404异常 - 验证密码,如果密码无效则抛出
401异常 - 生成签名用户id的JWT令牌
import { Auth } from './entities/auth.entity';
import { PrismaService } from './../prisma/prisma.service';
import {
  Injectable,
  NotFoundException,
  UnauthorizedException,
} from '@nestjs/common';
import { JwtService } from '@nestjs/jwt';

@Injectable()
export class AuthService {
  constructor(
    private readonly prismaService: PrismaService,
    private readonly jwtService: JwtService,
  ) {}

  async login(email: string, password: string) {
    const user = await this.prismaService.user.findUnique({ where: { email } });
    if (!user) {
      throw new NotFoundException(`No user found for email: ${email}`);
    }

    // 实际开发中需要使用 bcrypt 这样的库来加密密码
    const passwordValid = user.password === password;
    if (!passwordValid) {
      throw new UnauthorizedException('Invalid password');
    }

    return {
      accessToken: this.jwtService.sign({ userId: user.id }),
    };
  }
}
我们在 prisma studio 插入一条数据:
name: Bobemail: bob@shop.compassword: qwer1234(实际开发中使用像 bcrypt 这样的库进行加密存储)
然后调用登录接口:

创建 JwtStrategy
下一步是创建 JwtStrategy,该策略需要受保护路由的有效 JWT 令牌。passport-jwt 提供了验证 JWT 令牌并传递令牌有效载荷的策略。
首先在 auth 目录中创建一个 JwtStrategy 类,然后执行以下步骤:
//src/auth/jwt.strategy.ts
import { Injectable } from '@nestjs/common';

@Injectable()
export class JwtStrategy {}
-
从
@nestjs/passport中继承 PassportStrategy 并从 passport-jwt 中传递 Strategy -
在通过
super()传递选项的构造器中初始化 Strategy-
jwtFromRequest:使用
ExtractJwt.fromAuthHeaderAsBearerToken()这是接收不记名令牌的标准方法 -
secretOrKey:对 JwtModule 使用相同的密钥
-
-
注入 AuthService 并验证 userId 是否存在
-
将 JwtStrategy 添加到 AuthModule 的 providers 数组中
在 auth.service.ts 中创建一个验证用户的方法:
validateUser(userId: string) {
  return this.prismaService.user.findUnique({ where: { id: userId } });
}
修改 jwt.strategy.ts 中的代码如下:
import { Injectable, UnauthorizedException } from '@nestjs/common';
import { PassportStrategy } from '@nestjs/passport';
import { ExtractJwt, Strategy } from 'passport-jwt';
import { AuthService } from './auth.service';

@Injectable()
export class JwtStrategy extends PassportStrategy(Strategy) {
  constructor(private readonly authService: AuthService) {
    super({
      jwtFromRequest: ExtractJwt.fromAuthHeaderAsBearerToken(),
      secretOrKey: process.env.JWT_SECRET,
    });
  }

  async validate(payload: { userId: string }) {
    const user = await this.authService.validateUser(payload.userId);
    if (!user) {
      throw new UnauthorizedException();
    }
    return user;
  }
}
在 auth.module.ts 中添加 JwtStrategy:
...
import { JwtStrategy } from './jwt.strategy';

@Module({
  ...
  providers: [AuthService, JwtStrategy],
})
export class AuthModule {}
创建 JwtAuthGuard 并保护路由
你可以使用 Nest 命令生成一个守卫:
nest g gu jwt-auth
也可以自己手动建一个文件。这里在 auth 文件夹下新建了一个 **jwt-auth.guard.ts **文件。
这里只需要一个由 @nestjs/passport 提供的 AuthGuard 继承的简单守卫类。将策略名称 jwt 传递给 AuthGuard。
// jwt-auth.guard.ts
import { Injectable } from '@nestjs/common';
import { AuthGuard } from '@nestjs/passport';

@Injectable()
export class JwtAuthGuard extends AuthGuard('jwt') {}
在 product.controller.ts 中为每个拥有 @UseGuards() 装饰器的路由应用 JwtAuthGuard:
POST /productsPATCH /products/:idDELETE /products/:id
import { JwtAuthGuard } from './../auth/jwt-auth.guard';
import {
  Controller,
  Get,
  Post,
  Body,
  Patch,
  Param,
  Delete,
  Query,
  UseGuards,
} from '@nestjs/common';
...

@Controller('products')
export class ProductsController {
  ...

  @UseGuards(JwtAuthGuard)
  @Post()
  async create(@Body() createProductDto: CreateProductDto) {
    return new ProductEntity(
      await this.productsService.create(createProductDto),
    );
  }

 ...

  @UseGuards(JwtAuthGuard)
  @Patch(':id')
  async update(
    @Param('id') id: string,
    @Body() updateProductDto: UpdateProductDto,
  ) {
    return new ProductEntity(
      await this.productsService.update(id, updateProductDto),
    );
  }

  @UseGuards(JwtAuthGuard)
  @Delete(':id')
  async remove(@Param('id') id: string) {
    return new ProductEntity(await this.productsService.remove(id));
  }
}
现在我们试一下调用这些被保卫的路由看看效果:
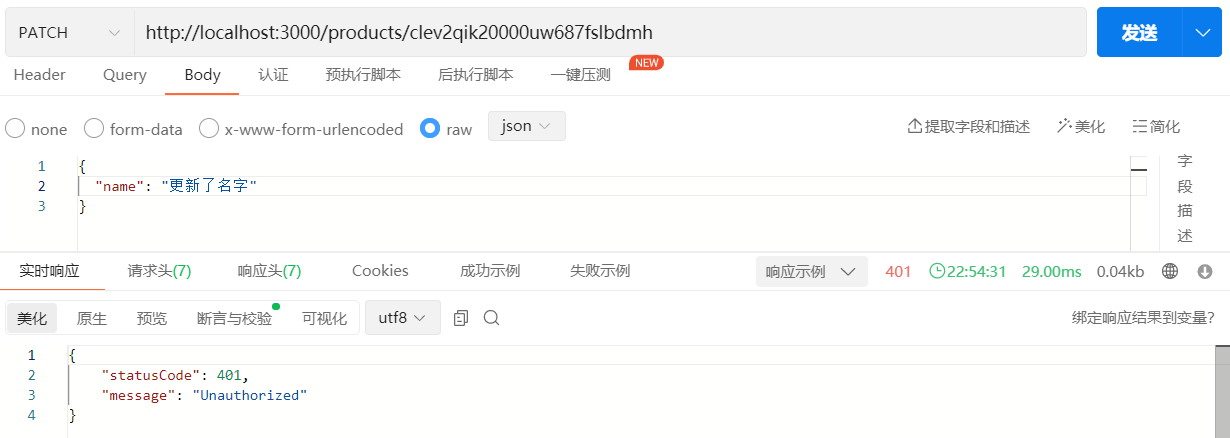
我们先登录一下,让后将响应的 token 复制下来(在验证前先将 auth.module.ts 中的过期时间改长一点),我这里使用的是 apipost,复制下来的 token 需要放到认证中:

然后再发送请求:

 浙公网安备 33010602011771号