
NestJS学习笔记
起步
要想使用 nest 需要先安装依赖
# 全局安装
npm i -g @nestjs/cli
# 局部安装
npm i -g @nestjs/cli
创建需要使用以下命令(如果使用局部安装,每次使用 nest 命令都需要加上 npx)
# 全局安装
nest new project-name
# 局部安装
npx nest new project-name
将会创建 project-name 目录, 安装 node_modules 和一些其他样板文件,并将创建一个 src 目录,目录中包含几个核心文件。
src
 ├── app.controller.spec.ts
 ├── app.controller.ts
 ├── app.module.ts
 ├── app.service.ts
 └── main.ts
以下是这些核心文件的简要概述:
| app.controller.ts | 带有单个路由的基本控制器示例。 |
|---|---|
| app.controller.spec.ts | 对于基本控制器的单元测试样例 |
| app.module.ts | 应用程序的根模块。 |
| app.service.ts | 带有单个方法的基本服务 |
| main.ts | 应用程序入口文件。它使用 NestFactory 用来创建 Nest 应用实例。 |
创建好之后我们直接运行
npm run start:dev
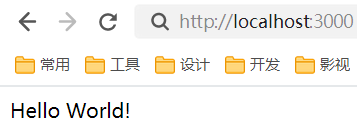
之后就可以在 http://localhost:3000 查看运行结果
控制器
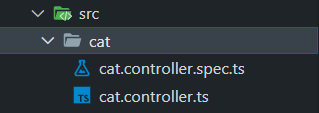
我们可以通过以下命令创建一个控制器
nest g co cat
路由
我们打开 cat.controller.ts 可以看到以下代码
import { Controller } from '@nestjs/common';

@Controller('cat')
export class CatController { }
其中 @Controller 装饰器中的 cat 就是一个路由。我们在里面编写一些代码
import { Controller } from '@nestjs/common';

@Controller('cat')
export class CatController {
    @Get()
    findAll(): string {
        return 'This action returns all cats';
    }
}
我们输入新创建的路由地址
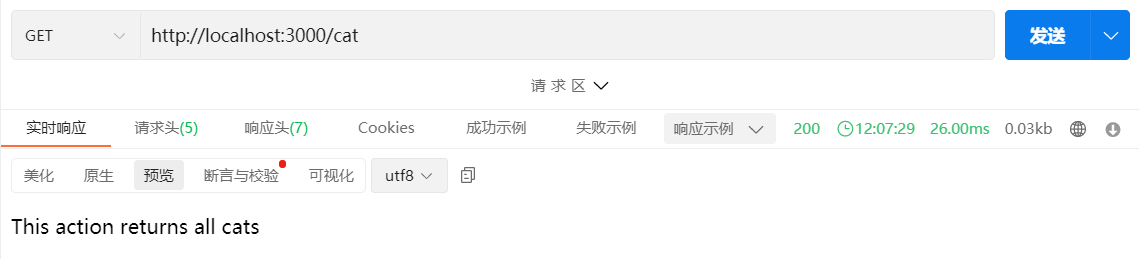
就可以得到我们返回的结果
请求参数
Get请求
我们可以通过 @Query 获取到 Get 请求的参数
DTO
使用以下命令生成
nest g class cat/dto/create-cat.dto --no-spec
nest g class cat/dto/update-cat.dto --no-spec
编写代码
// create-cat.dto.ts
export class CreateCoffeeDto {
  readonly name: string;
  readonly brand: string;
  readonly flavors: string[];
}

// update-cat.dto.ts
export class UpdateCoffeeDto {
  readonly name?: string;
  readonly brand?: string;
  readonly flavors?: string[];
}
类验证器
配置
import { ValidationPipe } from '@nestjs/common';

async function bootstrap() {
  ...
  app.useGlobalPipes(new ValidationPipe());
  ...
}
  ...
安装
npm i class-validator class-transformer
使用
import { IsString } from 'class-validator';

export class CreateCoffeeDto {
  @IsString()
  readonly name: string;

  @IsString()
  readonly brand: string;

  @IsString({ each: true })
  readonly flavors: string[];
}
减少冗余的代码
安装
npm i @nestjs/mapped-types
使用
import { CreateCoffeeDto } from './create-coffee.dto';
import { PartialType } from '@nestjs/mapped-types';

// 可以继承括号里类的多有代码
export class UpdateCoffeeDto extends PartialType(CreateCoffeeDto) {}
默认所有值都是可选的
白名单
可以过滤掉所有不应该接受的属性
import { ValidationPipe } from '@nestjs/common';

async function bootstrap() {
  ...
  app.useGlobalPipes(new ValidationPipe({
      whitelist: true,
  }));
  ...
}
  ...
使用
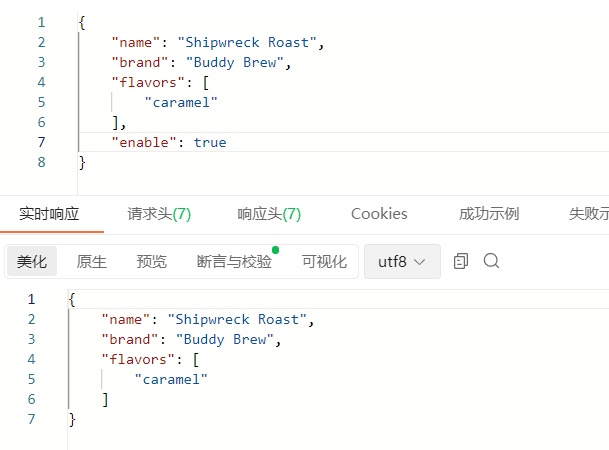
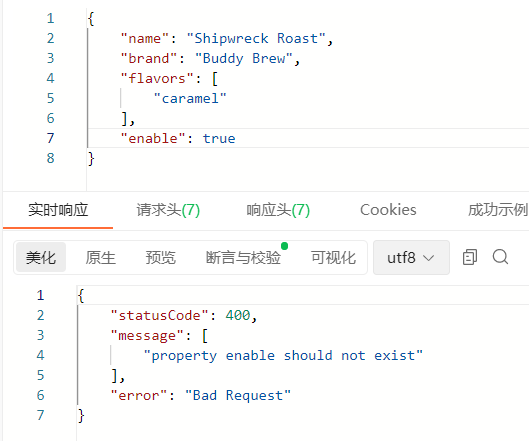
可以设置多余的属性报错
async function bootstrap() {
  ...
  app.useGlobalPipes(new ValidationPipe({
      whitelist: true,
      forbidNonWhitelisted: true,
  }));
  ...
}
转换请求
可以自动转换请求为我们所需要的实例
@Post()
create(@Body() createCoffeeDto: CreateCoffeeDto) {
  console.log(createCoffeeDto instanceof CreateCoffeeDto);  // false
  return this.coffeeService.create(createCoffeeDto);
}
默认我们获取到的不是我们所需要的实例。可以在 main.ts 中开启:
...
app.useGlobalPipes(new ValidationPipe({
  whitelist: true,
  forbidNonWhitelisted: true,
  transform: true
}));
...
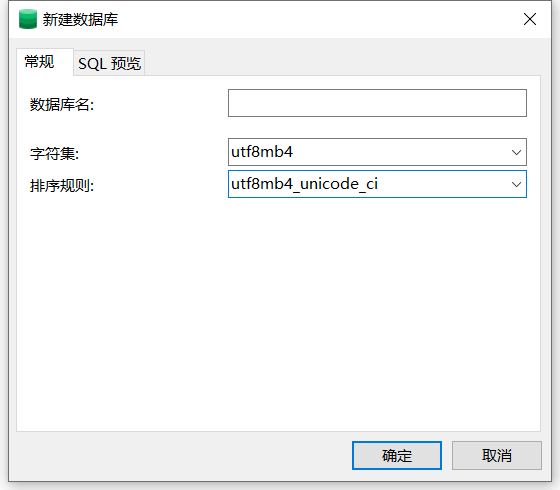
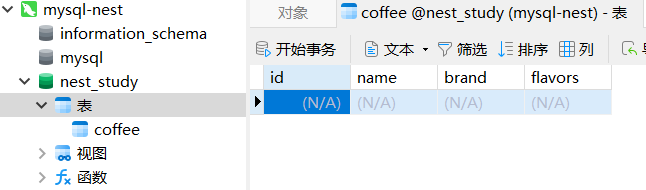
数据库
数据库使用的是MySQL,查看数据库的软件 Navicat 创建数据库
TypeORM
安装
npm install --save @nestjs/typeorm typeorm mysql2
配置
// app.module.ts
...
import { TypeOrmModule } from '@nestjs/typeorm';

@Module({
  imports: [
    ...
    TypeOrmModule.forRoot({
      type: 'mysql', //数据库类型
      username: 'root', //账号
      password: '0000', //密码
      host: 'localhost', //host
      port: 3306, //
      database: 'nest_study', //库名
      entities: [__dirname + '/**/*.entity{.ts,.js}'], //实体文件
      synchronize: true, //synchronize字段代表是否自动将实体类同步到数据库
      retryDelay: 500, //重试连接数据库间隔
      retryAttempts: 10, //重试连接数据库的次数
      autoLoadEntities: true, //如果为true,将自动加载实体 forFeature()方法注册的每个实体都将自动添加到配置对象的实体数组中
    }),
  ],
  ...
})
export class AppModule {}
创建
// entities/coffee.ts

import { Column, Entity, PrimaryGeneratedColumn } from 'typeorm';

@Entity()
export class Coffee {
  @PrimaryGeneratedColumn()
  id: number;

  @Column()
  name: string;

  @Column()
  brand: string;

  @Column('json', { nullable: true })
  flavors: string[];
}
注册
// coffee.module.ts

import { Coffee } from './entities/coffee.entity';
import { TypeOrmModule } from '@nestjs/typeorm';
import { CoffeeService } from './coffee.service';
import { CoffeeController } from './coffee.controller';
import { Module } from '@nestjs/common';

@Module({
  imports: [TypeOrmModule.forFeature([Coffee])],
  controllers: [CoffeeController],
  providers: [CoffeeService],
})
export class CoffeeModule {}
使用
在 coffee.service.ts 中进行操作
- 导入
constructor(
  @InjectRepository(Coffee)
  private readonly coffeeRepository: Repository<Coffee>,
) {}
- 使用
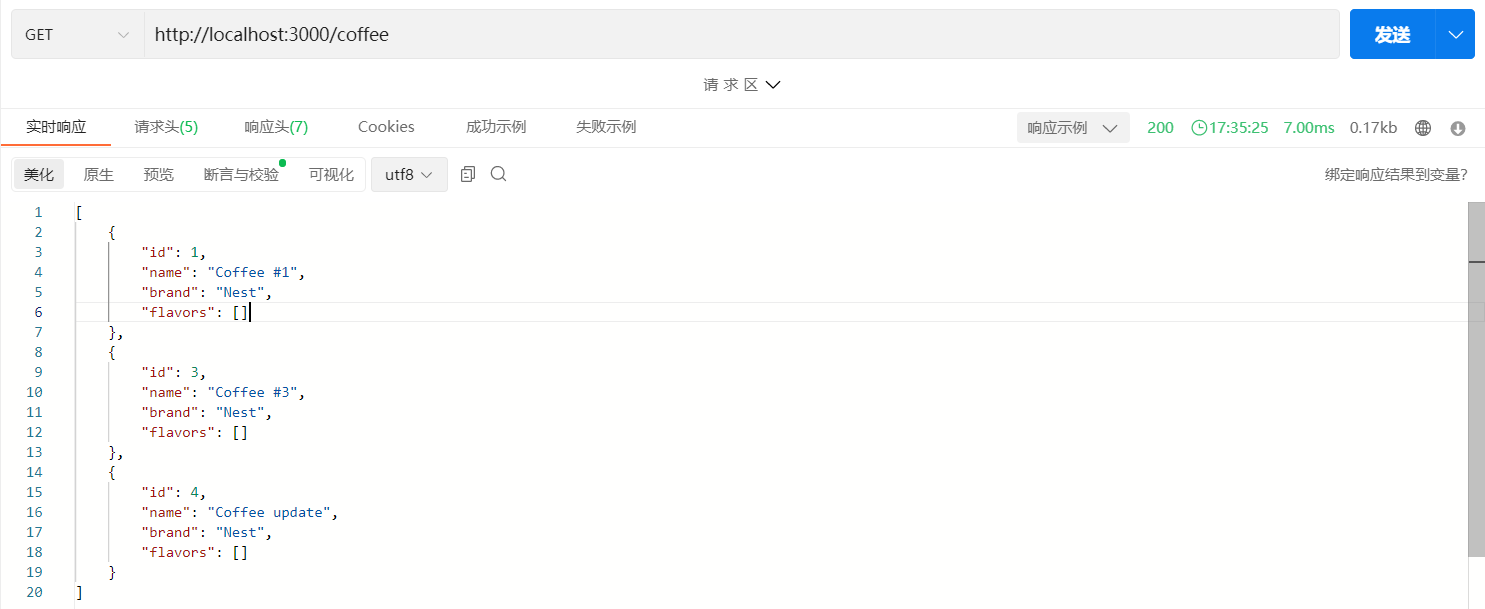
findAll() {
  return this.coffeeRepository.find();
}

async findOne(id: number) {
  const coffee = await this.coffeeRepository.findOne({where: { id }});
  if (!coffee) {
    throw new NotFoundException(`Coffee #${id} not found`);
  }
  return coffee;
}

create(createCoffeeDto: CreateCoffeeDto) {
  const coffee = this.coffeeRepository.create(createCoffeeDto);
  return this.coffeeRepository.save(coffee);
}

async update(id: number, updateCoffeeDto: UpdateCoffeeDto) {
  const coffee = await this.coffeeRepository.preload({
    id,
    ...updateCoffeeDto,
  });
  if (!coffee) {
    throw new NotFoundException(`Coffee #${id} not found`);
  }
  return this.coffeeRepository.save(coffee);
}

async remove(id: number) {
  const Coffee = await this.coffeeRepository.findOneBy({ id });
  return this.coffeeRepository.remove(Coffee);
}
关联数据库
创建一个 Flavor 实例
import { Coffee } from './coffee.entity';
import { Column, Entity, ManyToMany, PrimaryGeneratedColumn } from 'typeorm';

@Entity()
export class Flavor {
  @PrimaryGeneratedColumn()
  id: number;

  @Column()
  name: string;

  // 关联Coffee实例
  @ManyToMany((type) => Coffee, (coffee) => coffee.flavors)
  coffees: Coffee[];
}
更改 Coffee 实例代码
import { Flavor } from './flavor.entity';
import {
  Column,
  Entity,
  JoinTable,
  ManyToMany,
  PrimaryGeneratedColumn,
} from 'typeorm';

@Entity()
export class Coffee {
  @PrimaryGeneratedColumn()
  id: number;

  @Column()
  name: string;

  @Column()
  brand: string;

  // 因为这个实例里面需要有一个 Flavor 实例,所以需要添加 @JoinTable() 装饰器
  // 还需要更改 flavors 的数据类型
  @JoinTable()
  @ManyToMany((type) => Flavor, (flavor) => flavor.coffees)
  flavors: Flavor[];
}
虽然更改好了代码,但是如果我们现在调用接口会出现以下问题
返回的结果中不包含 Flavor 对象。我们需要更改以下查询的代码
findAll() {
  return this.coffeeRepository.find({
    relations: ['flavors'],
  });
}

async findOne(id: number) {
  const coffee = await this.coffeeRepository.findOne({
    where: { id },
    relations: ['flavors'],
  });
  if (!coffee) {
    throw new NotFoundException(`Coffee #${id} not found`);
  }
  return coffee;
}
级联插入
当我们想通过 Coffee 来更新 Flavor 数据库时,可以更改 coffee.entity.ts 为以下代码
...
@Entity()
export class Coffee {
  ...
  @JoinTable()
  @ManyToMany((type) => Flavor, (flavor) => flavor.coffees, { cascade: true })
  flavors: Flavor[];
}
更改 coffee.service.ts 代码
...
@Injectable()
export class CoffeeService {
constructor(
@InjectRepository(Coffee)
private readonly coffeeRepository: Repository<Coffee>,
@InjectRepository(Flavor)
private readonly flavorRepository: Repository<Flavor>,
) {}
...
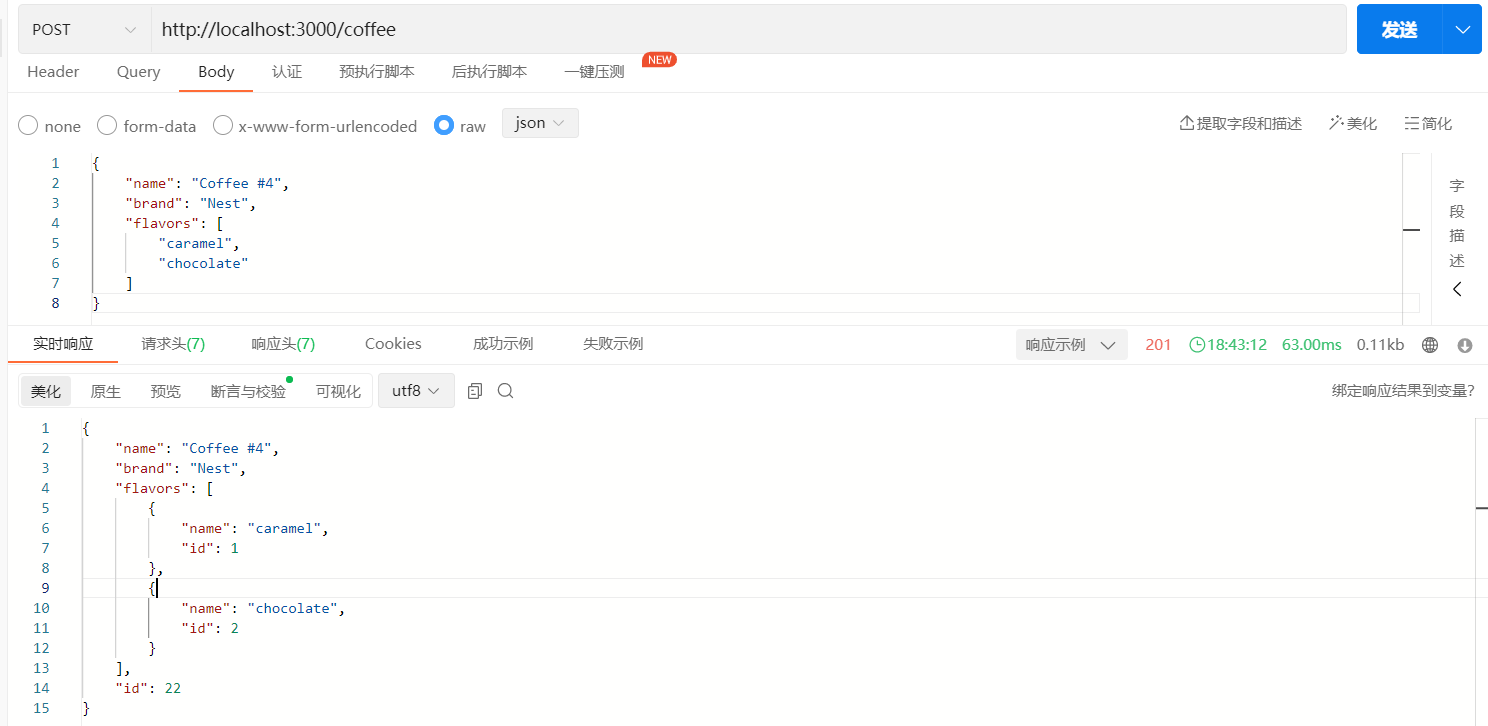
async create(createCoffeeDto: CreateCoffeeDto) {
const flavors = await Promise.all(
createCoffeeDto.flavors.map((name) => this.preloadFlavorByName(name)),
);
const coffee = this.coffeeRepository.create({
...createCoffeeDto,
flavors,
});
return this.coffeeRepository.save(coffee);
}
async update(id: number, updateCoffeeDto: UpdateCoffeeDto) {
const flavors = await Promise.all(
updateCoffeeDto.flavors.map((name) => this.preloadFlavorByName(name)),
);
const coffee = await this.coffeeRepository.preload({
id,
...updateCoffeeDto,
flavors,
});
if (!coffee) {
throw new NotFoundException(`Coffee #${id} not found`);
}
return this.coffeeRepository.save(coffee);
}
...
// 如果Flavor中不存在就添加
private async preloadFlavorByName(name: string): Promise<Flavor> {
const existingFlavor = await this.flavorRepository.findOneBy({ name });
if (existingFlavor) {
return existingFlavor;
}
return this.flavorRepository.create({name});
}
}
分页查询
写一个分页查询参数的数据对象表
// common/dto/pagination-query.dto.ts

import { IsOptional, IsPositive } from 'class-validator';

export class PaginationQueryDto {
  @IsOptional()  // 可选
  @IsPositive()  // 值为大于零的正数
  limit: number;

  @IsOptional()
  @IsPositive()
  offset: number;
}
在 main.ts 中配置
...
async function bootstrap() {
  ...
  app.useGlobalPipes(
    new ValidationPipe({
      whitelist: true,
      forbidNonWhitelisted: true,
      transform: true,
      transformOptions: {
        enableImplicitConversion: true,  // 如果设置为true,类转换器将尝试基于TS反射类型进行转换
      },
    }),
  );
 ...
}
...
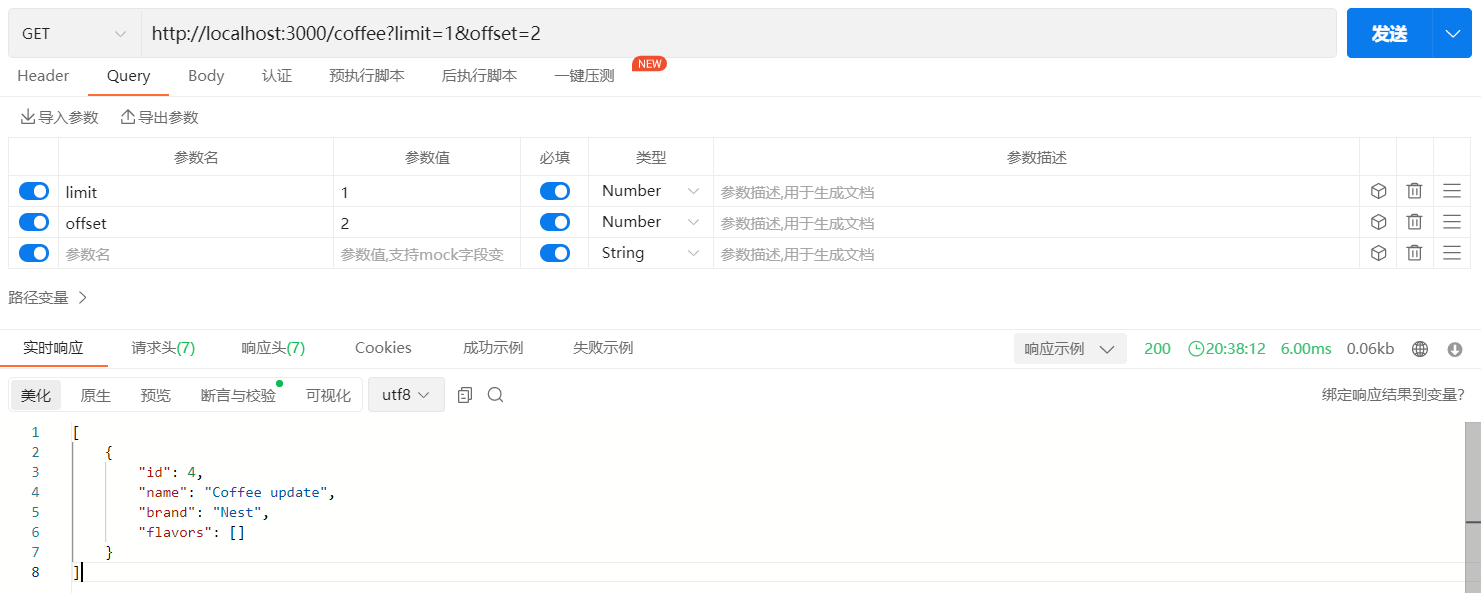
更改查询的代码
// coffee.controller.ts
@Get()
findAll(@Query() paginationQuery: PaginationQueryDto) {
  return this.coffeeService.findAll(paginationQuery);
}

// coffee.service.ts
findAll(paginationQuery: PaginationQueryDto) {
  const { limit, offset } = paginationQuery;
  return this.coffeeRepository.find({
    relations: ['flavors'],
    take: limit,
    skip: offset,
  });
}
数据迁移
在根目录创建一个 ormconfig.js 文件
module.exports = {
    type: 'mysql', //数据库类型
    host: 'localhost', //host
    port: 3306, //端口
    username: 'root', //账号
    password: '0000', //密码
    database: 'nest_study', //库名
    entities: ['dist/**/*.entity.js'], //实体文件
    mrgrations: ['dist/migration/*.js'], //迁移文件
    cli: {
        migrationsDir: 'src/migrations', //迁移文件目录
        seedsDir: 'src/seeds' //设置记录数据的目录
    }
};
然后运行以下命令
npx typeorm migration:create -o CoffeeRefactor
关于该功能的具体用法可以插件官网
事件
创建一个事件实体
// events/eventise/event.entity.ts

import { Entity, PrimaryGeneratedColumn, Column } from 'typeorm';
@Entity()
export class Event {
  @PrimaryGeneratedColumn()
  id: number;

  @Column()
  type: string;

  @Column()
  name: string;

  @Column('json')
  payload: Record<string, any>;
}
导入
// coffee.module.ts

...
import { Event } from 'src/events/eneities/event.entity';

@Module({
  imports: [TypeOrmModule.forFeature([Coffee, Flavor, Event])],
  ...
})
export class CoffeeModule {}
在 Coffee 实例中添加推荐属性
// coffee/entities/coffee.entity.ts

...
@Entity()
export class Coffee {
  @PrimaryGeneratedColumn()
  id: number;

  @Column()
  name: string;

  @Column()
  brand: string;

  @Column({ default: 0 })
  recommendations: number;

  @JoinTable()
  @ManyToMany((type) => Flavor, (flavor) => flavor.coffees, { cascade: true })
  flavors: Flavor[];
}
创建事务需要使用 TypeOrm 中的DataSource
// coffee.service.ts

...
import { DataSource, Repository } from 'typeorm';

@Injectable()
export class CoffeeService {
  constructor(
    ...
    private readonly dataSource: DataSource,
  ) {}
  ...
}
创建一个推荐的异步方法
// coffee.service.ts

@Injectable()
export class CoffeeService {
  ...
  async recommendCoffee(coffee: Coffee) {
    const queryRunner = await this.dataSource.createQueryRunner();
    await queryRunner.connect();
    await queryRunner.startTransaction();
  }
}
我们首先创建了一个 QueryRunner,用来建立一个到数据库的新连接,然后开始事件
// coffee.service.ts

@Injectable()
export class CoffeeService {
  ...
  async recommendCoffee(coffee: Coffee) {
    const queryRunner = await this.dataSource.createQueryRunner();
    await queryRunner.connect();
    await queryRunner.startTransaction();
    try {
      coffee.recommendations++;

      const coffeeEvent = new Event();
      coffeeEvent.name = 'recommend_coffee';
      coffeeEvent.type = 'coffee';
      coffeeEvent.payload = { coffee: coffee.id };

      await queryRunner.manager.save(coffee);
      await queryRunner.manager.save(coffeeEvent);

      await queryRunner.commitTransaction();
    } catch (e) {
      await queryRunner.rollbackTransaction();
    } finally {
      await queryRunner.release();
    }
  }
}
索引
索引是我们的数据库搜索引擎可以用来加速数据检索的图书查找表。假设在我们的应用程序中,一个非常常见的搜索请求将根据其“名称”检索一个事件,帮助加快搜索,我们可以使用 @Index 装饰器在 name 列上定义一个“索引”。
// events/eventise/event.entity.ts

...
@Entity()
export class Event {
  ...
  @Index()
  @Column()
  name: string;
  ...
}
在更高级的情况下,我们可能想要定义包含多个列的复合索引,我们可以通过将 @Index 装饰器应用到 Event 类本身,并在装饰器内传递一个列名数组作为参数来做到这一点。
// events/eventise/event.entity.ts

...
@Index(['name', 'type'])
@Entity()
export class Event {
  ...
  @Index()
  @Column()
  name: string;
  ...
}
索引可以帮助我们的应用程序快速随机查找和有效访问有效记录。只要性能对某个实体至关重要,就可以使用它。
依赖注入
我们创建 coffee-rating 的模块和服务
npx nest g mo coffee-rating
npx nest g s coffee-rating
如果 CoffeeRatingService 需要依赖 CoffeeService 获取数据,就需要引用
// coffee-rating.module.ts

import { CoffeeModule } from './../coffee/coffee.module';
import { Module } from '@nestjs/common';
import { CoffeeRatingService } from './coffee-rating.service';

@Module({
  imports: [CoffeeModule],
  providers: [CoffeeRatingService],
})
export class CoffeeRatingModule {}
在 CoffeeRatingService 中使用
// coffee-rating.service.ts

import { Injectable } from '@nestjs/common';
import { CoffeeService } from 'src/coffee/coffee.service';

@Injectable()
export class CoffeeRatingService {
  constructor(private readonly coffeeService: CoffeeService) {}
}
保存后我们发现终端报错了。我们需要导出 CoffeeService
// coffee.module.ts

...
@Module({
  ...
  exports: [CoffeeService],
})
export class CoffeeModule {}
useValue
定义一个常量
// coffee.constants.ts

export const COFFEE_BRANDS = 'COFFEE_BRANDS';
在 coffee.module.ts 中使用
...
@Module({
  ...
  providers: [
    CoffeeService,
    { provide: COFFEE_BRANDS, useValue: ['buddy brew', 'nescafe'] },
  ],
  ...
})
export class CoffeeModule {}
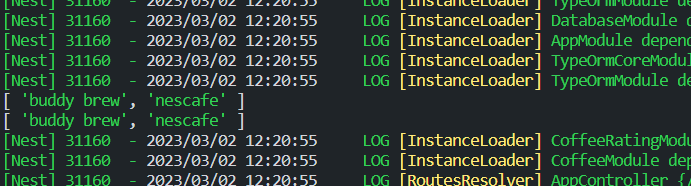
在需要的地方使用
// coffee.service.ts
...
export class CoffeeService {
constructor(
...
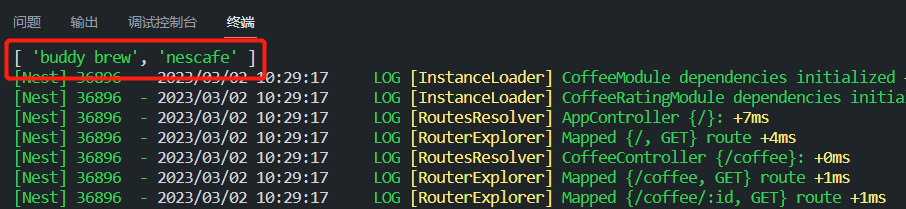
@Inject(COFFEE_BRANDS) coffeeBrands: string[],
) {
console.log(coffeeBrands);
}
...
}
useClass
// coffee.service.ts

...
class ConfigService {}
class DevelopmentConfigService {}
class ProductionConfigService {}

@Module({
  ...
  providers: [
    ...
    {
      provide: ConfigService,
      useClass:
        process.env.NODE_ENV === 'development'
          ? DevelopmentConfigService
          : ProductionConfigService,
    },
  ],
  ...
})
export class CoffeeModule {}
useFactory
// coffee.service.ts

...
@Injectable()
export class CoffeeBrandsFactory {
  create() {
    /* … do something ... */
    return ['buddy brew', 'nescafe'];
  }
}

@Module({
  ...
  providers: [
    CoffeeBrandsFactory,
    ...
    {
      provide: COFFEE_BRANDS,
      useFactory: (coffeeBrandsFactory: CoffeeBrandsFactory) =>
        coffeeBrandsFactory.create(),
      inject: [CoffeeBrandsFactory],
    },
  ],
  ...
})
export class CoffeeModule {}
以上内容看查看视频讲解
动态模块
我们创建一个 DatabaseModule 用来演示。
通常情况下我们使用以下写法
import { Module } from '@nestjs/common';
import { createConnection } from 'typeorm';

@Module({
  providers: [
    {
      provide: 'CONNECTION',
      useValue: createConnection({
        type: 'postgres',
        host: 'localhost',
        port: 5432,
      }),
    },
  ],
})
export class DatabaseModule {}
使用动态模块
import { DynamicModule, Module } from '@nestjs/common';
import { createConnection, DataSourceOptions } from 'typeorm';

@Module({})
export class DatabaseModule {
  static register(options: DataSourceOptions): DynamicModule {
    return {
      module: DatabaseModule,
      imports: [],
      providers: [
        {
          provide: 'CONNECTION',
          useValue: createConnection(options),
        },
      ],
    };
  }
}
作用域
默认情况下,Nest 中的每个提供者都是单例。例如,当我们使用 @Injectable() 时,实际如下
...
@Injectable({ scope: Scope.DEFAULT })
export class CoffeeService {
  ...
    @Inject(COFFEE_BRANDS) coffeeBrands: string[],
  ) {
    console.log(coffeeBrands);
  }
  ...
}
DEFAULT 就是单例。我们查看终端

结果打印了1次,大多数情况下建议使用这种。
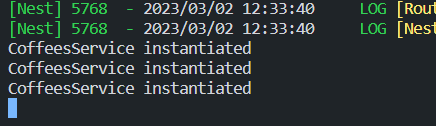
我们把 coffee.service.ts 中的 scope 更改为 TRANSIENT
...
@Injectable({ scope: Scope.TRANSIENT })
export class CoffeeService {
  ...
    @Inject(COFFEE_BRANDS) coffeeBrands: string[],
  ) {
    console.log(coffeeBrands);
  }
  ...
}
我们发现终端打印了两次
因为 OffeeService 在 CoffeesController 和 CoffeeBrandsFactory 中各使用了一次。
我们更改 coffee.module.ts 中代码
...
@Module({
  ...
  providers: [
    ...
    {
      provide: COFFEE_BRANDS,
      useFactory: (coffeeBrandsFactory: CoffeeBrandsFactory) =>
        coffeeBrandsFactory.create(),
      inject: [CoffeeBrandsFactory],
      scope: Scope.TRANSIENT,
    },
  ],
  ...
})
export class CoffeeModule {}
把 coffee.service.ts 中的 scope 更改为 REQUEST
...
@Injectable({ scope: Scope.REQUEST })
export class CoffeeService {
  ...
    @Inject(COFFEE_BRANDS) coffeeBrands: string[],
  ) {
    console.log('CoffeesService instantiated');
  }
  ...
}
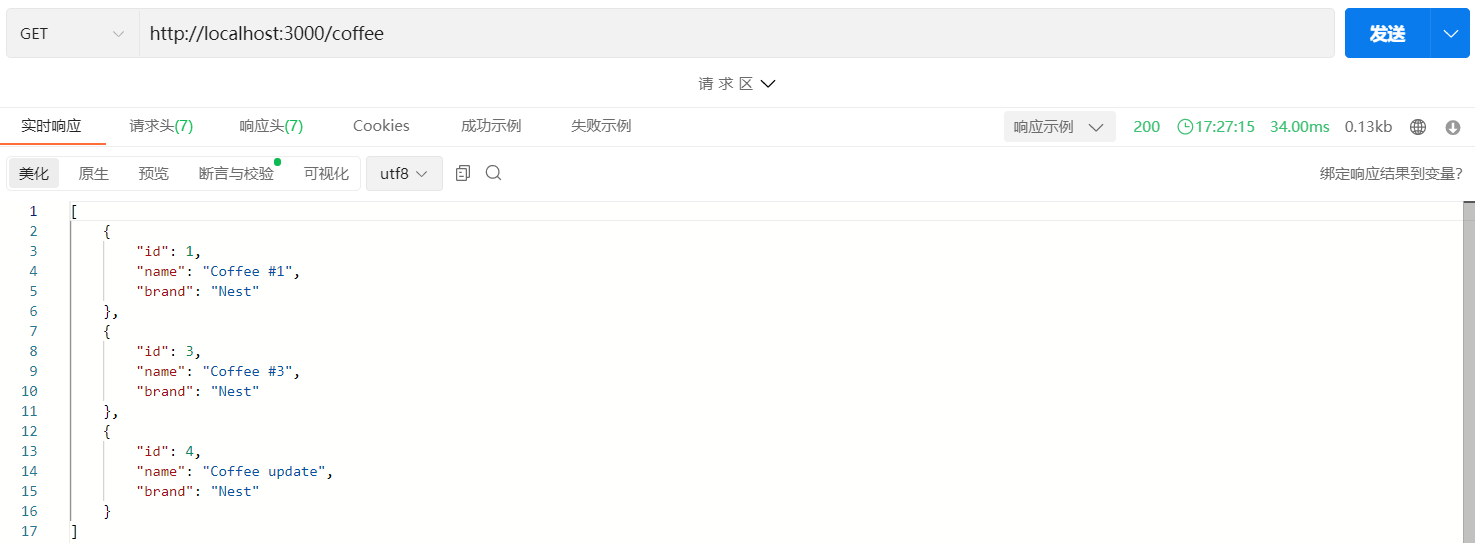
我们发现终端没有打印任何东西。因为我们尚未使用此服务的 API。我们发送3次 Get 请求 http://localhost:3000/coffee,然后查看终端:
结果被打印了3次。在 Nest 中,这些装饰器实际上使用注入链向上冒泡,这意味着如果 CoffeesController 依赖于属于 REQUEST 范围的 CoffeesService,它也隐式地变为 REQUEST 范围。
修改 CoffeeController 代码:
...
@Controller('coffee')
export class CoffeeController {
  constructor(private readonly coffeeService: CoffeeService) {
    console.log('CoffeeController create');
  }
  ...
}
然后再发送3次请求:
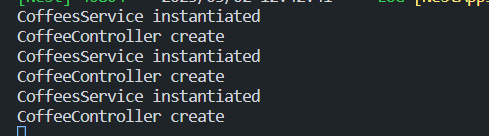
这意味着两者都是专门为每个请求创建的。这实际上是 REQUEST 范围提供程序的一项额外功能,请求范围的提供者可以注入原生Request 对象,如果你需要访问特定的信息,这将很有用。例如 headers、cookies、IP等。
应用配置
环境
安装依赖
npm i @nestjs/config
创建 .env 文件
DATABASE_USER=root
DATABASE_PASSWORD=0000
DATABASE_NAME=nest_study
DATABASE_PORT=3306
DATABASE_HOST=localhost
在 app.module.ts 中使用
...
import { ConfigModule } from '@nestjs/config';

@Module({
  imports: [
    ConfigModule.forRoot(),  // 可以配置一些内容
    CoffeeModule,
    TypeOrmModule.forRoot({
      type: 'mysql', //数据库类型
      host: process.env.DATABASE_HOST,
      port: +process.env.DATABASE_PORT,
      username: process.env.DATABASE_USER,
      password: process.env.DATABASE_PASSWORD, //密码
      database: process.env.DATABASE_NAME, //库名
     ...
    }),
    ...
  ],
  ...
})
export class AppModule {}
验证
安装依赖
npm i @hapi/joi
npm i @types/hapi__joi -D
在 app.module.ts 中使用
...
import * as Joi from '@hapi/joi';

@Module({
  imports: [
    ConfigModule.forRoot({
      validationSchema: Joi.object({
        DATABASE_HOST: Joi.required(),
        DATABASE_PORT: Joi.number().default(3306),
      }),
    }),
    CoffeeModule,
    TypeOrmModule.forRoot({
      type: 'mysql', //数据库类型
      host: process.env.DATABASE_HOST, //host
      port: +process.env.DATABASE_PORT, //
      username: process.env.DATABASE_USER, //账号
      password: process.env.DATABASE_PASSWORD, //密码
      database: process.env.DATABASE_NAME, //库名
      ...
    }),
    CoffeeRatingModule,
    DatabaseModule,
  ],
  ...
})
export class AppModule {}
如果这时候我们删除掉 .env 中的 DATABASE_HOST 就会报错。
ConfigService
提供了一个 get() 方法来读取我们配置的变量。
在 coffee.module.ts 中引入
...
import { ConfigModule } from '@nestjs/config';

@Module({
  imports: [TypeOrmModule.forFeature([Coffee, Flavor, Event]), ConfigModule],
  controllers: [CoffeeController],
  providers: [
    ...
  ],
  exports: [CoffeeService],
})
export class CoffeeModule {}
在 coffee.service.ts 中使用
...
import { ConfigService } from '@nestjs/config';

@Injectable()
export class CoffeeService {
  constructor(
    ...
    private readonly configService: ConfigService,
  ) {
    const databaseHost = configService.get<string>('DATABASE_HOST');
    console.log(databaseHost);
  }
  ...
}

get() 还有第二个参数,如果为空可以设置值为第二个参数。
自定义配置文件
创建一个配置文件 src/config/app.config.ts
export default () => ({
  environment: process.env.NODE_ENV || 'development',
  database: {
    host: process.env.DATABASE_HOST,
    port: parseInt(process.env.DATABASE_PORT, 10) || 5432,
  },
});
在 app.module.ts 中引入
...
import appConfig from './config/app.config';

@Module({
  imports: [
    ConfigModule.forRoot({
      ...
      load: [appConfig],
    }),
    ...
  ],
  ...
})
export class AppModule {}
在 coffee.service.ts 中使用
...
@Injectable()
export class CoffeeService {
  constructor(
    ...
    private readonly configService: ConfigService,
  ) {
    const databaseHost = configService.get('database.host');
    console.log(databaseHost);
  }
  ...
}
依旧可以在终端看到打印出了 localhost。
命名空间
在所需的地方创建一个配置文件,我这里是coffee/config/coffee.config.ts:
import { registerAs } from '@nestjs/config';

export default registerAs('coffee', () => ({
  foo: 'bar',
}));
创建命名空间需要 registerAs 方法,第一个参数就是名称,第二参数是值。
在 coffee.module.ts 中引入:
...
@Module({
  imports: [
    TypeOrmModule.forFeature([Coffee, Flavor, Event]),
    ConfigModule.forFeature(coffeeConfig),
  ],
  controllers: [CoffeeController],
  providers: [
    ...
  ],
  ...
})
export class CoffeeModule {}
在 coffee.service.ts 中使用:
...
@Injectable()
export class CoffeeService {
  constructor(
    ...
    private readonly configService: ConfigService,
  ) {
    const databaseHost = configService.get('coffee');
    console.log(databaseHost);
  }
  ...
}
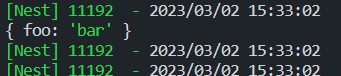
也可以通过 . 来获取 foo 的值。
出了上面这种方法,直接注入整个命名空间是最佳做法。
...
@Injectable()
export class CoffeeService {
  constructor(
    ...
    @Inject(coffeeConfig.KEY)
    private readonly coffeeConfiguration: ConfigType<typeof coffeeConfig>,
  ) {
    console.log(coffeeConfiguration.foo);
  }
  ...
}

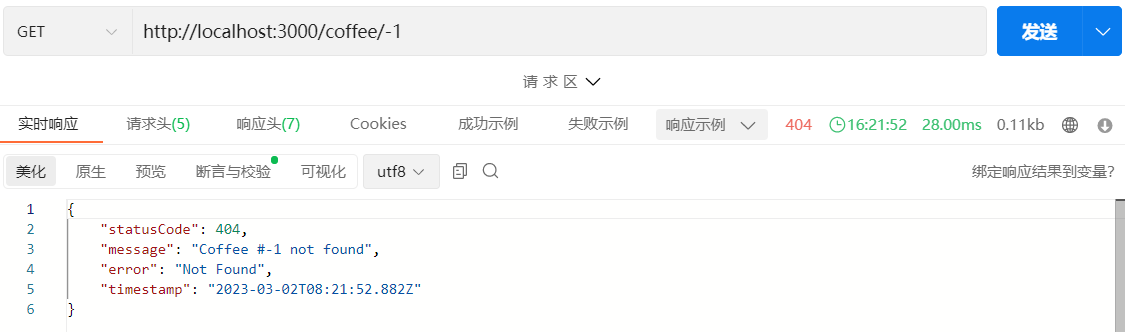
异常过滤器
创建一个过滤器
nest g filter common/fliters/http-exception
打开创建的文件,更改成以下代码:
import {
  ArgumentsHost,
  Catch,
  ExceptionFilter,
  HttpException,
} from '@nestjs/common';
import { Request, Response } from 'express';

@Catch(HttpException)
export class HttpExceptionFilter<T extends HttpException>
  implements ExceptionFilter
{
  catch(exception: T, host: ArgumentsHost) {
    // 获取Context
    const ctx = host.switchToHttp();
    // 获取原始请求信息
    const response = ctx.getResponse<Response>();

    const status = exception.getStatus();
    const exceptionResponse = exception.getResponse();
    const error =
      typeof response === 'string'
        ? { message: exceptionResponse }
        : (exceptionResponse as object);

    response
      .status(status)
      .json({ ...error, timestamp: new Date().toISOString() });
  }
}
创建好之后我们在 main.ts 中使用它
...
import { HttpExceptionFilter } from './common/fliters/http-exception.filter';

async function bootstrap() {
  const app = await NestFactory.create(AppModule);
  ...
  app.useGlobalFilters(new HttpExceptionFilter());
  await app.listen(3000);
}
bootstrap();
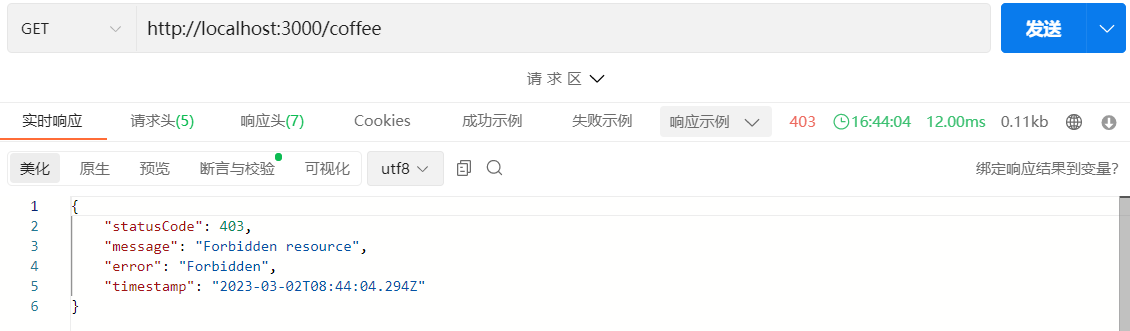
守卫
访问路由时是否存在 API 令牌
使用命令行创建一个守卫
nest g guard common/guards/api-key
我们把返回值改为 false
import { CanActivate, ExecutionContext, Injectable } from '@nestjs/common';
import { Observable } from 'rxjs';

@Injectable()
export class ApiKeyGuard implements CanActivate {
  canActivate(
    context: ExecutionContext,
  ): boolean | Promise<boolean> | Observable<boolean> {
    return false;
  }
}
然后在 main.ts 中使用
...
import { HttpExceptionFilter } from './common/fliters/http-exception.filter';

async function bootstrap() {
  const app = await NestFactory.create(AppModule);
  ...
  app.useGlobalGuards(new ApiKeyGuard());
  await app.listen(3000);
}
bootstrap();
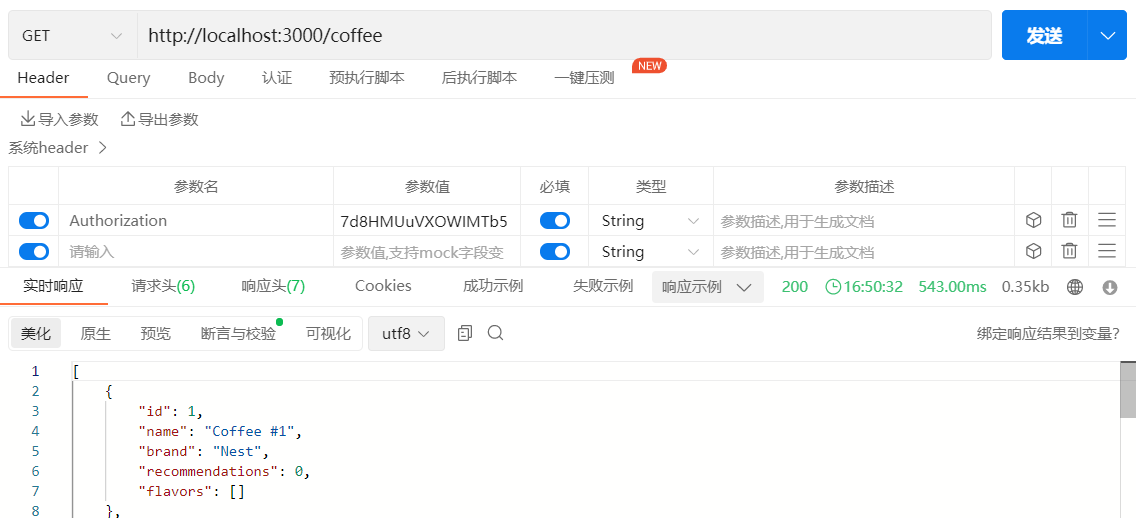
在 .env 中添加一个常量API_KEY=7d8HMUuVXOWIMTb5PbCy9PkypgNu4SRg,然后更改代码:
import { CanActivate, ExecutionContext, Injectable } from '@nestjs/common';
import { Request } from 'express';
import { Observable } from 'rxjs';

@Injectable()
export class ApiKeyGuard implements CanActivate {
  canActivate(
    context: ExecutionContext,
  ): boolean | Promise<boolean> | Observable<boolean> {
    const request = context.switchToHttp().getRequest<Request>();
    const authHeader = request.header('Authorization');
    return authHeader == process.env.API_KEY;
  }
}
访问的路由是否被声明为公共
我们可以在 coffee.controller.ts 中使用 @SetMetadata 装饰器
@SetMetadata('isPublic', true)
@Get()
findAll(@Query() paginationQuery: PaginationQueryDto) {
  return this.coffeeService.findAll(paginationQuery);
}
理想情况下,我们应该创建自己的装饰器,不仅可以减少重复代码,也可以不出错。
// src/common/decorators/public.decorator.ts

import { SetMetadata } from '@nestjs/common';

export const IS_PUBLIC_KEY = 'isPublic';
export const Pubilc = () => SetMetadata(IS_PUBLIC_KEY, true);
创建好后更改 coffee.controller.ts 中的代码:
@Pubilc()
@Get()
findAll(@Query() paginationQuery: PaginationQueryDto) {
  return this.coffeeService.findAll(paginationQuery);
}
我们写完代码可以发现,终端报了一些错误,这是因为我们在上面使用了依赖注入却没有在 Module 中注册。
我们创建一个公共的模块
nest g mo common
编写代码如下
import { ConfigModule } from '@nestjs/config';
import { ApiKeyGuard } from './guards/api-key.guard';
import { Module } from '@nestjs/common';
import { APP_GUARD } from '@nestjs/core';

@Module({
  imports: [ConfigModule],
  providers: [
    {
      provide: APP_GUARD,
      useClass: ApiKeyGuard,
    },
  ],
})
export class CommonModule {}
然后删掉 main.ts 中的 app.useGlobalGuards(new ApiKeyGuard());。
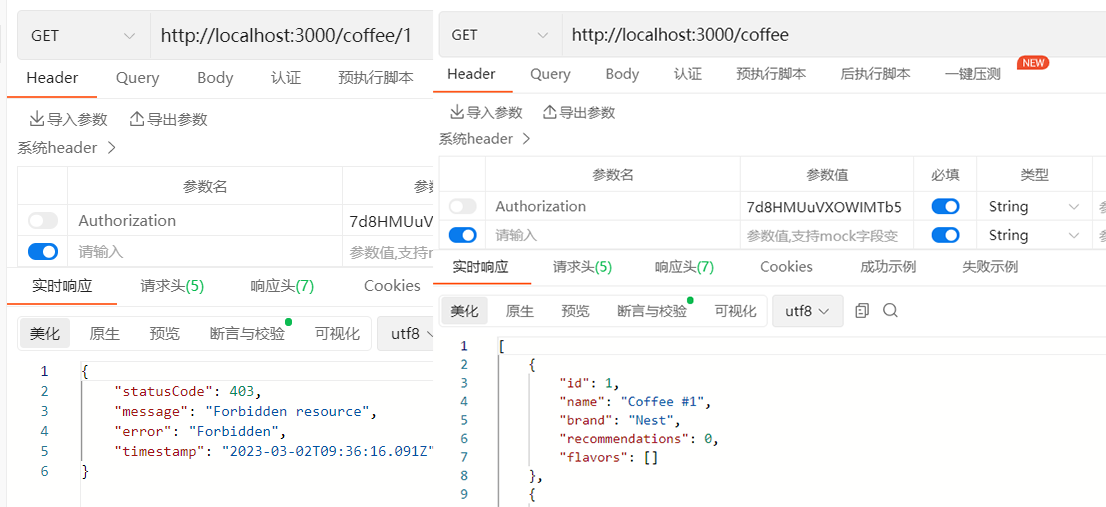
我们可以发现,如果添加了 @Public() 装饰器的没带 Authorization 也可以访问。
拦截器
创建一个拦截器:
nest g itc common/interceptors/wrap-response
编写如下代码:
import {
  CallHandler,
  ExecutionContext,
  Injectable,
  NestInterceptor,
} from '@nestjs/common';
import { Observable, tap } from 'rxjs';

@Injectable()
export class WrapResponseInterceptor implements NestInterceptor {
  intercept(context: ExecutionContext, next: CallHandler): Observable<any> {
    console.log('Before...');
    return next.handle().pipe(tap((data) => console.log('After...', data)));
  }
}
在 main.ts 中使用:
app.useGlobalInterceptors(new WrapResponseInterceptor());
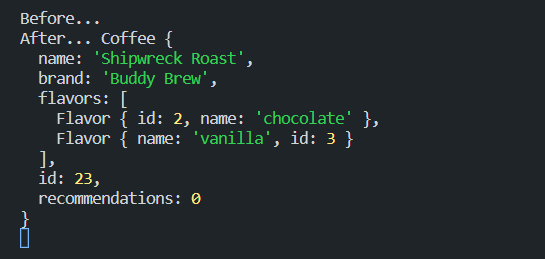
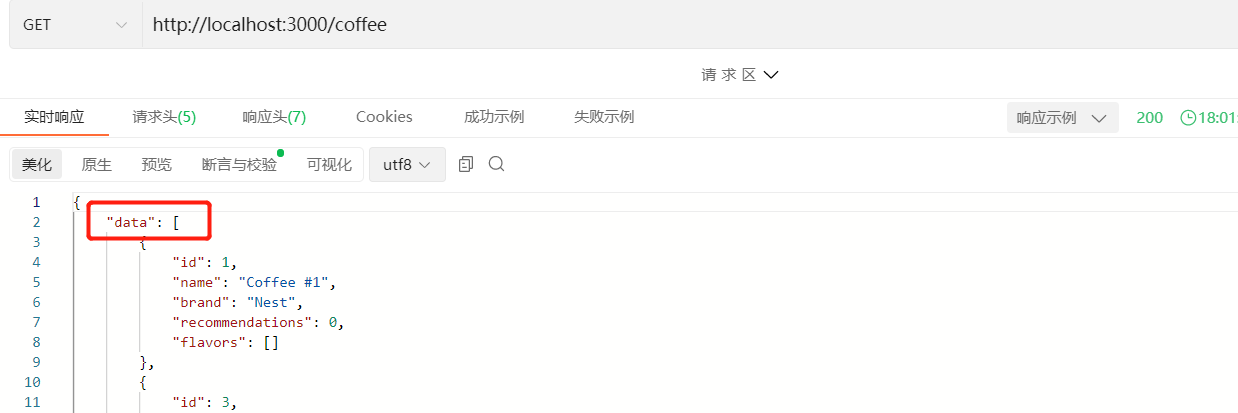
我们可以将相应的数据放到 data 对象中:
import {
  CallHandler,
  ExecutionContext,
  Injectable,
  NestInterceptor,
} from '@nestjs/common';
import { map, Observable } from 'rxjs';

@Injectable()
export class WrapResponseInterceptor implements NestInterceptor {
  intercept(context: ExecutionContext, next: CallHandler): Observable<any> {
    console.log('Before...');
    return next.handle().pipe(map((data) => ({ data })));
  }
}
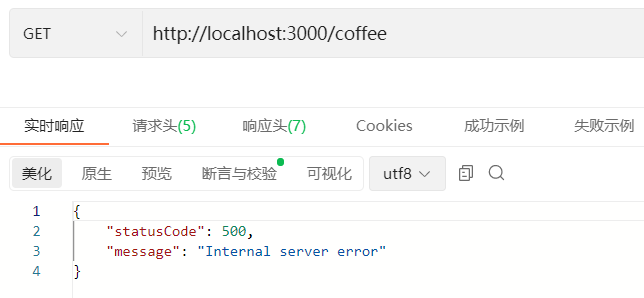
假如我们要处理所有的请求超时:
nest g itc common/interceptors/timeout
编写如下代码:
import {
  CallHandler,
  ExecutionContext,
  Injectable,
  NestInterceptor,
} from '@nestjs/common';
import { Observable, timeout } from 'rxjs';

@Injectable()
export class TimeoutInterceptor implements NestInterceptor {
  intercept(context: ExecutionContext, next: CallHandler): Observable<any> {
    return next.handle().pipe(timeout(3000));
  }
}
在 main.ts 中使用:
app.useGlobalInterceptors(
  new WrapResponseInterceptor(),
  new TimeoutInterceptor(),
);
更改以下 'coffee.controller.ts' 的代码:
@Pubilc()
@Get()
async findAll(@Query() paginationQuery: PaginationQueryDto) {
  await new Promise((resolve) => setTimeout(resolve, 5000));
  return this.coffeeService findAll(paginationQuery);
}
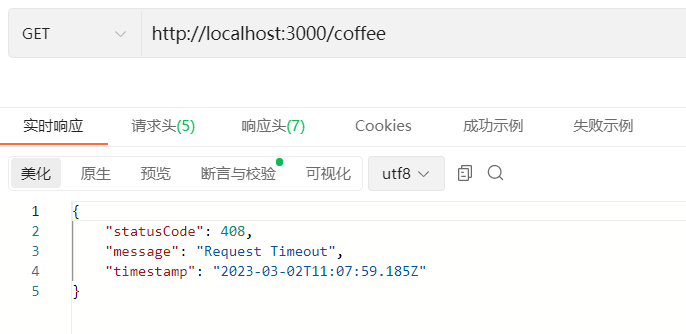
为了让获得的信息更加友好,编写以下代码:
import {
  CallHandler,
  ExecutionContext,
  Injectable,
  NestInterceptor,
  RequestTimeoutException,
} from '@nestjs/common';
import {
  catchError,
  Observable,
  throwError,
  timeout,
  TimeoutError,
} from 'rxjs';

@Injectable()
export class TimeoutInterceptor implements NestInterceptor {
  intercept(context: ExecutionContext, next: CallHandler): Observable<any> {
    return next.handle().pipe(
      timeout(3000),
      catchError((err) => {
        if (err instanceof TimeoutError) {
          return throwError(() => new RequestTimeoutException());
        }
        return throwError(() => err);
      }),
    );
  }
}
自定义管道
Nest 中自带了很多管道,详情查看这里。有时候我们需要自定义,这里以自定义一个 ParseIntPipe 为例,尽管 Nest 中自带了该管道。
生成一个管道文件:
nest g pi common/pipes/parse-int
修改代码如下:
import {
ArgumentMetadata,
BadRequestException,
Injectable,
PipeTransform,
} from '@nestjs/common';
@Injectable()
export class ParseIntPipe implements PipeTransform {
transform(value: any, metadata: ArgumentMetadata) {
const val = parseInt(value, 10);
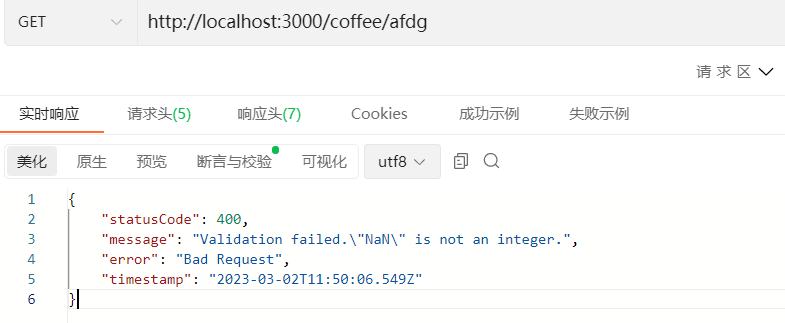
if (isNaN(val)) {
throw new BadRequestException(
`Validation failed."${value}" is not an integer.`,
);
}
return val;
}
}
在 coffee.controller.ts 中使用:
@Get(':id')
findOne(@Param('id', ParseIntPipe) id: number) {
  return this.coffeeService.findOne(Number(id));
}
中间件
使用命令创建一个中间件:
nest g mi common/middlewares/logging
我们只在里面编写一行代码:
import { Injectable, NestMiddleware } from '@nestjs/common';
@Injectable()
export class LoggingMiddleware implements NestMiddleware {
use(req: any, res: any, next: () => void) {
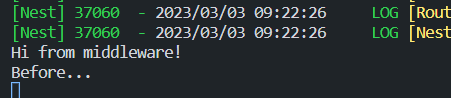
console.log('Hi from middleware!');
next();
}
}
然后更改 common.module.ts 中的代码:
import { MiddlewareConsumer, Module, NestModule } from '@nestjs/common';
...
export class CommonModule implements NestModule {
  configure(consumer: MiddlewareConsumer) {
    consumer.apply(LoggingMiddleware).forRoutes('*');  // 使用通配符控制路由
  }
}
我们可以把 ***** 号换成要使用的路由:
consumer.apply(LoggingMiddleware).forRoutes('coffee');
这样就只有 coffee 路由会使用该中间件。
我们可以指定使用该中间件的请求方法:
consumer.apply(LoggingMiddleware).forRoutes({
  path: 'coffee',
  method: RequestMethod.GET,
});
这样就只有 Get 方法会使用该路由。
我们可以指定哪些路由不使用该中间件:
consumer.apply(LoggingMiddleware).exclude('coffee').forRoutes('*');
这样以 coffee 开头的路由就不会使用该中间件。
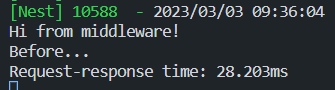
我们可以用中间件来查看整个请求的响应时间(这种计算将包括拦截器、过滤器、守卫、方法处理程序等):
import { Injectable, NestMiddleware } from '@nestjs/common';

@Injectable()
export class LoggingMiddleware implements NestMiddleware {
  use(req: any, res: any, next: () => void) {
    console.time('Request-response time');
    console.log('Hi from middleware!');
    res.on('finish', () => console.timeEnd('Request-response time'));
    next();
  }
}
自定义参数装饰器
创建一个自定义参数装饰器的文件:
// common/decorators/protocol.decorator.ts

import { createParamDecorator, ExecutionContext } from '@nestjs/common';

export const Protocol = createParamDecorator(
  (data: unknown, ctx: ExecutionContext) => {
    const req = ctx.switchToHttp().getRequest();
    return req.protocol;
  },
);
在控制器中使用:
@Pubilc()
@Get()
async findAll(
@Protocol() protocol: string,
@Query() paginationQuery: PaginationQueryDto,
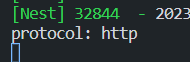
) {
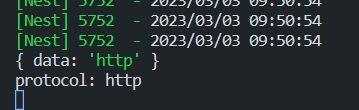
console.log(`protocol: ${protocol}`);
return this.coffeeService.findAll(paginationQuery);
}
现在我们的装饰器是无状态的,有时候我们还需要为装饰器传递参数。我们试着在里面传个参:
@Pubilc()
@Get()
async findAll(
  @Protocol('http') protocol: string,
  @Query() paginationQuery: PaginationQueryDto,
) {
  console.log(`protocol: ${protocol}`);
  return this.coffeeService.findAll(paginationQuery);
}
我们可以转到自定义的装饰器的代码里,我们有一个 data 参数,它可以接受穿过来的值。为了让代码更具可读性和安全性,我们改一下代码:
import { createParamDecorator, ExecutionContext } from '@nestjs/common';

export const Protocol = createParamDecorator(
  (data: string, ctx: ExecutionContext) => {
    console.log({ data });
    const req = ctx.switchToHttp().getRequest();
    return req.protocol;
  },
);
Swagger
详细文档可查看这里
测试
详细文档可查看这里
打开 coffee.service.spec.ts 文件,引入我们在 cofffee.service.ts 中引入的文件:
RESTful版本控制
文档地址点我
引入
main.ts
import { VersioningType } from '@nestjs/common';

async function bootstrap() {
  ...
  app.enableVersioning({
    type: VersioningType.URI
  });
  ...
}
使用
user.controller.ts
@Controller({
  path: 'user',
  version: '1'
})
export class UserController {
 ...
}
效果

Code码规范
| 代码 | 释义 |
|---|---|
| 200 | OK |
| 304 | Not Modified 协商缓存了 |
| 400 | Bad Request 参数错误 |
| 401 | Unauthorized token错误 |
| 403 | Forbidden referer origin 验证失败 |
| 404 | Not Found 接口不存在 |
| 500 | Internal Server Error 服务端错误 |
| 502 | Bad Gateway 上游接口有问题或者服务器问题 |
Session
安装
npm i express-session --save
智能依赖
npm i @types/express-session -D
使用
mian.ts
import * as session from 'express-session';

async function bootstrap() {
  ...
  app.use(
    session({
      secret: 'SuXiaotong',
      name: 'zfl.sid',
      rolling: true,
      cookie: { maxAge: 9999 },
    }),
  );
  ...
}
| 参数 | 释义 |
|---|---|
| secret | 生成服务端session 签名 可以理解为加盐 |
| name | 生成客户端cookie 的名字 默认 connect.sid |
| cookie | 设置返回到前端 key 的属性,默认值为 |
| rolling | 在每次请求时强行设置 cookie,这将重置 cookie 过期时间(默认:false) |
验证码
安装
npm install svg-captcha -S
使用
code.service.ts
@Injectable()
export class CodeService {
  create() {
    return svgCaptchar.create({
      size: 4,
      color: true,
      background: '#ffffff',
    });
  }
}
code.controller.ts
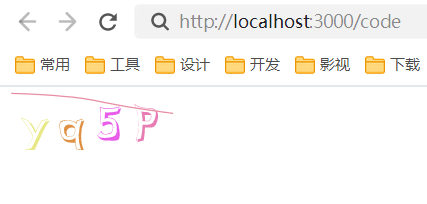
@Get()
create(@Res() res, @Session() session) {
    const captchar = this.codeService.create();
    session.code = captchar.text; // 存到session用来验证
    res.type('image/svg+xml');
    res.send(captchar.data);
}
上传图片
安装
npm i multer -S
npm i @types/multer -D
使用
upload.module.ts
import { Module } from '@nestjs/common';
import { UploadService } from './upload.service';
import { UploadController } from './upload.controller';
import { MulterModule } from '@nestjs/platform-express';
import { diskStorage } from 'multer';
import { extname, join } from 'path';

@Module({
  imports: [
    MulterModule.register({
      storage: diskStorage({
        destination: join(__dirname, '../images'),
        filename: (_, file, cb) => {
          const fileName = `${
            new Date().getTime() + extname(file.originalname)
          }`;
          cb(null, fileName);
        },
      }),
    }),
  ],
  controllers: [UploadController],
  providers: [UploadService],
})
export class UploadModule {}
upload.controller.ts
import {
  Controller,
  Post,
  UseInterceptors,
  UploadedFile,
} from '@nestjs/common';
import { UploadService } from './upload.service';
import { FileInterceptor } from '@nestjs/platform-express';

@Controller('upload')
export class UploadController {
  constructor(private readonly uploadService: UploadService) {}

  @Post()
  @UseInterceptors(FileInterceptor('file'))
  create(@UploadedFile() file) {
    console.log(file);
    return true;
  }
}
访问上传的文件
main.ts
import { NestFactory } from '@nestjs/core';
import { AppModule } from './app.module';
import { NestExpressApplication } from '@nestjs/platform-express';
import * as session from 'express-session';
import { join } from 'path';

async function bootstrap() {
  const app = await NestFactory.create<NestExpressApplication>(AppModule);
  app.useStaticAssets(join(__dirname, 'images'));
  await app.listen(3000);
}
bootstrap();

下载图片
upload.controller.ts
import { Controller, Get, Res } from '@nestjs/common';
import { UploadService } from './upload.service';
import { join } from 'path';
import { Response } from 'express';
@Controller('upload')
export class UploadController {
constructor(private readonly uploadService: UploadService) {}
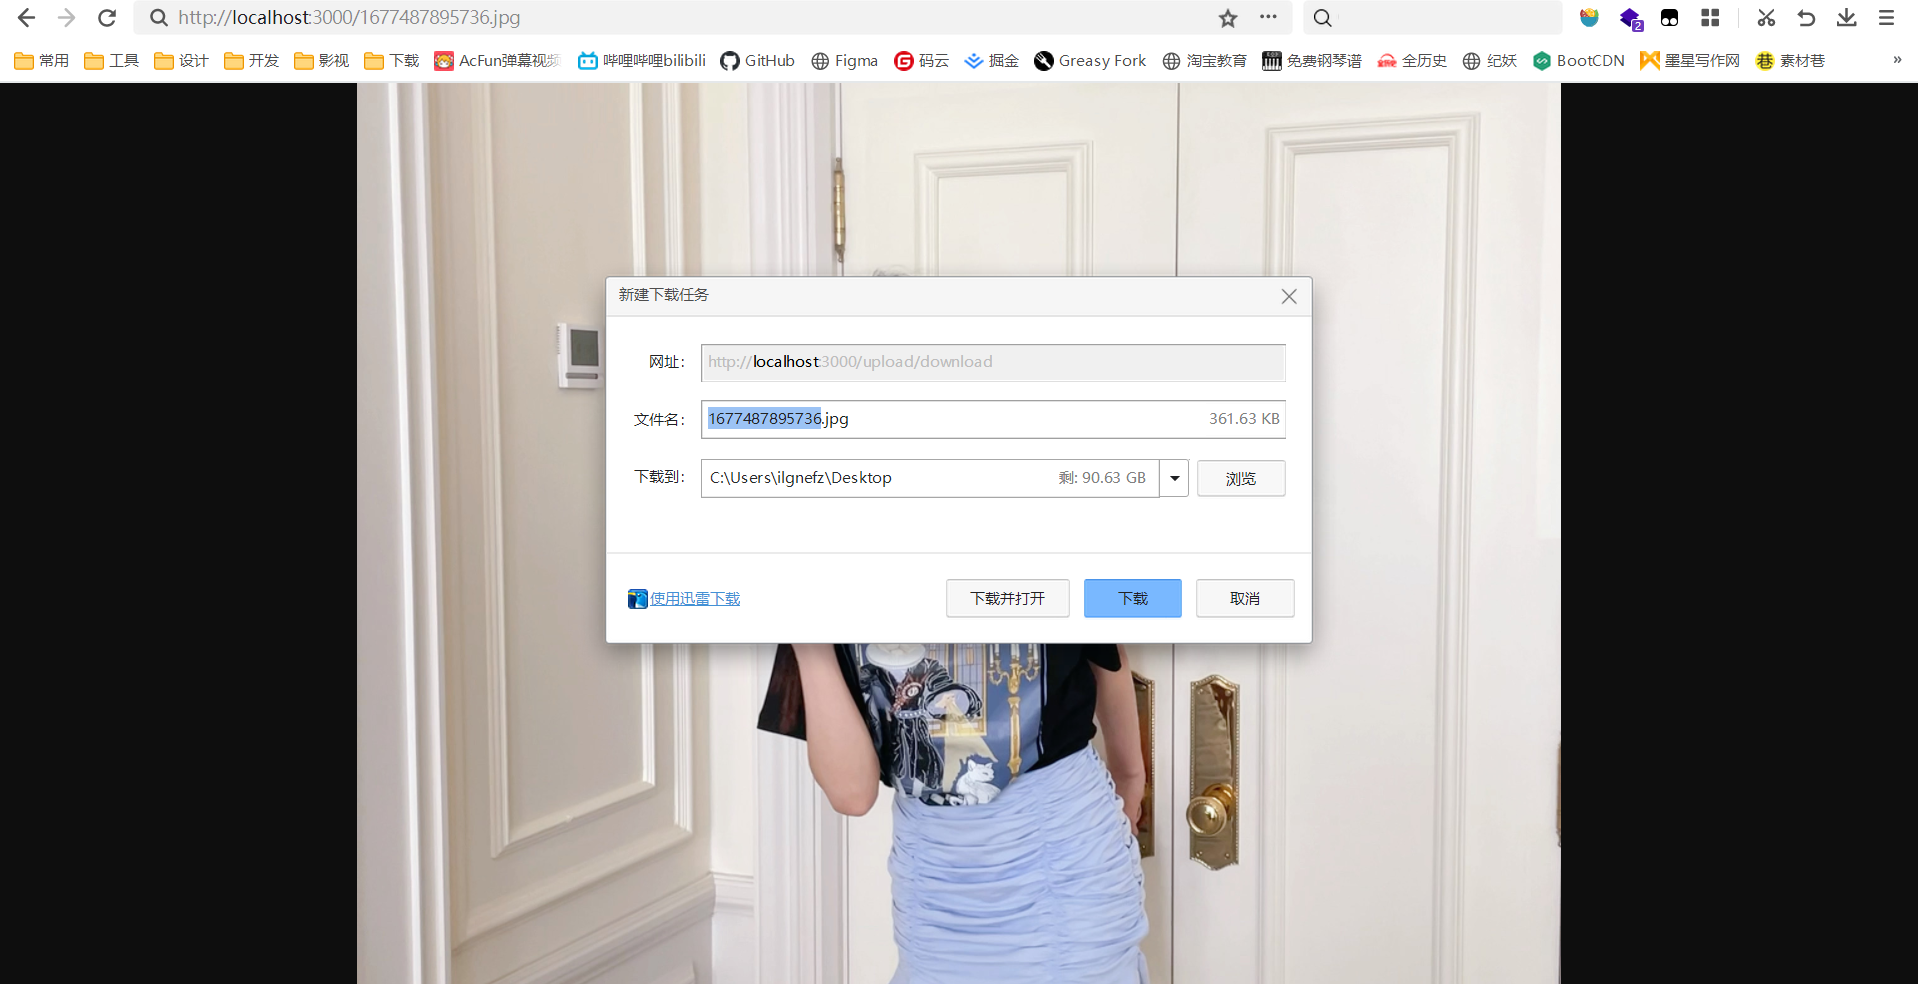
@Get('download')
download(@Res() res: Response) {
const url = join(__dirname, '../images/1677487895736.jpg');
res.download(url);
}
}
国际化
在 NestJS 中使用国家化目前发现两个第三方库,分别是 nestjs-i18n 和 i18next。
使用第一个我的项目会报错,所以这里我选择第二个。
首先安装这个库:
npm i --save @anchan828/nest-i18n-i18next i18next
然后在 app.module.ts 中引入并配置:
@Module({
  imports: [
    I18nextModule.register({
      fallbackLng: ["en"],
      resources: {
        en: {
          translation: { test: "Test" },
        },
        jp: {
          translation: { test: "テスト" },
        },
      },
    }),
  ],
})
export class AppModule {}
上面是官方文档的配置方法,但是要翻译的内容一多就不好管理。官方文档也写了使用以下方法配置多个文件:
I18nextModule.register({
  fallbackLng: ["en"],
  backend: {
    loadPath: "/locales/{{lng}}/{{ns}}.json",
  },
});
可能我悟性不高,使用这种方法配置没有成功。所以我自己配置了一种方法可以参考:
这里放一下 en.ts 的代码:
export const translation = {
  hello: 'Hello, there is Englishst',
};
其余语言只要把 hello 的值改为对应的就行。
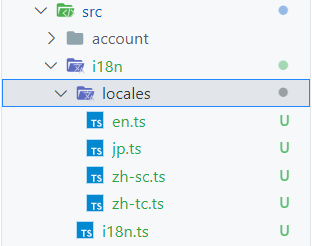
这是 i18n.ts 文件中的代码:
import * as en from './locales/en';
import * as jp from './locales/jp';
import * as zhsc from './locales/zh-sc';
import * as zhtc from './locales/zh-tc';

export { en, jp, zhsc, zhtc };
然后在 app.module.ts 中的配置:
import { I18nextModule } from '@anchan828/nest-i18n-i18next';
import * as i18n from './i18n/i18n';

I18nextModule.register({
  fallbackLng: ['en'],
  resources: i18n,
}),
使用方法如下:
@Controller()
class TestController {
  @Get("test")
  public test(@Headers("accept-language") acceptLanguage: string): string {
    return i18next.t("hello", { lng: acceptLanguage });
  }
}
每次请求都要在 header 中添加 Accept-Language:

当然,如果没有传入该参数,默认使用 fallbackLng 里的语言。在我这个例子中,传入的参数为 i18n.ts 导出的 en, jp, zhsc, zhtc。
文档中还有装饰器中使用:
import { I18nExceptionFilter, I18nNotFoundException } from "@anchan828/nest-i18n-i18next";

@Controller()
@UseFilters(I18nExceptionFilter)
class TestController {
  @Get("error")
  public i18nError(): Promise<string> {
    throw new I18nNotFoundException({ key: "test" });
  }
}

 浙公网安备 33010602011771号