

YOLOV5 环境搭建和使用记录
- 前言
- 环境搭建
- 测试官方demo
- labelimg相关使用
- 拓展应用
- 报错相关
- RuntimeError: [enforce fail at ..\c10\core\CPUAllocator.cpp:76] data. DefaultCPUAllocator: not enough memory: you tried to allocate 131072000 bytes.
- 报错 OSError: [WinError 1455] 页面文件太小,无法完成操作。
- 不吃GPU 实则环境错误的情况
- Arial.ttf 字体包缺失
- CondaHTTPError: HTTP 000 CONNECTION FAILED for url <https://repo.anaconda.co
- Solving environment: failed with initial frozen solve. Retrying with flexible solve.
- PackagesNotFoundError: The following packages are not available from current channels:
- Key already registered with the same priority: GroupSpatialSoftmax
- RuntimeError: CUDA error: no kernel image is available for execution on the device
前言
yolov5 github:https://github.com/ultralytics/yolov5
测试显卡:GTX 2060
python版本:3.8.12
CUDA版本:11.6
pytorch版本:1.10.1
环境搭建和测试运行中 遇到相关报错可参考 [报错相关]
环境搭建
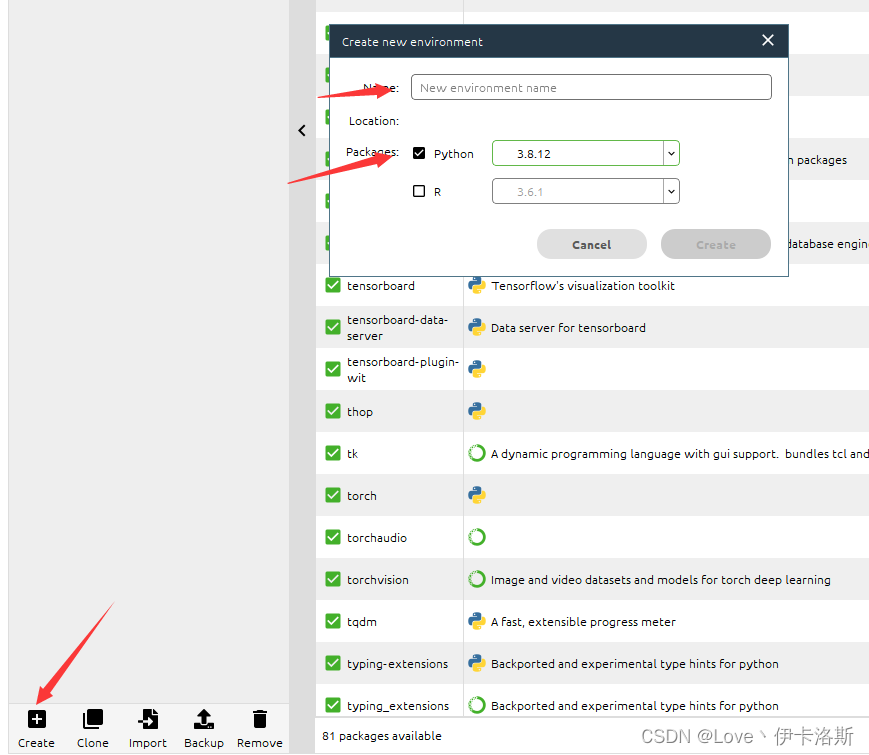
Anaconda
当然如果你不想用Anaconda,可以跳过这一步,直接安装和配置你的python环境也可以。
我这采取的方案是 本地环境 Anaconda
python版本选的 python3.8.12,创建环境

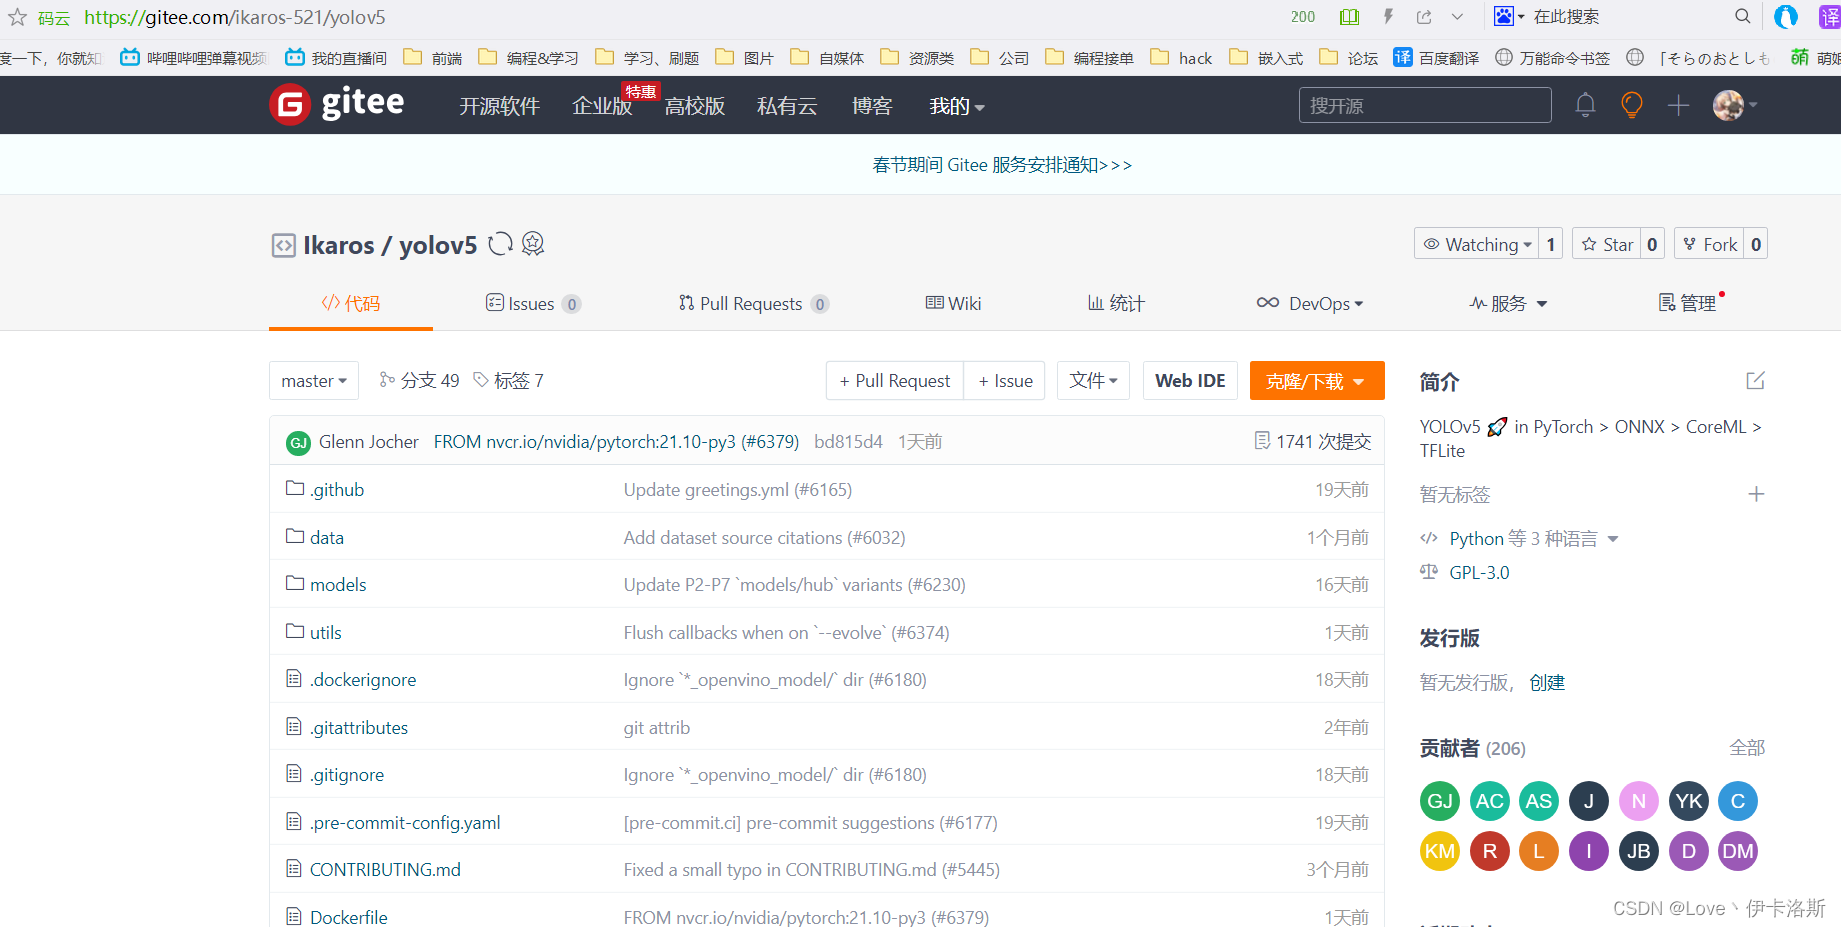
yolov5克隆到本地
官方仓库clone命令 git clone https://github.com/ultralytics/yolov5
我这采取的方案是fork了仓库 同步到了gitee,然后clone
安装相关依赖库
如果你不想用pycharm,也可以直接cmd进入指定目录,然后执行pip安装命令
我这采用pycharm打开工程,配置为 conda的环境
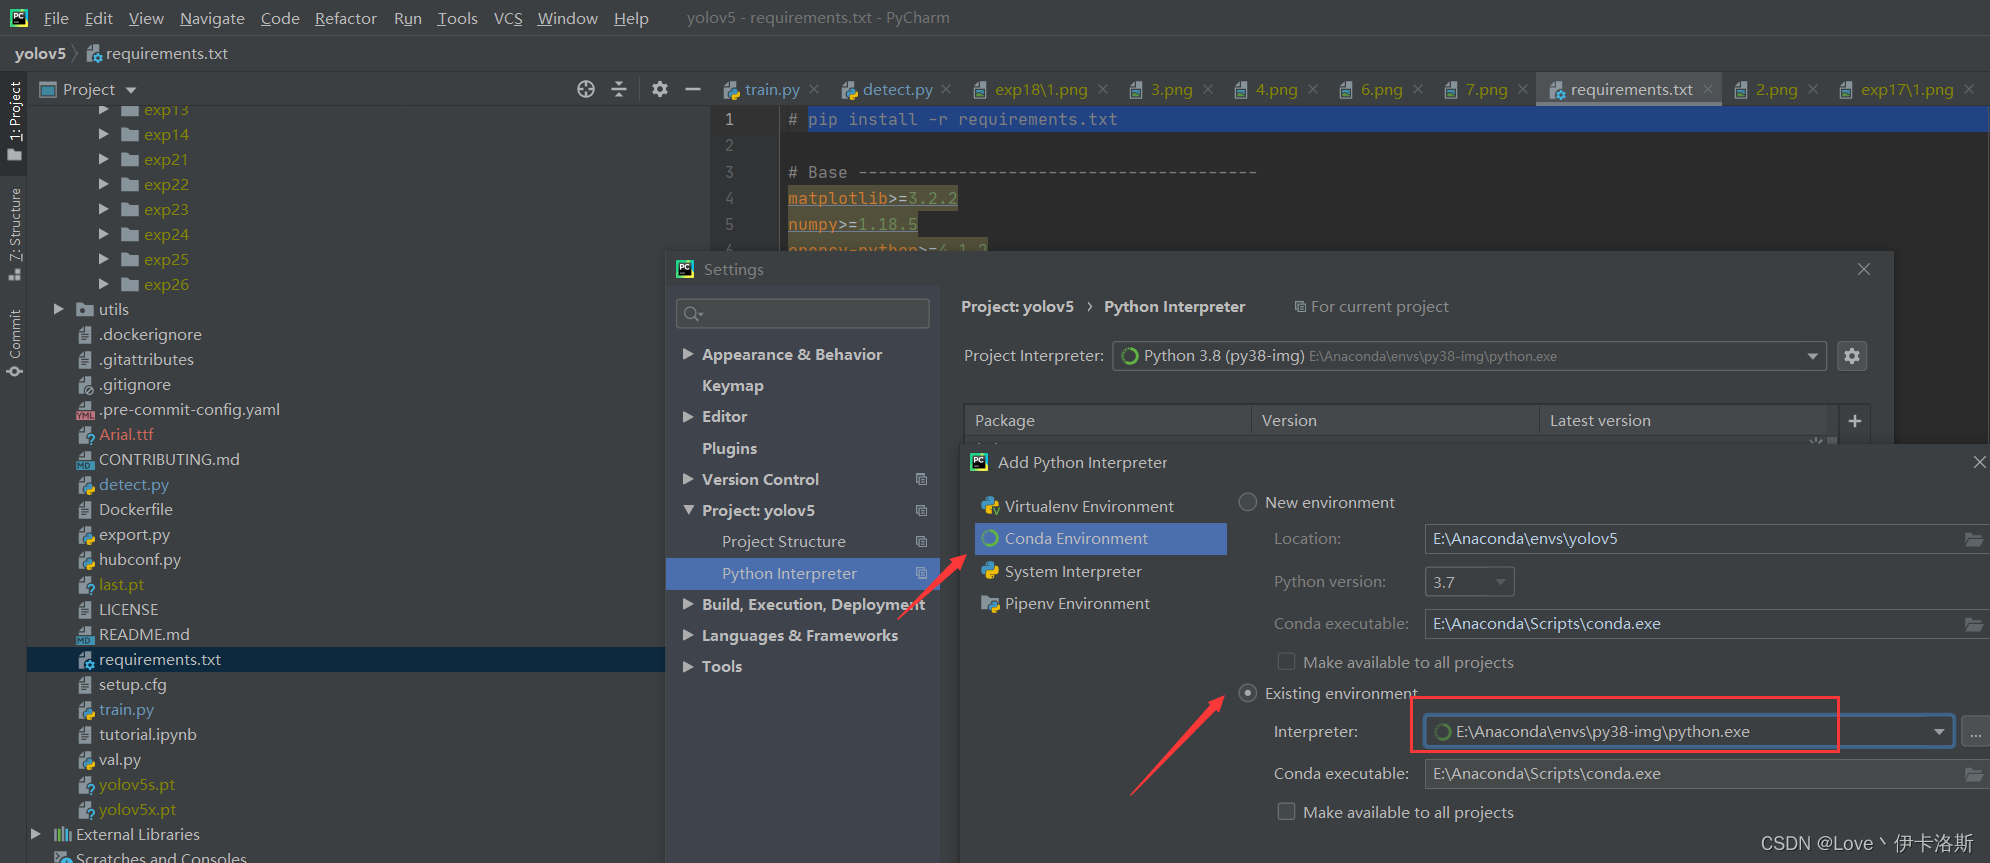
根据官方说明文档进行安装
激活我们刚才创建的环境 py38-img

执行pip命令 pip install -r requirements.txt
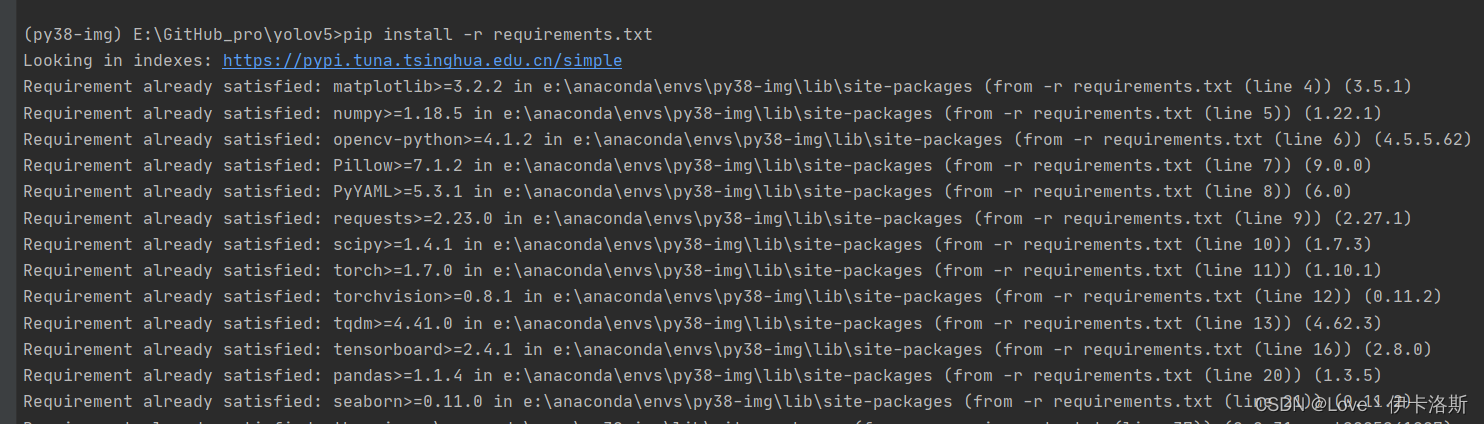
完成安装。
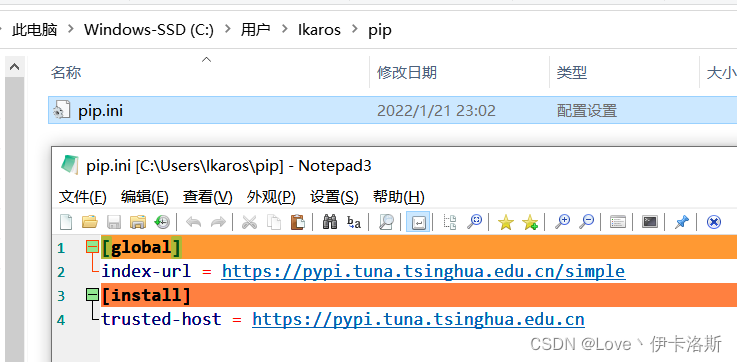
ps:我这已经换了源
路径:C:\Users\用户名\pip
pip.ini 内容为:
[global]
index-url = https://pypi.tuna.tsinghua.edu.cn/simple
[install]
trusted-host = https://pypi.tuna.tsinghua.edu.cn
安装CUDA和cuDNN(有显卡需求的话)
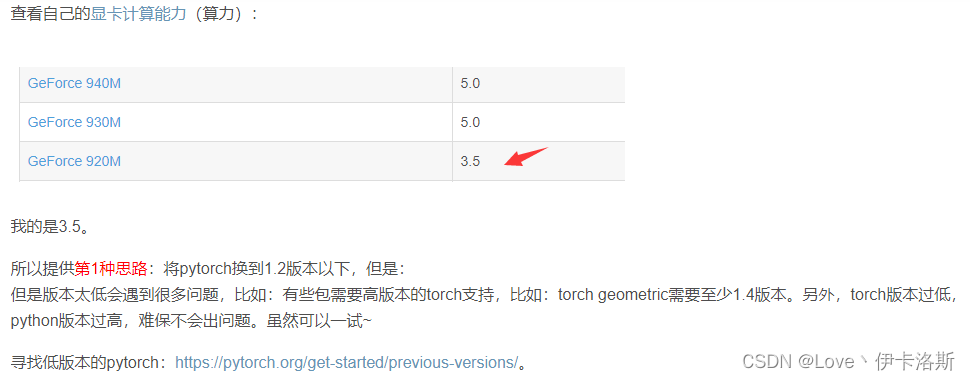
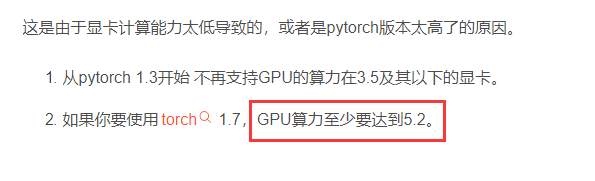
查看NVIDIA显卡计算能力
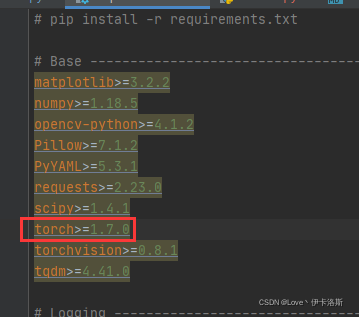
据 RuntimeError: CUDA error: no kernel image is available for execution on the device得知,如果你要使用torch 1.7,GPU算力至少要达到5.2。那么根据博主提供的算力表,如果没达标就不用装了。pytorch安装cpu版本吧。

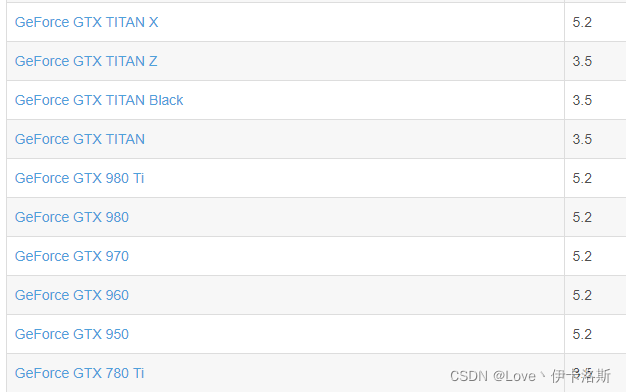
ps:我的显卡是RTX2060
参考文章:win10安装CUDA和cuDNN的正确姿势
CUDA下载页面:https://developer.nvidia.com/cuda-downloads
cuDNN下载页面:https://developer.nvidia.com/rdp/cudnn-download
根据教程 安装和配置好环境, cudnn里面的文件 需要复制到 cuda的对应文件夹下。这里访问比较困难
我这同步到了阿里云盘:「cuda_11.6.0_511.23_windows.exe」https://www.aliyundrive.com/s/6Q4yRH9nJ8Q

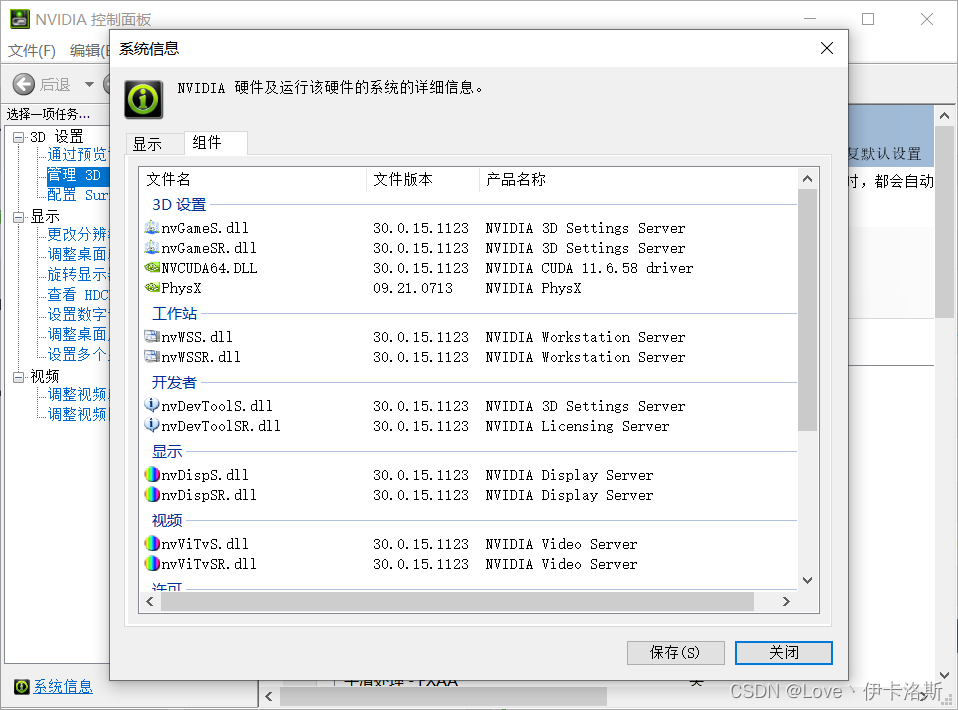
环境变量的配置
C:\Program Files\NVIDIA GPU Computing Toolkit\CUDA\v11.6
C:\Program Files\NVIDIA GPU Computing Toolkit\CUDA\v11.6\lib\x64

安装完后的测试 nvcc -V
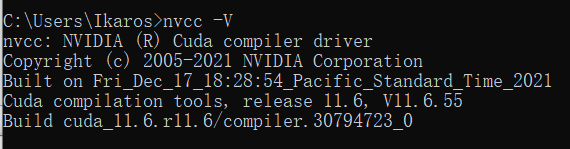
C:\Program Files\NVIDIA GPU Computing Toolkit\CUDA\v11.6\extras\demo_suite执行测试程序

这是我的相关参数
pytorch单独再次安装(视情况采用)
如果你前面采用了pip安装依赖,此处需要先卸载了 pip uninstall torch torchvision
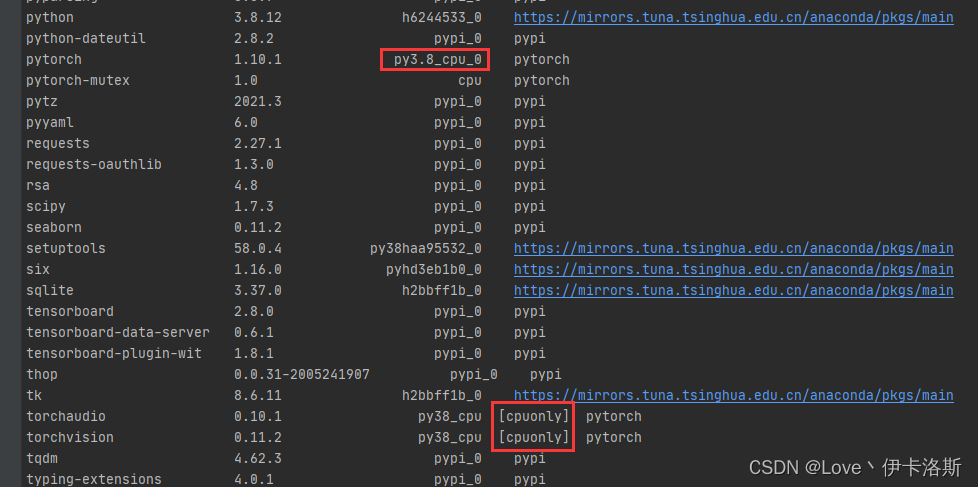
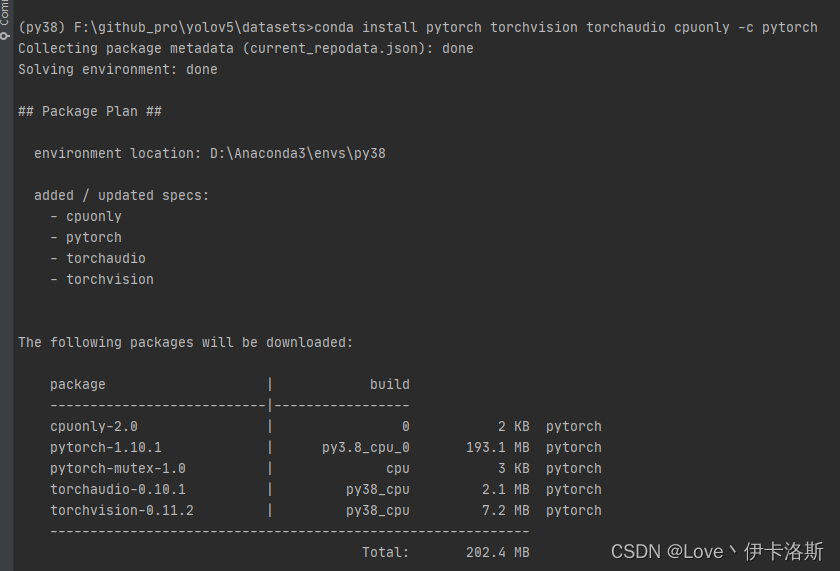
因为pytorch这块安装有 cpu only的版本 所以我掉了很多次坑
参考:Windows环境下Anaconda3安装配置pytorch详细步骤(踩坑汇总)
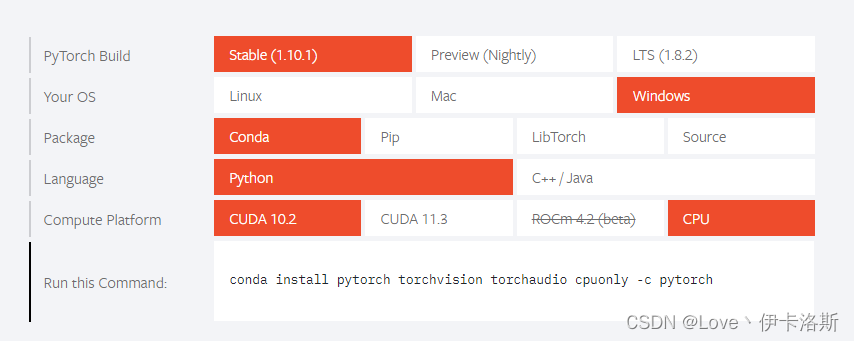
Pytorch版本、CUDA版本与显卡驱动版本的对应关系
注意版本是否对应!
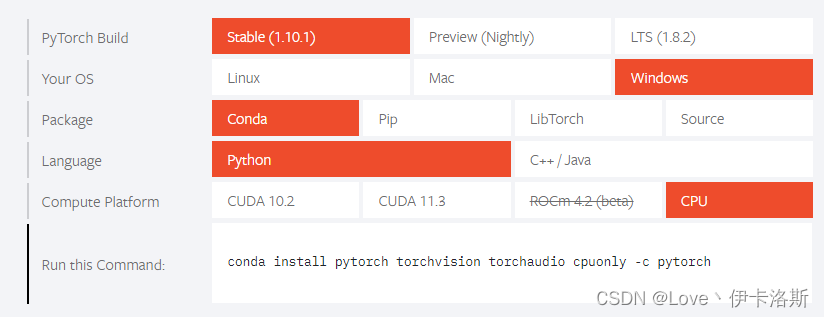
pytorch官网:https://pytorch.org/
根据你的需求生成安装命令,(后缀的 -c pytorch不删 是走官网下载,可以尝试删除)
conda install pytorch torchvision torchaudio cudatoolkit=11.3 -c pytorch

查看 安装的相关库 conda list ,没有带 cpuonly 对头

CPU版 conda install pytorch torchvision torchaudio cpuonly -c pytorch
测试官方demo
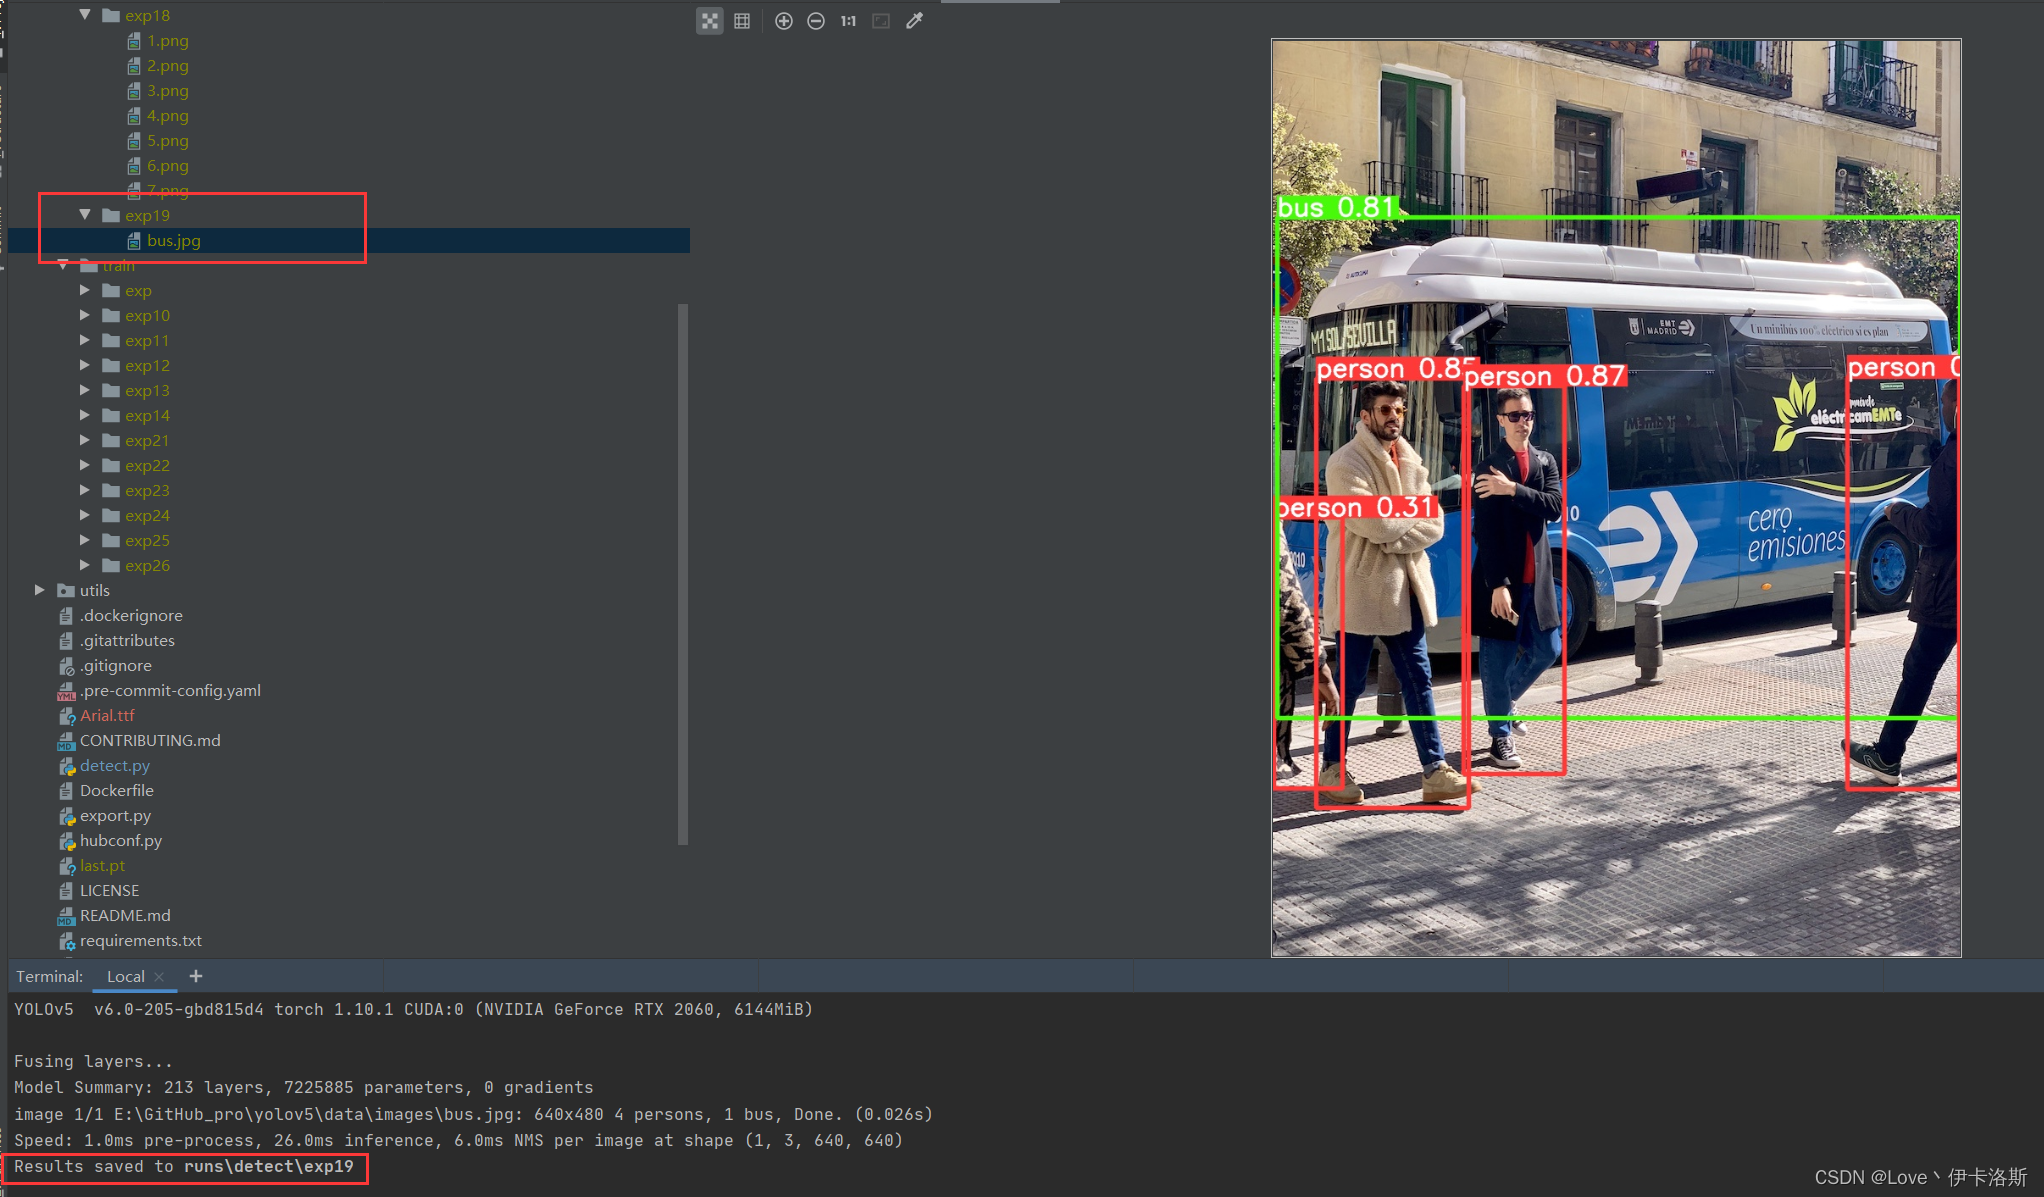
detect.py识别 bus.jpg
源码里面写了相关的使用命令和传参,当然直接跑多半会报错
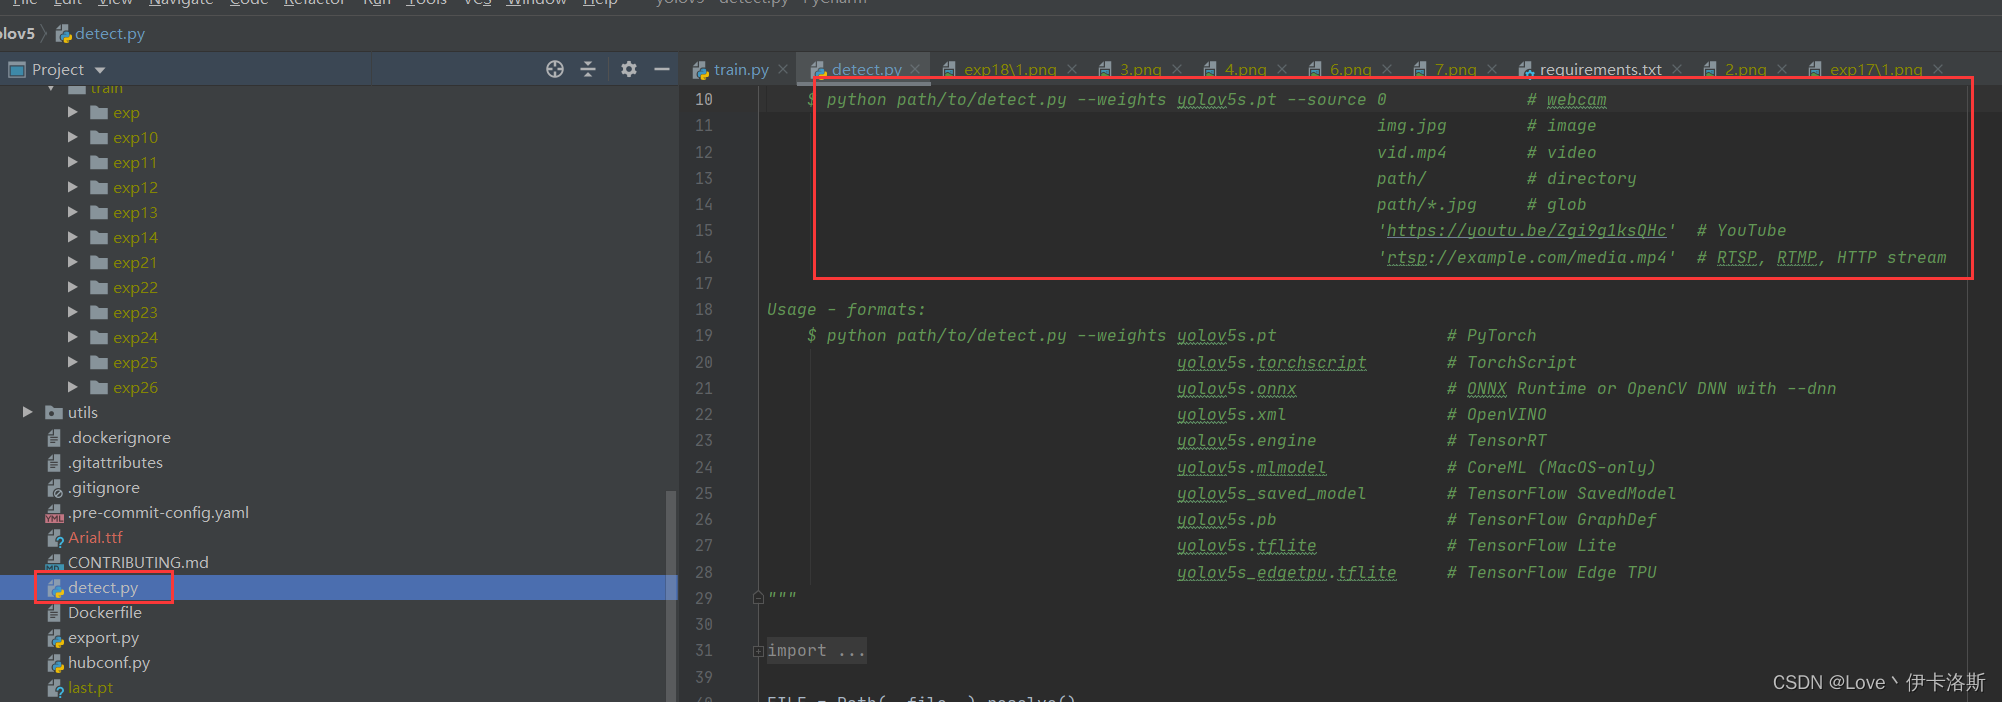
正常情况运行命令 python detect.py --weights yolov5s.pt --source data\images\bus.jpg,可以完成图片识别,显示结果到runs下的exp里

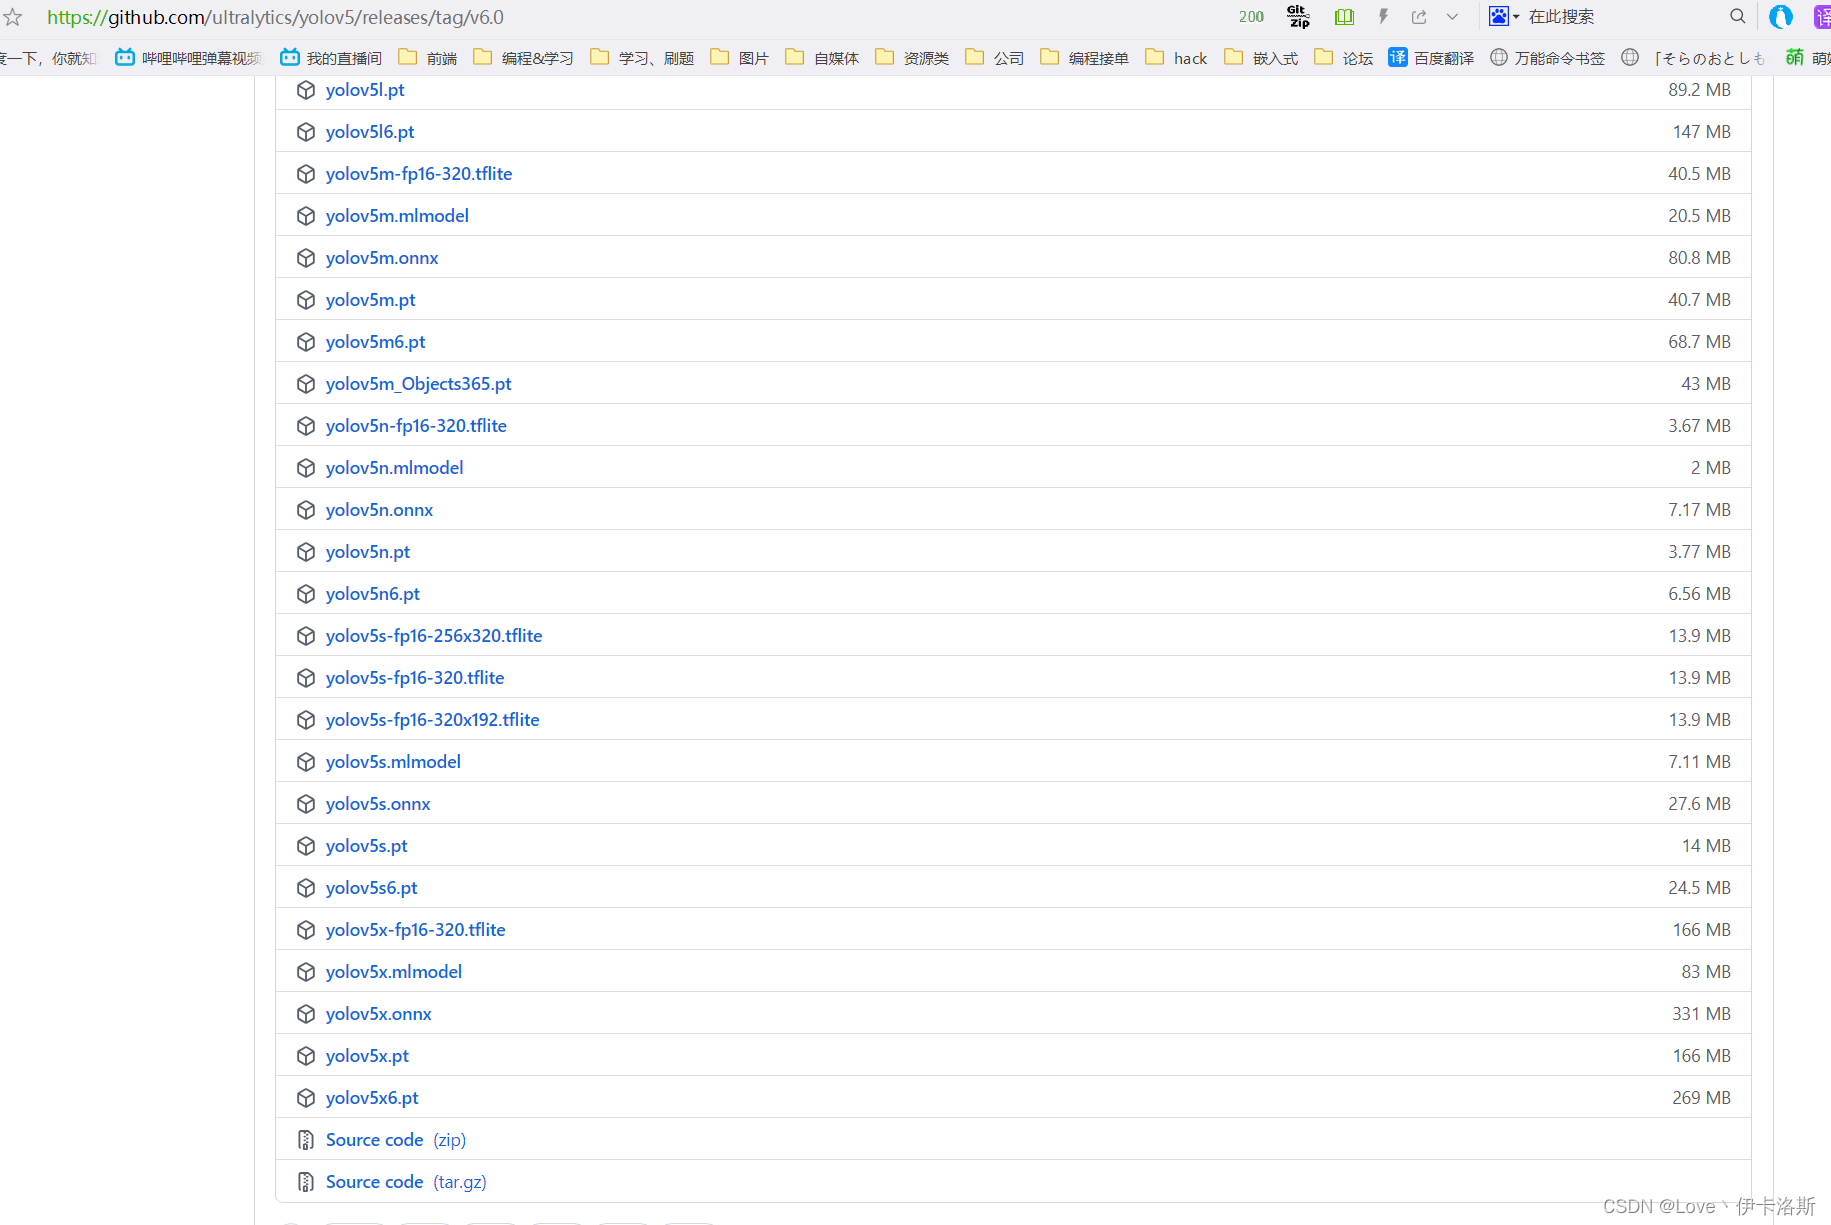
当然 细心的你会发现缺少了 对应的权重文件 yolov5s.pt,相应的权重文件可以在官方github仓库下载:https://github.com/ultralytics/yolov5/releases
当然如果你没有下载,例程也会自动帮你运行下载程序,不过网络不好的情况下多半会出现443等报错然后下载失败。
另外你例程会下载字体包 Arial.ttf,如果下载失败可以自行去提示的官网下载,然后存放在指定路径下 C:\Users\用户名\AppData\Roaming\Ultralytics,并安装字体包。
我这阿里云盘也上传了:https://www.aliyundrive.com/s/xzgh5fr6yLU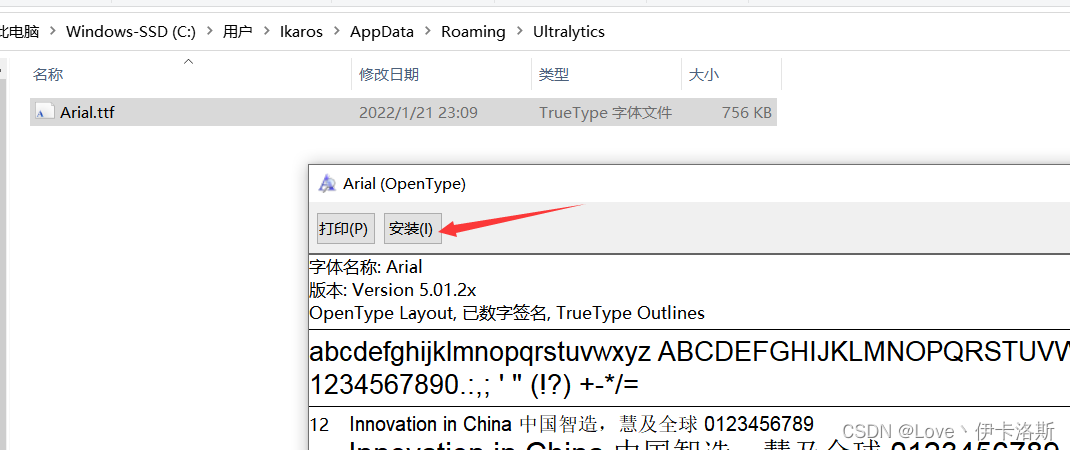
train.py训练模型
训练官方提供的coco128
源码里也同样提供了 参考的命令 当然直接跑也是运行不了的啦
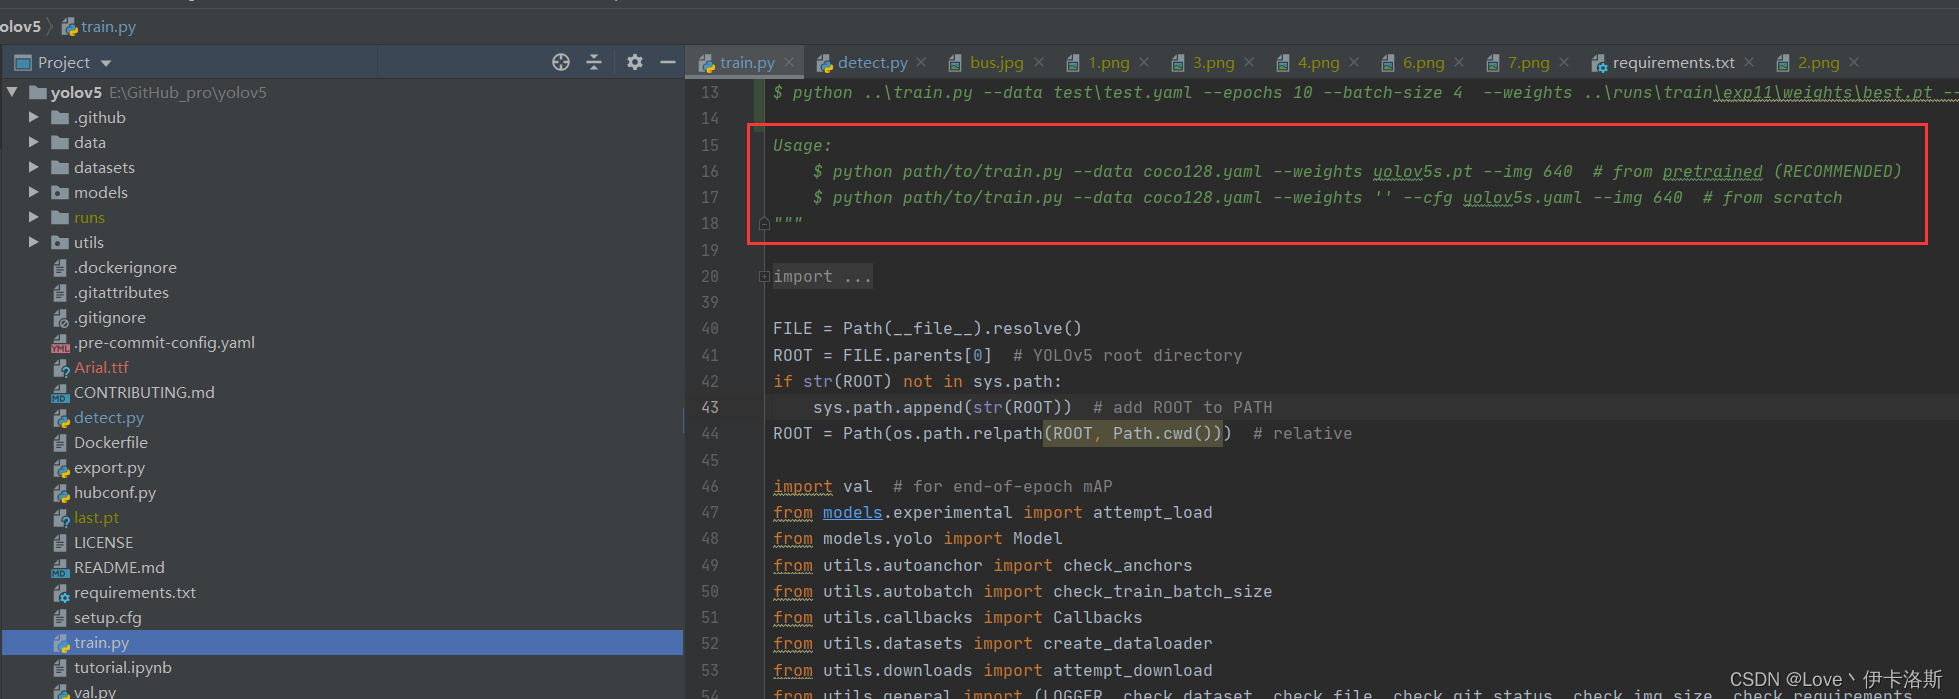
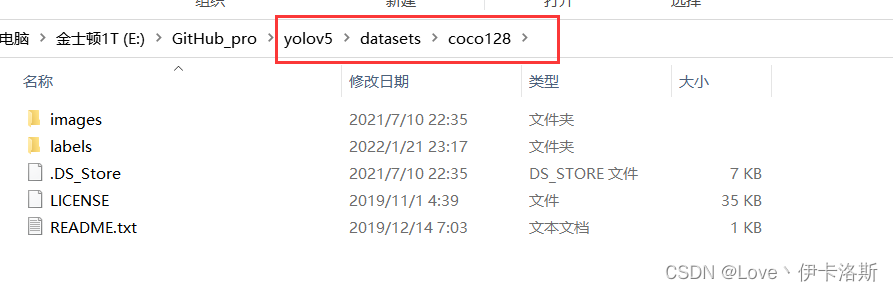
当然我这提供了运行命令,先创建文件夹 datasets,然后将coco128数据集下载后解压进去(当然例程会自己下载,不过我这下载还是失败了)
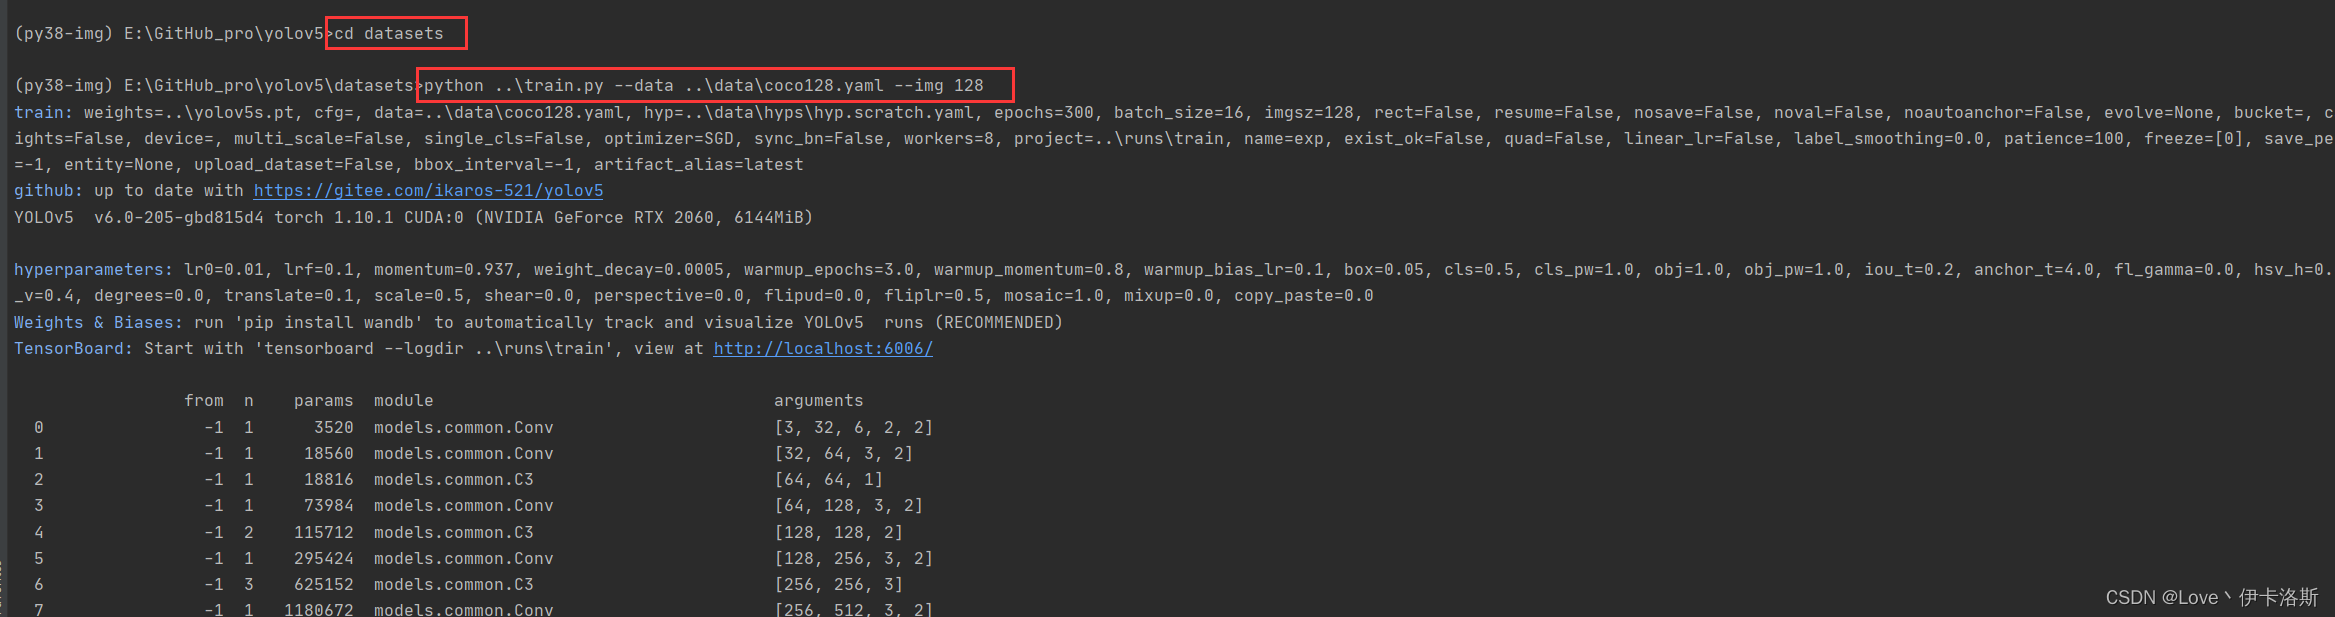
$ cd datasets
$ python ..\train.py --data ..\data\coco128.yaml --img 128
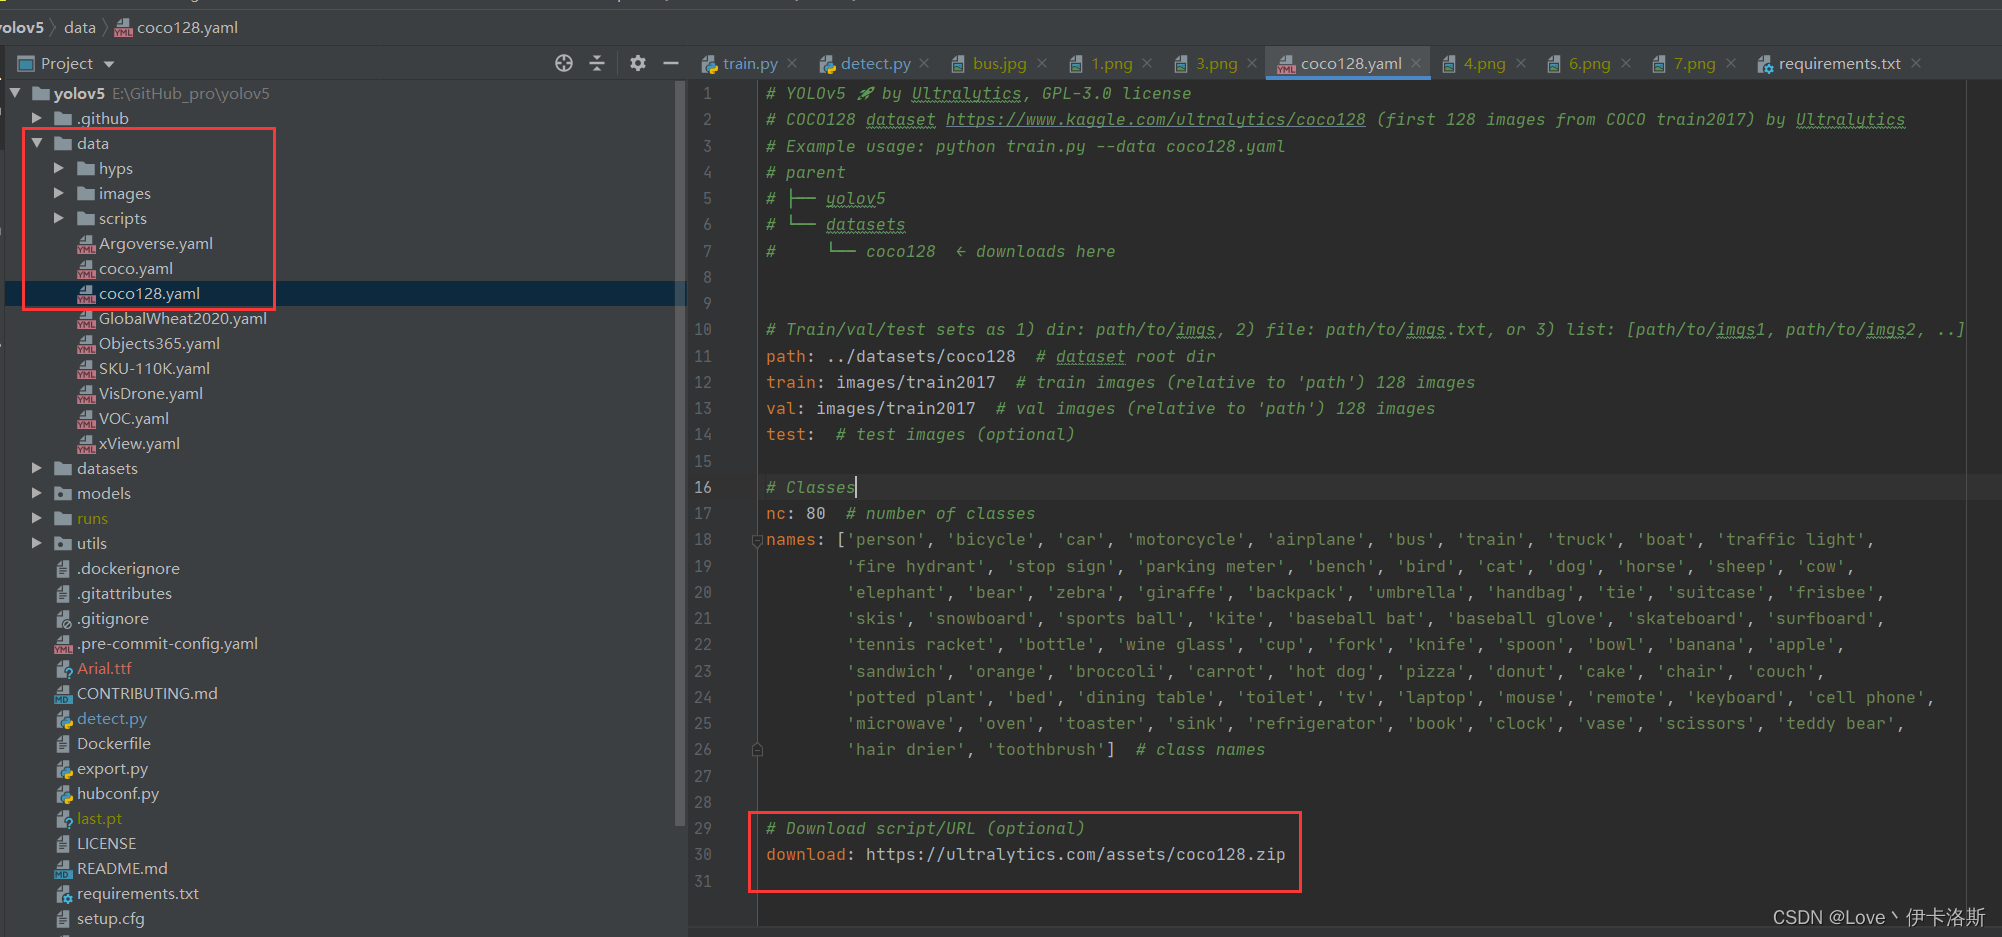
例程会读取 data\coco128.yaml 文件,yaml里面写了下载的数据集路径,你可以手动下载然后解压到datasets里面
https://ultralytics.com/assets/coco128.zip
再次执行我们的训练命令 ,开始训练(默认训练300轮 可以通过--epochs 修改轮数,另外默认配置还是比较吃电脑配置的,如果只是测个程序而已,可以使用我这提供的第3条命令)
(如果报错:DefaultCPUAllocator: not enough memory,内存不足,就需要调小配置 更多报错参考文章末尾的目录 报错相关)
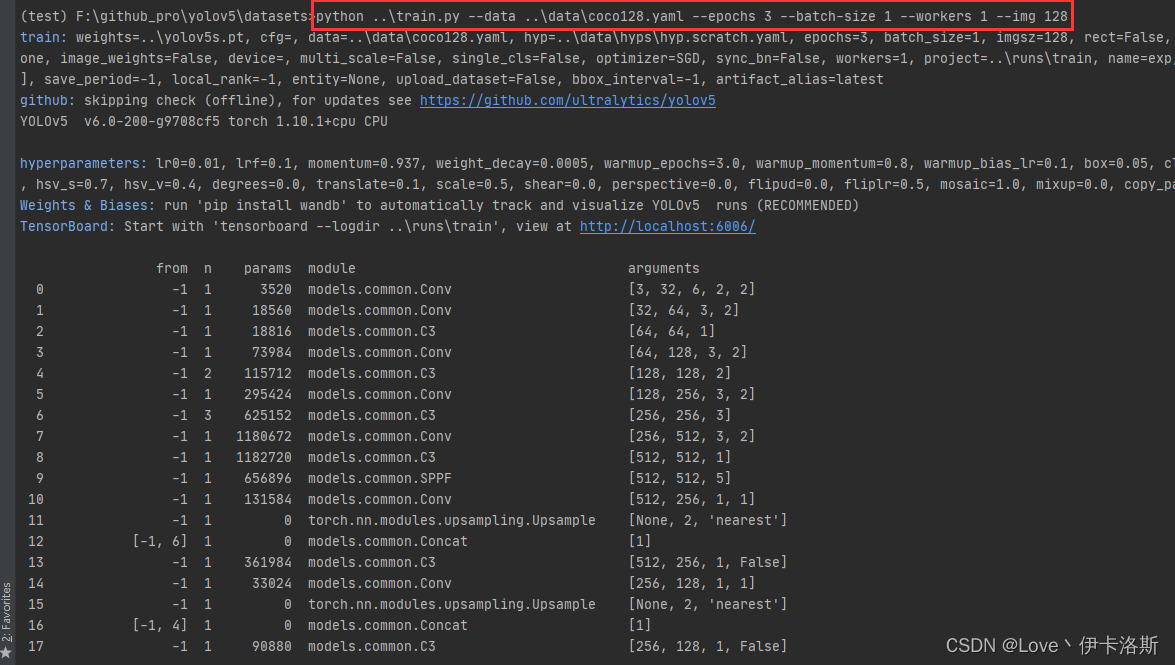
$ cd datasets
$ python ..\train.py --data ..\data\coco128.yaml --img 128
$ python ..\train.py --data ..\data\coco128.yaml --epochs 3 --batch-size 1 --workers 1 --img 128
训练自己的模型
当然可以不训练这个了,自己随便搞个test训练训练(这个test训练集 由labelimg 工具协助生成) labelimg相关使用可以参考下面的部分 传送门
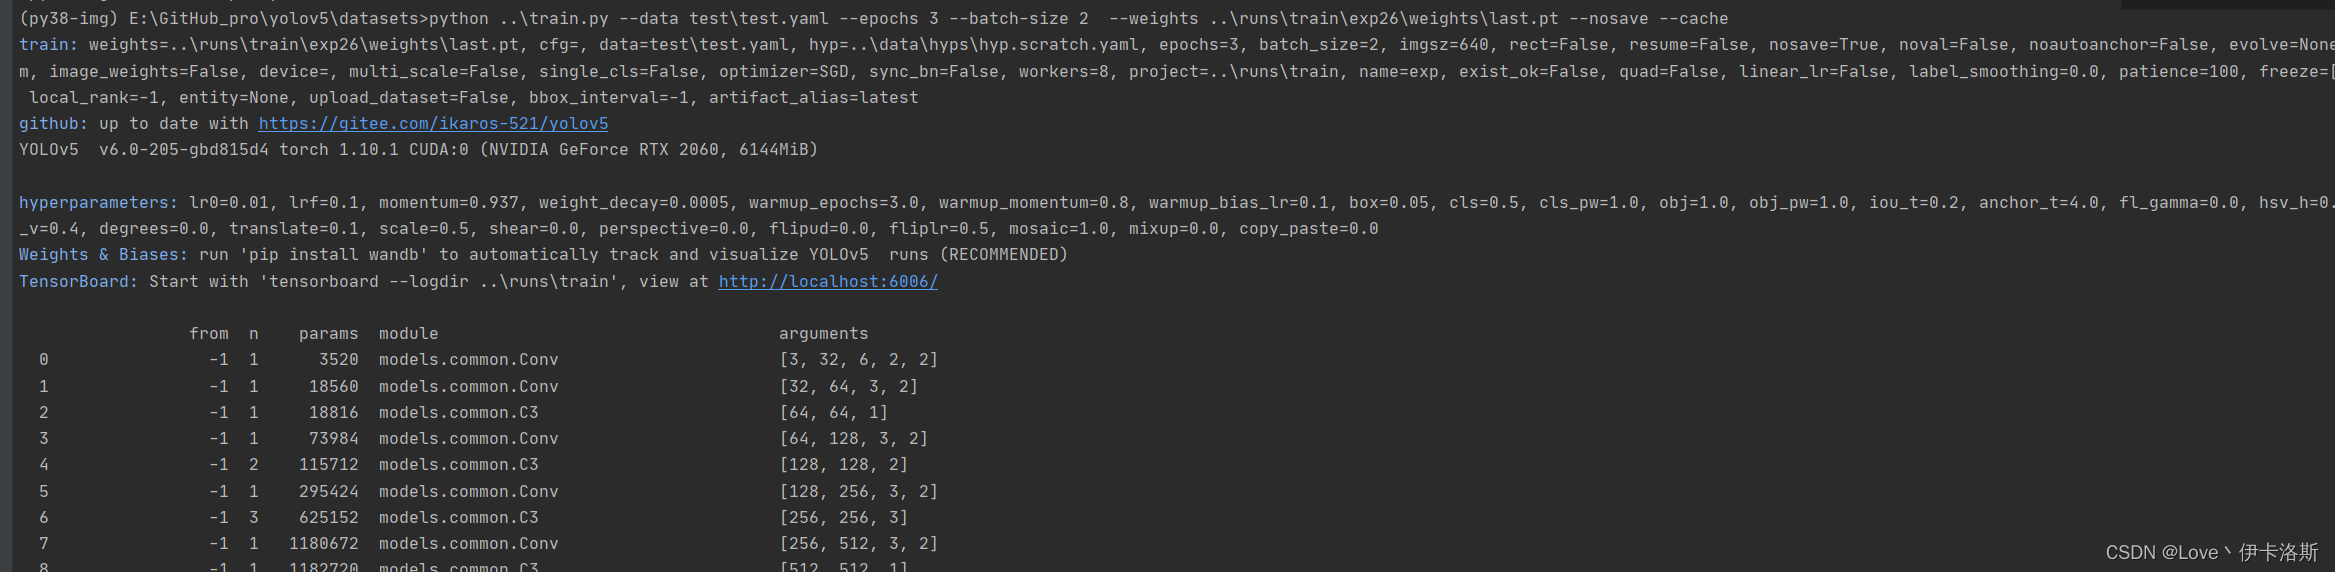
开始训练 python ..\train.py --data test\test.yaml --epochs 3 --batch-size 2 --weights ..\runs\train\exp26\weights\last.pt --nosave --cache (注意我这里传了不少参数,如果你不需要可以不加 --epochs是训练轮数,因为测试所以先调小点,节约时间。具体各个参数的含义可以看下面的参考图或直接看源码)
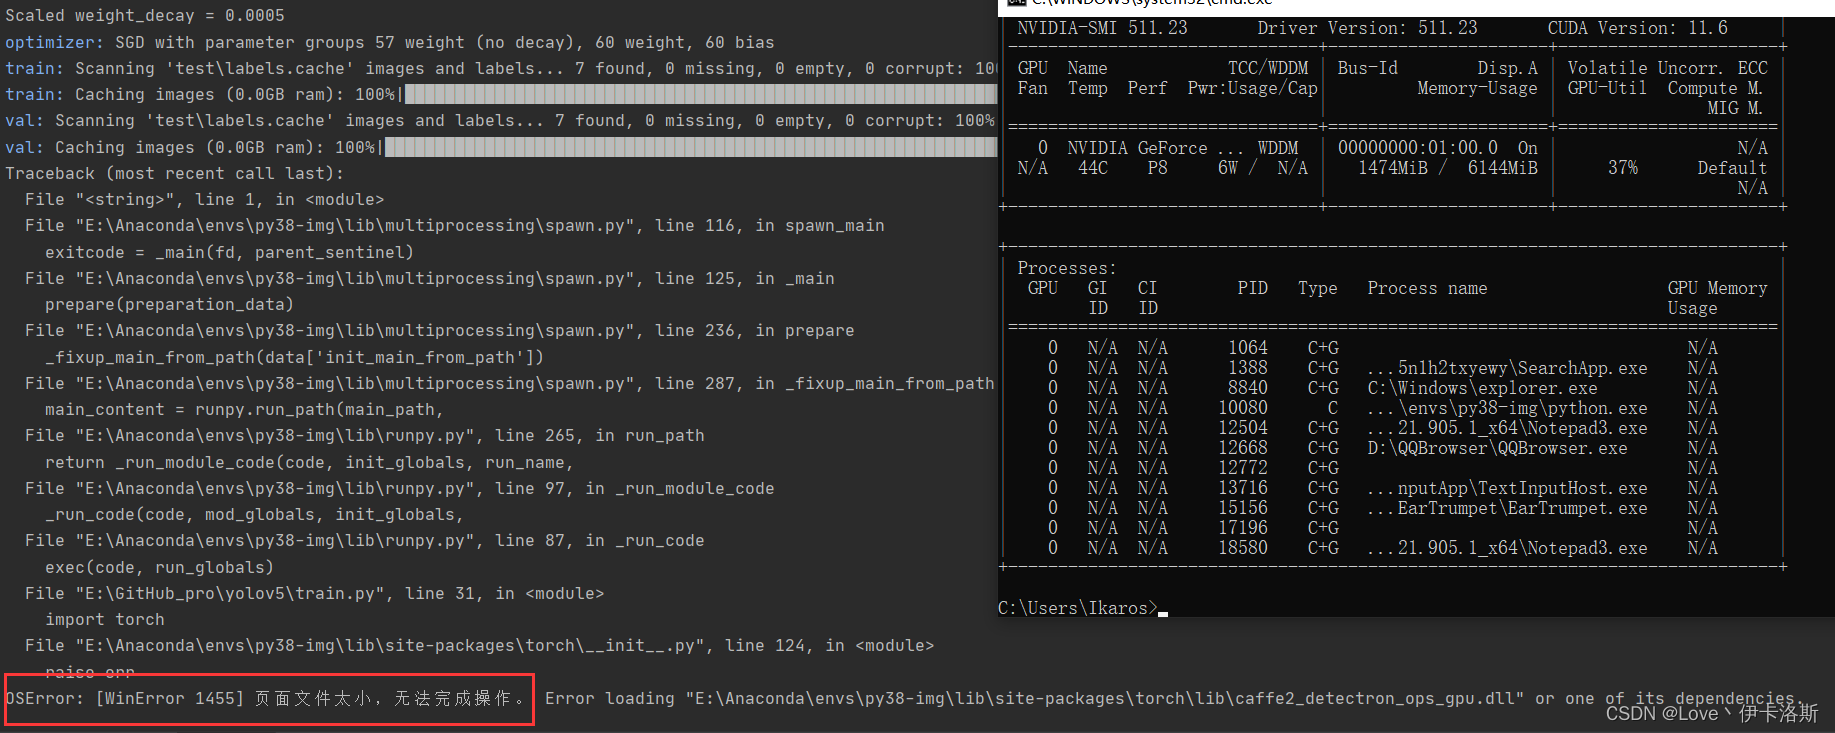
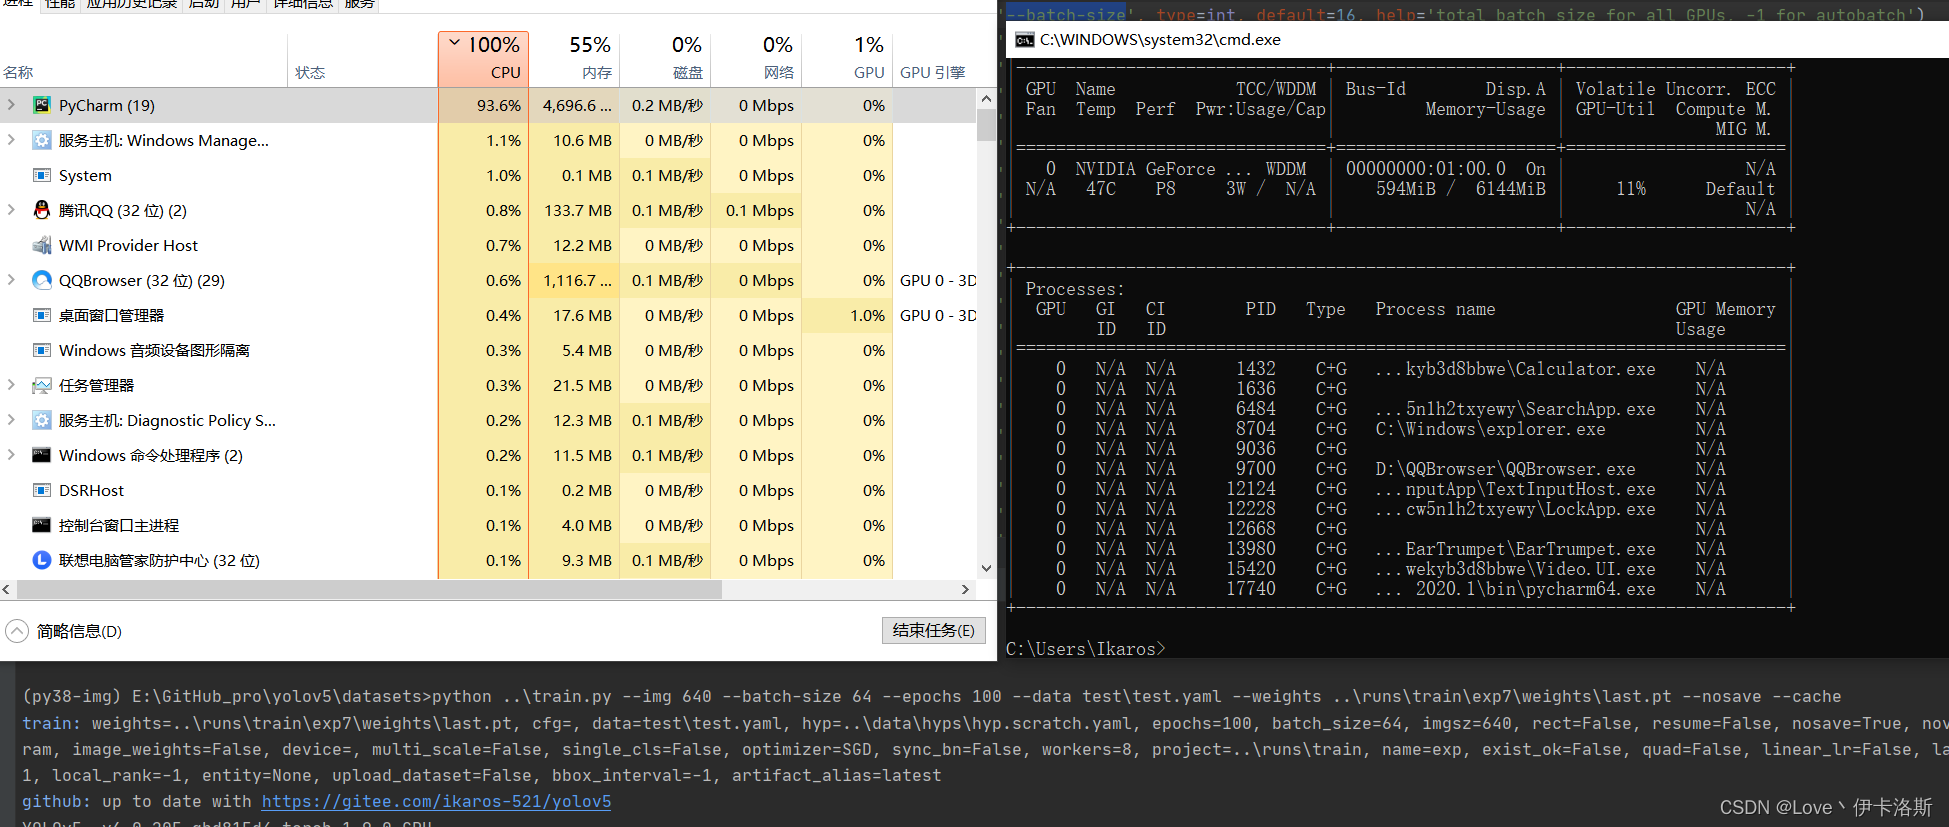
报错 OSError: [WinError 1455] 页面文件太小,无法完成操作。你可以调小 --batch-size
配合 命令 nvidia-smi,查看显卡信息
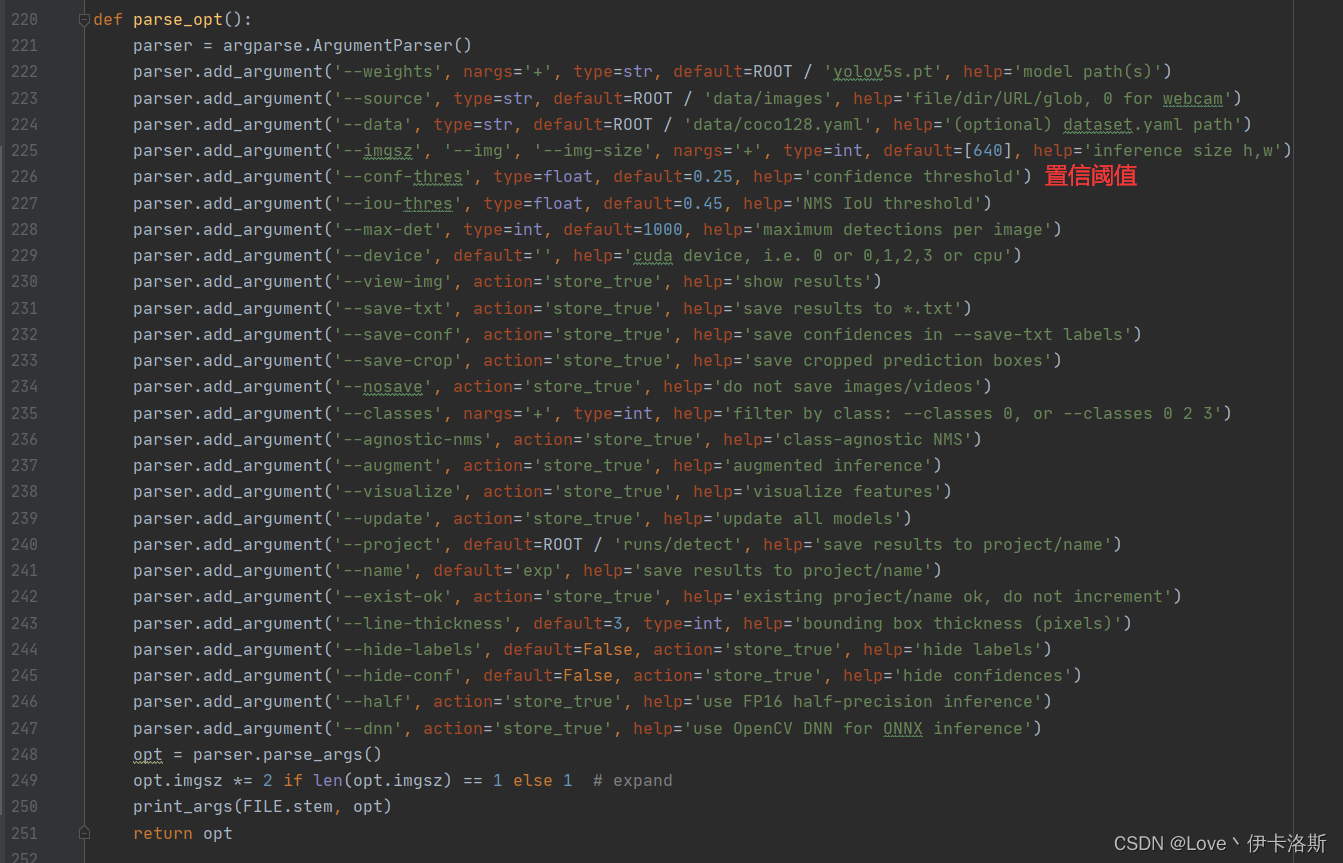
下图转自 yolov5训练相关参数解释
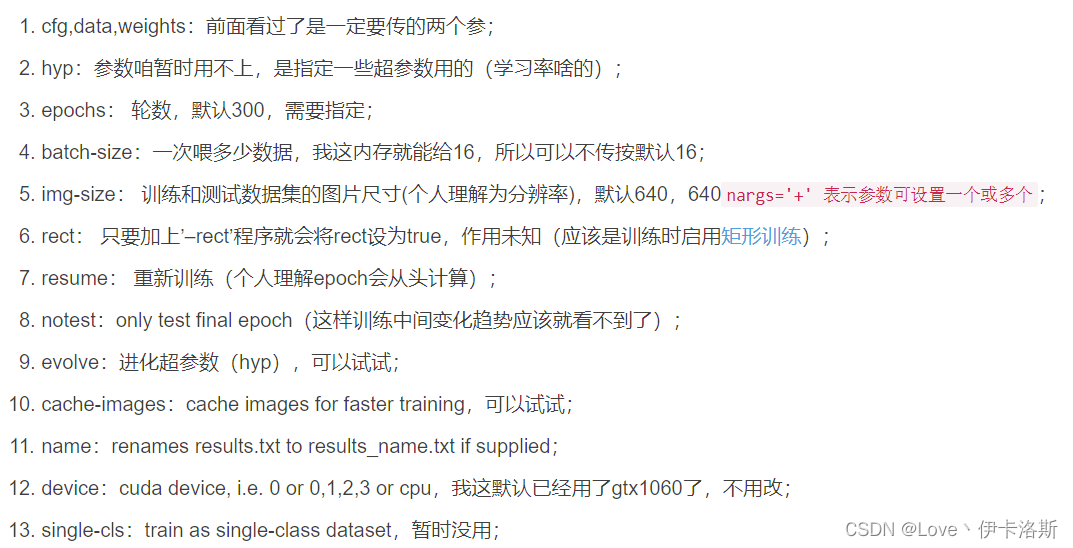
相关训练参数可参考:yolov5训练相关参数解释
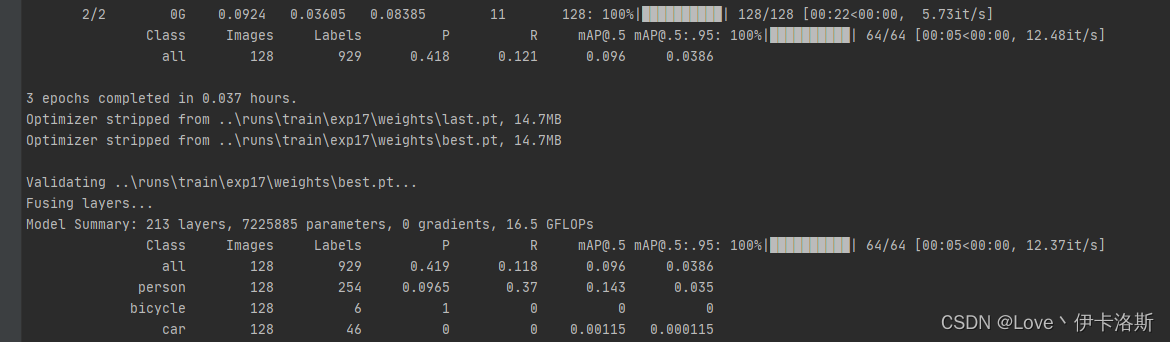
我们调小 --batch-size python ..\train.py --data test\test.yaml --epochs 3 --batch-size 2 --weights ..\runs\train\exp26\weights\last.pt --nosave --cache,成功完成训练。训练结果默认存储在 runs\train\exp 等下面,我们的权重文件 生成了2个 last.pt, best.pt 。当然可能你只会生成1个last.pt,问题不大,继续练。
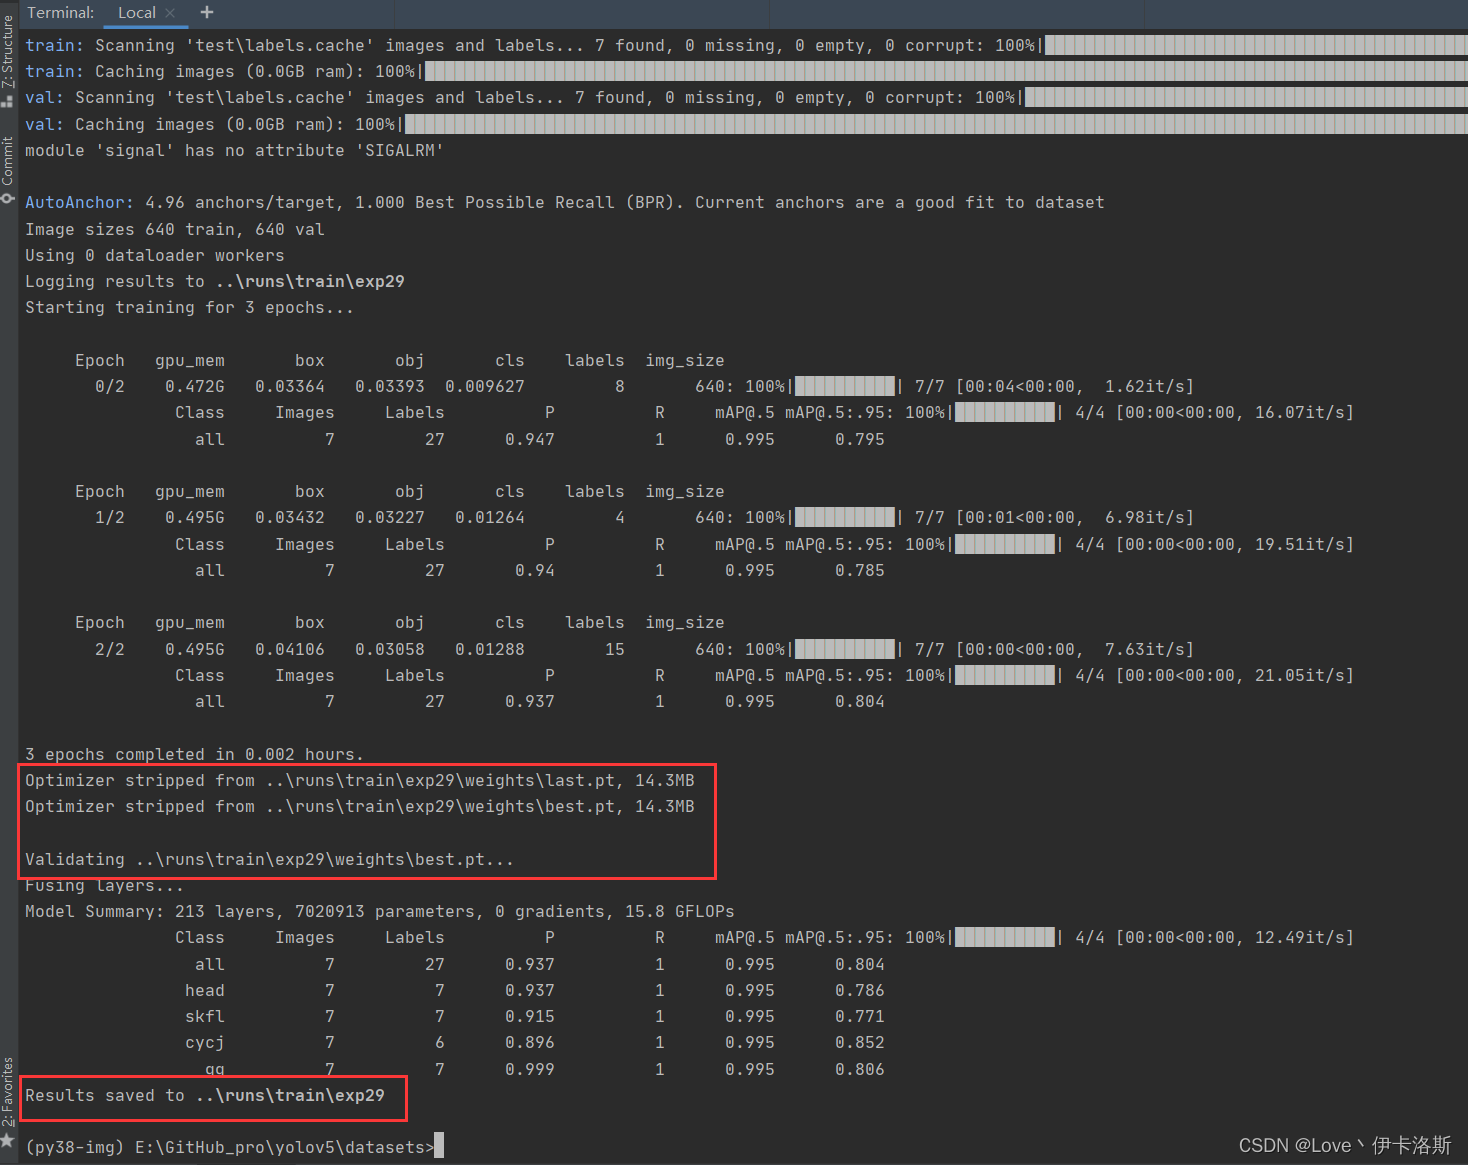
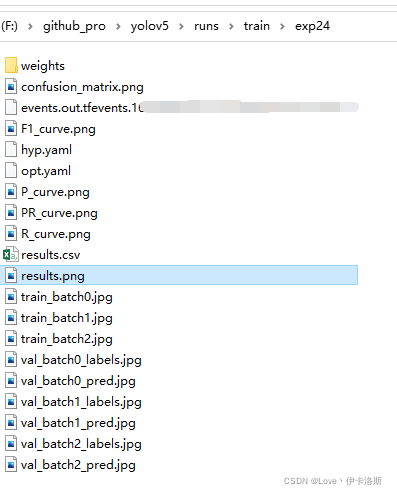
训练完后打开对应文件夹,会看到相应的分析数据,相关解析可参考:【深度学习】yolov5 可视化训练结果以及result.txt解析
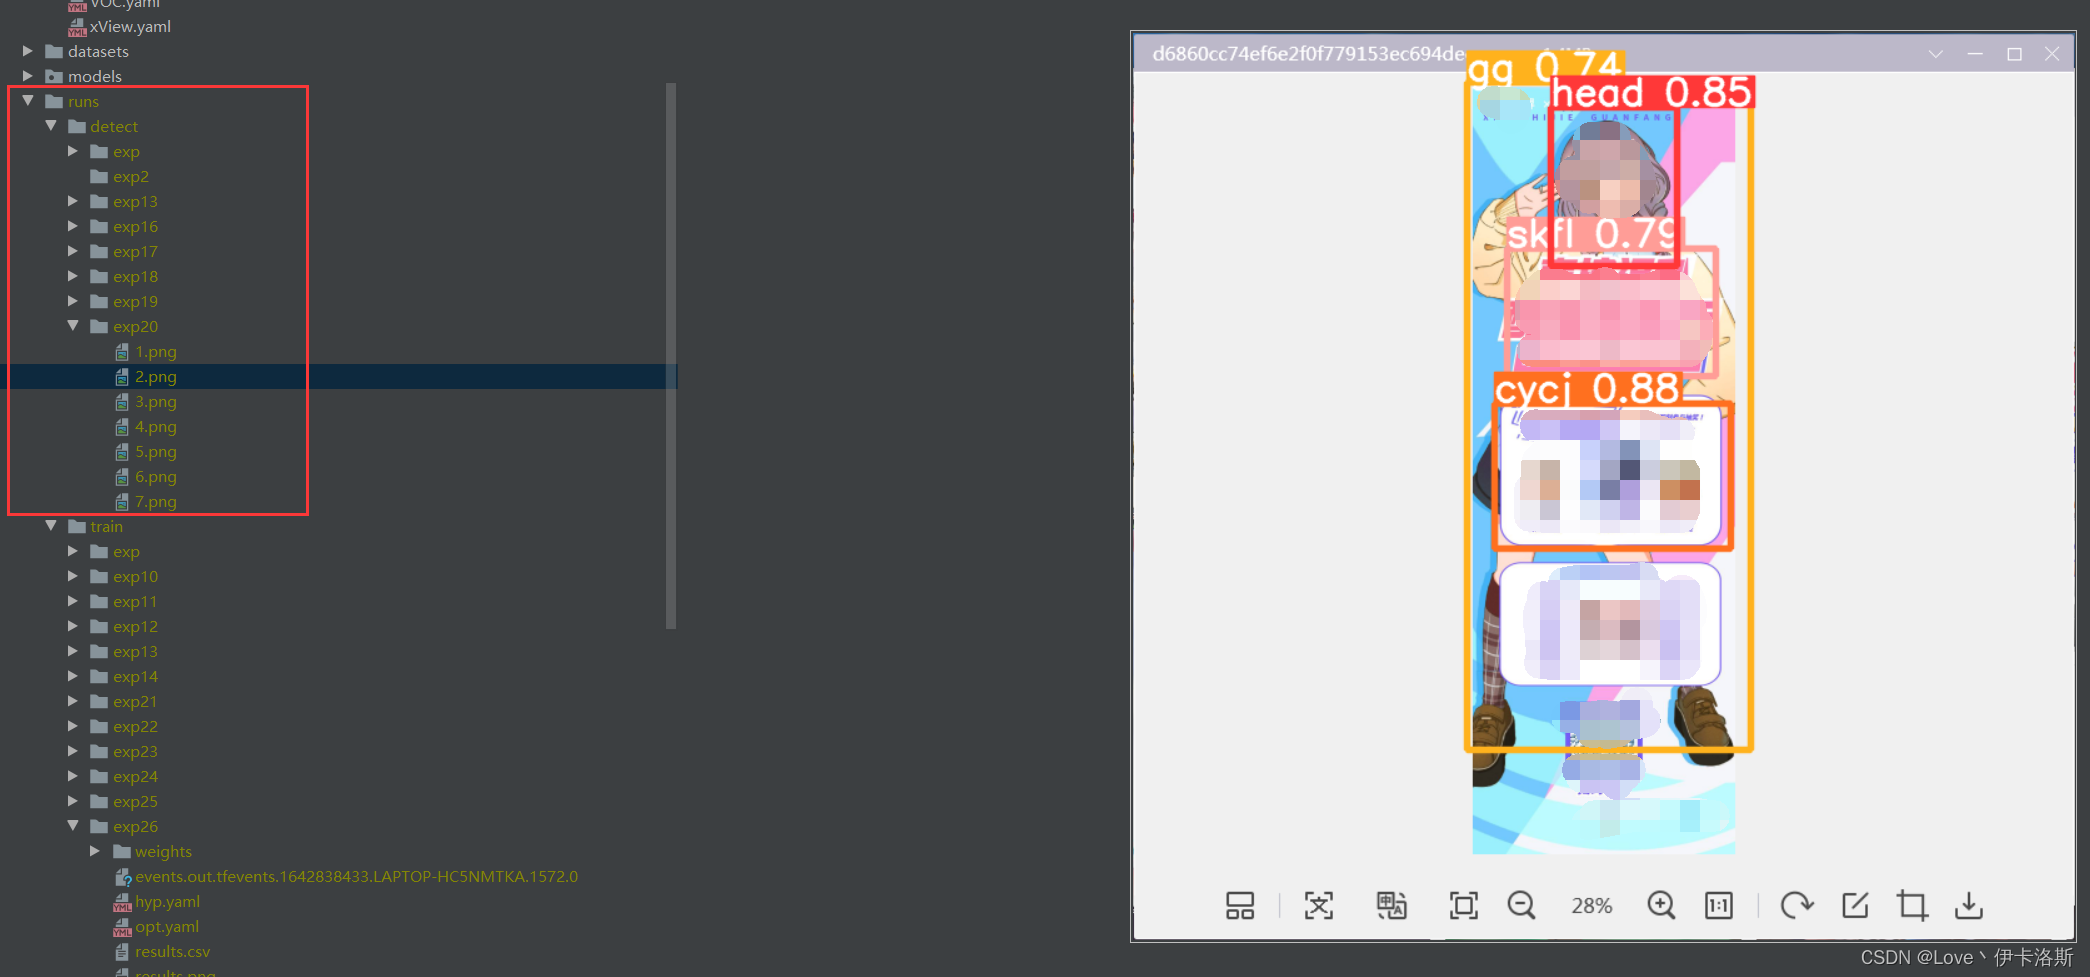
训练好后的权重 pt拿去 再次detect.py识别
相关命令
$ cd datasets
$ python ..\detect.py --weights ..\runs\train\exp29\weights\best.pt --source test\test --conf-thres 0.5
源码有各传参的解释,我们这追加了 --conf-thres 传入
因为这个模型我已经提前锻炼过,所以 准确性较高。
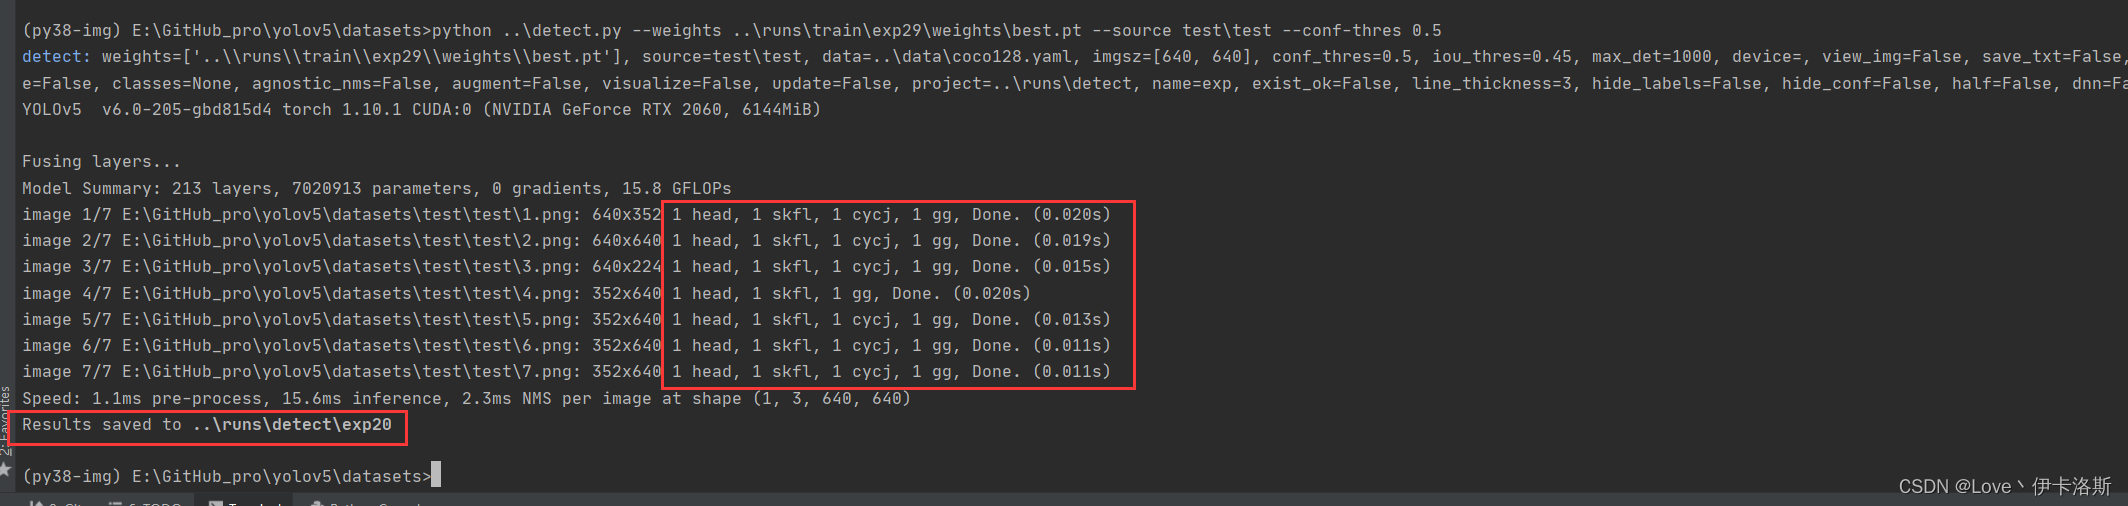
置信度还是很不错的 ,当然你刚开始训练的话,基本也就0.1差不多(粗略估计)
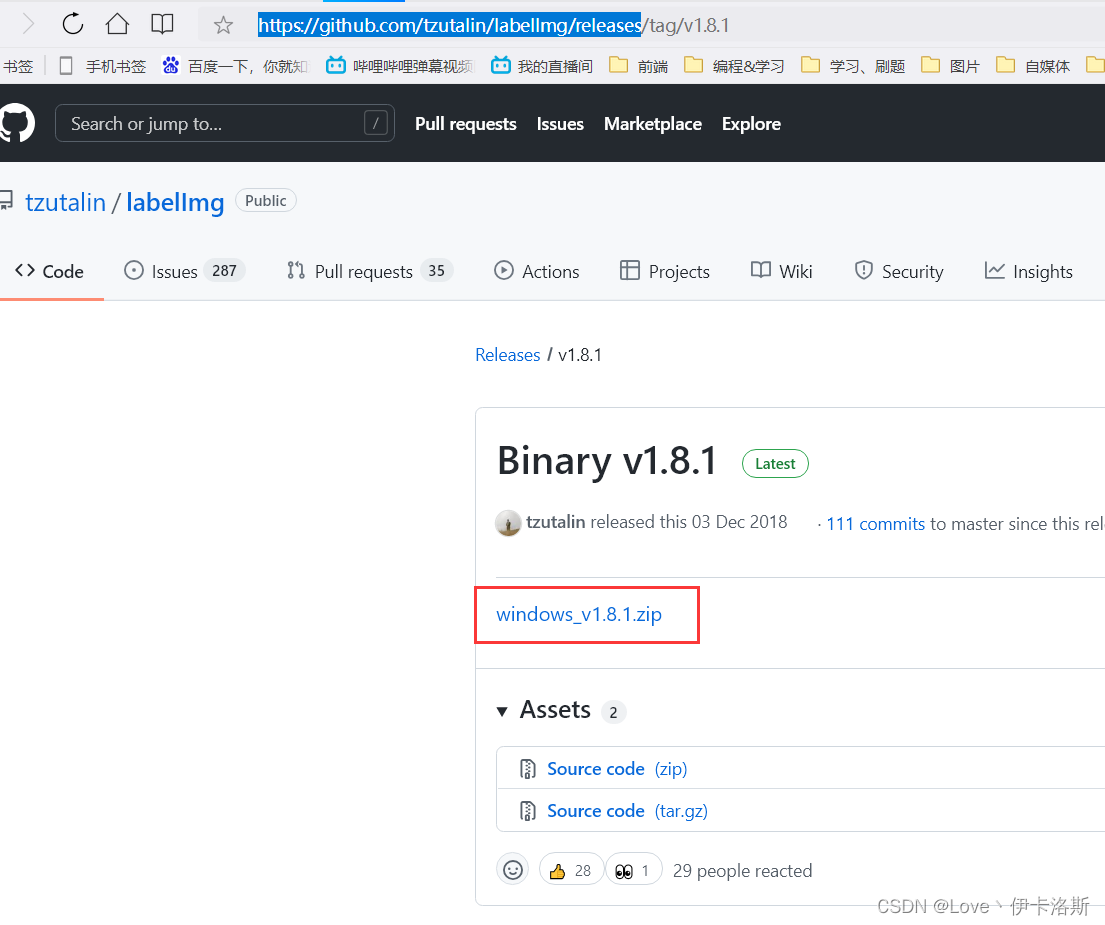
labelimg相关使用
下载
官方仓库:https://github.com/tzutalin/labelImg/releases
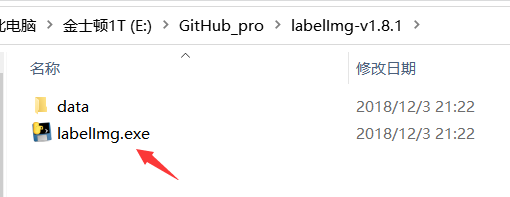
使用
解压,运行exe
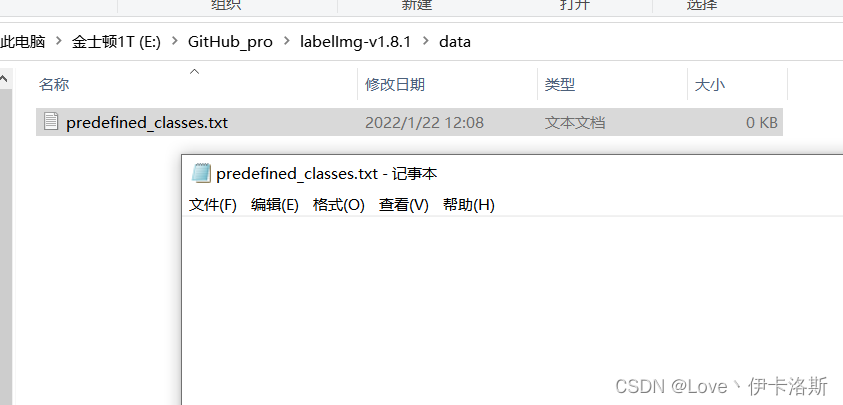
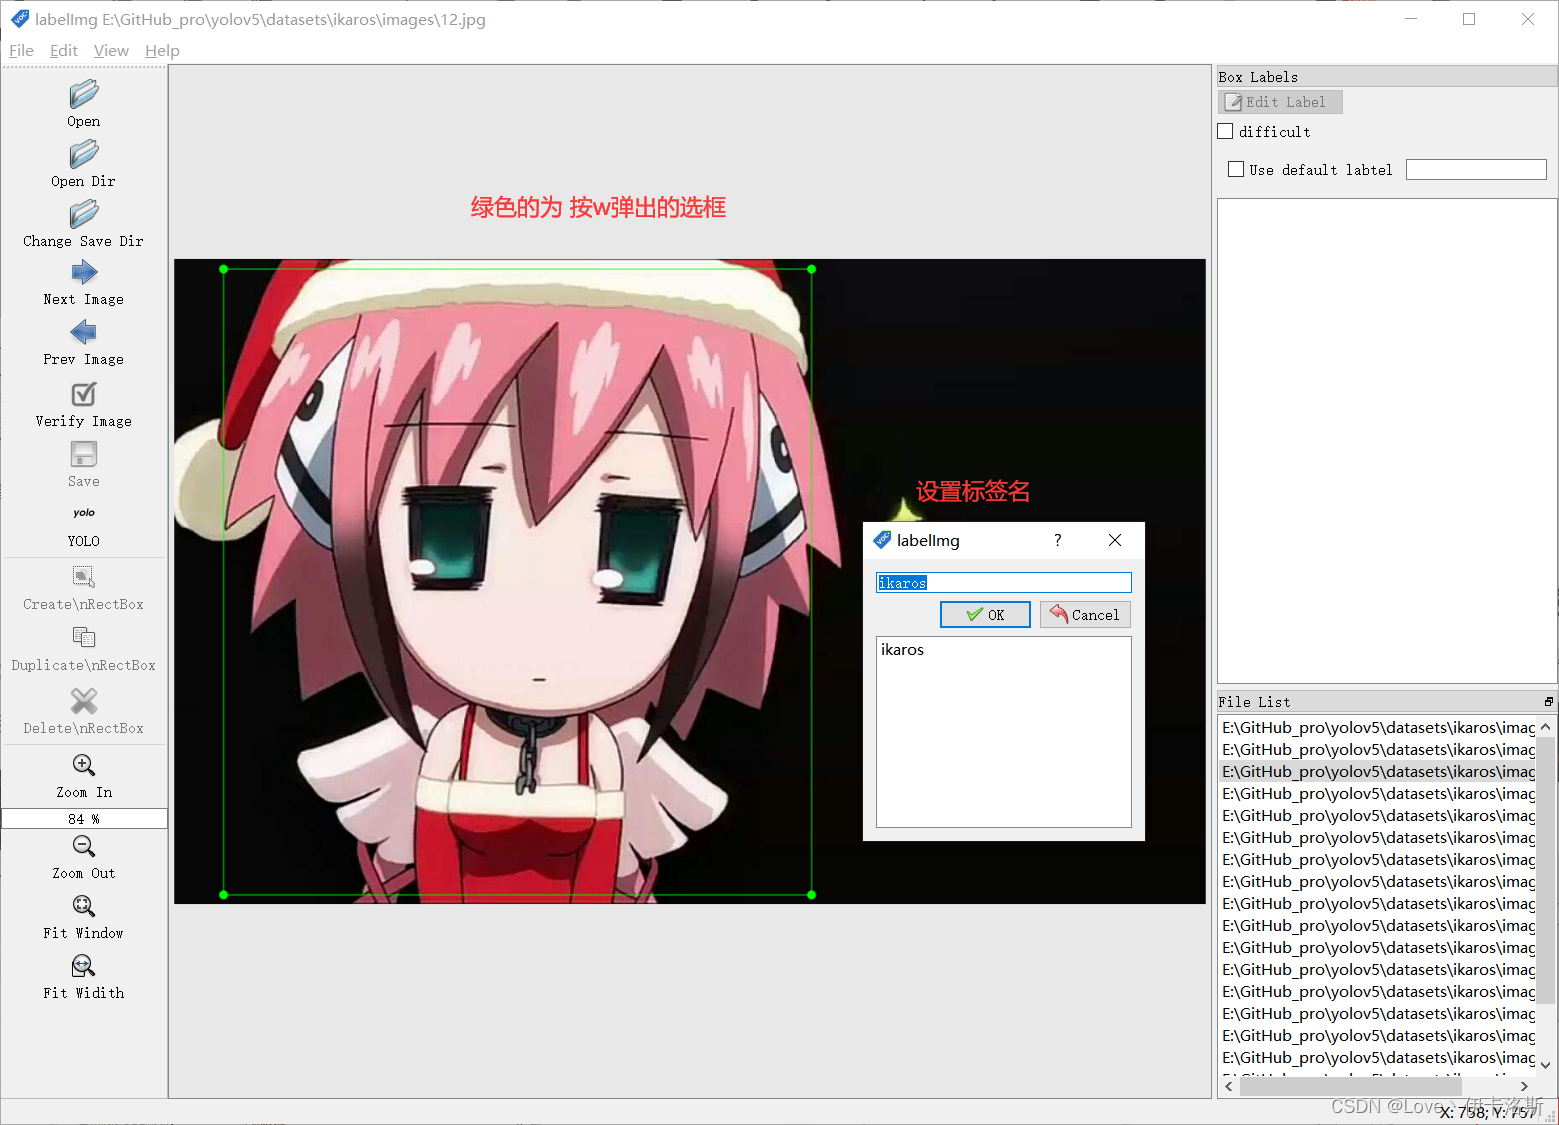
删除默认提供的类名(根据自己需要)
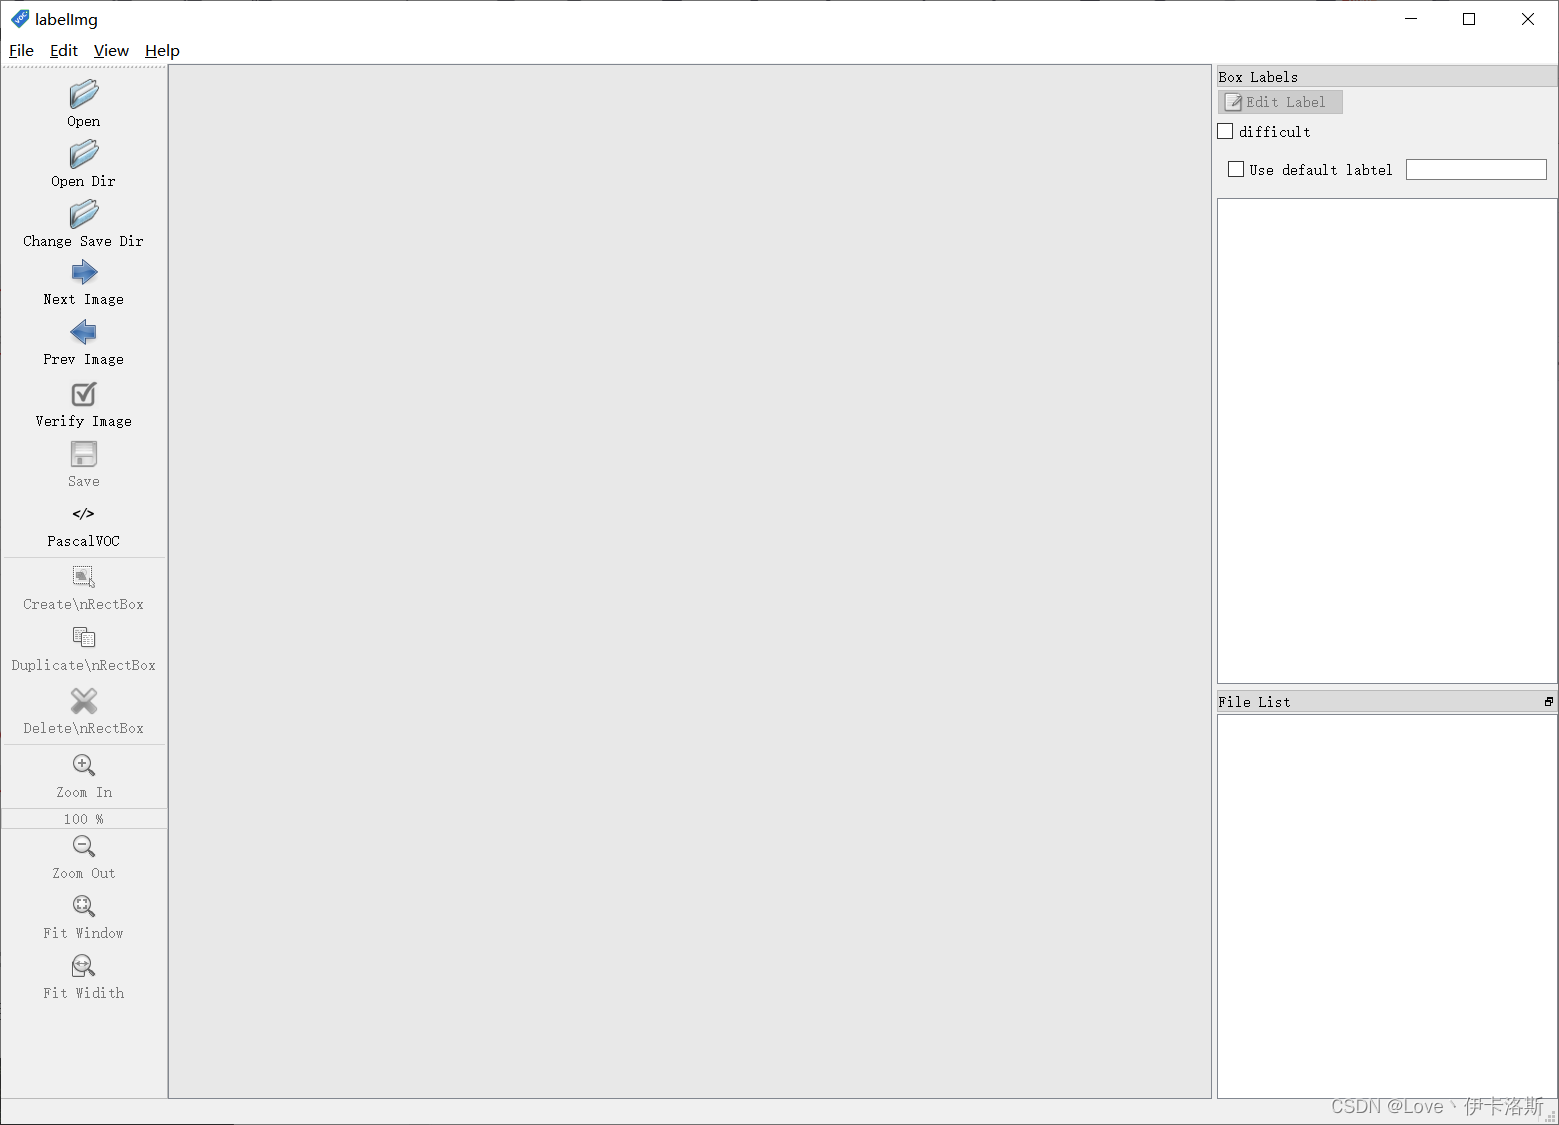
我这推荐的几个实用的快捷键
w 创建选框
a 前一张图片
d 后一张图片
ctrl+S 保存
准备需要标注的图片数据集
我这按自己喜欢的结构创建,images 和 labels 文件夹 和 yaml文件,在外面套个文件夹
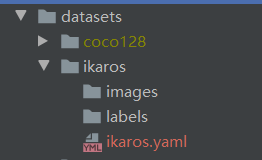

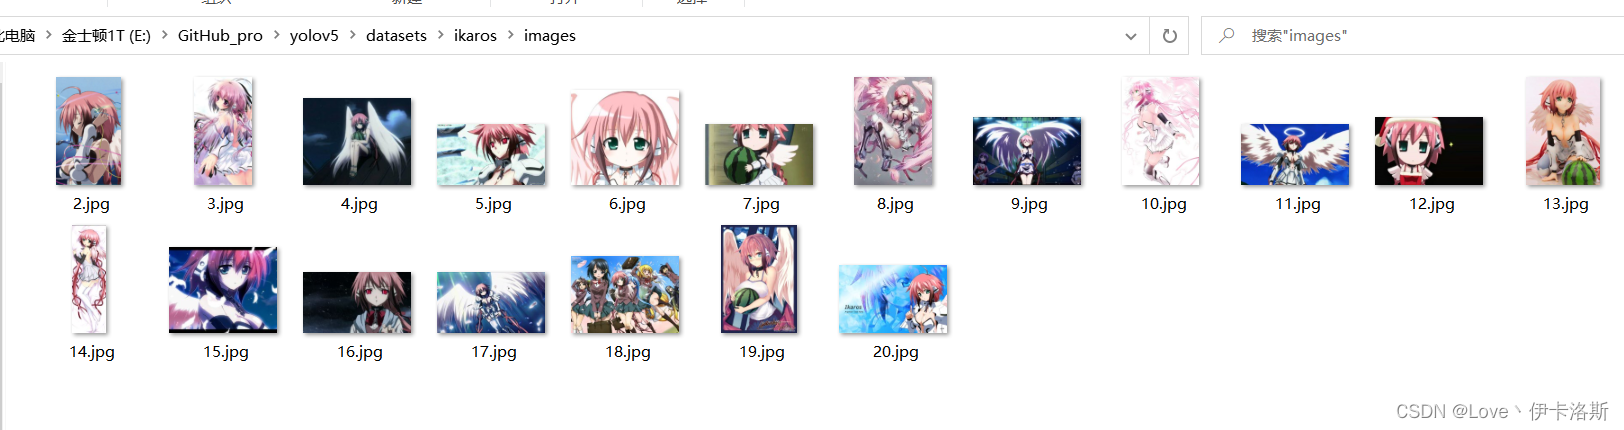
我们将要标注的原始图片放在 images文件夹内
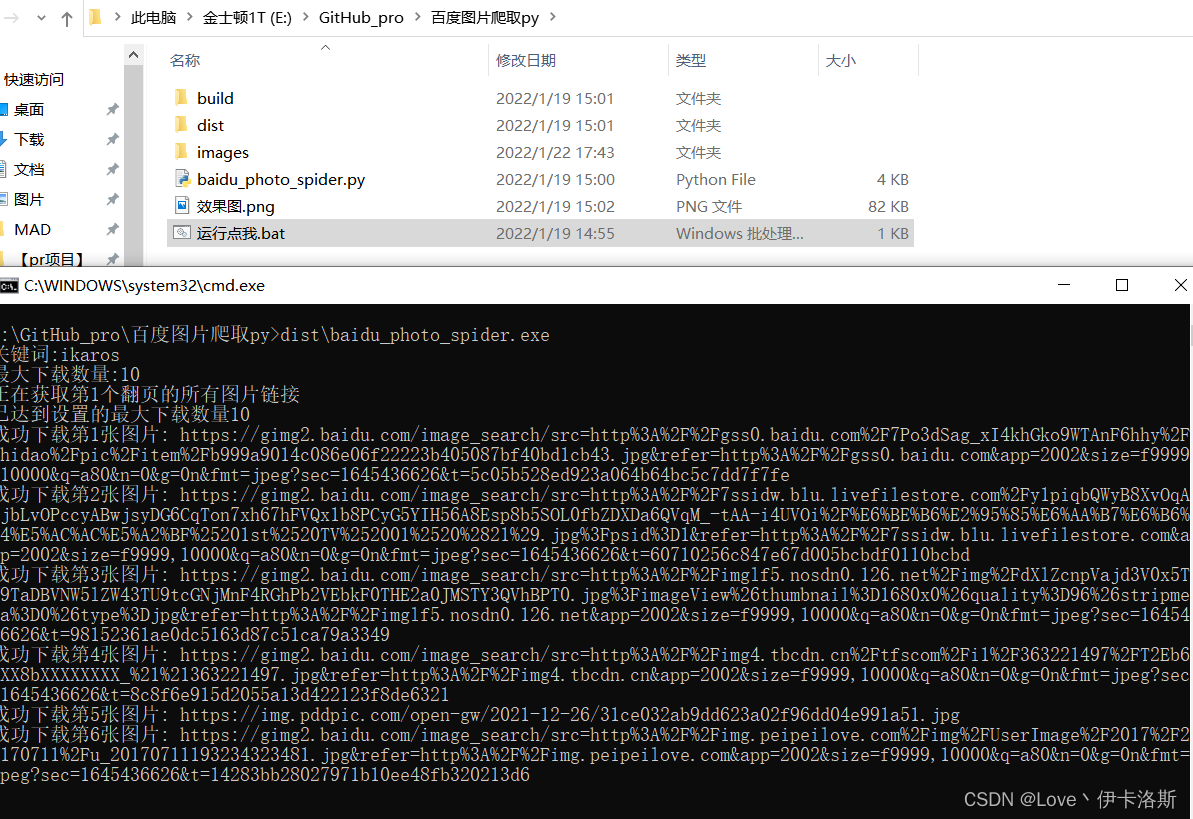
从百度爬点图片
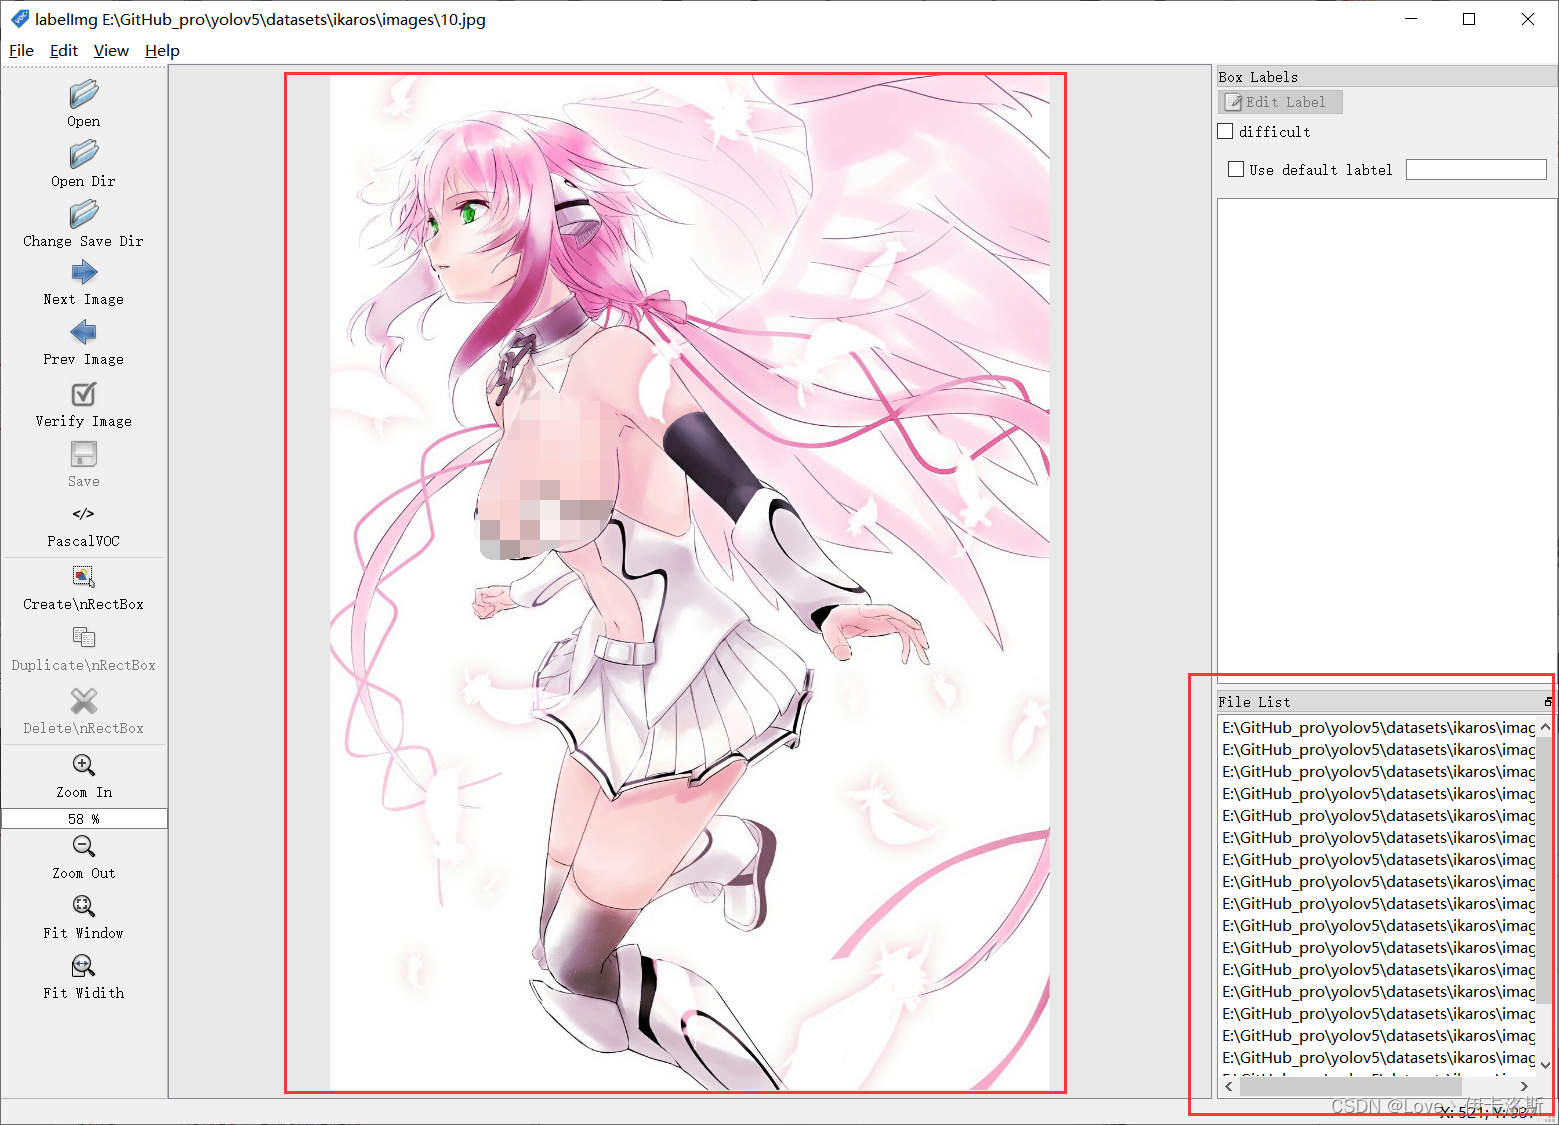
然后我们开始用工具进行标注,“open dir”打开我们需要标注的图片的文件夹
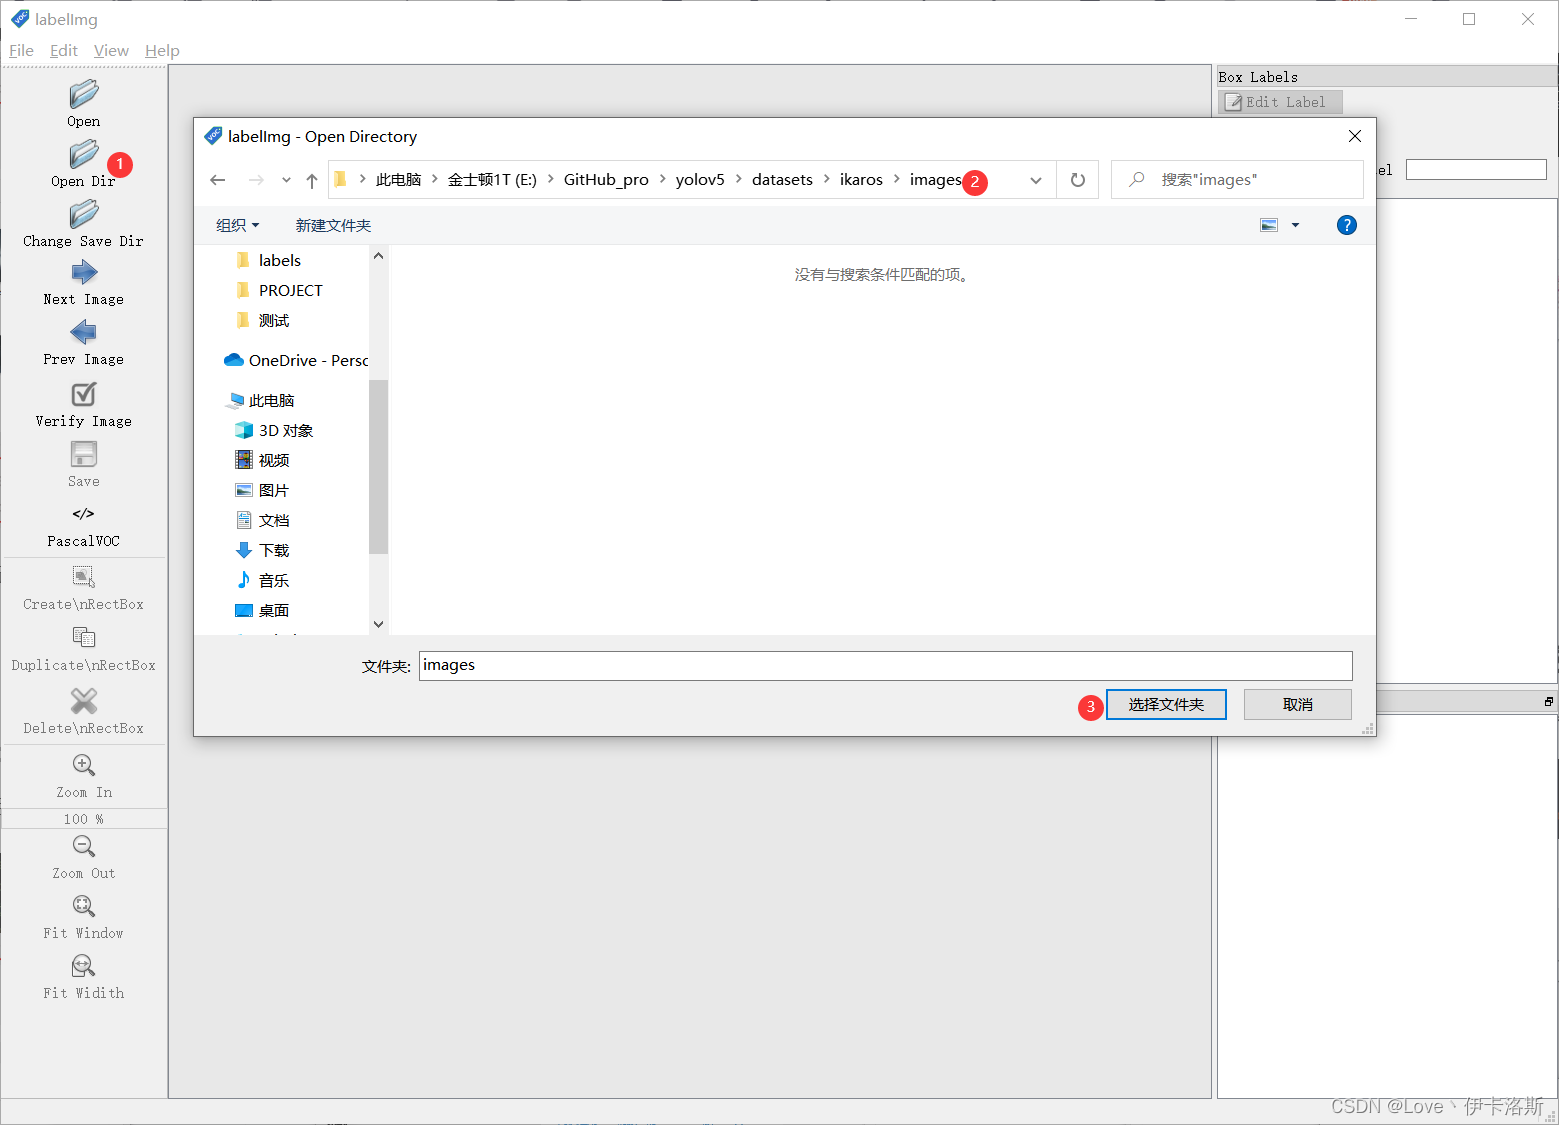
图片会自动加载进来
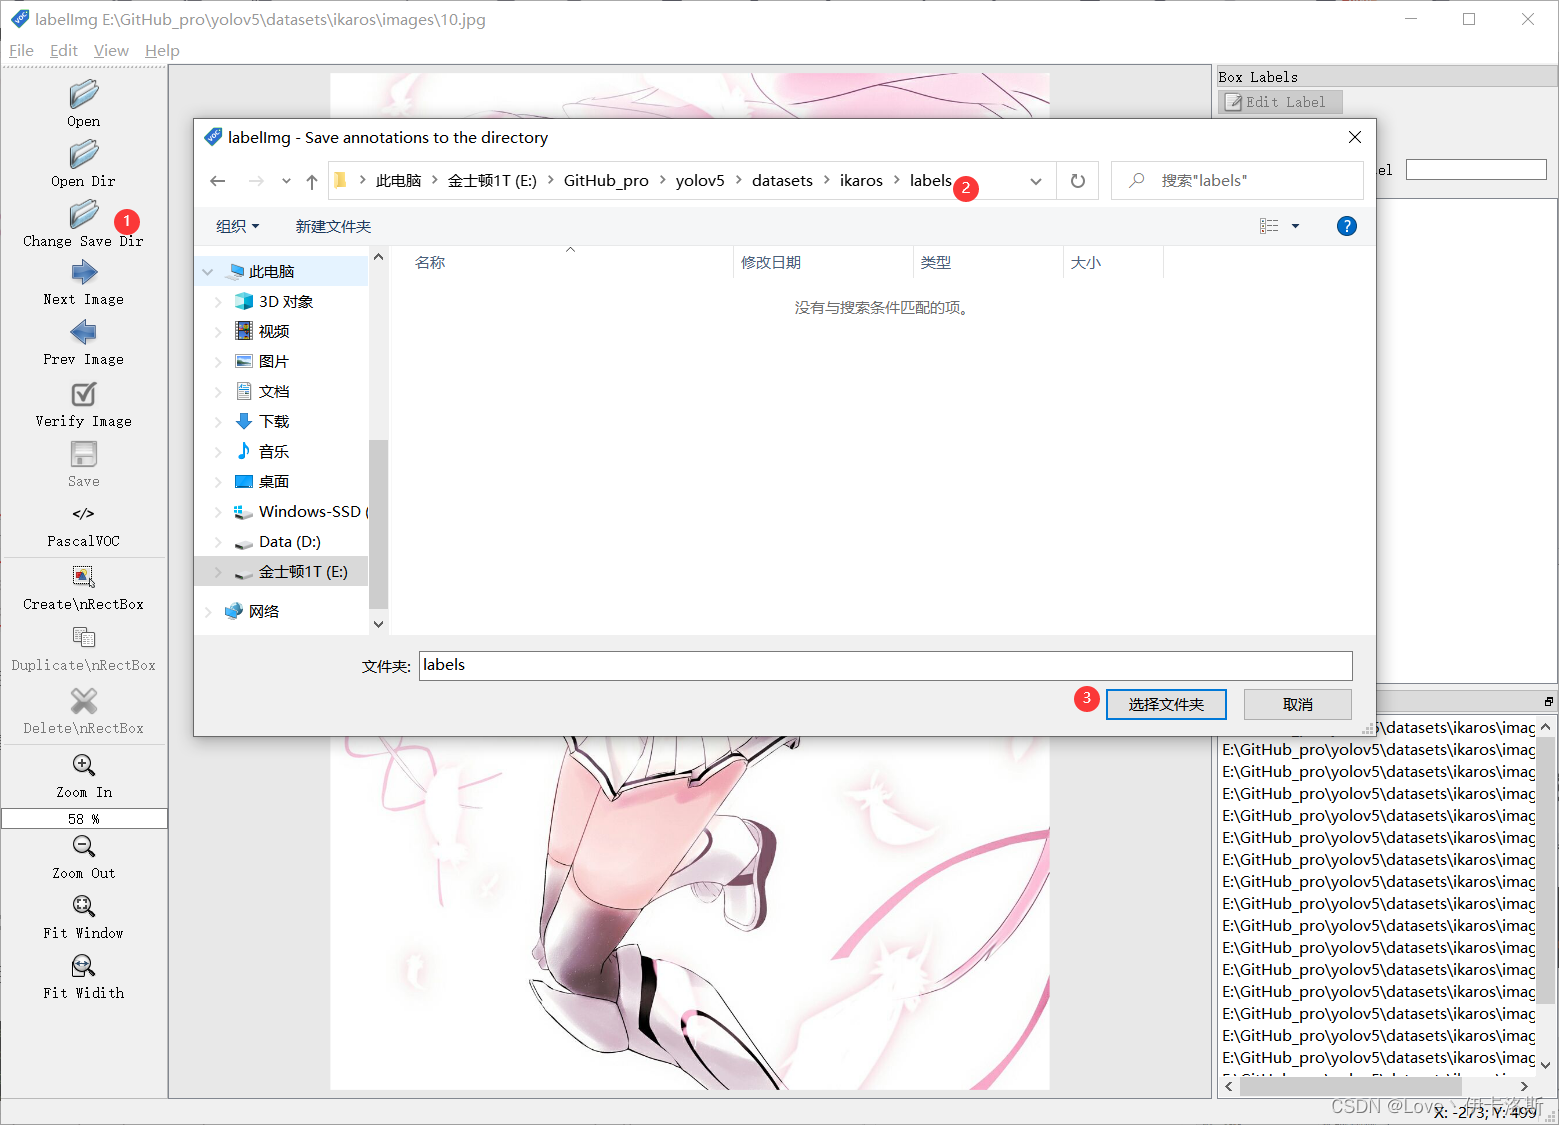
“change save dir”设置保存labels的路径为我们的 labels
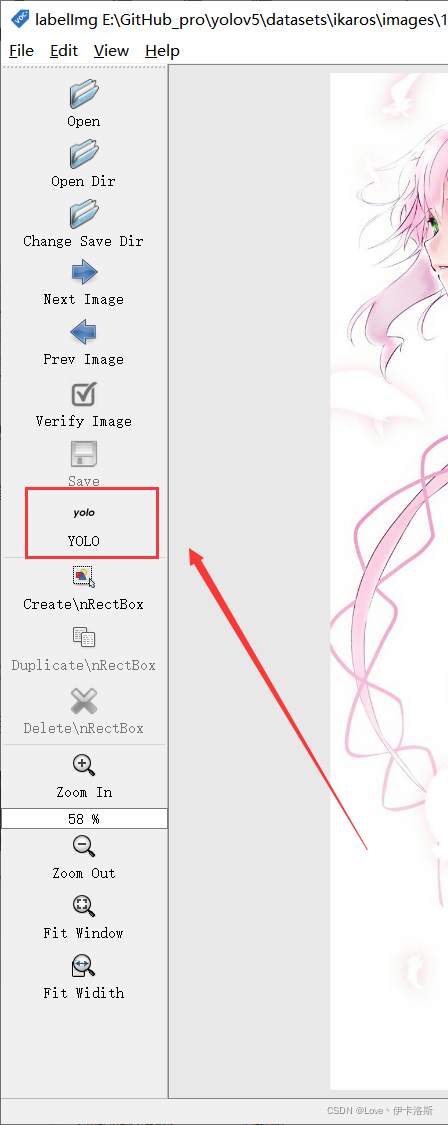
修改标注的格式为yolo(点击切换)
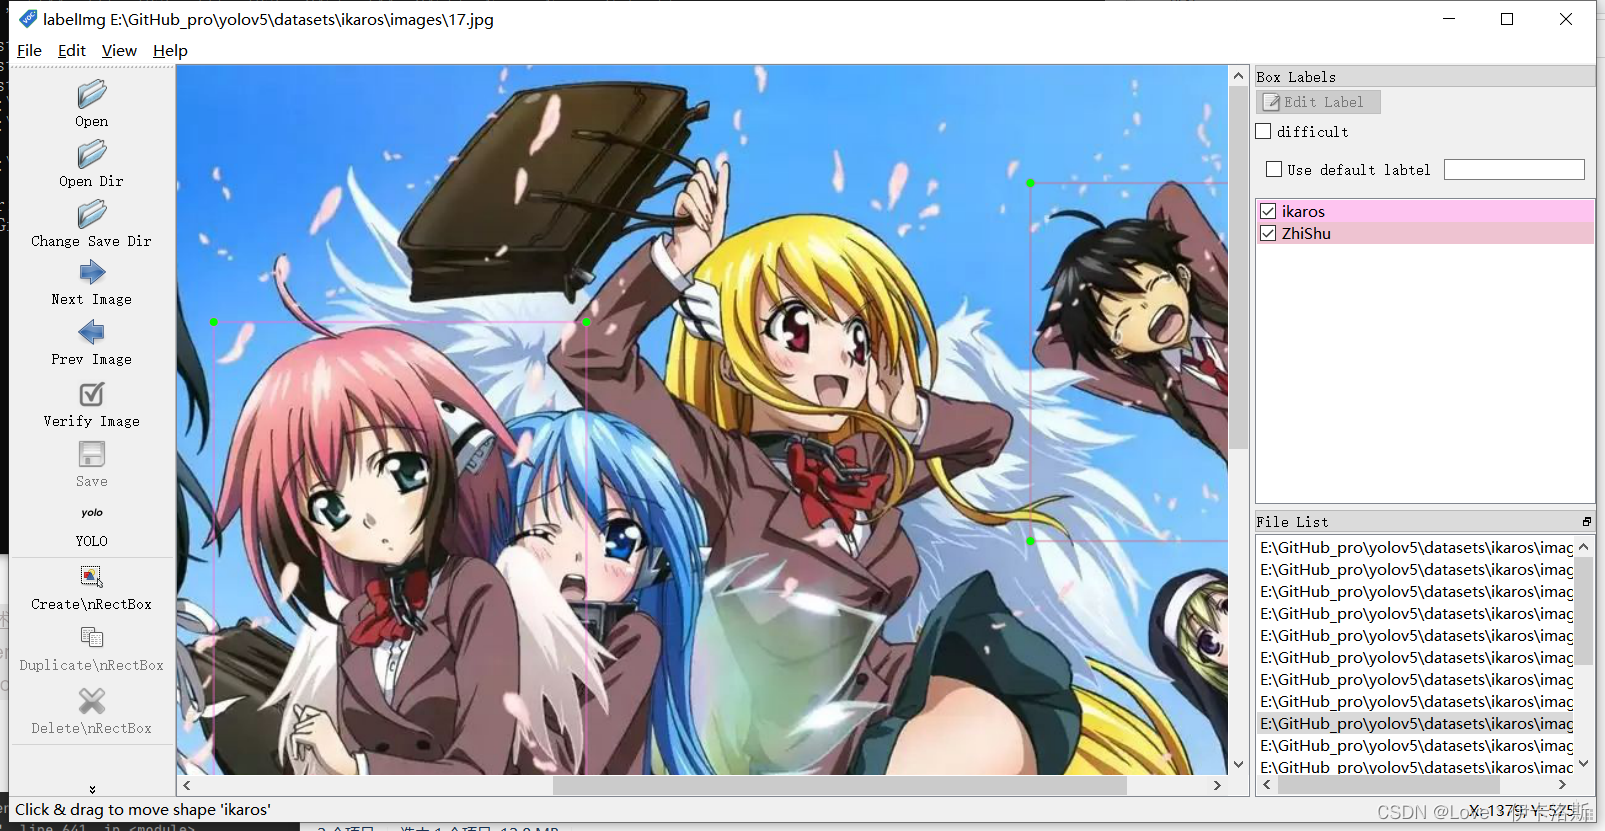
然后就是使用我们的快捷键 进行框选区域和打标签了。(记得保存,另外类别数需要大于1)
标注完,保存后,生成的配置都在 对应文件夹下,classes.txt为所有的labels,其他单个文件为 对应label的参数

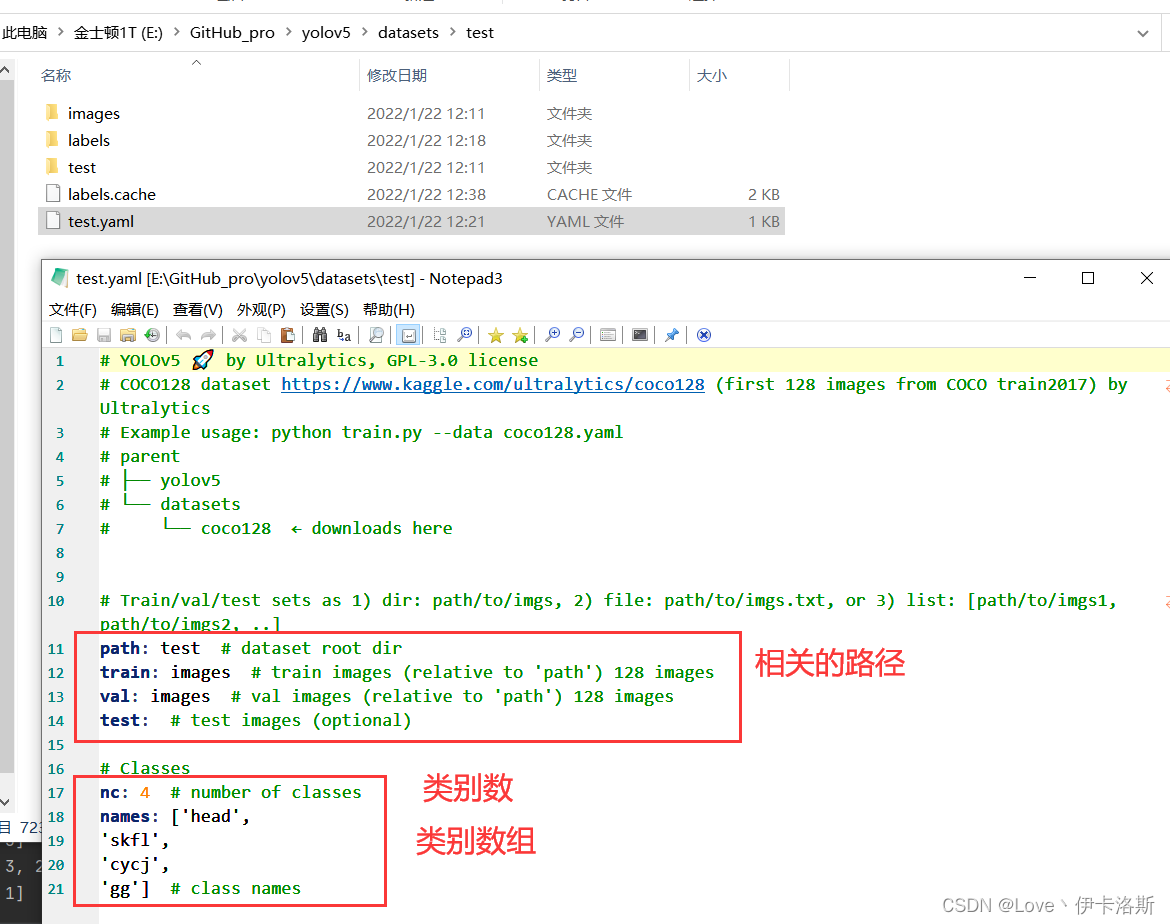
修改 yaml文件的相关配置
# Train/val/test sets as 1) dir: path/to/imgs, 2) file: path/to/imgs.txt, or 3) list: [path/to/imgs1, path/to/imgs2, ..]
path: ikaros # dataset root dir
train: images # train images (relative to 'path') 128 images
val: images # val images (relative to 'path') 128 images
test: # test images (optional)
# Classes
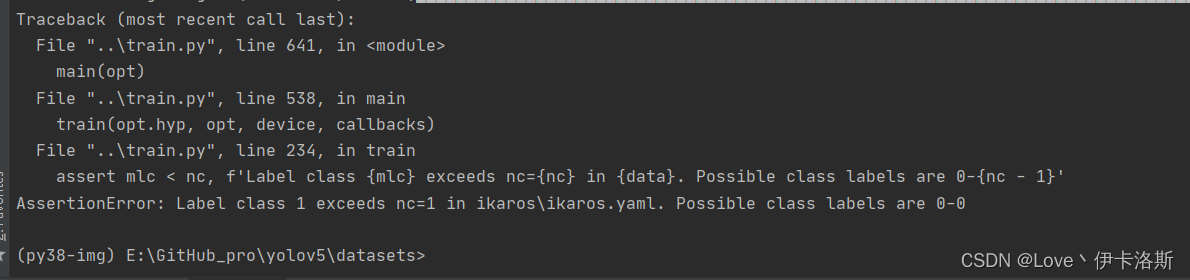
nc: 1 # number of classes 类别数(需要大于1)
names: ['ikaros'] # class names

拉去训练,1组报错
追加一个类
改yaml为
# Train/val/test sets as 1) dir: path/to/imgs, 2) file: path/to/imgs.txt, or 3) list: [path/to/imgs1, path/to/imgs2, ..]
path: ikaros  # dataset root dir
train: images  # train images (relative to 'path') 128 images
val: images  # val images (relative to 'path') 128 images
test:  # test images (optional)

# Classes
nc: 2  # number of classes
names: ['ikaros',
'ZhiShu']  # class names
从零开始的train.py训练生活
前面准备工作做好后,开始训练 先叫上GPU来100组俯卧撑(当然 你GPU兄弟累了 可以不叫他 诶嘿~)
$ cd datasets
$ python ..\train.py --data ikaros\ikaros.yaml --epochs 100 --batch-size 1 --nosave --cache
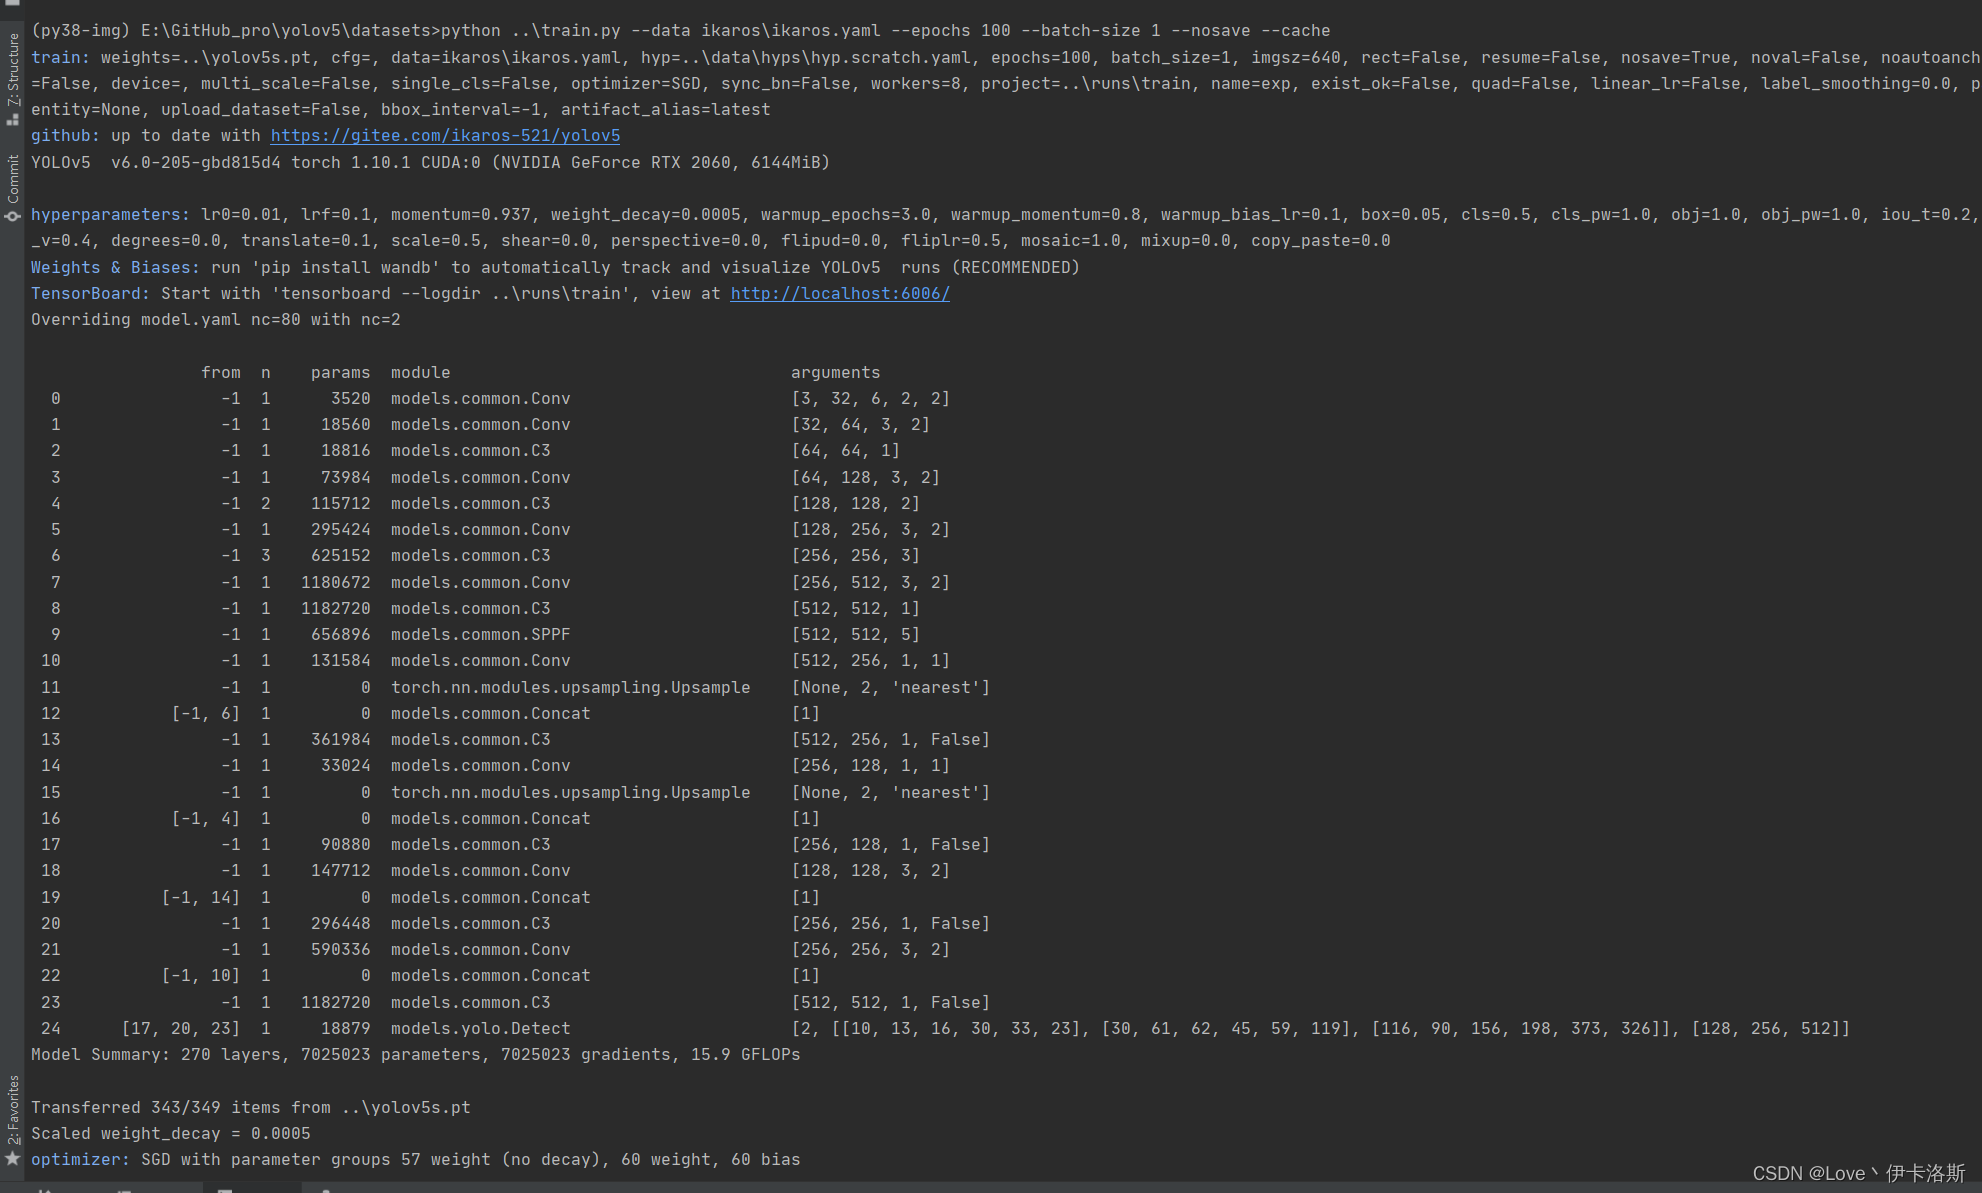
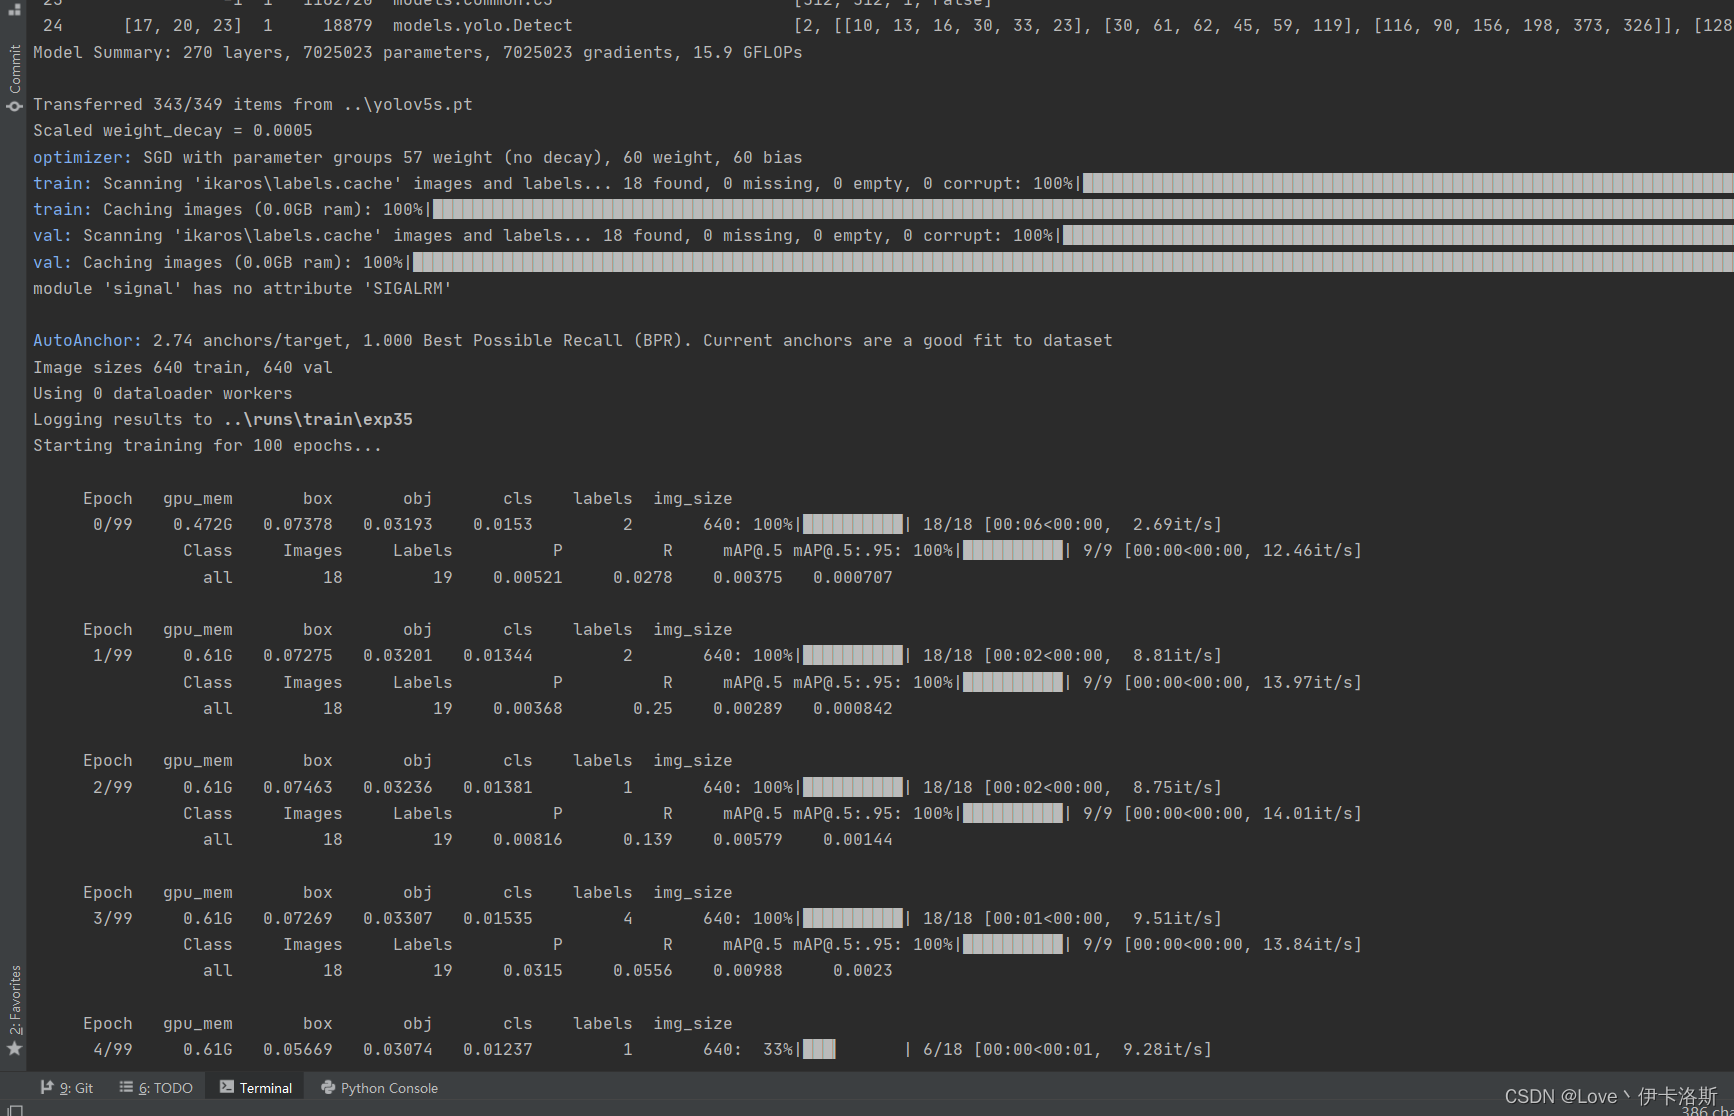
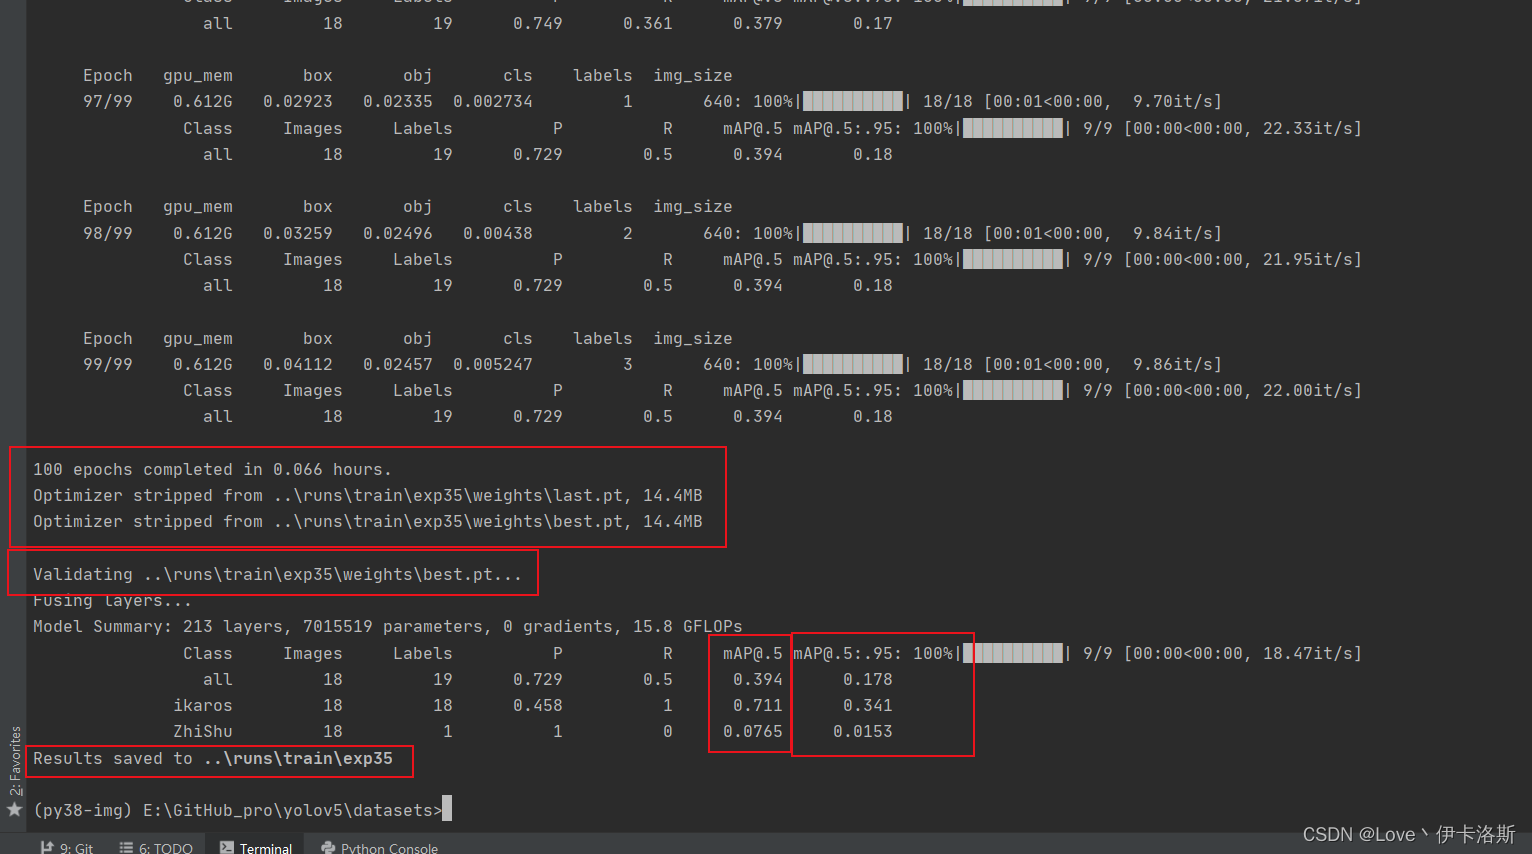
100组终于练好了。可以发现我们的锻炼结果不咋滴哈,all mAP@.5只有 0.394,没有0.5的置信度我很难办事呀,兄弟还得练哈
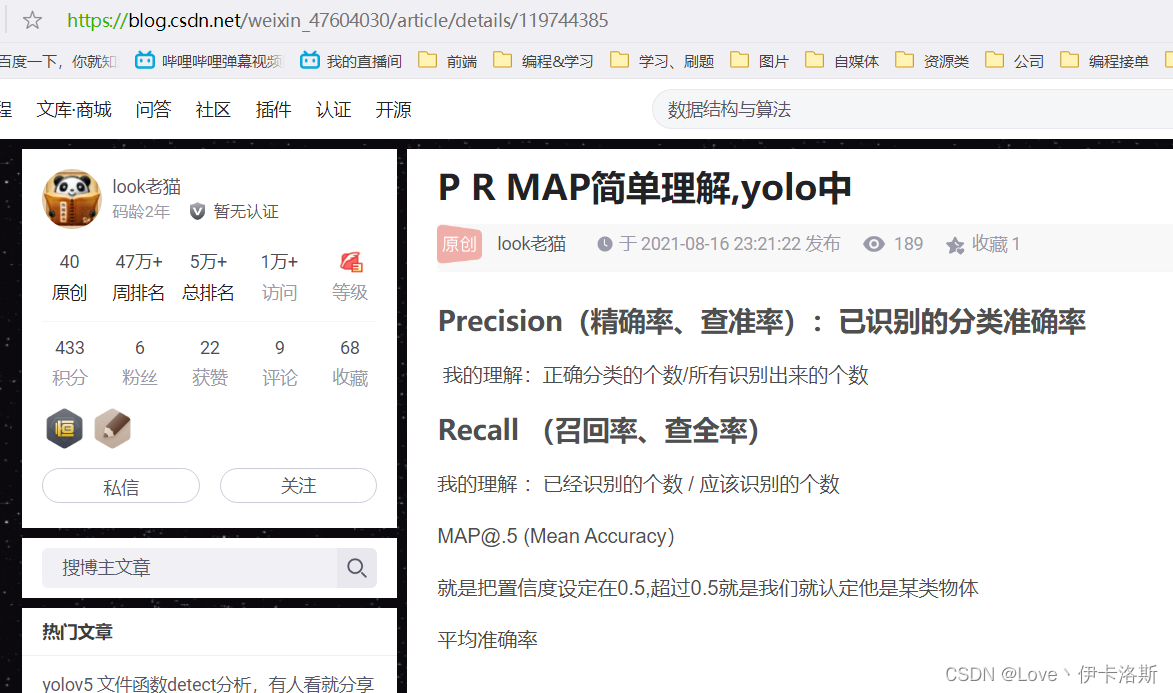
ps:对于目标检测中mAP@0.5的理解
mAP@0.5:mean Average Precision
通俗来说,就是给每一类分别计算AP,然后做mean平均。
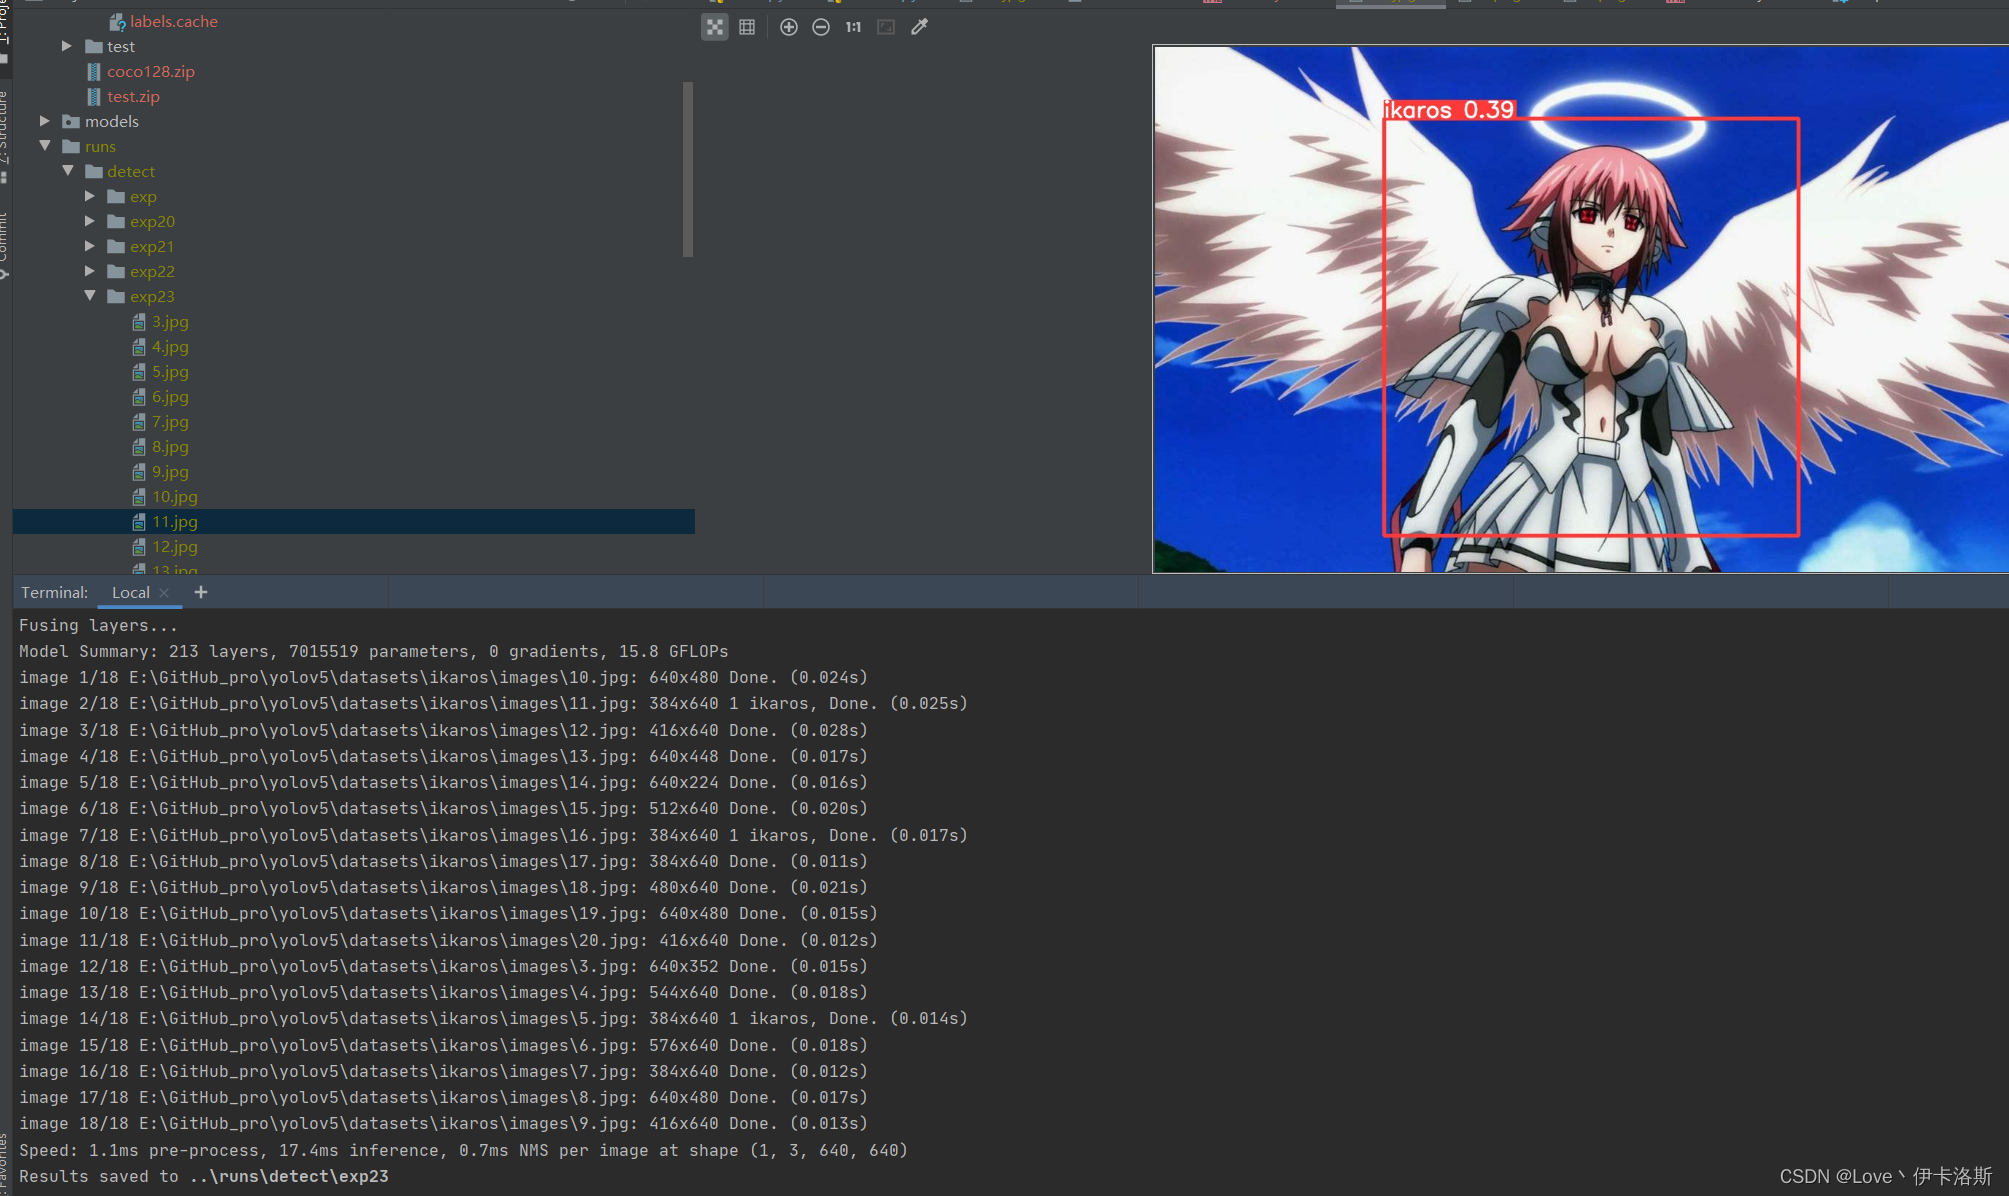
我们先拿这个练完100组的权重兄去测一测,置信度阈值设为0.3
python ..\detect.py --weights ..\runs\train\exp35\weights\best.pt --source ikaros\images --conf-thres 0.3
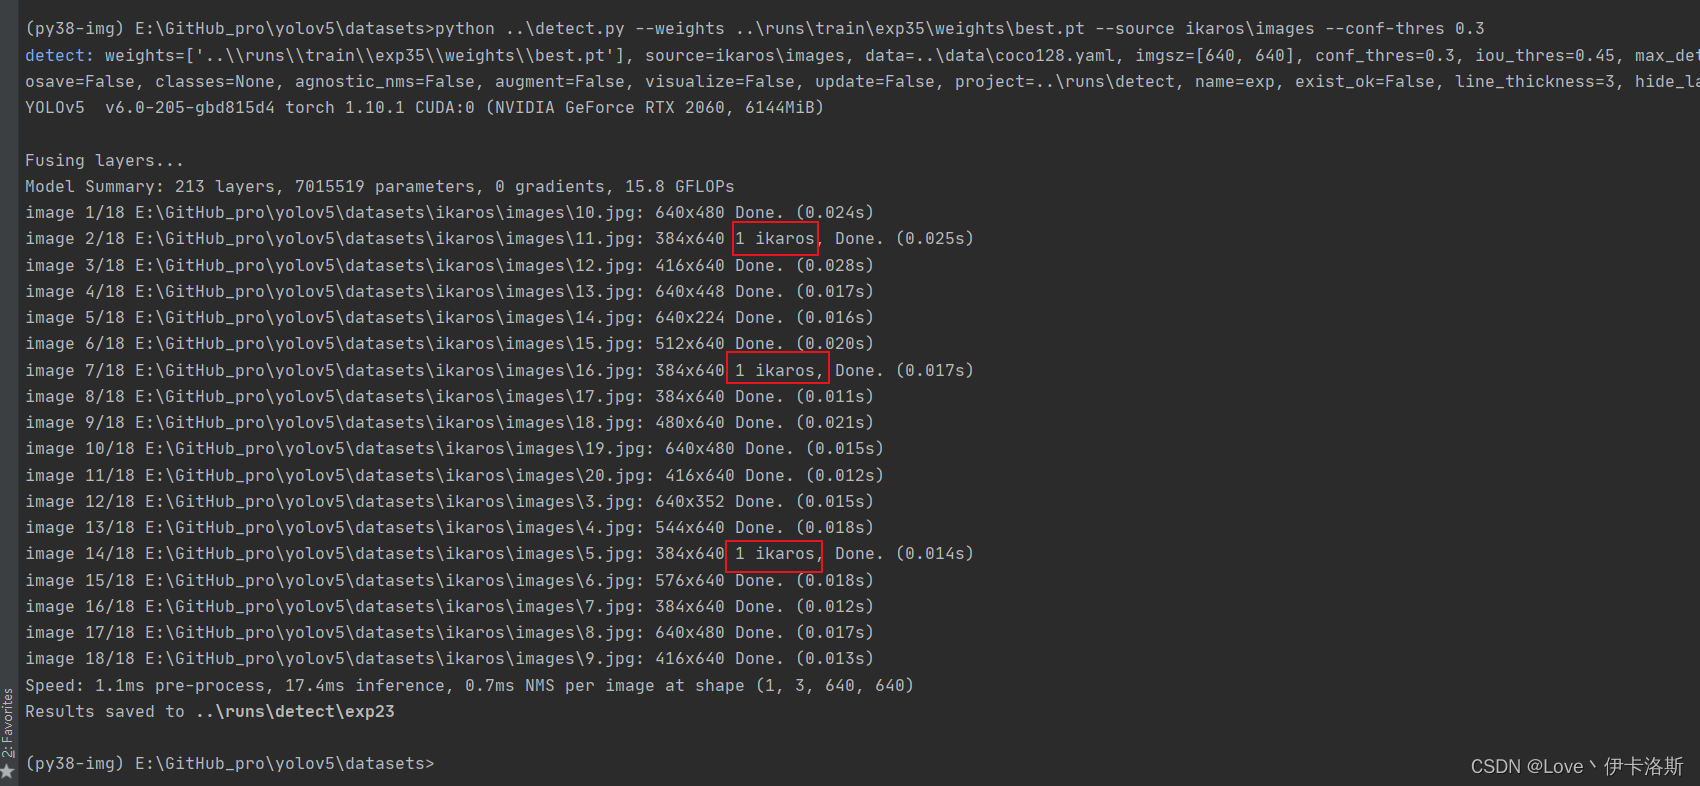
还行 还得多练练
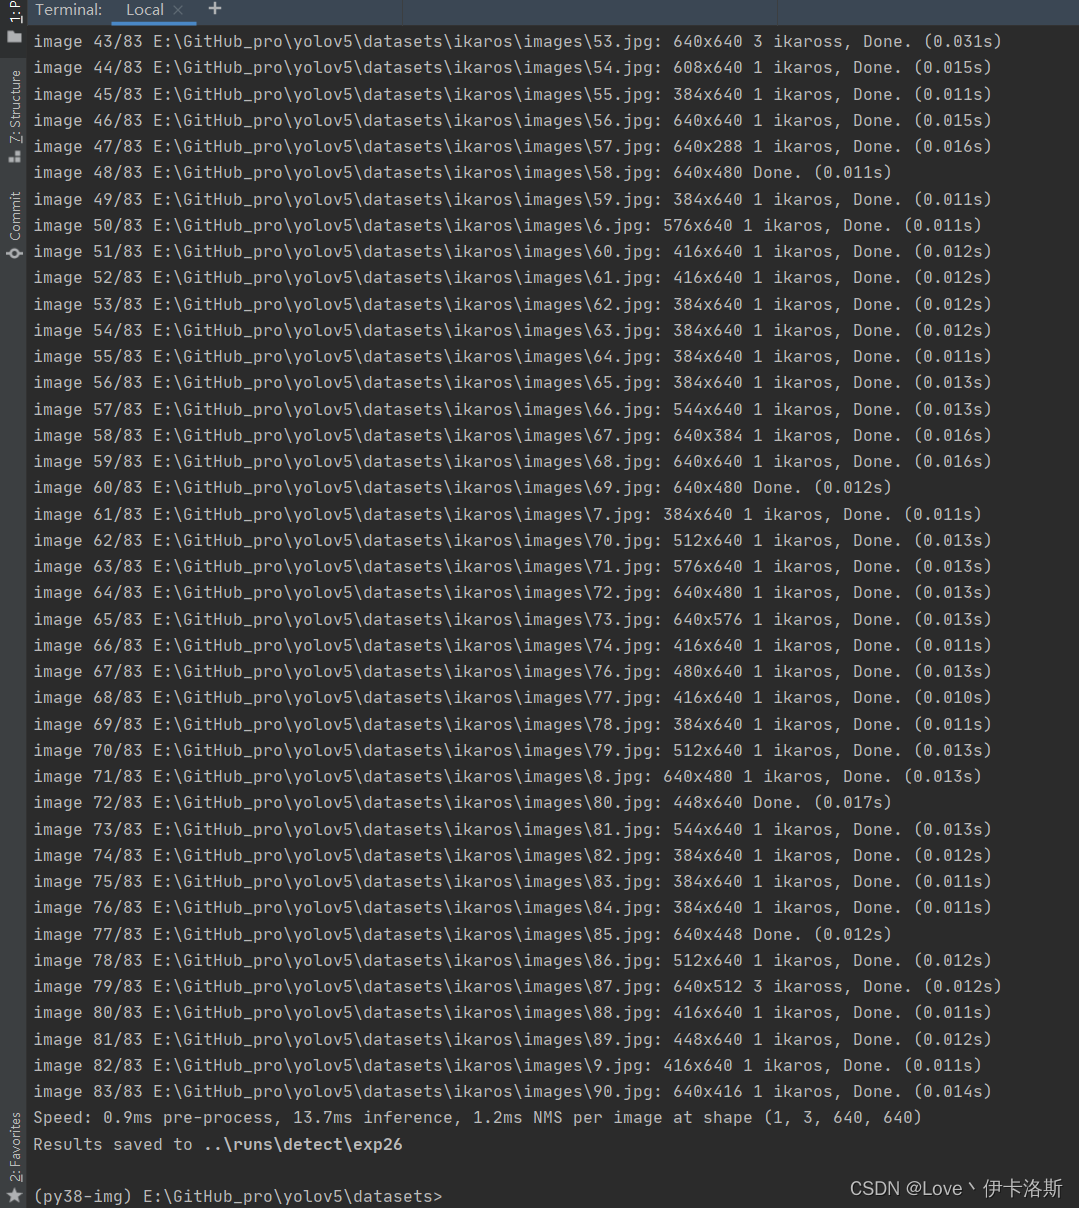
置信度阈值设为0.01
python ..\detect.py --weights ..\runs\train\exp35\weights\best.pt --source ikaros\images --conf-thres 0.01
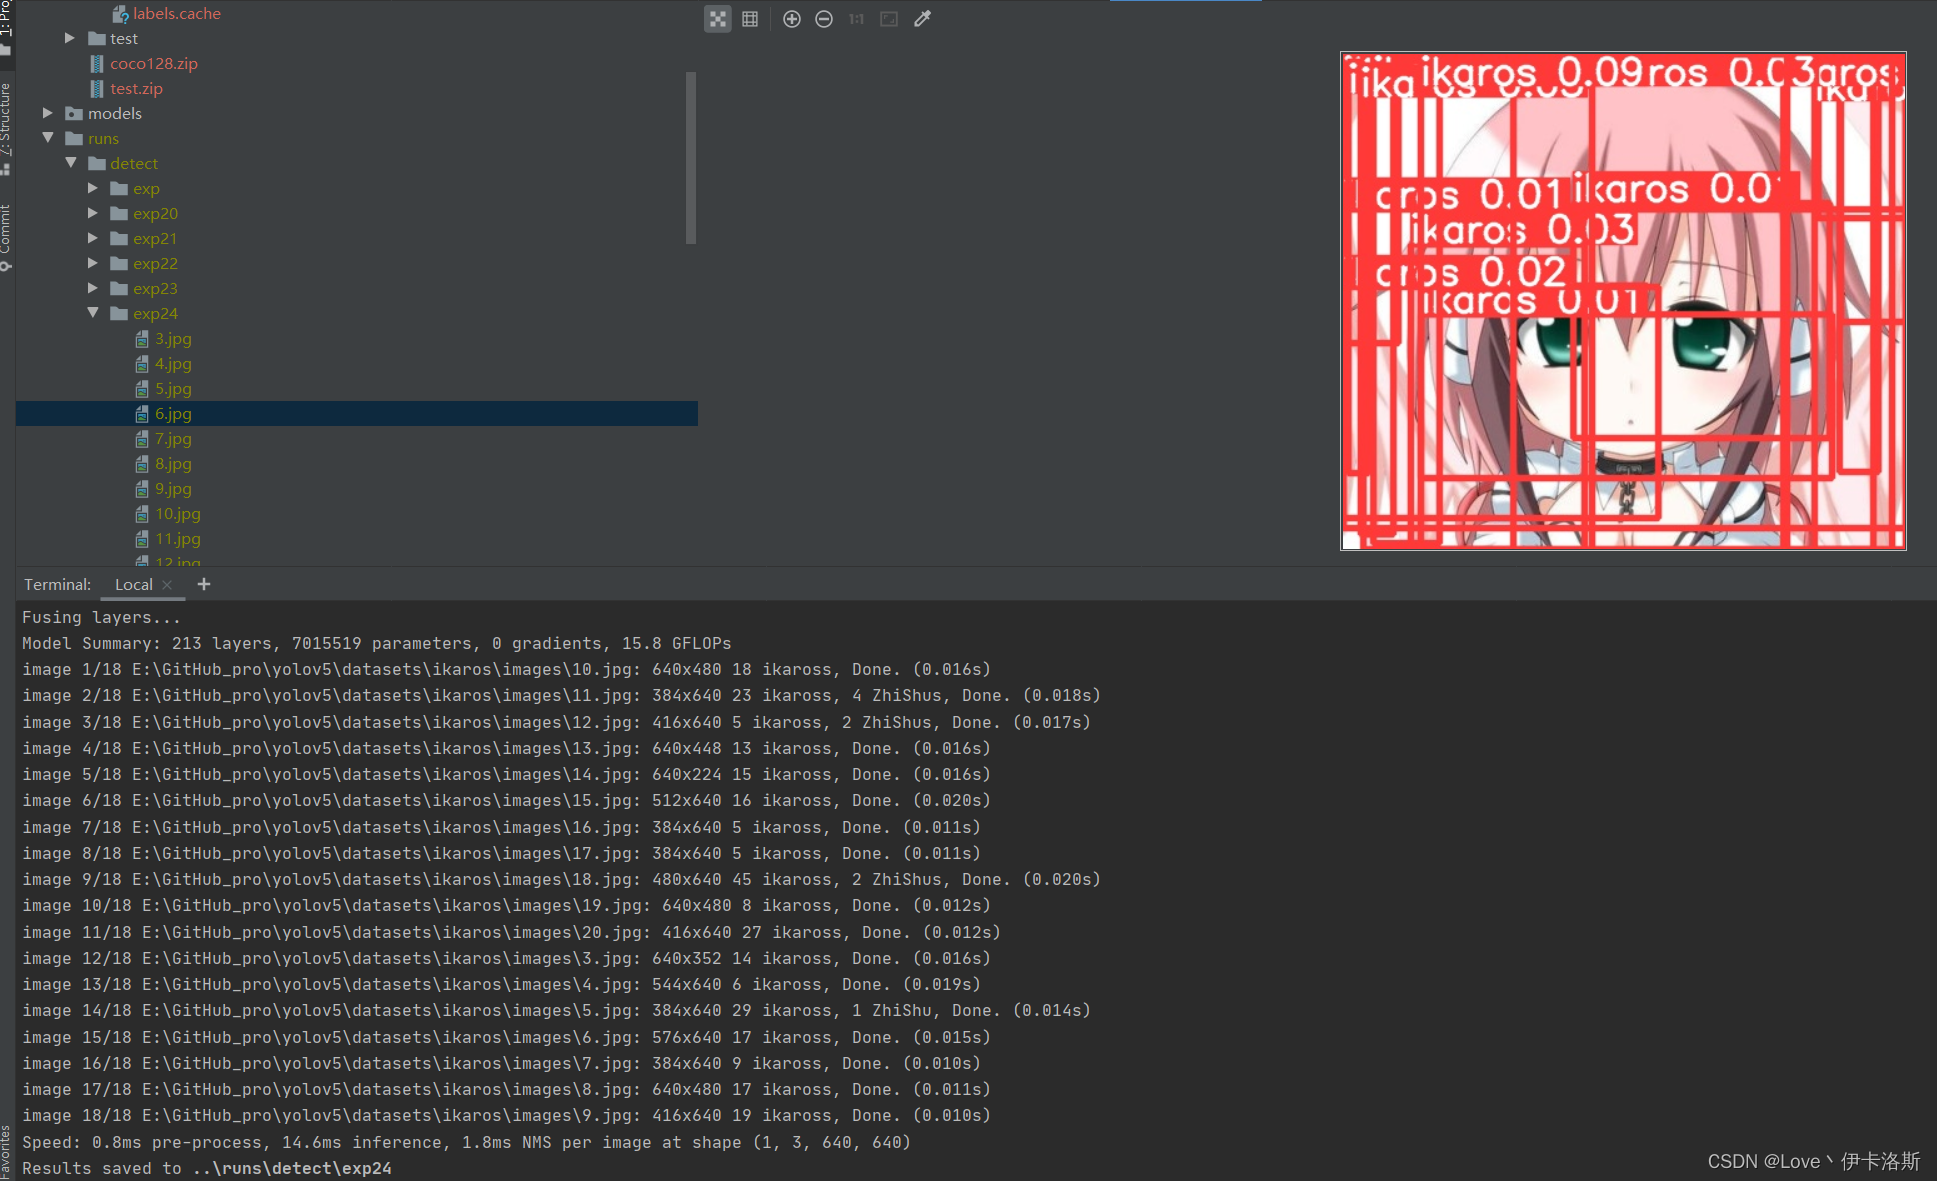
差不多了 在多练练。前面练好的pt不要丢,叫上继续训练 再来100组
python ..\train.py --data ikaros\ikaros.yaml --epochs 100 --weights ..\runs\train\exp35\weights\best.pt --batch-size 1 --nosave --cache
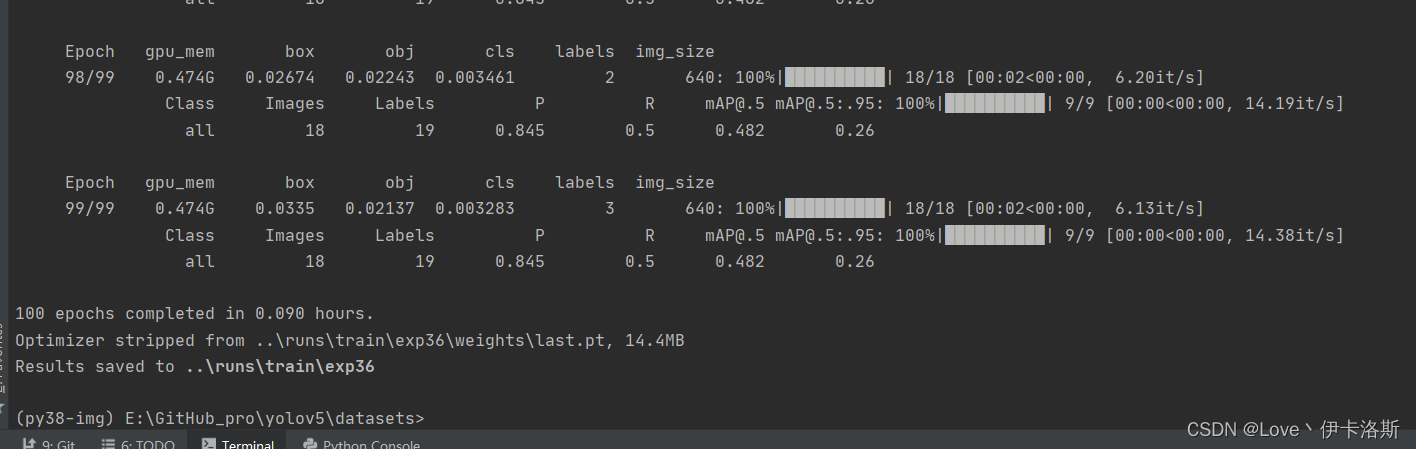
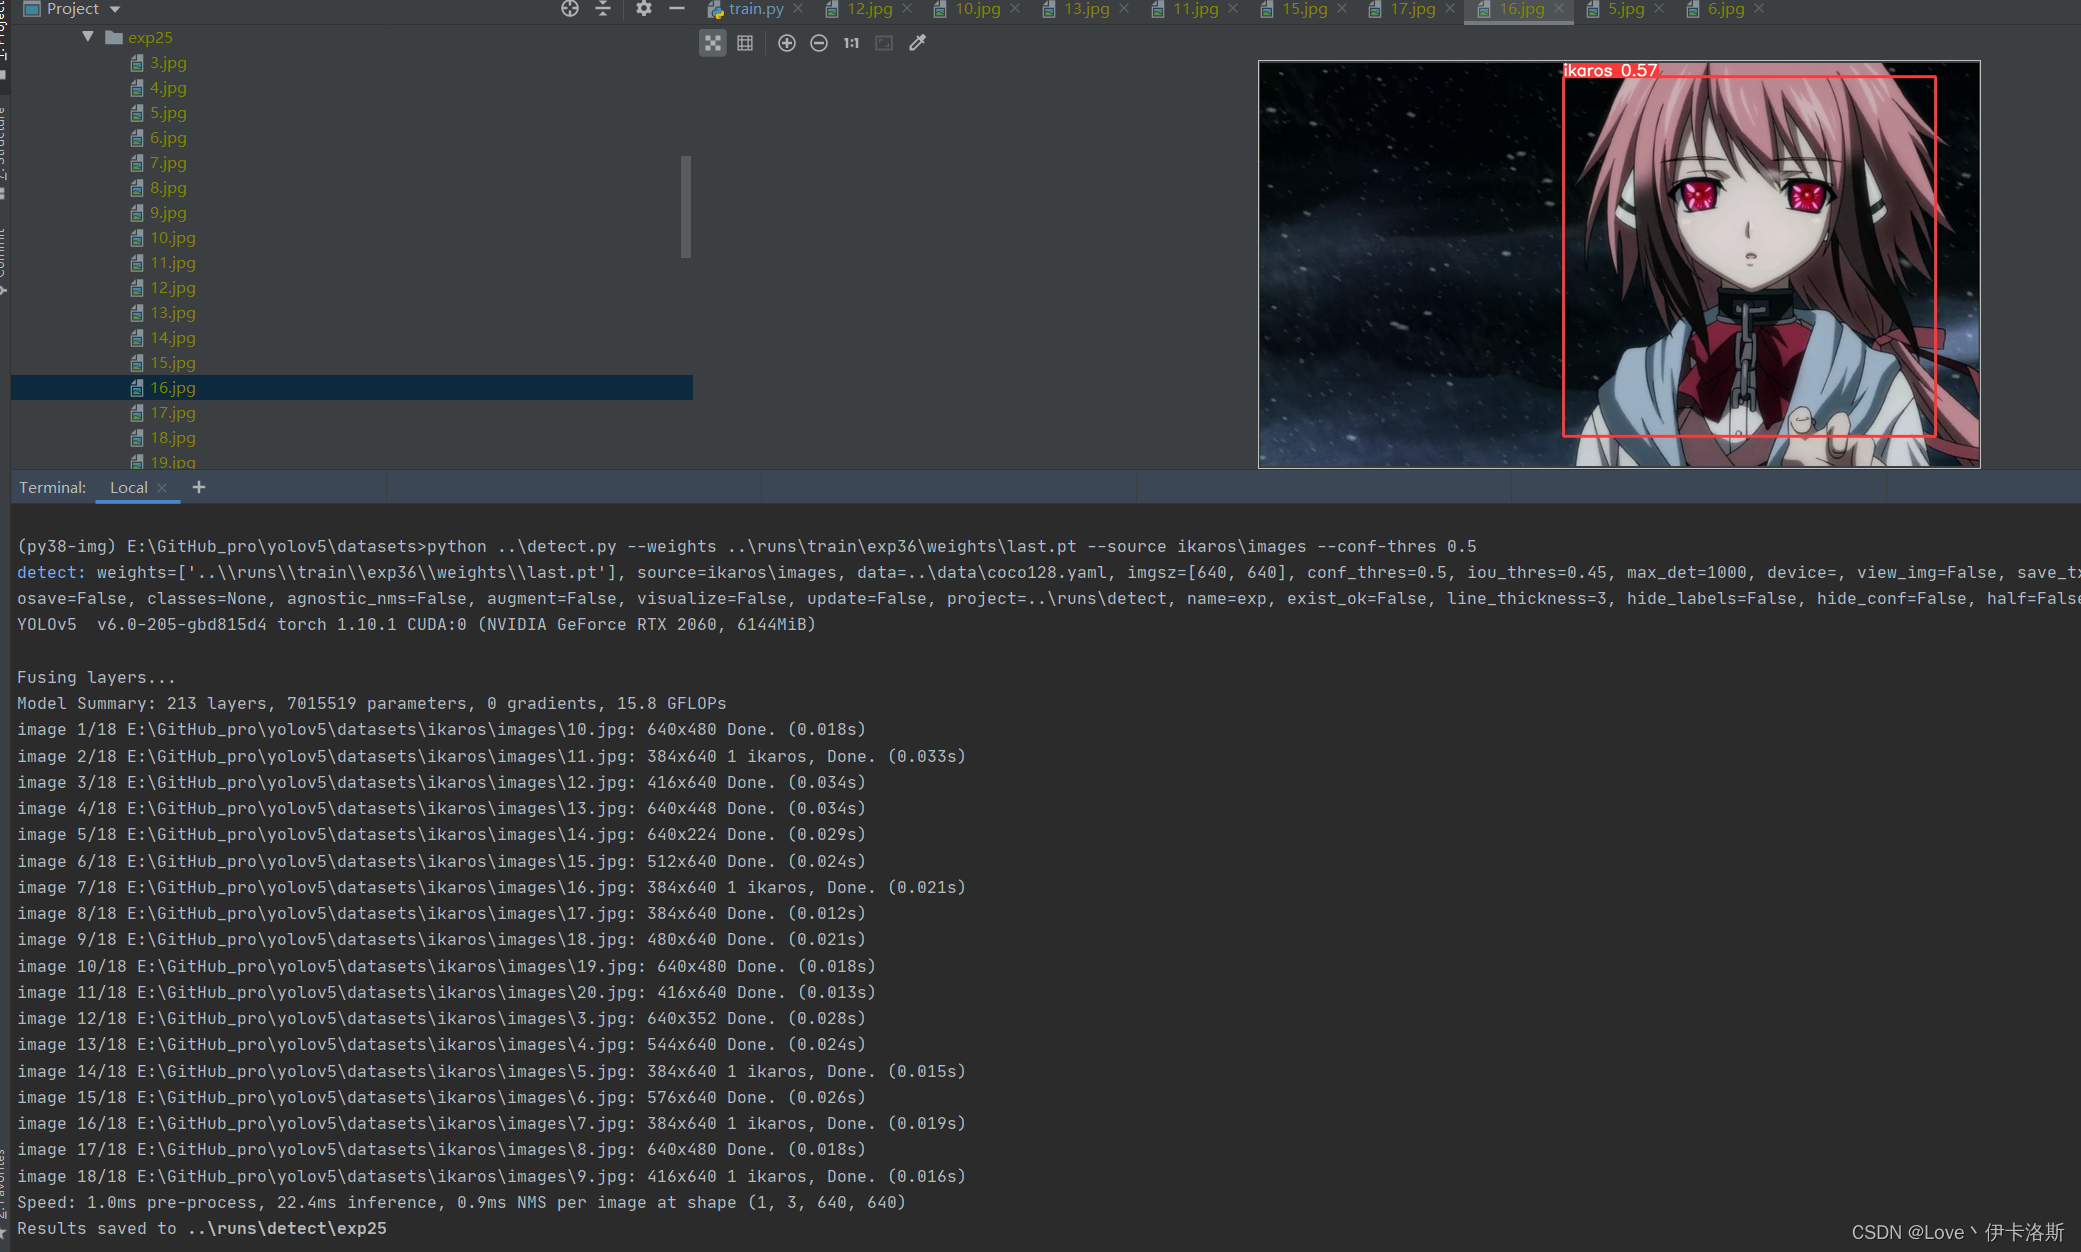
再次 测试 python ..\detect.py --weights ..\runs\train\exp36\weights\last.pt --source ikaros\images --conf-thres 0.5,差不多得了,有兴趣接着练
增加了样本数,继续锻炼
python ..\train.py --data ikaros\ikaros.yaml --epochs 100 --weights ..\runs\train\exp36\weights\last.pt --batch-size 1 --workers 4 --nosave --cache
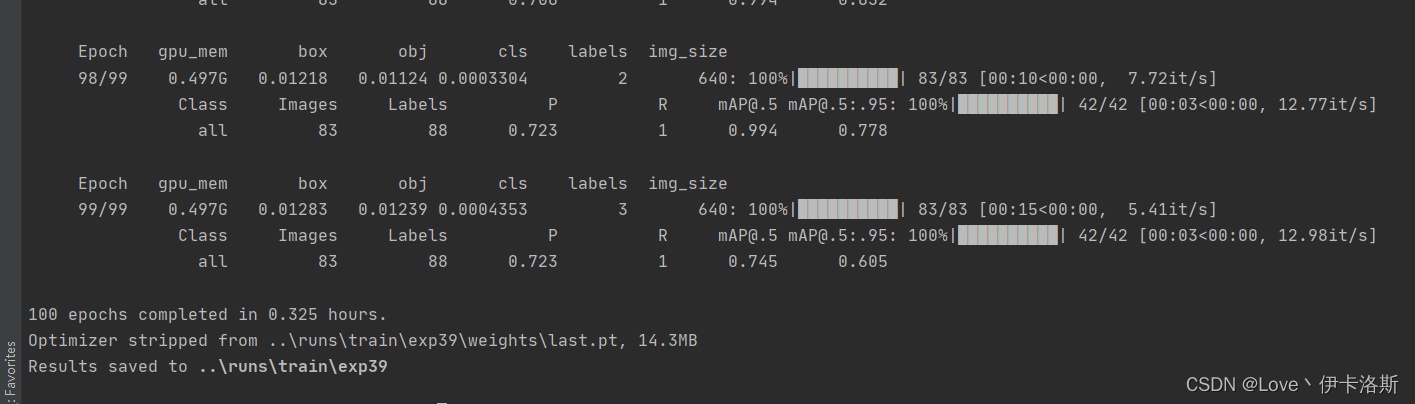
mAP@.5 0.745 效果不错了
找个视频识别下
python ..\detect.py --weights ..\runs\train\ikaros\ikaros.pt --source ..\data\videos\FallenDown.mp4

拓展应用
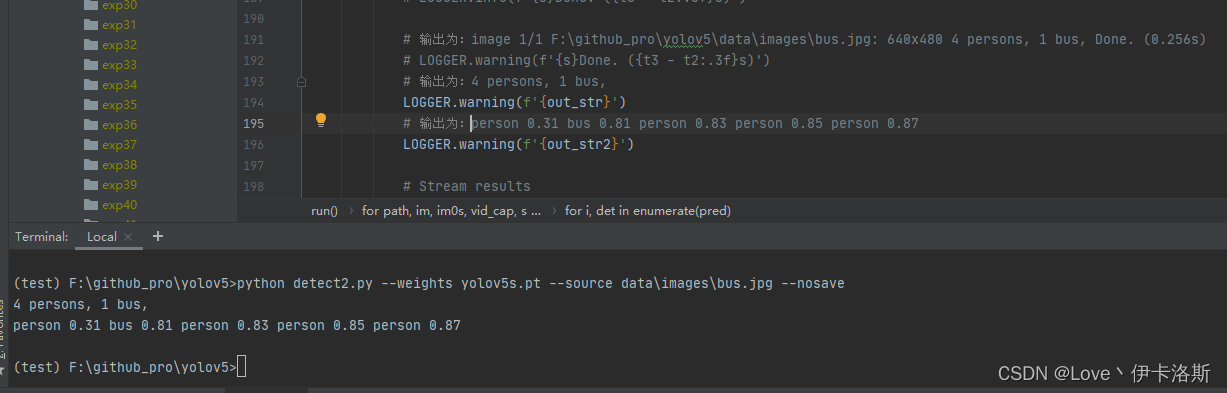
打印信息只提取识别的结果(获取类名和置信值),不显示其他无用信息
效果如下:

替换detecy.py源码
# YOLOv5 🚀 by Ultralytics, GPL-3.0 license
"""
Run inference on images, videos, directories, streams, etc.

python detect2.py --weights yolov5s.pt --source data\images\bus.jpg --nosave

Usage - sources:
    $ python path/to/detect.py --weights yolov5s.pt --source 0              # webcam
                                                             img.jpg        # image
                                                             vid.mp4        # video
                                                             path/          # directory
                                                             path/*.jpg     # glob
                                                             'https://youtu.be/Zgi9g1ksQHc'  # YouTube
                                                             'rtsp://example.com/media.mp4'  # RTSP, RTMP, HTTP stream

Usage - formats:
    $ python path/to/detect.py --weights yolov5s.pt                 # PyTorch
                                         yolov5s.torchscript        # TorchScript
                                         yolov5s.onnx               # ONNX Runtime or OpenCV DNN with --dnn
                                         yolov5s.xml                # OpenVINO
                                         yolov5s.engine             # TensorRT
                                         yolov5s.mlmodel            # CoreML (MacOS-only)
                                         yolov5s_saved_model        # TensorFlow SavedModel
                                         yolov5s.pb                 # TensorFlow GraphDef
                                         yolov5s.tflite             # TensorFlow Lite
                                         yolov5s_edgetpu.tflite     # TensorFlow Edge TPU
"""

import argparse
import os
import sys
from pathlib import Path

import cv2
import torch
import torch.backends.cudnn as cudnn

FILE = Path(__file__).resolve()
ROOT = FILE.parents[0]  # YOLOv5 root directory
if str(ROOT) not in sys.path:
    sys.path.append(str(ROOT))  # add ROOT to PATH
ROOT = Path(os.path.relpath(ROOT, Path.cwd()))  # relative

from models.common import DetectMultiBackend
from utils.datasets import IMG_FORMATS, VID_FORMATS, LoadImages, LoadStreams
from utils.general import (LOGGER, check_file, check_img_size, check_imshow, check_requirements, colorstr,
                           increment_path, non_max_suppression, print_args, scale_coords, strip_optimizer, xyxy2xywh)
from utils.plots import Annotator, colors, save_one_box
from utils.torch_utils import select_device, time_sync


@torch.no_grad()
def run(weights=ROOT / 'yolov5s.pt',  # model.pt path(s)
        source=ROOT / 'data/images',  # file/dir/URL/glob, 0 for webcam
        data=ROOT / 'data/coco128.yaml',  # dataset.yaml path
        imgsz=(640, 640),  # inference size (height, width)
        conf_thres=0.25,  # confidence threshold
        iou_thres=0.45,  # NMS IOU threshold
        max_det=1000,  # maximum detections per image
        device='',  # cuda device, i.e. 0 or 0,1,2,3 or cpu
        view_img=False,  # show results
        save_txt=False,  # save results to *.txt
        save_conf=False,  # save confidences in --save-txt labels
        save_crop=False,  # save cropped prediction boxes
        nosave=False,  # do not save images/videos
        classes=None,  # filter by class: --class 0, or --class 0 2 3
        agnostic_nms=False,  # class-agnostic NMS
        augment=False,  # augmented inference
        visualize=False,  # visualize features
        update=False,  # update all models
        project=ROOT / 'runs/detect',  # save results to project/name
        name='exp',  # save results to project/name
        exist_ok=False,  # existing project/name ok, do not increment
        line_thickness=3,  # bounding box thickness (pixels)
        hide_labels=False,  # hide labels
        hide_conf=False,  # hide confidences
        half=False,  # use FP16 half-precision inference
        dnn=False,  # use OpenCV DNN for ONNX inference
        ):
    source = str(source)
    save_img = not nosave and not source.endswith('.txt')  # save inference images
    is_file = Path(source).suffix[1:] in (IMG_FORMATS + VID_FORMATS)
    is_url = source.lower().startswith(('rtsp://', 'rtmp://', 'http://', 'https://'))
    webcam = source.isnumeric() or source.endswith('.txt') or (is_url and not is_file)
    if is_url and is_file:
        source = check_file(source)  # download

    # Directories
    save_dir = increment_path(Path(project) / name, exist_ok=exist_ok)  # increment run
    (save_dir / 'labels' if save_txt else save_dir).mkdir(parents=True, exist_ok=True)  # make dir

    # Load model
    device = select_device(device)
    model = DetectMultiBackend(weights, device=device, dnn=dnn, data=data)
    stride, names, pt, jit, onnx, engine = model.stride, model.names, model.pt, model.jit, model.onnx, model.engine
    imgsz = check_img_size(imgsz, s=stride)  # check image size

    # Half
    half &= (pt or jit or onnx or engine) and device.type != 'cpu'  # FP16 supported on limited backends with CUDA
    if pt or jit:
        model.model.half() if half else model.model.float()

    # Dataloader
    if webcam:
        view_img = check_imshow()
        cudnn.benchmark = True  # set True to speed up constant image size inference
        dataset = LoadStreams(source, img_size=imgsz, stride=stride, auto=pt)
        bs = len(dataset)  # batch_size
    else:
        dataset = LoadImages(source, img_size=imgsz, stride=stride, auto=pt)
        bs = 1  # batch_size
    vid_path, vid_writer = [None] * bs, [None] * bs

    # Run inference
    model.warmup(imgsz=(1, 3, *imgsz), half=half)  # warmup
    dt, seen = [0.0, 0.0, 0.0], 0
    for path, im, im0s, vid_cap, s in dataset:
        # 自定义存储输出结果的变量
        out_str = ''
        out_str2 = ''

        t1 = time_sync()
        im = torch.from_numpy(im).to(device)
        im = im.half() if half else im.float()  # uint8 to fp16/32
        im /= 255  # 0 - 255 to 0.0 - 1.0
        if len(im.shape) == 3:
            im = im[None]  # expand for batch dim
        t2 = time_sync()
        dt[0] += t2 - t1

        # Inference
        visualize = increment_path(save_dir / Path(path).stem, mkdir=True) if visualize else False
        pred = model(im, augment=augment, visualize=visualize)
        t3 = time_sync()
        dt[1] += t3 - t2

        # NMS
        pred = non_max_suppression(pred, conf_thres, iou_thres, classes, agnostic_nms, max_det=max_det)
        dt[2] += time_sync() - t3

        # Second-stage classifier (optional)
        # pred = utils.general.apply_classifier(pred, classifier_model, im, im0s)

        # Process predictions
        for i, det in enumerate(pred):  # per image
            seen += 1
            if webcam:  # batch_size >= 1
                p, im0, frame = path[i], im0s[i].copy(), dataset.count
                s += f'{i}: '
            else:
                p, im0, frame = path, im0s.copy(), getattr(dataset, 'frame', 0)

            p = Path(p)  # to Path
            save_path = str(save_dir / p.name)  # im.jpg
            txt_path = str(save_dir / 'labels' / p.stem) + ('' if dataset.mode == 'image' else f'_{frame}')  # im.txt
            s += '%gx%g ' % im.shape[2:]  # print string
            gn = torch.tensor(im0.shape)[[1, 0, 1, 0]]  # normalization gain whwh
            imc = im0.copy() if save_crop else im0  # for save_crop
            annotator = Annotator(im0, line_width=line_thickness, example=str(names))
            if len(det):
                # Rescale boxes from img_size to im0 size
                det[:, :4] = scale_coords(im.shape[2:], det[:, :4], im0.shape).round()

                # Print results
                for c in det[:, -1].unique():
                    n = (det[:, -1] == c).sum()  # detections per class
                    s += f"{n} {names[int(c)]}{'s' * (n > 1)}, "  # add to string
                    out_str += f"{n} {names[int(c)]}{'s' * (n > 1)}, "  # add to string

                # Write results
                for *xyxy, conf, cls in reversed(det):
                    # 标签名 和 置信度
                    out_str2 += f'{names[int(cls)]} {conf:.2f} '

                    if save_txt:  # Write to file
                        xywh = (xyxy2xywh(torch.tensor(xyxy).view(1, 4)) / gn).view(-1).tolist()  # normalized xywh
                        line = (cls, *xywh, conf) if save_conf else (cls, *xywh)  # label format
                        with open(txt_path + '.txt', 'a') as f:
                            f.write(('%g ' * len(line)).rstrip() % line + '\n')

                    if save_img or save_crop or view_img:  # Add bbox to image
                        c = int(cls)  # integer class
                        label = None if hide_labels else (names[c] if hide_conf else f'{names[c]} {conf:.2f}')
                        annotator.box_label(xyxy, label, color=colors(c, True))
                        if save_crop:
                            save_one_box(xyxy, imc, file=save_dir / 'crops' / names[c] / f'{p.stem}.jpg', BGR=True)

            # Print time (inference-only)
            # LOGGER.info(f'{s}Done. ({t3 - t2:.3f}s)')

            # 输出为:image 1/1 F:\github_pro\yolov5\data\images\bus.jpg: 640x480 4 persons, 1 bus, Done. (0.256s)
            # LOGGER.warning(f'{s}Done. ({t3 - t2:.3f}s)')
            # 输出为:4 persons, 1 bus,
            LOGGER.warning(f'{out_str}')
            # 输出为:person 0.31 bus 0.81 person 0.83 person 0.85 person 0.87
            LOGGER.warning(f'{out_str2}')

            # Stream results
            im0 = annotator.result()
            if view_img:
                cv2.imshow(str(p), im0)
                cv2.waitKey(1)  # 1 millisecond

            # Save results (image with detections)
            if save_img:
                if dataset.mode == 'image':
                    cv2.imwrite(save_path, im0)
                else:  # 'video' or 'stream'
                    if vid_path[i] != save_path:  # new video
                        vid_path[i] = save_path
                        if isinstance(vid_writer[i], cv2.VideoWriter):
                            vid_writer[i].release()  # release previous video writer
                        if vid_cap:  # video
                            fps = vid_cap.get(cv2.CAP_PROP_FPS)
                            w = int(vid_cap.get(cv2.CAP_PROP_FRAME_WIDTH))
                            h = int(vid_cap.get(cv2.CAP_PROP_FRAME_HEIGHT))
                        else:  # stream
                            fps, w, h = 30, im0.shape[1], im0.shape[0]
                            save_path += '.mp4'
                        vid_writer[i] = cv2.VideoWriter(save_path, cv2.VideoWriter_fourcc(*'mp4v'), fps, (w, h))
                    vid_writer[i].write(im0)

    # Print results
    t = tuple(x / seen * 1E3 for x in dt)  # speeds per image
    LOGGER.info(f'Speed: %.1fms pre-process, %.1fms inference, %.1fms NMS per image at shape {(1, 3, *imgsz)}' % t)
    if save_txt or save_img:
        s = f"\n{len(list(save_dir.glob('labels/*.txt')))} labels saved to {save_dir / 'labels'}" if save_txt else ''
        LOGGER.info(f"Results saved to {colorstr('bold', save_dir)}{s}")
    if update:
        strip_optimizer(weights)  # update model (to fix SourceChangeWarning)


def parse_opt():
    parser = argparse.ArgumentParser()
    parser.add_argument('--weights', nargs='+', type=str, default=ROOT / 'yolov5s.pt', help='model path(s)')
    parser.add_argument('--source', type=str, default=ROOT / 'data/images', help='file/dir/URL/glob, 0 for webcam')
    parser.add_argument('--data', type=str, default=ROOT / 'data/coco128.yaml', help='(optional) dataset.yaml path')
    parser.add_argument('--imgsz', '--img', '--img-size', nargs='+', type=int, default=[640], help='inference size h,w')
    parser.add_argument('--conf-thres', type=float, default=0.25, help='confidence threshold')
    parser.add_argument('--iou-thres', type=float, default=0.45, help='NMS IoU threshold')
    parser.add_argument('--max-det', type=int, default=1000, help='maximum detections per image')
    parser.add_argument('--device', default='', help='cuda device, i.e. 0 or 0,1,2,3 or cpu')
    parser.add_argument('--view-img', action='store_true', help='show results')
    parser.add_argument('--save-txt', action='store_true', help='save results to *.txt')
    parser.add_argument('--save-conf', action='store_true', help='save confidences in --save-txt labels')
    parser.add_argument('--save-crop', action='store_true', help='save cropped prediction boxes')
    parser.add_argument('--nosave', action='store_true', help='do not save images/videos')
    parser.add_argument('--classes', nargs='+', type=int, help='filter by class: --classes 0, or --classes 0 2 3')
    parser.add_argument('--agnostic-nms', action='store_true', help='class-agnostic NMS')
    parser.add_argument('--augment', action='store_true', help='augmented inference')
    parser.add_argument('--visualize', action='store_true', help='visualize features')
    parser.add_argument('--update', action='store_true', help='update all models')
    parser.add_argument('--project', default=ROOT / 'runs/detect', help='save results to project/name')
    parser.add_argument('--name', default='exp', help='save results to project/name')
    parser.add_argument('--exist-ok', action='store_true', help='existing project/name ok, do not increment')
    parser.add_argument('--line-thickness', default=3, type=int, help='bounding box thickness (pixels)')
    parser.add_argument('--hide-labels', default=False, action='store_true', help='hide labels')
    parser.add_argument('--hide-conf', default=False, action='store_true', help='hide confidences')
    parser.add_argument('--half', action='store_true', help='use FP16 half-precision inference')
    parser.add_argument('--dnn', action='store_true', help='use OpenCV DNN for ONNX inference')
    opt = parser.parse_args()
    opt.imgsz *= 2 if len(opt.imgsz) == 1 else 1  # expand
    # print_args(FILE.stem, opt)
    return opt


def main(opt):
    # CRITICAL = 50
    # FATAL = CRITICAL
    # ERROR = 40
    # WARNING = 30
    # WARN = WARNING
    # INFO = 20
    # DEBUG = 10
    # NOTSET = 0
    LOGGER.setLevel(30)
    check_requirements(exclude=('tensorboard', 'thop'))
    run(**vars(opt))


if __name__ == "__main__":
    opt = parse_opt()
    main(opt)
报错相关
RuntimeError: [enforce fail at ..\c10\core\CPUAllocator.cpp:76] data. DefaultCPUAllocator: not enough memory: you tried to allocate 131072000 bytes.
申请内存过多,没有足够的内存了。
解决方案:同样也是 调小 --batch-size 和 --workers
参考命令:
python ..\train.py --data ..\data\coco128.yaml --epochs 3 --batch-size 1 --workers 1 --img 128
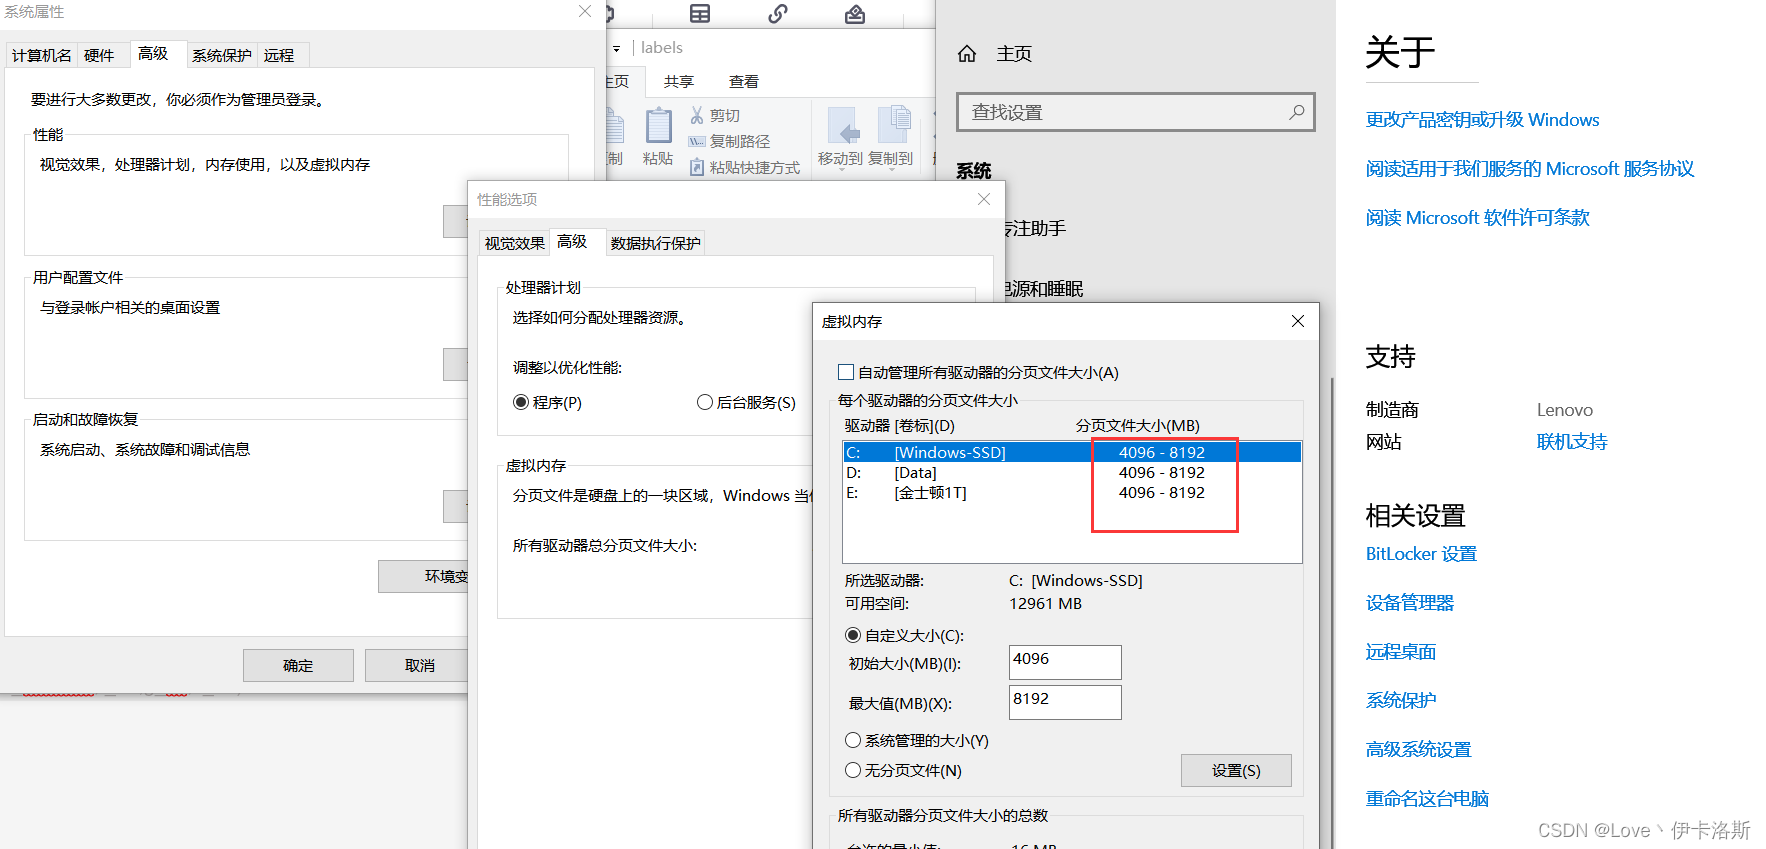
报错 OSError: [WinError 1455] 页面文件太小,无法完成操作。
增加分配虚拟内存,然后重启。调小 --batch-size,或者改 --batch-size -1 自动识别(不过我这就经常崩溃)
减小 --workers


# 我的显卡是RTX2060 测了几套下来,基本上--batch-size 2 --workers 8 不能再高了
python ..\train.py --data ikaros\ikaros.yaml --epochs 100 --weights ..\runs\train\exp36\weights\last.pt --batch-size 1 --workers 4  --nosave --cache
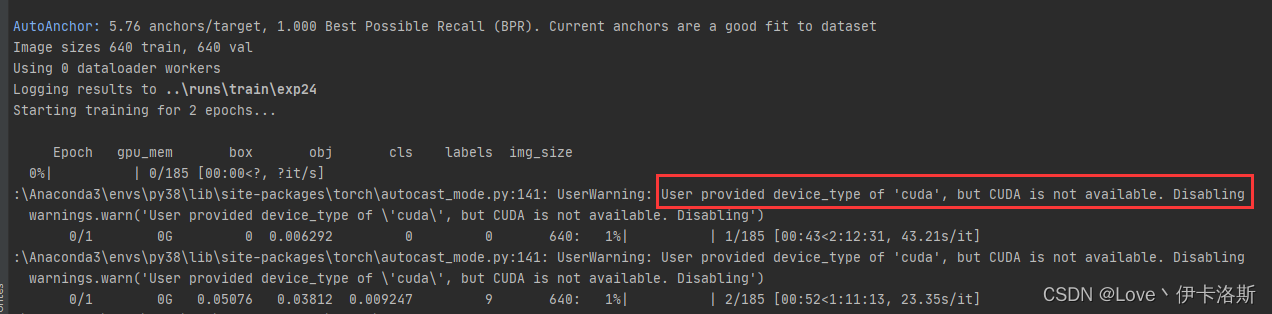
不吃GPU 实则环境错误的情况
基本会报错 UserWarning: User provided device_type of 'cuda', but CUDA is not available.
看看 CUDA 相关环境是否装好;看 pytorch版本是否匹配,是否错装了 cpuonly版;命令是否写错了
Arial.ttf 字体包缺失
例程会下载字体包 Arial.ttf,如果下载失败可以自行去提示的官网下载,然后存放在指定路径下 C:\Users\用户名\AppData\Roaming\Ultralytics,并安装字体包。
我这阿里云盘也上传了:https://www.aliyundrive.com/s/xzgh5fr6yLU

CondaHTTPError: HTTP 000 CONNECTION FAILED for url <https://repo.anaconda.co
参考:CondaHTTPError: HTTP 000 CONNECTION FAILED for url <https://repo.anaconda.co
Solving environment: failed with initial frozen solve. Retrying with flexible solve.
参考:conda install 安装很慢并且Solving environment: failed with initial frozen solve.
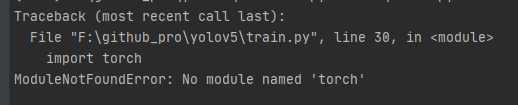
PackagesNotFoundError: The following packages are not available from current channels:
- torch
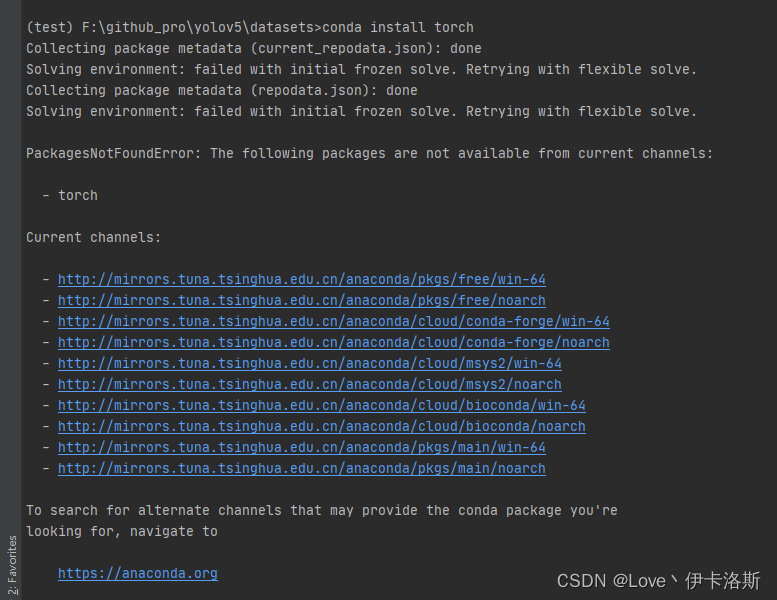
网上的方法不太管用,全部重装算了。
pip uninstall -r requirements.txt
conda uninstall pytorch torchvision torchaudio cudatoolkit
还卸不掉了,呃 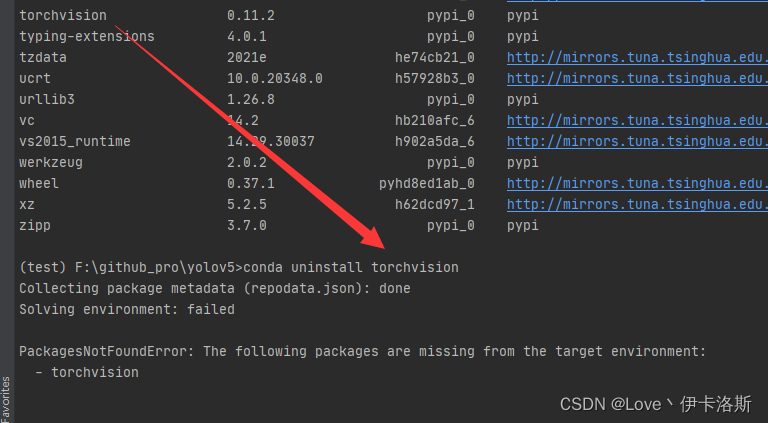
直接环境删了 算了


重装还是同样的问题
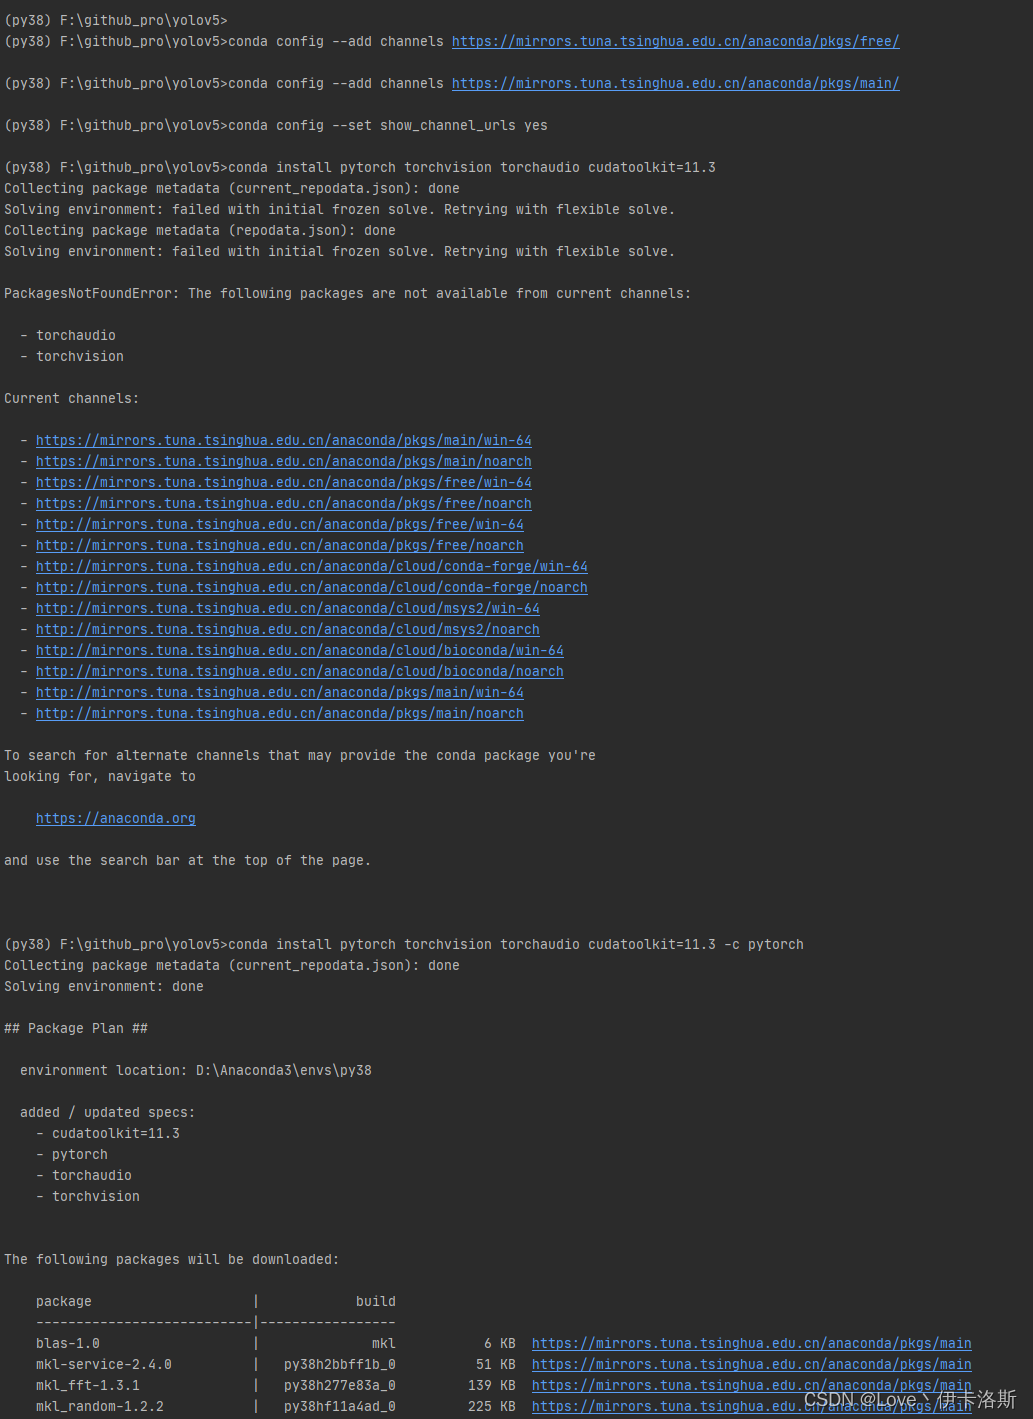
换命令走官方镜像
conda install pytorch torchvision torchaudio cudatoolkit=11.3 -c pytorch
Key already registered with the same priority: GroupSpatialSoftmax
参考:(解决)Key already registered with the same priority: GroupSpatialSoftmax
先尝试卸载了 conda uninstall pytorch 和 pip uninstall torch torchvision
然后重新安装 conda install pytorch torchvision torchaudio cudatoolkit=11.3 -c pytorch
RuntimeError: CUDA error: no kernel image is available for execution on the device
训练 报错(测试显卡 GT 720)
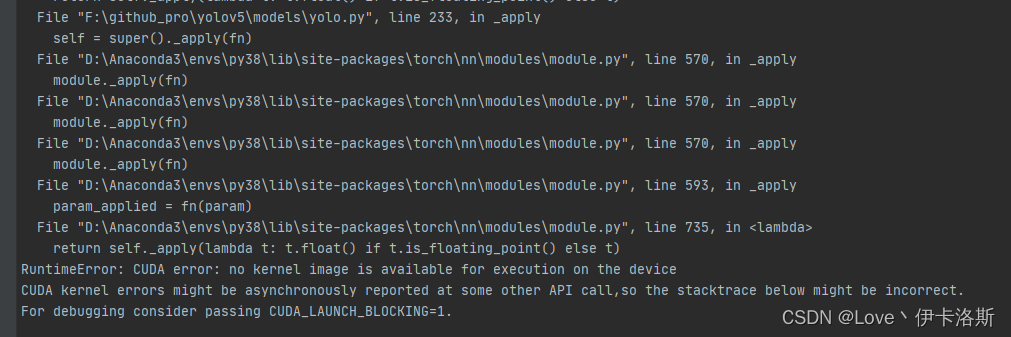
参考:RuntimeError: CUDA error: no kernel image is available for execution on the device

据参考文章解释为更换低版本pytorch,低于1.2,那肯定是没救了
换CPU版了
卸载前面装的库 conda uninstall pytorch torchvision torchaudio cudatoolkit

官网查看cpu版安装命令 conda install pytorch torchvision torchaudio cpuonly -c pytorch
再次训练,成功

 浙公网安备 33010602011771号