[svc]glusterfs的简单部署
服务端安装

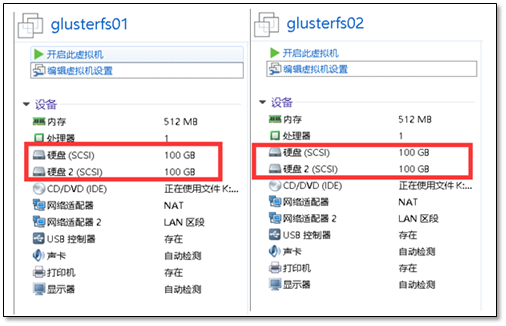
gluster01主机挂载磁盘
[root@glusterfs01 ~]# mkfs.xfs /dev/sdb
[root@glusterfs01 ~]# mkdir -p /data/brick1
[root@glusterfs01 ~]# echo '/dev/sdb /data/brick1 xfs defaults 0 0' >> /etc/fstab
[root@glusterfs01 ~]# mount -a && mount
gluster02主机挂载磁盘
[root@glusterfs02 ~]# mkfs.xfs /dev/sdb
[root@glusterfs02 ~]# mkdir -p /data/brick1
[root@glusterfs02 ~]# echo '/dev/sdb /data/brick1 xfs defaults 0 0' >> /etc/fstab
[root@glusterfs02 ~]# mount -a && mount
安装软件
- 在两个节点上操作
yum install centos-release-gluster -y

- 修改镜像源加速
sed -i 's#http://mirror.centos.org#https://mirrors.shuosc.org#g' /etc/yum.repos.d/CentOS-Gluster-3.12.repo
yum install -y glusterfs glusterfs-server glusterfs-fuse glusterfs-rdma

[root@glusterfs01 ~]#  rpm  -qa glusterfs
glusterfs-3.12.5-2.el7.x86_64

[root@glusterfs01 ~]# systemctl start glusterd.service
[root@glusterfs01 ~]# systemctl status glusterd.service
配置互信(可信池)
在glusterfs01上操作
[root@glusterfs01 ~]# gluster peer probe glusterfs02
peer probe: success.
在glusterfs02上操作
[root@glusterfs02 ~]# gluster peer probe glusterfs01
peer probe: success.
注意:一旦建立了这个池,只有受信任的成员可能会将新的服务器探测到池中。新服务器无法探测池,必须从池中探测。
检查对等状态
[root@glusterfs01 ~]#  gluster peer status
Number of Peers: 1

Hostname: 10.0.0.121
Uuid: 61d043b0-5582-4354-b475-2626c88bc576
State: Peer in Cluster (Connected)
Other names:
glusterfs02
注意:看到的UUID应不相同。
[root@glusterfs02 ~]#  gluster peer status
Number of Peers: 1

Hostname: glusterfs01
Uuid: e2a9367c-fe96-446d-a631-194970c18750
State: Peer in Cluster (Connected)
建立一个GlusterFS卷
在两个节点上操作
mkdir -p /data/brick1/gv0
在任意一个节点上执行
[root@glusterfs01 ~]# gluster volume create gv0 replica 2 glusterfs01:/data/brick1/gv0 glusterfs02:/data/brick1/gv0
Replica 2 volumes are prone to split-brain. Use Arbiter or Replica 3 to avoid this. See: http://docs.gluster.org/en/latest/Administrator%20Guide/Split%20brain%20and%20ways%20to%20deal%20with%20it/.
Do you still want to continue?
 (y/n) y
volume create: gv0: success: please start the volume to access data
启用存储卷
[root@glusterfs01 ~]# gluster volume start gv0
volume start: gv0: success
查看信息
[root@glusterfs01 ~]# gluster volume info

Volume Name: gv0
Type: Replicate
Volume ID: 865899b9-1e5a-416a-8374-63f7df93e4f5
Status: Started
Snapshot Count: 0
Number of Bricks: 1 x 2 = 2
Transport-type: tcp
Bricks:
Brick1: glusterfs01:/data/brick1/gv0
Brick2: glusterfs02:/data/brick1/gv0
Options Reconfigured:
transport.address-family: inet
nfs.disable: on
performance.client-io-threads: off
至此,服务端配置结束
客户端测试
安装客户端工具
挂载测试
[root@maotai ~]# yum install centos-release-gluster -y
[root@maotai ~]# yum install -y glusterfs glusterfs-fuse
注意:要配置好hosts文件,否则连接会出错
[root@maotai ~]# mount.glusterfs  glusterfs01:/gv0 /mnt
[root@maotai ~]# df -h
Filesystem        Size  Used Avail Use% Mounted on
/dev/sda3          19G  2.2G   16G  13% /
tmpfs             238M     0  238M   0% /dev/shm
/dev/sda1         190M   40M  141M  22% /boot
glusterfs01:/gv0  100G   33M  100G   1% /mnt
复制文件测试
[root@maotai ~]# for i in `seq -w 1 100`; do cp -rp /var/log/messages /mnt/copy-test-$i; done
客户端检查文件
[root@maotai ~]#  ls -lA /mnt/copy* | wc -l
10

服务节点检查文件
[root@glusterfs01 ~]#   ls -lA /data/brick1/gv0/copy* |wc -l
100

服务节点检查文件
[root@glusterfs02 ~]#   ls -lA /data/brick1/gv0/copy* |wc -l
100

 浙公网安备 33010602011771号