1.Springboot整合SSM
介绍
Spring Boot 是Spring 公司的一个顶级项目,和Spring Framework是一个级别的。
Spring Boot 实际上是利用 Spring Framework4 自动配置特性完成。编写项目时不需要编写xml文件。发展到现在,Spring Boot 已经具有很大很大的生态圈,各种主流技术已经都提供了Spring Boot 的启动器。
那什么是启动器呢?
Spring Boot 的启动器实际上就是一个依赖。这个依赖中包含了整个这个技术的相关jar包,还包含了这个技术的自动配置,以前的绝大多数xml配置都不需要配置了。当然了,启动器也是无法实现所有内容的自动配置,所以在使用Spring Boot时还需要进行少量的配置(这个配置不是在xml中了,而是在properties或有yml中即可)。如果是Spring 自己封装的启动器,那启动器的artifactid值叫:Spring-boot-starter-XXXX,如果是第三方公司提供的启动器,那启动器的artifactid值叫:XXXX-spring-boot-starter。以后每次使用Spring Boot 整合其他技术时首先需要考虑导入启动器。
Spring Boot 在学习什么?
Spring Boot本质是Spring Framework,Spring Framework框架在项目中作用是Spring 整合各种其他技术,让其他技术使用更加方便。所以学习Spring Boot 就是在学习如何整合其他技术。
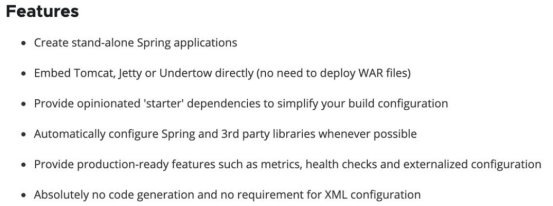
- 创建独立的Spring应用程序;
- 直接嵌入Tomcat,Jetty或Undertow(无需部署WAR文件);
- 提供“初始”的POM文件内容,以简化Maven配置;
- 尽可能自动配置Spring;
- 提供生产就绪的功能,如指标,健康检查和外部化配置;
- 绝对无代码生成,也不需要XML配置.
创建项目
maven继承方式
1.创建Maven工程


2.添加依赖
    <!--parent 表示继承
        继承了springboot工程 当前工程就是一个springboot工程
        springboot为我们提供了很多常用的依赖版本 我们不需要自己指定 不需要考虑版本兼容性
     -->
    <parent>
        <groupId>org.springframework.boot</groupId>
        <artifactId>spring-boot-starter-parent</artifactId>
        <version>2.6.5</version>
    </parent>

    <dependencies>
        <!-- web  的 依赖-->
        <dependency>
            <groupId>org.springframework.boot</groupId>
            <artifactId>spring-boot-starter-web</artifactId>
        </dependency>
    </dependencies>
3.添加主启动类
@SpringBootApplication  // springboot的核心注解 这个注解所在的类是springboot的启动类
public class Main {
    // 启动下面的main方法 会帮我们启动springboot内嵌的tomcat 并且帮我们创建IOC容器
    public static void main(String[] args) {
        SpringApplication.run(Main.class,args);
    }
}
4.核心注解
@SpringBootApplication
5.配置文件
Springboot常用的有两种格式的配置文件application.properties 和 application.yml
- application.properties
server.port=8081
server.servlet.context-path=/woniu
- application.yml
server:
  port: 8081
  servlet:
    context-path: /woniu
前缀:
  后缀: 值
  后缀: 值
    子集: 值
6.静态资源
springboot为我们提供了四个静态资源文件夹,只要将视图资源放在这四个文件夹下,就可以直接访问静态资源
- classpath:/META-INF/resources/ 优先级最高
- classpath:/resources/
- classpath:/static/
- classpath:/public/ 优先级最低
整合MyBatis
1.引入mybatis依赖
 <!-- 整合mybatis -->
        <!-- 数据库连接java的依赖-->
        <dependency>
            <groupId>mysql</groupId>
            <artifactId>mysql-connector-java</artifactId>
        </dependency>
        <dependency>
            <groupId>org.mybatis.spring.boot</groupId>
            <artifactId>mybatis-spring-boot-starter</artifactId>
            <version>2.3.2</version>
        </dependency>
        <dependency>
            <groupId>com.alibaba</groupId>
            <artifactId>druid-spring-boot-starter</artifactId>
            <version>1.2.14</version>
        </dependency>
        <dependency>
            <groupId>org.projectlombok</groupId>
            <artifactId>lombok</artifactId>
        </dependency>
2.配置文件
server:
  port: 8081
#数据库相关配置
spring:
  datasource:
    driver-class-name: com.mysql.cj.jdbc.Driver
    url: jdbc:mysql://localhost:3306/db31?useSSL=false&serverTimezone=GMT%2B8&characterEncoding=utf-8&useUnicode=true
    username: root
    password: wang
    # 连接池相关的配置
    type: com.alibaba.druid.pool.DruidDataSource
    druid:
      max-wait: 60000 #最大等待时长
      max-active: 20 #最大激活数
      min-idle: 5 #最小空闲数量
mybatis:
  mapper-locations: classpath:mapper/*.xml  #配置 mybatis映射文件的路径
  configuration:
    log-impl: org.apache.ibatis.logging.stdout.StdOutImpl # 控制台打印日志
    map-underscore-to-camel-case: true #下划线转驼峰
  type-aliases-package: com.woniu.entity  #别名扫描
3.编写接口
package com.woniu.mapper;

import com.woniu.entity.User;
import org.apache.ibatis.annotations.Mapper;
import org.apache.ibatis.annotations.Param;

import java.util.List;

// @Mapper  // 表示这个接口是一个Mapper
public interface UserMapper {

     // 查询全部
    List<User> findAll();
    // 根据id查询
    User findById(@Param("id") Integer id);
    // 根据姓名 年龄 查找
    List<User> findByCondition(@Param("name") String name,@Param("age") Integer age);
    // 添加用户
    Integer addUser(User user);
    // 修改用户
    Integer updateUser(User user);
    // 删除用户
    Integer delUser(@Param("id") Integer id);
}
4.映射文件
<?xml version="1.0" encoding="UTF-8"?>
<!DOCTYPE mapper
        PUBLIC "-//ibatis.apache.org//DTO Mapper 3.0//EN"
        "https://mybatis.org/dtd/mybatis-3-mapper.dtd">
<mapper namespace="com.woniu.mapper.UserMapper">
    <select id="findAll" resultType="com.woniu.entity.User">
        select * from tb_user
    </select>
    <select id="findById" resultType="User" parameterType="int">
        select * from tb_user where id = #{id}
    </select>
    <select id="findByCondition" resultType="User" >
        select * from tb_user where name like concat('%',#{name},'%') and age = #{age}
    </select>
    <!-- useGeneratedKeys 使用主键生成策略 keyColumn="id" keyProperty="id" 可以将生成id 从数据库列 映射到 实体类属性上  -->
    <insert id="addUser" parameterType="User" useGeneratedKeys="true" keyColumn="id" keyProperty="id">
        insert into tb_user values(default,#{name},#{password},#{gender},#{birthday},#{age},#{classId})
    </insert>
    <update id="updateUser" parameterType="User" >
        update tb_user
        <set>
            <if test="name != null">
                name =#{name},
            </if>
            <if test="password != null">
                password=#{password},
            </if>
            <if test="gender != null">
                gender=#{gender},
            </if>
            <if test="birthday != null">
                birthday=#{birthday},
            </if>
            <if test="age != null">
                age=#{age},
            </if>
            <if test="classId != null">
                class_id=#{classId}
            </if>
        </set>
        where id = #{id}
    </update>
    <delete id="delUser" parameterType="User">
        delete from tb_user where id = #{id}
    </delete>
</mapper>
5.测试接口
package com.woniu.test;

import com.woniu.entity.User;
import com.woniu.mapper.UserMapper;
import org.junit.jupiter.api.Test;
import org.springframework.boot.test.context.SpringBootTest;

import javax.annotation.Resource;
import java.util.Date;

/**
 * @Classname TestUser
 * @Description TODO
 * @Date 2025/5/13 11:04
 * @Created by pc
 */
@SpringBootTest // 这是springboot的测试类
public class TestUser {

    @Resource
    private UserMapper userMapper;

    @Test
    public void testFindAll(){
        userMapper.findAll().forEach(System.out::println);
    }

    @Test
    public void test01(){
        System.out.println(userMapper.findById(1));
    }
    @Test
    public void test02(){
        System.out.println(userMapper.findByCondition("张", 20));
    }
    @Test
    public void test03(){
        User user = new User(null, "王6", "123", "女", new Date(), 20, 3);
        Integer result = userMapper.addUser(user);
        System.out.println(user);
    }
}
注意:spirngboot的测试类路径要和项目(src-java)路径完全一致
整合MVC
springMVC MVC设计模式:
- V(视图View):表示的是能看到的页面(jsp或html);
- C(控制器Controller):对应的组件是Servlet,用来接收用户请求,处理完请求后需要将处理的结果响应给浏览器端;
- M(模型Model):对应的组件是javabean,就是普通的java类,第一个是进行业务的处理,第二个可以封装处理的结果;
MVC框架学习四条主线
1.路由规则——根据请求路径去寻找对应的java类中的方法;
2.参数绑定(类型转换,数据校验)——在mvc框架中参数自动绑定的,不需要手工获取;
3.拦截器 interceptor,有点像Filter,但是拦截器和filter实现原理完全不同,filter必须依赖web容器,拦截器不是必须要依赖web容器,也是单纯java工程也可以使用拦截器,底层通过aop来实现;
4.国际化 文字的属性文件,地区用大写字母,语言用小写字母;i18n:国际化 Internationalization
Json
前后端交互的一种数据格式,以后我们写前后端分离项目都以这种数据格式交互
常用注解
@Controller:挂在类上 表示这个类是一个控制器 可以接受用户请求
@RequestMapping:可以挂在类上也可以挂在方法上,挂在类上表示通过路径寻找某一个类,挂在方法上表示通过路径寻找某一个方法
@RequestParam:可以解决前后端提交的key不一致不能进行参数自动绑定的问题 并且可以指定参数是否必须 和 指定默认值
@DateTimeFormat:MVC框架不能帮我们自动转换日期类型的参数(报400错误),可以在实体类日期属性上加这个注解解决
@JsonFormat:如果我们想自定义日期出参格式 可以使用这个注解
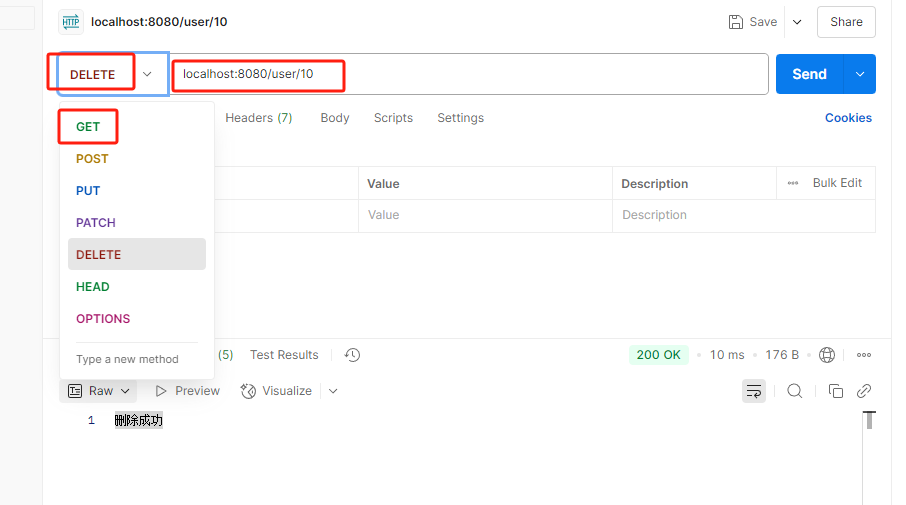
Rest风格
RestFul一种流行的软件架构风格,通过不同的动作来区分用户行为
| 请求方式 | URL | 功能说明 | 对应注解 |
|---|---|---|---|
| GET | /users | 查询用户列表 | @GetMapping |
| POST | /users | 创建一个用户 | @PostMapping |
| GET | /users/id | 根据id查询一个用户 | @GetMapping |
| PUT | /users/id | 根据id更新一个用户 | @PutMapping |
| DELETE | /users/id | 根据id删除一个用户 | @DeleteMapping |
@GetMapping:请求方式是get类型
@PostMapping:请求方式必须是Post类型
@DeleteMapping:删除操作
@PutMapping:修改操作
@PathVariable:当使用rest风格的时候我们会在url上直接拼接参数,控制器接收的时候,url上使用{变量名} 占位,通过这个注解将这个变量名绑定到方法的形参上
	@GetMapping("/{id}")
    public User findById(@PathVariable("id") Integer id) {
        return userService.findById(id);
    }

	@DeleteMapping("/{id}")
    public String delUser(@PathVariable("id") Integer id){
        Integer result = userService.delUser(id);
        return result > 0 ? "删除成功" : "删除失败";
    }
@ResponseBody:挂在方法上表示这个方法的返回值是JSON格式数据,挂在控制器上,表示这个控制器的所有方法返回的都是json格式
@RestController = @Controller + @ResponseBody
思维导图

本文来自博客园,作者:icui4cu,转载请注明原文链接:https://www.cnblogs.com/icui4cu/p/18874795

 浙公网安备 33010602011771号