4.Spring配置进阶
本章目标
- 自动装配(了解)
- Spring注解分类(理解)
- 使用注解完成自动装配(熟练)
- 基于注解声明组件(熟练)
- JavaConfig(掌握)
- MapperScannerConfigurer(理解)
具体内容
Spring 容器提供配置元数据有三种方式
- XML配置文件。
- 基于注解的配置。
- 基于java的配置。
一、自动装配
本节目标:掌握自动装配思想,作为过渡,后期我们频繁使用的是注解形式
之前的例子中我们都是手动装配
自动装配就是让应用程序上下文为你找出依赖项的过程。说的通俗一点,就是Spring会在上下文中自动查找,并自动给bean装配与其关联的属性!
Spring中实现自动装配的方式有两种,一种是通过xml文件、另一种是通过注解。
1、通过xml文件实现自动装配
要使用自动装配,需要在xml配置文件中的<bean>要配置元素的autowire属性。autowire常用属性具体说明如下:
| 模式 | 描述 |
|---|---|
| no | 这是默认的设置,它意味着没有自动装配,你应该使用显式的bean引用来连线。你不用为了连线做特殊的事。 |
| byName | 由属性名自动装配。Spring 容器看到在 XML 配置文件中 bean 的自动装配的属性设置为 byName。然后尝试匹配,并且将它的属性与在配置文件中被定义为相同名称的 beans 的属性进行连接。 |
| byType | 由属性数据类型自动装配。Spring 容器看到在 XML 配置文件中 bean 的自动装配的属性设置为 byType。然后如果它的类型匹配配置文件中的一个确切的 bean 名称,它将尝试匹配和连接属性的类型。如果存在不止一个这样的 bean,则一个致命的异常将会被抛出 |
| constructor | 类似于 byType,但该类型适用于构造函数参数类型。如果在容器中没有一个构造函数参数类型的 bean,则一个致命错误将会发生。 |
这里我们讲byName,byType两种方式
2、byName
设置autowire属性为byName,那么Spring会根据class属性找到实体类,然后查询实体类中所有setter方法的名字,根据setter方法后面的名字(例如SetDog,则setter方法后面的名字为dog)再到配置文件中寻找一个与该名字相同id的Bean,注入进来。
-
相关dao,service接口代码
public interface UserDao {
  void save();
 }
 public class UserDaoImpl implements UserDao {
  @Override
  public void save(){
  System.out.println(“save User”);
  }
 }
 public interface UserService {

  void test();

 }
 public class UserServiceImpl implements UserService {

  private UserDao  userDao;
  public void setUserDao(UserDao userDao) {
  this.userDao = userDao;
  }
  public void test(){
    userDao.save();

  }
}
注意UserServiceImpl中的setUserDao方法一定要加入,采用设置注入方式
-
配置文件:
<bean id="userDao" class="com.woniuxy.dao.impl.UserDaoImpl"></bean>
<bean id="userService" class="com.woniuxy.service.impl.UserServiceImpl" autowire=“byName”></bean>
如果把userDao改为userDao1,这时就会出现空指针了
3、byType
设置autowire属性为byType,那么Spring会自动寻找一个与该属性类型相同的Bean,注入进来。
类同上,配置文件如下
<bean id="userDao1" class="com.woniuxy.dao.impl.UserDaoImpl"></bean>
<bean id="userService" class="com.woniuxy.service.impl.UserServiceImpl" autowire="byType"></bean>
这时发现只要类型相同就会注入成功
二、Spring注解分类
在之前已经XML配置了,使用大量的XML配置,使得整个项目变得非常的臃肿,Spring主要的目标是简化企业开发,提高开发效率,学习框架以后,没减轻工作量,反而工作量变大,有着大量的XML配置,XML配置的年代过度到注解配置的时代,XML的配置依然存在,主要是以注解为主,XML为辅。
默认情况下,<context:component-scan/>查找使用构造型(stereotype)注解所标注的类,如@Component(组件),@Service(服务),@Controller(控制器),@Repository(/rɪˈpɑːzətɔːri/数据仓库)。
Spring中有非常多的注解,这里我们只列举了目前我们常用到的几个注解
1、Spring中类级别的注解
@Component、@Repository、@Controller、@Service以及JavaEE6的@ManagedBean和@Named注解,都是添加在类上面的类级别注解
Spring容器根据注解的过滤规则扫描读取注解Bean定义类,并将其注册到Spring IoC容器中。
1、使用asm技术扫描.class文件,并将包含@Component、@Controller、@Service、@Repository或者其他自定义的的bean注册到beanFactory中,
2、然后spring在注册处理器
3、实例化处理器,然后将其放到beanPostFactory中,然后我们就可以在类中进行使用了。
4、创建bean时,会自动调用相应的处理器进行处理。
2、类内部的注解
@Autowire、@Value、@Resource注解等,都是添加在类内部的字段或者方法上的类内部注解。
SpringIoC容器通过Bean后置注解处理器解析Bean内部的注解,比如Spring实现@Autowire解析和注入的核心的类是通过AutowiredAnnotationBeanPostProcessor来实现的
三、注解实现自动装配
类内部注解
前面我们已经实现了自动装配,除了在配置文件中通过autowire属性来实现该功能,我们也可以通过注解的形式来实现。
1、使用注解前的准备:
在Spring使用注解之前首先要开户注解的自动扫描功能
修改Spring的xml配置文件:
 <?xml version="1.0" encoding="UTF-8"?>
 <beans xmlns="http://www.springframework.org/schema/beans"
        xmlns:xsi="http://www.w3.org/2001/XMLSchema-instance"
        xmlns:context="http://www.springframework.org/schema/context"
        xsi:schemaLocation="http://www.springframework.org/schema/beans
         https://www.springframework.org/schema/beans/spring-beans.xsd
         http://www.springframework.org/schema/context
         https://www.springframework.org/schema/context/spring-context.xsd">

     <!--设置扫描位置,自动扫描该包下的注解-->
         <context:component-scan base-package="com.woniuxy"></context:component-scan>

 </beans>
2、 @Autowired注解
@Autowired为Spring提供的注解,只按照类型(byType)注入,导入org.springframework.beans.factory.annotation.Autowired;
在默认情况下使用 @Autowired 注解进行自动注入时,Spring 容器中匹配的候选 Bean 数目必须有且仅有一个。当找不到一个匹配的
Bean 时,Spring 容器将抛出 BeanCreationException 异常,并指出必须至少拥有一个匹配的 Bean。
当不能确定 Spring 容器中一定拥有某个类的 Bean 时,可以在需要自动注入该类 Bean 的地方可以使用@Autowired(required= false)。这等于告诉 Spring:在找不到匹配 Bean 时也不报错。
@Autowired可以放在字段和setter方法上。
2.1 注解放在属性上
在实体类的对应属性上添加@Autowired注解,实现自动装配。当在字段上,那么就不需要再写setter方法
修改SysUserMapperImpl如下:
 public class SysUserMapperImpl implements SysUserMapper {
     @Autowired
     private SqlSessionFactory sqlSessionFactory;
     @Override
     public List<SysUser> queryAll() {
         List<SysUser> list;
         try(SqlSession sqlSession = sqlSessionFactory.openSession()){
            SysUserMapper sysUserMapper = sqlSession.getMapper(SysUserMapper.class);
            list = sysUserMapper.queryAll();
         }
         return list;
     }
 }
2.2 注解放在setter方法上
修改SysUserServiceImpl类如下:
 public class SysUserServiceImpl implements SysUserService {

     private SysUserMapper sysUserMapper;
     @Autowired
     public void setSysUserMapper(SysUserMapper sysUserMapper) {
         this.sysUserMapper = sysUserMapper;
     }
     @Override
     public List<SysUser> queryAll() {
         return sysUserMapper.queryAll();
     }

     @Override
     public Integer updateById(SysUser sysUser) {
         return sysUserMapper.updateById(sysUser);
     }
 }
2.3 spring-config.xml文件结构
<bean id="sysUserMapper" class="com.woniuxy.ssm.mapper.impl.SysUserMapperImpl"></bean>
<bean id="sysUserService" class="com.woniuxy.ssm.service.impl.SysUserServiceImpl"></bean>
3、@Resource注解
默认按名称进行装配
@Resource默认按照ByName自动注入,由J2EE提供,需要导入包javax.annotation.Resource。
@Resource有两个重要的属性:name和type,而Spring将@Resource注解的name属性解析为bean的名字,而type属性则解析为bean的类型。
@Resource可以写在字段和setter方法上。当在字段上,那么就不需要再写setter方法。
如果既没有指定name,又没有指定type,则自动按照byName方式进行装配;如果没有匹配,则回退为一个原始类型进行匹配,如果匹配则自动装配
3.1 默认按名字
 public class SysUserMapperImpl implements SysUserMapper {
     @Resource
     private SqlSessionFactory sqlSessionFactory;

     public void setSqlSessionFactory(SqlSessionFactory sqlSessionFactory) {
         this.sqlSessionFactory = sqlSessionFactory;
     }

     @Override
     public List<SysUser> queryAll() {
         List<SysUser> list;
         try(SqlSession sqlSession = sqlSessionFactory.openSession()){
            SysUserMapper sysUserMapper = sqlSession.getMapper(SysUserMapper.class);
            list = sysUserMapper.queryAll();
         }
         return list;
     }
 }
3.2 按类型
效果和@Autowired一样
public class SysUserMapperImpl implements SysUserMapper {
    @Resource(type = SqlSessionFactory.class)
    private SqlSessionFactory sqlSessionFactory;

    public void setSqlSessionFactory(SqlSessionFactory sqlSessionFactory) {
        this.sqlSessionFactory = sqlSessionFactory;
    }

    @Override
    public List<SysUser> queryAll() {
        List<SysUser> list;
        try(SqlSession sqlSession = sqlSessionFactory.openSession()){
           SysUserMapper sysUserMapper = sqlSession.getMapper(SysUserMapper.class);
           list = sysUserMapper.queryAll();
        }
        return list;
    }
}
@Resource装配顺序:
①如果同时指定了name和type,则从Spring上下文中找到唯一匹配的bean进行装配,找不到则抛出异常。
②如果指定了name,则从上下文中查找名称(id)匹配的bean进行装配,找不到则抛出异常。
③如果指定了type,则从上下文中找到类似匹配的唯一bean进行装配,找不到或是找到多个,都会抛出异常。
④如果既没有指定name,又没有指定type,则自动按照byName方式进行装配;如果没有匹配,则回退为一个原始类型进行匹配,如果匹配则自动装配。
4、@Qualifier注解(了解)
什么情况会使用到@Qualifier(/kwɒlɪfaɪə(r)/)注解?
当ioc容器根据属性类型去容器中找找到多个相同类型的组件,再将属性的名称作为组件(bean)的id去容器中查找找不到时就是用这两个注解搭配,指定需要装配的bean的id。
@Qualifier注解可以和使用Autowired搭配使用
@Qualifier指定需要装配的组件的id,而不是使用属性名。例如下边例子,spring就会优先在容器中查找id为“cat”的组件。
public class Peopel {
    @Autowired
    @Qualifier(value = "cat")
    private Cat cat;
}
思考?
至此我们实现了通过注解的形式实现自动装配,那能不能通过注解的形式声明组件,这样就不需要在spring-config.xml文件中声明了
四、基于注解声明组件
类注解
目前常用的组件有:@Component(组件),@Service(服务),@Controller(控制器),@Repository(数据仓库)。后期随着知识点的增加,还会学很多新的注解,最终我们会在Spring中使用大量的注解来实现我们的功能。
1、使用@Component注解
@Component:通用的注解,可标注任意类为 Spring 组件。如果一个 Bean 不知道属于哪个层,可以使用@Component 注解标注。
-
在applictionContext.xml文件中添加扫描
<beans xmlns="http://www.springframework.org/schema/beans" xmlns:xsi="http://www.w3.org/2001/XMLSchema-instance" xmlns:context="http://www.springframework.org/schema/context" xsi:schemaLocation="http://www.springframework.org/schema/beans http://www.springframework.org/schema/beans/spring-beans.xsd http://www.springframework.org/schema/context http://www.springframework.org/schema/context/spring-context.xsd"> <!--设置扫描位置,自动扫描该包下的注解--> <context:component-scan base-package="com.woniuxy"></context:component-scan> </beans> -
修改SysUserMapperImpl中使用@Component进行声明
@Component
public class SysUserMapperImpl implements SysUserMapper {
    @Resource
    private SqlSessionFactory sqlSessionFactory;

    public void setSqlSessionFactory(SqlSessionFactory sqlSessionFactory) {
        this.sqlSessionFactory = sqlSessionFactory;
    }

    @Override
    public List<SysUser> queryAll() {
        List<SysUser> list;
        try(SqlSession sqlSession = sqlSessionFactory.openSession()){
           SysUserMapper sysUserMapper = sqlSession.getMapper(SysUserMapper.class);
           list = sysUserMapper.queryAll();
        }
        return list;
    }
}
说明:如果一个类中有@Component,没有指定名称,那么这个组件名称就是类名首字母小写
-
修改SysUserServiceImpl类结构
把普通pojo实例化到spring容器中,相当于配置文件中的
@Component("sysUserService")
public class SysUserServiceImpl implements SysUserService {
    @Autowired
    private SysUserMapper sysUserMapper;

    public void setSysUserMapper(SysUserMapper sysUserMapper) {
        this.sysUserMapper = sysUserMapper;
    }
    @Override
    public List<SysUser> queryAll() {
        return sysUserMapper.queryAll();
    }
}
注意@Component(“sysUserService”),如果不指定名称时默认为“组件名称就是类名首字母小写”,这样在测试类中将出现找不到的情况,所以此处指定了名称
-
修改spring-config.xml文件
删除掉声明的dao层的bean信息,以及service信息,只保留基础配置信息
<?xml version="1.0" encoding="UTF-8"?>
<beans xmlns="http://www.springframework.org/schema/beans"
       xmlns:xsi="http://www.w3.org/2001/XMLSchema-instance"
       xmlns:context="http://www.springframework.org/schema/context"
       xsi:schemaLocation="http://www.springframework.org/schema/beans
        https://www.springframework.org/schema/beans/spring-beans.xsd
        http://www.springframework.org/schema/context
        https://www.springframework.org/schema/context/spring-context.xsd">
    <context:property-placeholder location="classpath:jdbc.properties"/>
    <context:component-scan base-package="com.woniuxy.ssm"/>

    <bean id="dataSource" destroy-method="close"
          class="com.alibaba.druid.pool.DruidDataSource">
        <property name="driverClassName" value="${jdbc.driver}"/>
        <property name="url" value="${jdbc.url}"/>
        <property name="username" value="${jdbc.username}"/>
        <property name="password" value="${jdbc.password}"/>
    </bean>
    <bean id="sqlSessionFactory" class="org.mybatis.spring.SqlSessionFactoryBean">
        <property name="dataSource" ref="dataSource"/>
        <property name="typeAliasesPackage" value="com.woniuxy.ssm.entity"/>
        <property name="mapperLocations" value="classpath:mapper/*"/>
        <property name="configuration">
            <bean class="org.apache.ibatis.session.Configuration">
                <property name="logImpl" value="org.apache.ibatis.logging.stdout.StdOutImpl"/>
                <property name="cacheEnabled" value="true"/>
                <property name="lazyLoadingEnabled" value="true"/>
            </bean>
        </property>
    </bean>

</beans>
2、优化注解
如果上所有的组件都是用的@Component,但是在实际开发过程中使用@Component,虽然也能完成Bean实例化声明,但是不能见名知意,Spring提供了如下注解:
- @Repository:用于声明DAO层的
- @Service:用于业务层
- @Controller:用于控制器 (暂时先不用,后面接触Spring MVC再使用)
修改对应代码如下:
@Repository
public class SysUserMapperImpl implements SysUserMapper {
    @Resource
    private SqlSessionFactory sqlSessionFactory;

    public void setSqlSessionFactory(SqlSessionFactory sqlSessionFactory) {
        this.sqlSessionFactory = sqlSessionFactory;
    }
    ......
}

@Service("sysUserService")
public class SysUserServiceImpl implements SysUserService {
    @Autowired
    private SysUserMapper sysUserMapper;

    public void setSysUserMapper(SysUserMapper sysUserMapper) {
        this.sysUserMapper = sysUserMapper;
    }
    .......
}
测试……
五、JavaConfig
1、什么是JavaConfig
JavaConfig是指基于java配置的spring。传统的Spring一般都是基本xml配置的,后来spring3.0新增了许多JavaConfig的注解。
JavaConfig相关的配置注解
| 注解 | 说明 |
|---|---|
| @Configuration | 在类上打上这一标签,表示这个类是配置类 |
| @ComponentScan | 相当于xml的<context:componentscan basepakage=> |
| @Bean | bean的定义,相当于xml的<bean id="objectMapper" class="org.it.map.ObjectMapper" /> |
| @EnableWebMvc | 相当于xml的<mvc:annotation-driven>,springMVC阶段涉及 |
| @ImportResource | 相当于xml的 <import resource="applicationContext-cache.xml"> |
| @PropertySource | spring 3.1开始引入,它是基于java config的注解,用于读取properties文件 |
| @Profile | spring3.1开始引入,一般用于多环境配置,激活时可用@ActiveProfiles注解,@ActiveProfiles(“dev”) |
| @Value | 读取外部配置文件对应的property |
2、 @Configuration
被该注解标识的类,表明该类是一个JavaConfig形式的Spring Ioc容器的配置类
下面我们看一下XML配置方式跟config配置方式的区别:
2.1 表达形式层面
-
基于XML配置的方式是这样:
<?xml version=“1.0” encoding=“UTF-8”?>
<beans xmlns=“http://www.springframework.org/schema/beans”
xmlns:xsi=“http://www.w3.org/2001/XMLSchema-instance”
xsi:schemaLocation=“http://www.springframework.org/schema/beans http://www.springframework.org/schema/beans/spring-beans-3.0.xsd”> </beans>
一个xml文件代表一个配置
-
而基于JavaConfig的配置方式是这样:
@Configuration
public class MockConfiguration{
//bean定义
}
任何一个标注了@Configuration的Java类定义都是一个JavaConfig配置类。
2.2 注册bean定义层面
-
基于XML的配置形式是这样:
<bean id=“mockService” class=“..MockServiceImpl”> … </bean> -
而基于JavaConfig的配置形式是这样的:
@Configuration
public class MockConfiguration{
@Bean
public MockService mockService(){
  return new MockServiceImpl();
  }
}
任何一个标注了@Bean的方法,其返回值将作为一个bean定义注册到Spring的IoC容器,方法名将默认成该bean定义的id。
@Bean一般用在使用第三方类来生成对象注入到spring容器的情况下使用
2.3 表达依赖注入关系层面
-
为了表达bean与bean之间的依赖关系,在XML形式中一般是这样:
<bean id=“dependencyService” class=“DependencyServiceImpl”></bean> <bean id=“mockService” class=“..MockServiceImpl”> <propery name =“dependencyService” ref=“dependencyService” /> </bean> -
而基于JavaConfig的配置形式是这样的:
@Configuration
public class MockConfiguration{
@Bean
public DependencyService dependencyService(){
    return new DependencyServiceImpl();
}
@Bean
public MockService mockService(){
    return new MockServiceImpl(dependencyService());
    }
}
如果一个bean的定义依赖其他bean,则直接调用对应的JavaConfig类中依赖bean的创建方法就可以了。
3、@Value
@Value的值有两类:
${ property : default_value }——读取外部配置文件对应的property (常用)#{ obj.property? :default_value }——SpEL表达式对应的内容 (了解)
default_value是前面的值为空时的默认值。注意二者的不同,#{}里面那个obj代表对象。
3.1、优化自定义数据源
主要是测试${ property : default_value }的使用
创建MyConfig类来读取jdbc.properties配置文件中信息
package com.woniuxy.ssm.config;

import com.alibaba.druid.pool.DruidDataSource;
import org.springframework.beans.factory.annotation.Value;
import org.springframework.context.annotation.Bean;
import org.springframework.context.annotation.Configuration;
import org.springframework.context.annotation.PropertySource;

import javax.sql.DataSource;

/**
 * @author :fengSir
 * @date :Created By 2022-05-28 17:42
 * @description :TODO
 */
@Configuration
@PropertySource("classpath:jdbc.properties")//解析指定文件
public class MyConfig {
    //@Value("${jdbc.url}")通过springEL表达式(读取括号里面表达式的值)并且赋给下面的变量
    @Value("${jdbc.driver}")
    private String driver;
    @Value("${jdbc.url}")
    private String url;
    @Value("${jdbc.username}")
    private String username;
    @Value("${jdbc.password}")
    private String password;
    @Bean
    public DataSource dataSource() {
        DruidDataSource dataSource = new DruidDataSource();
        dataSource.setDriverClassName(driver);
        dataSource.setUsername(username);
        dataSource.setPassword(password);
        dataSource.setUrl(url);
        return dataSource;
    }
}
3.2、 修改spring-config.xml
注释掉xml文件中的dataSource进行测试
<?xml version="1.0" encoding="UTF-8"?>
<beans xmlns="http://www.springframework.org/schema/beans"
       xmlns:xsi="http://www.w3.org/2001/XMLSchema-instance"
       xmlns:context="http://www.springframework.org/schema/context"
       xsi:schemaLocation="http://www.springframework.org/schema/beans
        https://www.springframework.org/schema/beans/spring-beans.xsd
        http://www.springframework.org/schema/context
        https://www.springframework.org/schema/context/spring-context.xsd">
    <context:property-placeholder location="classpath:jdbc.properties"/>
    <context:component-scan base-package="com.woniuxy.sm" />

<!--    <bean id="dataSource" destroy-method="close"-->
<!--          class="com.alibaba.druid.pool.DruidDataSource">-->
<!--        <property name="driverClassName" value="${jdbc.driver}"/>-->
<!--        <property name="url" value="${jdbc.url}"/>-->
<!--        <property name="username" value="${jdbc.username}"/>-->
<!--        <property name="password" value="${jdbc.password}"/>-->
<!--    </bean>-->
    <bean id="sqlSessionFactory" class="org.mybatis.spring.SqlSessionFactoryBean">
        <property name="dataSource" ref="dataSource"/>
        <property name="typeAliasesPackage" value="com.woniuxy.ssm.entity"/>
        <property name="mapperLocations" value="classpath:mapper/*"/>
        <property name="configuration">
            <bean class="org.apache.ibatis.session.Configuration">
                <property name="logImpl" value="org.apache.ibatis.logging.stdout.StdOutImpl"/>
                <property name="cacheEnabled" value="true"/>
                <property name="lazyLoadingEnabled" value="true"/>
            </bean>
        </property>
    </bean>

</beans>
测试程序,发现程序依然可以正常访问数据库,说明我们自定义的数据源生效了。
六、MapperScannerConfigurer
在上面采用自动装配的基础上,操作当前配置,
添加以下配置
MyBatis中可以使用SqlSession的getMapper(Class type)方法,根据指定的映射器和映射文件直接生成实现类,这样不必自行编写映射器的实现类,就可以调用映射器的方法进行功能实现。
MyBatis-Spring中提供了MapperScannerConfigurer,它可以扫描指定包中的接口并将它直接注册为MapperFactoryBean。
public class MapperFactoryBean<T> extends SqlSessionDaoSupport implements FactoryBean<T> {
    private Class<T> mapperInterface;
    private boolean addToConfig = true;
    ......

    public T getObject() throws Exception {
        return this.getSqlSession().getMapper(this.mapperInterface);
    }
    ......
}
MapperScannerConfigurer的配置方法如下示例所示:
<bean class="org.mybatis.spring.mapper.MapperScannerConfigurer">
    <property name="sqlSessionFactoryBeanName" value="sqlSessionFactory"/>
    <property name="basePackage" value="com.woniuxy.mapper"/>
</bean>
- basePackage属性中可以包含多个包名,多个包含之间使用逗号或分号隔开。
- MapperScannerConfigurer会为所有又它创建的映射器实现开启自动装配,也就是MapperScannerConfigurer创建的所有映射器实现都会被自动注入SqlSessionFactory例,因此在如上示例中配置DAO组件时无需显示注入SqlSessionFactory实例
- 映射器被注册到Spring容器时,Spring会根据其接口名称为其命名,默认规则是首字母小写的非完全限定类名。例如EmpMapper类型的组件会被默认命名为empMapper
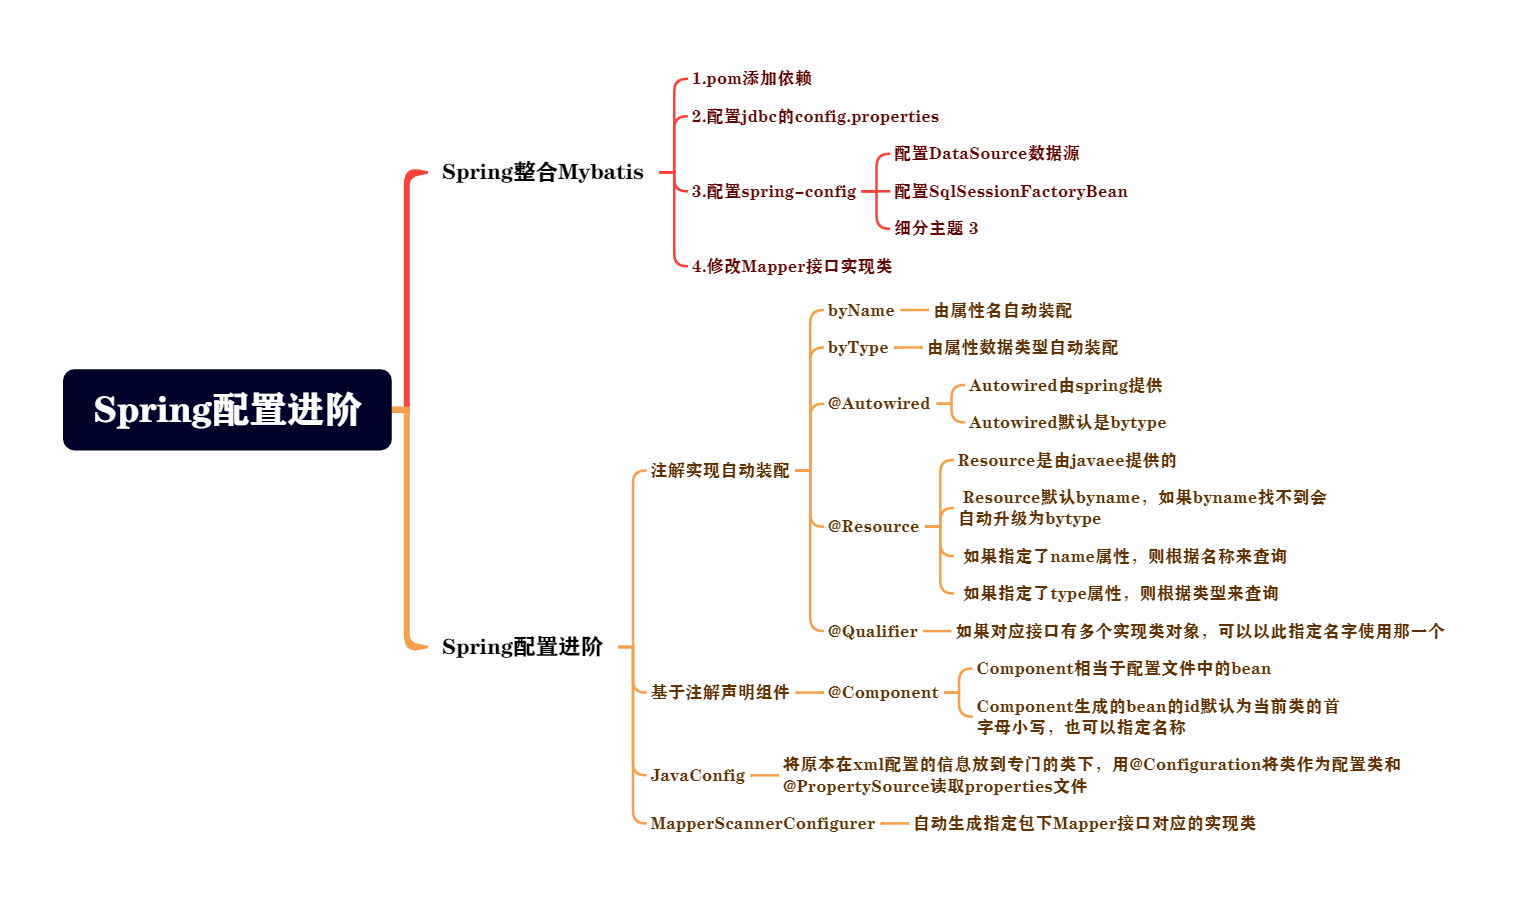
思维导图
本文来自博客园,作者:icui4cu,转载请注明原文链接:https://www.cnblogs.com/icui4cu/p/18839034

 浙公网安备 33010602011771号