

Hazel引擎学习(九)
我自己维护引擎的github地址在这里,里面加了不少注释,有需要的可以看看
参考视频链接在这里
Entity Component System
这节课干货比较多,我单独放到文章Entity Component System与Entity Component里了
Intro to EnTT (ECS)
该库所有的内容,应该都放到一个叫entt.hpp的文件里了,我看了下,这个文件非常大,一共有17600行,500多KB,应该代码都在里面了,就把它当头文件用就行了。
这里把该文件放到vendor/entt/include文件夹下,把liscense文件放到vendor/entt文件夹下
entt相关的内容可以直接看对应的github仓库的介绍,这里看一些例子代码:
// 用于后面的Callback例子, 当Transform组件被创建时调用, 会加到entity上
static void OnTransformConstruct(entt::registry& registry, entt::entity entity){}

// 创建一个TransformComponent类
struct TransformComponent
{
	glm::mat4 Transform{ 1.0f };

	TransformComponent() = default;
	TransformComponent(const TransformComponent&) = default;
	TransformComponent(const glm::mat4 & transform)
		: Transform(transform) {}

	operator glm::mat4& () { return Transform; }
	operator const glm::mat4& () const { return Transform; }
};

// 创建一个registry, 可以把它理解为vector<entity>, 也就是包含所有entity的容器
entt::registry m_Registry;

// 创建一个entity, entt::entity其实是uint32_t
entt::entity entity = m_Registry.create();
// emplace等同于AddComponent, 这里给entity添加TransformComponent
m_Registry.emplace<TransformComponent>(entity, glm::mat4(1.0f));// 后面的参数会传给TransformComponent的构造函数

// entt提供的Callback, 当TransformComponent被创建时, 调用OnTransformConstruct函数
m_Registry.on_construct<TransformComponent>().connect<&OnTransformConstruct>();

// 判断entity上是否有TransformComponent, 相当于HasComponent
if (m_Registry.has<TransformComponent>(entity))
	// 从entity上get TransformComponent, 相当于GetComponent
	TransformComponent& transform = m_Registry.get<TransformComponent>(entity);

// 获取所有带有TransformComponent的entity数组
auto view = m_Registry.view<TransformComponent>();
for (auto entity : view)
{
	TransformComponent& transform = view.get<TransformComponent>(entity);
}

// group用来获取同时满足拥有多个Component的Entity数组, 这里得到的group是
// m_Registry里所有既有TransformComponent、又有MeshComponent的Entity数组
auto group = m_Registry.group<TransformComponent>(entt::get<MeshComponent>);
// 这样写行不行?
//auto group = m_Registry.group<TransformComponent, MeshComponent>();
for (auto entity : group)
{
	// transform和mesh都是记录的引用
	auto&[transform, mesh] = group.get<TransformComponent, MeshComponent>(entity);
}
顺便说一句,这里的HasComponent使用的是registry的has函数,在新版本的enTT里,这个函数被重命名为all_of函数,相关内容参考:where did the basic_registry::has function go?
Entities and Components
课里主要做了:
- 小Tip: C++工程编译报错时,不要看Error List,要看output上的信息,更容易排查问题
- EditorLayer相关的代码从HazeEditor工程转移到Hazel的工程里,作为引擎内部的一部分(不过我暂时没做这步)
- 创建Scene文件夹、Scene类和Entity类,在EditorLayer里加m_Scene、EditorLayer的Update里调用m_Scene的Update函数,Scene类应该负责在Update里执行对里面的GameObjects的操作。
- 创建
TransformComponent和SpriteRendererComponent类,再在EditorLayer里创建一个Square Entity,为其添加这俩Component,其实就是一个Entity,带了一个类似Unity里的MeshRenderer,Mesh为正方形 - EditorLayer的BeginScene和EndScene之间,调用m_Scene的Update函数,在里面调用Renderer2D::DrawQuad来绘制这个Square Entity
The ENTITY Class
设计GameObject的AddComponent函数
Cherno这里叫Entity类,我这里叫GameObject类,代码里GameObject的AddComponent操作是需要通过Scene里的entt::Registry来实现的。但是实际上,作为用户来讲,调用AddComponent函数时,应该是由GameObject调用,应该不需要提供Scene信息。
所以要让GameObject类记录的entt::Registry的引用,原本我是这么设计的:
class GameObject
{
private:
	std::shared_ptr<Scene> m_Scene;
}
但是这样写会有问题,原因在于shared_ptr的机制。正常逻辑是,当我外部不再记录Scene对象时,Scene的引用计数应该为0,此时Scene被摧毁。但此时的GameObject记录了Scene的引用,如果外部不再记录Scene对象,但仍然记录着GameObejct对象,则Scene的引用计数永远不为0。
思路是把GameObejct记录的Scene引用从强引用改为弱引用,所以要改成:
class GameObject
{
private:
	std::weak_ptr<Scene> m_Scene;
}
此时的GameObject不会改变Scene的引用计数,不会影响Scene对象的销毁了。
最终的GameObject.h代码如下,要记得模板函数一般都要放到头文件里:
#pragma once
#include "entt.hpp"
#include "Scene.h"

namespace Hazel
{
	class Scene;
	class GameObject
	{
	public:
		GameObject(const std::shared_ptr<Scene>& ps, const entt::entity& entity);

		template<class T, class... Args>
		// 应该返回创建的Component, 模板函数都应该放到.h文件里
		T& AddComponent(Args&& ...args)
		{
			//auto s = new T(args...);
			std::shared_ptr<Scene> p = m_Scene.lock();

			if (p)
				return p->GetRegistry().emplace<T>(m_InsanceId, std::forward<Args>(args)...);
		}

		template<class T>
		bool HasComponent()
		{
			std::shared_ptr<Scene> p = m_Scene.lock();

			if (p)
				return p->GetRegistry().all_of<T>(m_InstanceId);

			return false;
		}

		template<class T>
		T& GetComponent()
		{
			HAZEL_ASSERT(HasComponent<T>(), "GameObject Does Not Have The Specified Component!")

			std::shared_ptr<Scene> p = m_Scene.lock();

			return p->GetRegistry().get<T>(m_InsanceId);
		}

		operator entt::entity()  { return m_InsanceId; }
		operator entt::entity() const { return m_InsanceId; }

	private:
		entt::entity m_InsanceId;
		std::weak_ptr<Scene> m_Scene;
	};
}
Camera Systems(添加CameraComponent)
重点:
- 现有代码优化:使用lambda表达式代替
std::bind - 创建
CameraComponent类,继承于Component - 把
CameraComponent看到的东西,另外开一个Camera对应的Viewport窗口,类似于UE4的CameraActor一样
使用lambda表达式代替std::bind
目前Hazel的事件系统主要是由std::bind和std::function写起来的,在Hazel引擎学习(二)的后面附录里我写过std::bind和std::function的用法,std::bind就是把一个Callable Object和具体的参数绑定起来,形成一个wrapper,比如说:
void f3(int c) { cout << c << endl; }
void main()
{
	int c = 2;
	// 直接绑定c为函数的参数
	const auto f = std::bind(&f3, std::ref(c));
	// 之后每次调用f3函数就不用输入参数了
	f(); // print 2
	c = 4;
	f(); // print 4
}
而std::function其实就是把一个特定的函数签名对应的callback加大了范围(比如原本只能传入函数指针,现在可以传入Functor)。
可以先来看看现有的代码:
// 窗口产生Event时, 会调用此函数
void Application::OnEvent(Event& e)
{
	// EventDispatcher里面存了处理Event的函数, 在Event类型跟模板T匹配时, 才响应事件
	EventDispatcher dispatcher(e);

	// 1. Application处理Event, 当e类型为WindowCloseEvent时, 调用OnWindowClose函数
	dispatcher.Dispatch<WindowCloseEvent>(std::bind(&Application::OnWindowClose, this, std::placeholders::_1));
	dispatcher.Dispatch<WindowResizedEvent>(std::bind(&Application::OnWindowResized, this, std::placeholders::_1));

	// 2. Layer来处理事件, 逆序遍历是为了让ImGuiLayer最先收到Event
	uint32_t layerCnt = m_LayerStack.GetLayerCnt();
	for (int i = layerCnt - 1; i >= 0; i--)
	{
		if (e.IsHandled())
			break;

		m_LayerStack.GetLayer((uint32_t)i)->OnEvent(e);
	}
}
这里的Dispatch函数里接受的东西,其实是一个callback,这个callback是用std::bind写的,目前的callback对应的函数前面为bool(T&),返回类型为bool,参数为T&,代码如下:
class EventDispatcher
{
	template<typename T>
	using EventHandler = std::function<bool(T&)>;//EventHandler存储了一个输入为任意类型的引用,返回值为bool的函数指针
public:
	// Dispatch会直接执行响应事件对应的函数指针对应的函数
	// T指的是事件类型, 如果输入的类型没有GetStaticType会报错
	template<typename T>
	void Dispatch(EventHandler<T> handler)
	{
		if (m_Event.m_Handled)
			return;

		// 只有Event类型跟模板T匹配时, 才响应事件
		if (m_Event.GetEventType() == T::GetStaticType())
		{
			m_Event.m_Handled = handler(*(T*)&m_Event); //使用(T*)把m_Event转换成输入事件的指针类型
			m_Event.m_Handled = true;// Temporary: 现在不会直接对应的Handler里都返回true
		}
	}

	EventDispatcher(Event& e):
		m_Event(e){}

private:
	Event& m_Event;//必须是引用,不可以是Event的实例,因为Event带有纯虚函数
};
OK,介绍完了之后,需要用lambda表达式来替代std::bind了,先给几个结论:
- C++14以后,基本任何地方都可以用
lambda表达式,来替代std::bind - 写
lambda表达式会比写std::bind更好,
需要改成这样,详情参考后面的附录:
// 原本的
m_Window->SetEventCallback(std::bind(&Application::OnEvent, this, std::placeholders::_1));

//
m_Window->SetEventCallback([this](auto&&... args) -> decltype(auto) { return this >Application::OnEvent(std::forward<decltype(args)>(args)...); });
这种写法,相当于直接给了个{}的函数体,函数签名和函数返回类型都是通过auto和decltype推断出来的:
// ->后面接的是函数返回类型
// capture list里传入了this指针(值传递)
// 函数签名为auto&&..., 这里又没有模板, 为啥能这么写, 这是不是模板元编程?
[this](auto&&... args) -> decltype(auto)
{
	return this >Application::OnEvent(std::forward<decltype(args)>(args)...);
}
创建CameraComponent类
之前用于绘制Viewport的Camera,本质上是View矩阵和Projection矩阵的乘积,这个Camera是引擎内部使用的,相当于EditorLayer;而现在需要创建一个CameraComponent,由于这里设计的每个GameObject都自带TransformComponent,而相机的View矩阵其实是根据相机的Transform计算出来的,所以CameraComponent类,其实只需要记录Projection数据,不需要记录View矩阵。
类声明如下:
namespace Hazel
{
	class CameraComponent : public Component
	{
	public:
		CameraComponent(float left, float right, float bottom, float top);

		glm::mat4 GetProjectionMatrix() { return m_Projection; }
		glm::mat4 GetProjectionMatrix() const { return m_Projection; }

		void SetRenderTargetSize(uint32_t width, uint32_t height) { m_RenderTargetWidth = width, m_RenderTargetHeight = height; }
		uint32_t GetRenderTargetWidth() { return m_RenderTargetWidth; }
		uint32_t GetRenderTargetHeight() { return m_RenderTargetHeight; }

	private:
		glm::mat4 m_Projection;// Camera的View矩阵由对应的Transform来记录
		uint32_t m_RenderTargetWidth, m_RenderTargetHeight;
	};
}
而且之前的Renderer2D::BeginScene函数已经不适用了,要加一个新接口,用于在BeginScene里接受Runtime下的Camera:
// TODO: 临时的
static void DrawSpriteRenderer(const SpriteRenderer& spriteRenderer, const glm::vec3 & globalPos, const glm::vec2& size, const glm::vec4& tintColor = { 1,1,1,1 });
绘制CameraComponent
目前有两个Camera:Viewport对应的引擎内部的Camera和CameraComponent,这两个Camera,Cherno这里做法是,用一个CheckBox来判断,勾选时绘制其中一个Camera,取消勾选时绘制另外一个Camera。这个做法我觉得很别扭,因为绘制Viewport的画面是不应该被CameraComponent绘制的画面替代的,而且在代码里,绘制Viewport的代码应该在EditorLayer的Update函数里,而绘制Camera的代码应该在Scene的Update函数里,所以按照我自己的思路做了,UI上仿照了UE4的做法,创建了俩Framebuffer,如下图所示:

Scene Camera(根据窗口变化resize CameraComponent)
课里提到的重点:
- GameEngine里会有多个Camera,它们各自如何应对窗口的缩放,相机输出的贴图的横纵比例(Aspect Radio)会不会改变
- 在Scene类里,添加
WindowResizedEvent发生时对应的处理函数OnViewportResize,在里面对所有的CameraComponent进行判断,如果该CameraComponent需要改变Aspect Radio,则改变其Projection矩阵 - 不再在每帧都去更新所有的Camera,计算它们的VP矩阵,而是只在Resize发生时,才去更新所有的Camera
- 封装了很多个Camera的类(它写的代码看上去也很混乱,我就不这么弄了)
- 最终实现效果为:根据输入的float,改变CameraComponent的远近
CameraComponent添加FixedAspectRatio变量
然后在添加Scene的函数:
void Scene::OnViewportResize(uint32_t width, uint32_t height)
{
	m_ViewportWidth = width;
	m_ViewportHeight = height;

	// Resize our non-FixedAspectRatio cameras
	auto view = m_Registry.view<CameraComponent>();
	for (auto entity : view)
	{
		auto& cameraComponent = view.get<CameraComponent>(entity);
		if (!cameraComponent.FixedAspectRatio)
			cameraComponent.Camera.SetViewportSize(width, height);
	}
}

两种CameraComponent
这里不考虑引擎内部用于Viewport的Camra,而是只考虑游戏里会用到的CameraComponent,根据CameraComponent的AspectRadio,可以分为两类:
- 窗口变化,会影响AspectRadio的CameraComponent:
- 窗口变化,不会影响AspectRadio的CameraComponent:比如负责渲染游戏里的一个方形电视机上面画面的CameraComponent,其AspectRadio永远是1
感觉这两节关于Camera的课含金量不大,无非是对Camera、正交矩阵那几个参数进行反复的封装,没啥特别的,总之这里的CameraComponent也是为了后面实现游戏里的Camera而做铺垫,不多说了,相关的代码,我等到要实现什么功能的时候,再补吧。
我这里只要在ViewportResizedEvent产生时,把随着窗口变化的CameraComponent的Aspect Radio更改了即可,代码如下:
// 这是实际执行的代码, 在Scene.cpp里
void Scene::OnViewportResized(uint32_t width, uint32_t height)
{
	std::vector<std::shared_ptr<CameraComponent>> cams = GetComponents<CameraComponent>();

	for (std::shared_ptr<CameraComponent>& cam : cams)
	{
		if (!cam->IsFixedAspectRatio())
		{
			cam -> SetAspectRatio(width, height);
		}
	}
}


// 这是调用的代码, 在EditorLayer.cpp里

// 当Viewport的Size改变时, 更新Framebuffer的ColorAttachment的Size, 同时调用其他函数
if (viewportSize != m_LastViewportSize)
{
	// 先Resize Framebuffer
	m_ViewportFramebuffer->ResizeColorAttachment((uint32_t)viewportSize.x, (uint32_t)viewportSize.y);
	m_OrthoCameraController.GetCamera().OnResize(viewportSize.x, viewportSize.y);
	m_Scene->OnViewportResized(viewportSize.x, viewportSize.y);
}
Native Scripting
Native Scripting的意思是允许Hazel引擎使用C++语言编写游戏脚本,就如同UE4是用C++写的,但是它可以用C++或者蓝图作为Scripting Language一样。
在游戏引擎里,有一种特殊的Component,是提供给用户自定义的,比如Unity的MonoBehaviour和UE的Blueprint。这节课就是搭建Hazel引擎的基础ScriptComponent类。
首先创建对应的基类,Cherno的做法非常麻烦,我写了个自己的版本,代码如下所示:
namespace Hazel
{
	class ScriptComponent : public Component
	{
	public:
		virtual void Awake() = 0;
		virtual void Start() = 0;
		virtual void Update() = 0;
	};
}
这节课的内容,暂时没怎么用到,而且我觉得代码看上去很乱,我这边就先不做了。
Scene Hierachy Panel
这节课是UI的东西,目的是把Scene里的Entity用Imgui绘制出来,创建对应的类文件,类声明如下:
class SceneHierarchyPanel
{
public:
	SceneHierarchyPanel() = default;
	SceneHierarchyPanel(const Ref<Scene>& scene);

	void SetContext(const Ref<Scene>& scene);
	void OnImGuiRender();// 其实就是在EditorLayer里的OnImguiRender里调用它而已

private:
	void DrawEntityNode(Entity entity);

private:
	std::shared_ptr<Scene> m_Scene;
	Entity m_SelectionContext;// 代表Selected Entity
};
把对应类的对象存到EditorLayer即可,相关绘制如下:
void SceneHierarchyPanel::OnImGuiRender()
{
	ImGui::Begin("Scene Hierarchy");
	// 使用ImGui::Text绘制每个GameObject

	ImGui::End();
}
另外一个知识点,就是使用ImGui绘制TreeView,写法如下:
void SceneHierarchyPanel::OnImGuiRender()
{
	ImGui::Begin("SceneHierarchyPanel");

	const std::vector<GameObject>& gos = m_Scene->GetGameObjects();
	for (size_t i = 0; i < gos.size(); i++)
	{
		uint32_t id = gos[i].GetInstanceId();
		// 每个node都自带OpenOnArrow的flag, 如果当前go正好是被选择的go, 那么还会多一个selected flag
		ImGuiTreeNodeFlags flag = ImGuiTreeNodeFlags_OpenOnArrow |
			((m_SelectedGOId == id) ? ImGuiTreeNodeFlags_Selected : 0);

		// 这里的TreeNodeEx会让ImGui基于输入的HashCode(GUID), 绘制一个TreeNode, 由于这里需要一个
		// void*指针, 这里直接把GameObject的id转成void*给它即可
		// ex应该是expanded的意思, 用于判断go对应的Node是否处于展开状态
		bool expanded = ImGui::TreeNodeEx((void*)(id), flag, gos[i].ToString().c_str());

		// 如果鼠标悬浮在item上, 且点击了鼠标左键, 则返回true
		if (ImGui::IsItemClicked())
			m_SelectedGOId = id;

		// 如果此节点是expanded状态, 那么需要继续loop到里面去
		// 由于目前没有链式GameObjects, 所以这里把展开的对象再绘制一个相同的子节点
		if (expanded)
		{
			ImGuiTreeNodeFlags flag = ImGuiTreeNodeFlags_OpenOnArrow;
			// ID 随便取一个就行, 只要不跟已有的一样就行
			bool opened = ImGui::TreeNodeEx((void*)9817239, flag, gos[i].ToString().c_str());

			// TreePop貌似是个结束的操作, 好像每个节点绘制结束时要调用此函数
			if (opened)
				ImGui::TreePop();

			ImGui::TreePop();
		}
	}

	ImGui::End();
}
Properties Panel
其实就是绘制类似Unity的Inspector界面而已,由于这里的ImGui只是临时用用,Properties Pane的代码就也写在SceneHierarchyPanel.cpp里了。没啥难的,无法就是可以在界面上实现对数据的读写,这节课的内容:
- UI界面上实现读写GameObject名字(Hazel这里用TagComponent表示),就是一个string的读写
- Transform Component的读写,就是俩float3和一个float4
- 为了让Component的信息可以折叠,为需要折叠的Component(比如TransformComponent)创建一个
TreeNodeEx,输入的id使用的C++的typeid的hash code - 点击Hierarchy的空白处时,取消对GameObject的选择
点击Hierarchy的空白处时,取消对GameObject的选择
注意是点击Hierarchy的空白处,点击其他窗口的空白是不会取消选择的,代码如下:
void SceneHierarchyPanel::OnImGuiRender()
{
	ImGui::Begin("SceneHierarchyPanel");

		...
	if (ImGui::IsMouseClicked(0) && ImGui::IsWindowHovered())
		m_SelectedGOId = 999999;// 只要这个值跟出现在Hierarchy里Node的Instance Id不同即可

	ImGui::End();
}
UI界面上实现读写GameObject名字
代码如下:
void SceneHierarchyPanel::DrawComponentsForSelectedGameObject()
{
	bool suc;
	GameObject& go = m_Scene->GetGameObjectById(m_SelectedGOId, suc);
	if (!suc) return;

	char buffer[256];
	memset(buffer, 0, sizeof(buffer));
	strcpy_s(buffer, sizeof(buffer), go.ToString().c_str());

	 老式的写法会让Text在右边显示
	//if (ImGui::InputText("Name", buffer, sizeof(buffer)))
	//	go.SetName(std::string(buffer));

	// 新的写法用" "占了个位, 也不是特别科学
	ImGui::Text("Name");
	ImGui::SameLine();
	if (ImGui::InputText(" ", buffer, sizeof(buffer)))
		go.SetName(std::string(buffer));
}
可折叠的Component和TransformComponent绘制
核心代码:
void SceneHierarchyPanel::DrawComponentsForSelectedGameObject()
{
	bool suc;
	GameObject& go = m_Scene->GetGameObjectById(m_SelectedGOId, suc);
	if (!suc) return;

	// Draw name for GameObject
	...

	// Draw Transform Component
	HAZEL_ASSERT(go.HasComponent<Transform>(), "Invalid GameObject Without Transform Component!");
	if (go.HasComponent<Transform>())
	{
		if (ImGui::TreeNodeEx((void*)typeid(Transform).hash_code(), ImGuiTreeNodeFlags_DefaultOpen, "Transform"))
		{
			glm::mat4& transform = go.GetComponent<Transform>();
			ImGui::DragFloat3("Position", glm::value_ptr(transform[3]), 0.1f);

			ImGui::TreePop();
		}
	}
}
Camera Component UI
也很简单,负责绘制Camera Component的Inspector信息,主要有:
- 绘制Camera的投影类型,其实就是个EnumPopup的绘制,有正交投影和透视投影两种选择
- 根据选择的不同的投影类型,UI显示不同类型Camera的参数
- 添加CameraComponent对透视投影的支持
给CameraComponent添加枚举,并绘制出来
先给CameraComponent加变量,和相关的Set、Get函数:
class CameraComponent : public Component
{
public:
	enum class ProjectionType { Perspective = 0, Orthographic = 1 };

public:
	...
	ProjectionType GetProjectionType() { return m_ProjectionType; }
	void SetProjectionType(const ProjectionType& type) { m_ProjectionType = type; }

private:
	ProjectionType m_ProjectionType = ProjectionType::Orthographic;
};
实际绘制代码:
// Draw Camera Component
if (go.HasComponent<CameraComponent>())
{
	// 默认展开TreeView
	if (ImGui::TreeNodeEx((void*)typeid(CameraComponent).hash_code(), ImGuiTreeNodeFlags_DefaultOpen, "CameraComponent"))
	{
		CameraComponent& cam = go.GetComponent<CameraComponent>();

		// 绘制俩选项, 这里的选项顺序与ProjectionType的枚举顺序相同
		const char* projectionTypeStrings[] = { "Perspective", "Orthographic" };
		// 当前选项从数组中找
		const char* currentProjectionTypeString = projectionTypeStrings[(int)cam.GetProjectionType()];
		// BeginCombo是ImGui绘制EnumPopup的方法
		if (ImGui::BeginCombo("Projection", currentProjectionTypeString))
		{
			for (int i = 0; i < 2; i++)
			{
				bool isSelected = currentProjectionTypeString == projectionTypeStrings[i];
				if (ImGui::Selectable(projectionTypeStrings[i], isSelected))
				{
					currentProjectionTypeString = projectionTypeStrings[i];
					cam.SetProjectionType((CameraComponent::ProjectionType)i);
				}

				// 高亮当前已经选择的Item
				if (isSelected)
					ImGui::SetItemDefaultFocus();
			}

			ImGui::EndCombo();
		}

		ImGui::TreePop();
	}
}
效果如下,会默认高亮已经选择好的选项:

鼠标指上去后,鼠标hover的那一项会更亮:

不同投影类型的Camera绘制不同参数
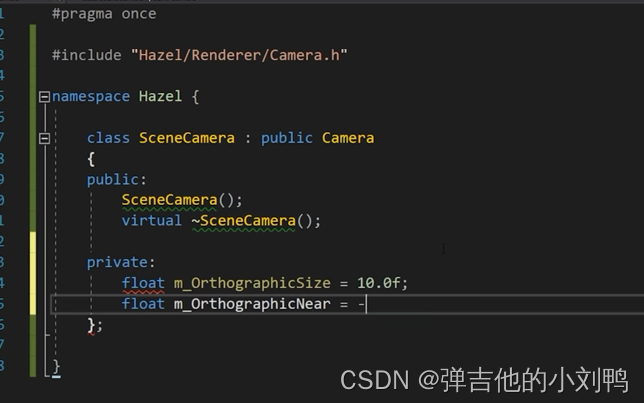
- 正交矩阵的数据为:Size(类似于Zoom的数值)、Far和Near平面的值
- 透视矩阵的数据为:FOV角度、Far和Near平面的值
这里正交矩阵的size数值可以回顾一下,它其实就是计算的Camera的投影范围的size,看下面的用法就知道了:
void CameraComponent::RecalculateProjectionMat()
{
	float orthoLeft = -m_OrthographicSize * m_AspectRatio * 0.5f;
	float orthoRight = m_OrthographicSize * m_AspectRatio * 0.5f;
	float orthoBottom = -m_OrthographicSize * 0.5f;
	float orthoTop = m_OrthographicSize * 0.5f;

	m_Projection = glm::ortho(orthoLeft, orthoRight,
		orthoBottom, orthoTop, m_OrthographicNear, m_OrthographicFar);
}
剩下的内容就简单了,给相机加上透视矩阵的参数,然后把glm::ortho改成glm::perspective即可:
// 先添加数据在CameraComponent里
float m_PerspectiveFOV = glm::radians(45.0f);
float m_PerspectiveNear = -1.0f, m_PerspectiveFar = 1.0f;
在设置一些相关的参数的Get和Set函数:
float GetPerspectiveVerticalFOV() const { return m_PerspectiveFOV; }
void SetPerspectiveVerticalFOV(float verticalFov) { m_PerspectiveFOV = verticalFov; RecalculateProjectionMat(); }
...
再更新一下RecalculateProjectionMat:
void CameraComponent::RecalculateProjectionMat()
{
	if (m_ProjectionType == ProjectionType::Orthographic)
	{
		float orthoLeft = -m_OrthographicSize * m_AspectRatio * 0.5f;
		float orthoRight = m_OrthographicSize * m_AspectRatio * 0.5f;
		float orthoBottom = -m_OrthographicSize * 0.5f;
		float orthoTop = m_OrthographicSize * 0.5f;
		m_Projection = glm::ortho(orthoLeft, orthoRight,
			orthoBottom, orthoTop, m_OrthographicNear, m_OrthographicFar);
	}
	else
	{
		m_Projection = glm::perspective(m_PerspectiveFOV, m_AspectRatio, m_PerspectiveNear, m_PerspectiveFar);
	}
}
最后绘制出来即可:
if (cam.GetProjectionType() == CameraComponent::ProjectionType::Perspective)
{
	float verticalFov = glm::degrees(cam.GetPerspectiveVerticalFOV());
	if (ImGui::DragFloat("Vertical FOV", &verticalFov))
		cam.SetPerspectiveVerticalFOV(glm::radians(verticalFov));

	float orthoNear = cam.GetPerspectiveNearClip();
	if (ImGui::DragFloat("Near", &orthoNear))
		cam.SetPerspectiveNearClip(orthoNear);

	float orthoFar = cam.GetPerspectiveFarClip();
	if (ImGui::DragFloat("Far", &orthoFar))
		cam.SetPerspectiveFarClip(orthoFar);
}

if (cam.GetProjectionType() == CameraComponent::ProjectionType::Orthographic)
{
	float orthoSize = cam.GetOrthographicSize();
	if (ImGui::DragFloat("Size", &orthoSize))
		cam.SetOrthographicSize(orthoSize);

	float orthoNear = cam.GetOrthographicNearClip();
	if (ImGui::DragFloat("Near", &orthoNear))
		cam.SetOrthographicNearClip(orthoNear);

	float orthoFar = cam.GetOrthographicFarClip();
	if (ImGui::DragFloat("Far", &orthoFar))
		cam.SetOrthographicFarClip(orthoFar);

	ImGui::Checkbox("Fixed Aspect Ratio", &cam.GetFixedAspectRatio());
}
不过目前对于透视矩阵来说,带Camera组件的GameObject,其旋转如果改了,View矩阵是否是正确的,还不是很确定,因为我看目前还没有用到glm::lookat函数
Drawing Component UI
内容不多,其实就是绘制SpriteRendererComponent,然后测试不同颜色的SpriteRenderer混合在一起的Blend效果,UI如下所示:

目前的SpriteRendererComponent的数据其实只是一个vec4,作为color。后期应该加上Texture槽位,甚至Material槽位。代码如下:
这里是支持Blend的,修改一个Quad的alpha,再修改其Z值,会产生Blend效果,类似于带颜色的透镜来看的视角。但是由于这里还没有对绘制顺序进行要求,而Blend需要先绘制离相机远的,再绘制近的,所以这里只有绿色的正方形在红色上方才会出现Blend效果,后续需要根据Z值大小改变物体先后绘制顺序。
Transform Component UI
以下几个点:
- 用矩阵存储Rotation数据是不准确的,因为比如我有个绕Z轴旋转7000°的Rotation,用矩阵去存储和运算就会存成0到360°范围的值,所以这里用Yaml这种文本文件来存储GameObject的Transform(跟Unity一样)
- 修改Transform组件,数据从mat4改成三个向量:translation、rotation和scale,它这里的旋转还是用欧拉角表示的,还没用到四元数(因为目前的2DRenderer只会有绕Z轴的旋转,不会有Gimbal Lock)。然后修改相应的使用代码和Inspector代码
- 绘制Transform的UI
用文本文件存储Transform信息
像这种信息,需要人为编辑,且很可能是多人协同编辑的,一般都是以文本的形式存储的,不会用binary来存储。Unity就是用Yaml保存物体在场景里的Transform数据的,存在.scene文件里,如下所示:


数据如下图所示,可以看到,物体有哪些Component,在GameObject的数据之后就是每个Component的相关数据。比如Transform数据都存储到文本里了,注意这里的实际rotation数据是用quaternion存的,但是表示在Inspector上的旋转数据是用m_LocalEulerAnglesHint来表示的:

绘制Transform组件
这里可以借鉴一下UE的做法,如下图所示,在这里加了RGB三个颜色作为区分(Unity就只写了XYZ),右边黄色的小按钮还可以Reset这个Vector:

预期效果为:

写了个专门绘制vector的函数:
static void DrawVec3Control(const std::string& label, glm::vec3& values, float resetValue = 0.0f, float columnWidth = 100.0f)
{
	// Translation、Scale都会有相同的类似DragFloat("##Y"的函数, 而ImGui是根据输入的"##Y"来作为identifier的
	// 为了让不同组件的相同名字的值可以各自通过UI读写, 这里需要在绘制最开始加入ID, 绘制结束后PopId
	ImGui::PushID(label.c_str());

	// 先在最左边绘制vector代表的label
	ImGui::Columns(2);// 大概意思是Label占两列的空间
	ImGui::SetColumnWidth(0, columnWidth);
	ImGui::Text(label.c_str());
	ImGui::NextColumn();

	// 这行代码参考自ImGui::DragScalarN函数, 意思是我要在一行绘制3个Item
	ImGui::PushMultiItemsWidths(3, ImGui::CalcItemWidth());
	ImGui::PushStyleVar(ImGuiStyleVar_ItemSpacing, ImVec2{ 0, 0 });

	// 基于字体的大小和Padding算出这一行的行高
	float lineHeight = GImGui->Font->FontSize + GImGui->Style.FramePadding.y * 2.0f;
	ImVec2 buttonSize = { lineHeight + 3.0f, lineHeight };

	// x值的处理, 三个StyleColor分别对应: 按钮本身颜色、鼠标悬停在按钮上的颜色、点击按钮时的颜色
	ImGui::PushStyleColor(ImGuiCol_Button, ImVec4{ 0.8f, 0.1f, 0.15f, 1.0f });
	ImGui::PushStyleColor(ImGuiCol_ButtonHovered, ImVec4{ 0.9f, 0.2f, 0.2f, 1.0f });
	ImGui::PushStyleColor(ImGuiCol_ButtonActive, ImVec4{ 0.8f, 0.1f, 0.15f, 1.0f });
	// 按X按钮重置x值
	if (ImGui::Button("X", buttonSize))
		values.x = resetValue;
	ImGui::PopStyleColor(3);// 把上面Push的三个StyleColor给拿出来

	// 把x值显示出来, 同时提供拖拽修改功能
	ImGui::SameLine();
	ImGui::DragFloat("##X", &values.x, 0.1f, 0.0f, 0.0f, "%.2f");
	ImGui::PopItemWidth();
	ImGui::SameLine();

	// y值的处理
	ImGui::PushStyleColor(ImGuiCol_Button, ImVec4{ 0.2f, 0.7f, 0.2f, 1.0f });
	ImGui::PushStyleColor(ImGuiCol_ButtonHovered, ImVec4{ 0.3f, 0.8f, 0.3f, 1.0f });
	ImGui::PushStyleColor(ImGuiCol_ButtonActive, ImVec4{ 0.2f, 0.7f, 0.2f, 1.0f });
	if (ImGui::Button("Y", buttonSize))
		values.y = resetValue;
	ImGui::PopStyleColor(3);

	ImGui::SameLine();
	ImGui::DragFloat("##Y", &values.y, 0.1f, 0.0f, 0.0f, "%.2f");
	ImGui::PopItemWidth();
	ImGui::SameLine();

	// z值的处理
	ImGui::PushStyleColor(ImGuiCol_Button, ImVec4{ 0.1f, 0.25f, 0.8f, 1.0f });
	ImGui::PushStyleColor(ImGuiCol_ButtonHovered, ImVec4{ 0.2f, 0.35f, 0.9f, 1.0f });
	ImGui::PushStyleColor(ImGuiCol_ButtonActive, ImVec4{ 0.1f, 0.25f, 0.8f, 1.0f });
	if (ImGui::Button("Z", buttonSize))
		values.z = resetValue;
	ImGui::PopStyleColor(3);

	ImGui::SameLine();
	ImGui::DragFloat("##Z", &values.z, 0.1f, 0.0f, 0.0f, "%.2f");// 小数点后2位
	ImGui::PopItemWidth();

	// 与前面的PushStyleVar相对应
	ImGui::PopStyleVar();

	ImGui::Columns(1);

	ImGui::PopID();
}
最后调用下这个函数绘制Transform即可:
// Draw Transform Component
HAZEL_ASSERT(go.HasComponent<Transform>(), "Invalid GameObject Without Transform Component!");
if (go.HasComponent<Transform>())
{
	if (ImGui::TreeNodeEx((void*)typeid(Transform).hash_code(), ImGuiTreeNodeFlags_DefaultOpen, "Transform"))
	{
		Transform& tc = go.GetComponent<Transform>();
		DrawVec3Control("Translation", tc.Translation);
		// 面板上展示的是degrees, 但是底层数据存的是radians
		glm::vec3 rotation = glm::degrees(tc.Rotation);
		DrawVec3Control("Rotation", rotation);
		tc.Rotation = glm::radians(rotation);
		DrawVec3Control("Scale", tc.Scale, 1.0f);
		ImGui::TreePop();
	}
}
Adding/Removing Entities and Components UI
- Hierarchy上右键可以添加空的GameObject
- 选中物体后,按Delete键删除物体
- 在GameObject的Inspector界面添加Add Component按钮
- 在GameObject的Inspector界面添加Remove Component按钮
- 在Scene类里给,Add Component和Remove Component加了回调(这个我先不做了)
Hierarchy上右键可以添加空的GameObject
直接加在绘制Hierarchy的ImguiWindow部分里
ImGui::Begin("SceneHierarchyPanel");
{
	...

	// Right-click on blank space
	// 1代表鼠标右键(0代表左键、2代表中键), bool over_item为false, 意味着这个窗口只在空白处点击才会触发
	// 后续应该允许在item上点击, 无非此时创建的是子GameObject
	if (ImGui::BeginPopupContextWindow(0, 1, false))
	{
		if (ImGui::MenuItem("Create New GameObject"))
			m_Scene->CreateGameObjectInScene(m_Scene, "New GameObject");

		ImGui::EndPopup();
	}
}
ImGui::End();
选中物体后,按Delete键删除物体
首先给Scene添加删除GameObject的函数:
void Scene::DestroyGameObject(const GameObject& go)
{
	for (std::vector<GameObject>::iterator it = m_GameObjects.begin(); it != m_GameObjects.end(); it++)
	{
		if (*it == go)
		{
			m_GameObjects.erase(it);
			return;
		}
	}
}
添加Add Component按钮
写的比较简单,无非就是写UI的Popup,而且这里人为的列出了可以选择的Component,然后调用各自的AddComponent函数(后面肯定是不能这么写的,应该是脚本寻找所有Component的子类,然后加上来)
ImGui::Begin("Properties");
		if (m_SelectionContext)
		{
			DrawComponents(m_SelectionContext);

			if (ImGui::Button("Add Component"))
				ImGui::OpenPopup("AddComponent");

			if (ImGui::BeginPopup("AddComponent"))
			{
				if (ImGui::MenuItem("Camera"))
				{
					m_SelectionContext.AddComponent<CameraComponent>();
					ImGui::CloseCurrentPopup();
				}

				if (ImGui::MenuItem("Sprite Renderer"))
				{
					m_SelectionContext.AddComponent<SpriteRendererComponent>();
					ImGui::CloseCurrentPopup();
				}

				ImGui::EndPopup();
			}

		}
添加Remove Component按钮
目标效果如下图所示,左键点击加号,可以出来下拉菜单,删除Component,跟Unity差不多:

Unity也是放到了折叠的那一栏:

写法如下,比如说这里为SpriteRenderer添加额外的button:
// Draw SpriteRendererComponent
if (go.HasComponent<SpriteRenderer>())
{
	// 在每一个Component的绘制函数里添加此函数
	ImGui::PushStyleVar(ImGuiStyleVar_FramePadding, ImVec2{ 4, 4 });
	bool openComponentDetails = ImGui::TreeNodeEx((void*)typeid(SpriteRenderer).hash_code(), ImGuiTreeNodeFlags_DefaultOpen, "Sprite Renderer");

	// SameLine的意思是继续与上面的内容在同一行
	ImGui::SameLine(ImGui::GetWindowWidth() - 25.0f);
	// 绘制20x20大小的+号按钮
	if (ImGui::Button("+", ImVec2{ 20, 20 }))
	{
		// 这里的Popup通过OpenPopup、BeginPopup和EndPopup一起生效, 输入的string为id
		ImGui::OpenPopup("ComponentSettings");
	}

	ImGui::PopStyleVar();

	if (ImGui::BeginPopup("ComponentSettings"))
	{
		if (ImGui::MenuItem("Remove component"))
		{
			m_Scene->RemoveComponentForGameObject<SpriteRenderer>(go);
			openComponentDetails = false;// 如果此Component被移除, 则不展示details信息
		}

		ImGui::EndPopup();
	}

	if (openComponentDetails)
	{
		auto& src = go.GetComponent<SpriteRenderer>();
		ImGui::ColorEdit4("Color", glm::value_ptr(src.GetColor()));
	}

	ImGui::TreePop();
}
其他Component也是类似的写法,无非Transform Component不可以被remove掉。
Making the Hazelnut Editor Look Good
终于到了近期绘制编辑器UI的最后一节课了,这节课也就是优化UI:
- 修改引擎默认font,也就是字体
- 添加第二种font,作为部分文字加粗使用的bold font
- 设计一个DrawComponent的模板函数
14:39
修改引擎默认字体
可以直接去Google Fonts上搜自己想要的字体,下载对应的文件。这里Cherno选择了Open Sans,放到了Editor项目的Assets的Fonts文件夹里,然后在ImGui的初始部分,加载font就可以了。
目前引擎的ImGuiRender的逻辑是在核心loop里执行以下操作:
// 3. 最后调用ImGUI的循环
m_ImGuiLayer->Begin();
for (std::shared_ptr<Hazel::Layer> layer : m_LayerStack)
{
	// 调用每个Layer的OnImGuiRender函数, 比如目前Editor下就是先调用EditorLayer, 再调用ImGuiLayer
	layer->OnImGuiRender();
}
m_ImGuiLayer->End();
相关ImGui的初始函数也是在ImGui的Attach Layer里进行的:
// ImGuiLayer的Init函数
void Hazel::ImGuiLayer::OnAttach()
{
	// 这里的函数,参考了ImGui上的docking分支给的例子:example_glfw_opengl3的文件里的main函数
	// Setup Dear ImGui context
	IMGUI_CHECKVERSION();
	// 1. 创建ImGui Contex
	ImGui::CreateContext();

	// 2. IO相关的Flag设置, 目前允许键盘输入、允许Dokcing、允许多个Viewport
	ImGuiIO& io = ImGui::GetIO();
	...
	io.FontDefault = io.Fonts->AddFontFromFileTTF("Resources/Fonts/SourceSansPro-Regular.ttf", 18);
	...
}
使用bold font
ImGui会有一个Font数组,加载bold font,然后在绘制的时候PushFont,用完了PopFont即可:
// 加载
ImGuiIO& io = ImGui::GetIO();
io.FontDefault = io.Fonts->AddFontFromFileTTF("Resources/Fonts/SourceSansPro-Regular.ttf", 18);
io.Fonts->AddFontFromFileTTF("Resources/Fonts/SourceSansPro-Bold.ttf", 18);


// 使用时的写法稍微有点奇怪, 因为它这里有个FontAtlas总管所有的fonts
ImGuiIO& io = ImGui::GetIO();
ImFontAtlas& fontAtlas = io.Fonts[0];

ImGui::PushFont(fontAtlas.Fonts[1]);
// 按X按钮重置x值
if (ImGui::Button("X", buttonSize))
	values.x = resetValue;
ImGui::PopFont();
剩下的UI优化部分如下,具体代码就不多说了,都是些Dear ImGui的东西:
- 让整个横行都可以选择TreeNode
- 拖拽窗口时UI自动匹配
- Add Component放在右上角
- 给Inspector窗口和右边的窗口都设置最小的可拖拽width
- 优化ImGui的颜色,现在很多ImGui的高亮选择颜色都是蓝色的,感觉看起来比较丑陋
附录
C++的模板元编程语法
参考:https://eli.thegreenplace.net/2014/variadic-templates-in-c/#:~:text=Variadic%20templates%20are%20written%20just,(args…).
写法如下:
// ===========================例一===========================
// 1. 写一个最终版本的模板, 相当于递归函数的终止递归的部分
template<typename T>
T adder(T v)
{
  return v;
}

// 2. 写递归具体的过程
template<typename T, typename... Args>
T adder(T first, Args... args)
{
  return first + adder(args...);
}

// 3. 实际使用时
long sum = adder(1, 2, 3, 8, 7);// 可以写无穷多的参数

std::string s1 = "x", s2 = "aa", s3 = "bb", s4 = "yy";
std::string ssum = adder(s1, s2, s3, s4);
手动让模板针对特定类型进行编译
我在Hazel里写了个模板类,然后再在EditorLayer里调用这个模板类,但问题在于,目前我在引擎内部没有调用到AddComponent代码,导致该模板没有被生成出来,此时EditorLayer调用AddComponent会失败,所以需要手动让该Component可以编译。
namespace Hazel
{
	template<class T>
	T& GameObject::AddComponent(const T& component)
	{
		m_Scene->GetRegistry().emplace<T>(go, T);
	}

	// 注意, 这里不是模板特化, 而是让编译器生成这几个特定类型的模板函数而已
	template SpriteRenderer& GameObject::AddComponent<SpriteRenderer>(const SpriteRenderer& component);
	template Transform& GameObject::AddComponent<Transform>(const Transform& component);
}
不过正常情况下不需要用到这个功能,正常情况下,模板应该被定义在header文件里
手动编译Variadic Templates
代码如下:
template<class T, class... Arguments>
T& GameObject::AddComponent(const T& component, Arguments... arguments)
{
	std::shared_ptr<Scene> p = m_Scene.lock();// m_Scene是weak_ptr
	if(p)
		p->GetRegistry().emplace<T>(m_InsanceId, (arguments...));

	return component;
}

// 注意, 这里不是模板特化, 而是让编译器生成这几个特定类型的模板函数而已
template<class... Arguments>
// 编译报错
SpriteRenderer& GameObject::AddComponent<SpriteRenderer, Arguments...>(const SpriteRenderer& sRenderer, Arguments... args);
不知道哪里写错了,应该是语法问题,先回顾下模板特化的写法:
// 原始模板, 注意没有尖括号
template<class T1, class T2, int I>
class A {};

// 模板偏特化:T2偏特化为T*, 模板特化必须带尖括号
template<class T, int I>
class A<T, T*, I> {};   // #1: partial specialization where T2 is a pointer to T1

template<class T, class T2, int I>
class A<T*, T2, I> {};  // #2: partial specialization where T1 is a pointer

 // 模板全特化, 只有在模板里确定了类型为int, 才能在尖括号里写5
template<class T>
class A<int, T*, 5> {}; // #3: partial specialization where
                        //     T1 is int, I is 5, and T2 is a pointer

template<class X, class T, int I>
class A<X, T*, I> {};   // #4: partial specialization where T2 is a pointer
但这只是一般参数的模板特化而已,variadic tempaltes的模板特化该怎么写呢?
举个例子,下面这种写法会编译报错:
//  模板, 无论接受多少个参数, 都返回0
template <typename... Ts>
struct Foo
{
    int foo()
    {
        return 0;
    }
};

template <>
struct Foo<int x, int y>
{
    int foo() {
        return x * y;
    }
};

int main()
{
    Foo<2, 3> x;
    cout << x.foo() << endl; //should print 6
}
不要用shared_ptr去存储this指针
写了个这么代码:
class Scene
{
public:
	Scene(){ m_ThisPtr =  std::shared_ptr<Scene>(this); }

private:
	std::shared_ptr<Scene> m_ThisPtr;
}
这样写会引起问题,Scene对象的析构函数会被调用两次,可能会引起Heap上的报错
bind-vs-lambda
参考我写的std::bind与lambda表达式
error C2855: command-line option ‘/source-charset’ inconsistent with precompiled header
更改编译器设置后,导致版本与PCH不一致了,Rebuild整个项目就可以了
因为std::make_shared引起的bug
代码如下:
template<class T>
std::vector<std::shared_ptr<T>> GetComponents()
{
	std::vector<std::shared_ptr<T>>res;
	auto& view = m_Registry.view<T>();
	for (auto& entity : view)
	{
		T& ref = view.get<T>(entity);
		// 这里的写法错误, make_shared里会调用构造函数, 所以这里会调用Component T的复制构造函数
		res.push_back(std::make_shared<T>(ref));
	}

	return res;
}
实际上我只是想创建一个指向ref的shared_ptr而已,应该写成:
template<class T>
std::vector<std::shared_ptr<T>> GetComponents()
{
	std::vector<std::shared_ptr<T>>res;
	auto& view = m_Registry.view<T>();
	for (auto& entity : view)
	{
		T& ref = view.get<T>(entity);
		res.push_back(std::shared_ptr<T>(&ref));
	}

	return res;
}

 浙公网安备 33010602011771号