
Mysql主从搭建
添加用户mysql和组myGroup
> useradd mysql

> groupadd myGroup

> usermod -G myGroup mysql
初始化mysql用户名密码:> passwd mysql
解压mysql
下载好的文件存储到到/usr/local/目录> tar -zxvf mysql-5.6.12-linux-glibc2.5-x86_64.tar.gz
重命名目录(命名为:mysql)> cd /usr/local
>mv mysql-5.6.12-linux-glibc2.5-x86_64 mysql
改变目录权限>chown -R mysql:myGroup /usr/local/mysql
注意:-R参数表示递归改变,也即子目录的权限同样改变
安装mysql
>/usr/local/mysql/scripts/mysql_install_db --user=mysql --basedir=/usr/local/mysql --datadir=/usr/local/mysql/data
有的时候第一次安装可能失败,第二次安装就成功了。
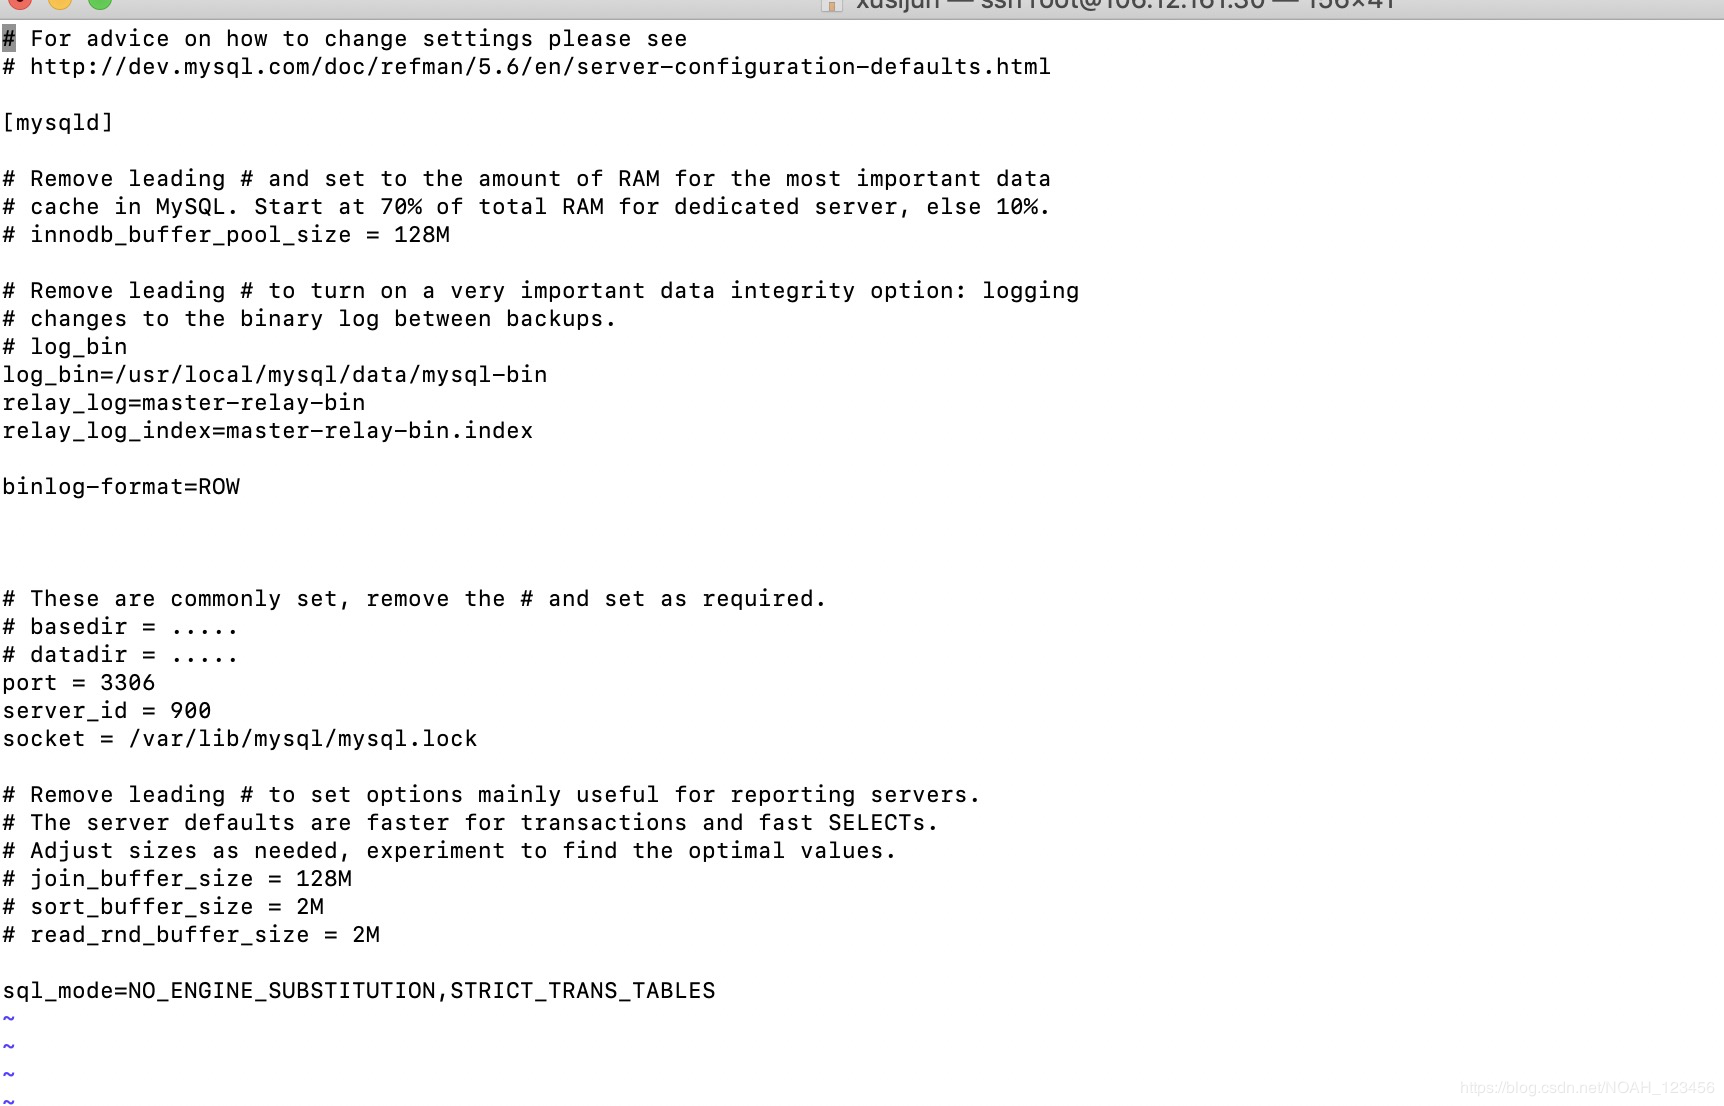
/etc/my.cnf配置内容:

注意:安装过程可能出现错误,需要分析逐一解决,常见错误有:
1、提示:Can't locate Data/Dumper.pm
解决方法:https://blog.csdn.net/zhengwei125/article/details/79093068
1、解决Can’t locate ExtUtils/MakeMaker.pm in @INC
解决方法:https://blog.csdn.net/celeste7777/article/details/77117371>yum install perl-ExtUtils-MakeMaker
2、gcc未安装错误:
解决方法:
https://blog.csdn.net/btt2013/article/details/78138045>yum -y install gcc>yum -y install gcc-c++
## 添加mysql启动服务> cp /usr/local/mysql/support-files/mysql.server /etc/init.d/mysql
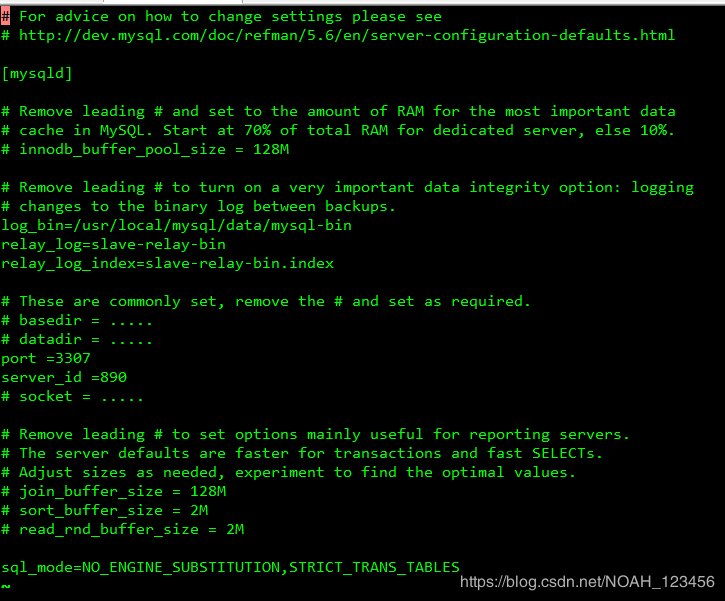
## 修改mysql配置>vi /usr/local/mysql/my.cnf
注意:端口号,服务号,binlog, relay-log都要开启(以下为slave的配置)
[mysqld]
log_bin=/usr/local/mysql/data/mysql-bin
relay_log=slave-relay-bin
relay_log_index=slave-relay-bin.index
port =3307
server_id =890
添加环境变量> vi /etc/profile
添加环境变量export MYSQL_HOME=/usr/local/mysqlPATH=$MYSQL_HOME/bin:$PATH

生效环境变量:>source /etc/profile
注意:安装了mysql以后,建议重启下服务器(若为环境变量的生效,则不需要重启)
启动mysql
> mysql -uroot -h 127.0.0.1 -p
首次登陆没有密码直接回车
指定配置文件的启动方式:
进入bin目录
> ./mysqld --defaults-file=/etc/my.cnf --user=root &
不确定:WARNING: Found existing config file /usr/local/mysql/my.cnf on the system.
Because this file might be in use, it was not replaced,
but was used in bootstrap (unless you used --defaults-file)
and when you later start the server.
The new default config file was created as /usr/local/mysql/my-new.cnf,
please compare it with your file and take the changes you need.
WARNING: Default config file /etc/my.cnf exists on the system
This file will be read by default by the MySQL server
If you do not want to use this, either remove it, or use the
--defaults-file argument to mysqld_safe when starting the server
拷贝文件my.cnf到/etc目录
设置数据库root密码
登录数据库(注意:首次登录不需要输入密码,登录以后设置root密码):>mysql -u root -p
如果这个命令报错:/tmp/mysql.lock
换用这个命令:
>mysql -uroot -h 127.0.0.1 -p
首次登陆没有密码直接回车
> use mysql;>UPDATE user SET password=PASSWORD('123456') WHERE user='root';>flush privileges;
注意:flush执行以后密码设置才能生效
主库增加mysql用户名的访问权限
进入主库服务器>cd /usr/local/mysql/bin
注意:执行以下命令后,输入上步已经设置好的root密码>mysql -uroot -h 127.0.0.1 -p
或者>mysql -u root -p
创建用户:mysql> CREATE USER 'mysql'@'host' IDENTIFIED BY '123456';
设置mysql用户的登录密码:
>UPDATE user SET password=PASSWORD('123456') WHERE user='mysql';
生效设置(这步别忘记喽,否则无效)
>flush privileges;
开启远程访问权限:
>mysql -uroot -h 127.0.0.1 -p
> use mysql;
> grant all privileges on *.* to root@'%' identified by "123456";
> flush privileges;
详细MySQL主从搭建步骤及源码请查看原文:https://developer.aliyun.com/article/741765?utm_content=g_1000098469

 浙公网安备 33010602011771号