Ubuntu apt-get方式安装Subversion
按照官方文档 http://subversion.apache.org/packages.html
使用apt-get安装方式:
1.安装Subversion:
sudo apt-get install subversion
2.安装libapavhe2-svn
sudo apt-get install libapache2-svn
提示:
No apache MPM package installed
需要安装一个apache的mpm模块:
sudo apt-get install apache2-mpm-*
可供安装的模块有四种:
apache2-mpm-event	事件驱动的MPM
apache2-mpm-perchild	依赖worker,过渡
apache2-mpm-prefork	传统MPM(不使用线程)
apache2-mpm-worker	支持多线程和多进行混合模型的高速MPM
只需安装mpm-worker:
sudo apt-get install apache2-mpm-worker
3.创建配置库根目录(该目录下存放多个配置库)和建库
mkdir /usr/svn_root
chmod -R 770 /usr/svn_root
svnadmin create /usr/svn_root/repo1
4.创建apache账户并赋值
sudo adduser apache
sudo chown -R apache:apache /usr/svn_root
5.配置dav_svn.conf:
sudo vi /etc/apache2/mods-available/dav_svn.conf

# dav_svn.conf - Example Subversion/Apache configuration
#
# For details and further options see the Apache user manual and
# the Subversion book.
#
# NOTE: for a setup with multiple vhosts, you will want to do this
# configuration in /etc/apache2/sites-available/*, not here.

# <Location URL> ... </Location>
# URL controls how the repository appears to the outside world.
# In this example clients access the repository as http://hostname/svn/
# Note, a literal /svn should NOT exist in your document root.
<Location /svn>

  # Uncomment this to enable the repository
  DAV svn

  # Set this to the path to your repository
  #SVNPath /var/lib/svn
  # Alternatively, use SVNParentPath if you have multiple repositories under
  # under a single directory (/var/lib/svn/repo1, /var/lib/svn/repo2, ...).
  # You need either SVNPath and SVNParentPath, but not both.
  SVNParentPath /usr/svn_root

  # Access control is done at 3 levels: (1) Apache authentication, via
  # any of several methods.  A "Basic Auth" section is commented out
  # below.  (2) Apache <Limit> and <LimitExcept>, also commented out
  # below.  (3) mod_authz_svn is a svn-specific authorization module
  # which offers fine-grained read/write access control for paths
  # within a repository.  (The first two layers are coarse-grained; you
  # can only enable/disable access to an entire repository.)  Note that
  # mod_authz_svn is noticeably slower than the other two layers, so if
  # you don't need the fine-grained control, don't configure it.

  # Basic Authentication is repository-wide.  It is not secure unless
  # you are using https.  See the 'htpasswd' command to create and
  # manage the password file - and the documentation for the
  # 'auth_basic' and 'authn_file' modules, which you will need for this
  # (enable them with 'a2enmod').
  AuthType Basic
  AuthName "Subversion Repository"
  AuthUserFile /etc/apache2/dav_svn.passwd

  # To enable authorization via mod_authz_svn (enable that module separately):
  <IfModule mod_authz_svn.c>
  AuthzSVNAccessFile /etc/apache2/dav_svn.authz
  </IfModule>


  # The following three lines allow anonymous read, but make
  # committers authenticate themselves.  It requires the 'authz_user'
  # module (enable it with 'a2enmod').
  #<LimitExcept GET PROPFIND OPTIONS REPORT>
    Require valid-user
  #</LimitExcept>

</Location>
6.增加svn用户,第一次增加需要加-c参数(创建新的dav_svn.passwd文件):
sudo htpasswd -c /etc/apache2/dav_svn.passwd wwl
New password:
Re-type new password:
Adding password for user wwl
sudo htpasswd /etc/apache2/dav_svn.passwd apache
sudo htpasswd /etc/apache2/dav_svn.passwd test1
sudo htpasswd /etc/apache2/dav_svn.passwd test2
7.设置svn库权限:
sudo vi /etc/apache2/dav_svn.authz
[groups]
admin = wwl
CM = apache
test = test1,test2

[/]
* =
@admin = rw
@CM = r

[repo1:/]
* =
@CM = rw
@test = r

[repo1:/branches]
@test = rw
[repo1:/trunk]
test2 = rw
[groups]代表组定义:“组名 = 用户1,用户2...”;

[repo1:/]代表repo1配置库,repo1是配置库名称;

[repo1:/trunk]代表repo1配置库下/trunk目录;

@ 符号,则表示这是个群组权限设置;

@ admin = rw代表admin 这个组的所有用户有读写权限

test2 = rw代表test2这个用户对trunk有读写权限

PS:注意svn的权限继承关系
8.修改apache启动用户为apache:
sudo vi /etc/apache2/envvars
export APACHE_RUN_USER=apache
export APACHE_RUN_GROUP=apache
9.授权svn.authz要加载mod_authz_svn.so 在目录 /etc/apache2/mods-enabled 下创建软链接到 ../mods-available/authz_svn.load:
cd /etc/apache2/mods-enabled
sudo ln -s ../mods-available/authz_svn.load
10.启动Apache:
sudo /etc/init.d/apache2 start

 * Usage: /etc/init.d/apache2 {start|stop|graceful-stop|restart|reload|force-reload|start-htcacheclean|stop-htcacheclean|status}
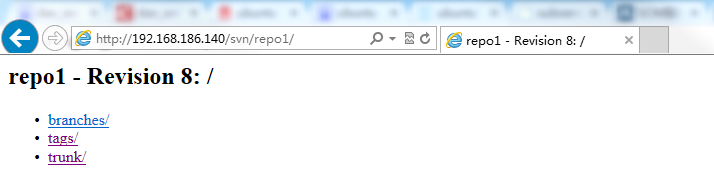
11.上传文件后显示:
题外话:

采用这种方式安装后,svn支持 svn:// file:// 访问方式
配置好apache后支持http:// https:// 方式访问
系统环境:Ubuntu13_64
目前apt-get方式安装的版本是:
svn --version
svn, version 1.7.5 (r1336830)

apache2 -v
Server version: Apache/2.2.22 (Ubuntu)


 浙公网安备 33010602011771号