day7_vite
day7_vite
1安装node.js
node是js独立的运行工具 很多js生态的工具 都需要node支持 相当于jre
npm 包管理工具 有远程仓库, 敲命令,可以把指定js库,下载到本地仓库.

直接下一步到结束
安装完后 测试命令

2包管理工具
npm 远程仓库在国外 0界面
pnpm

安装完成

3安装vite
安装和创建一体命令
pnpm create vite 安装+创建 如果安装过 创建项目

使用命令
  cd vite-demo
  pnpm install
  pnpm run dev

项目运行
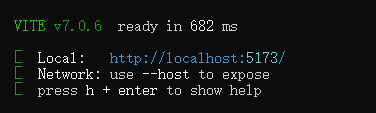
看到这个界面

安装完成
了解打包
打包命令

pnpm run build
打包后的文件

可以放在任意服务器运行 单纯的html css javascript
4vite项目目录结构
单页面应用 只有一个html文件 xxx.vue 替换之前的hmtl文件

src目录
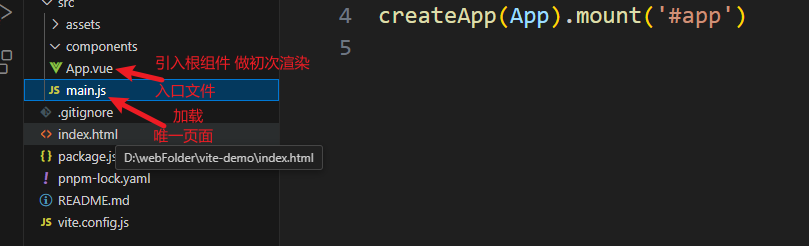
之后写代码 写vue文件
5与开发工具的配置
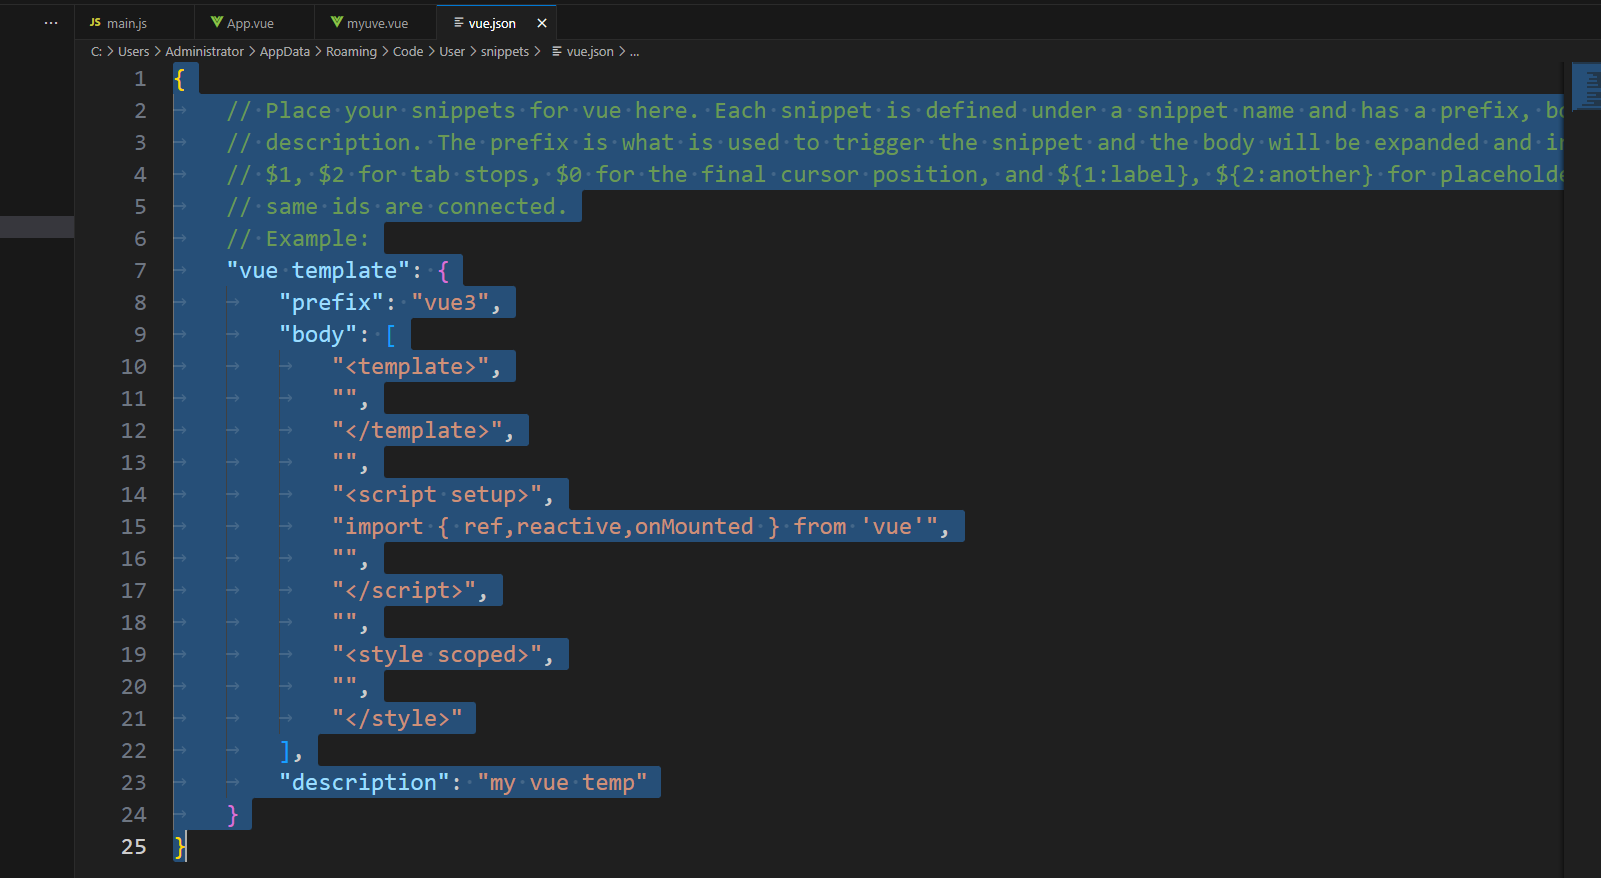
配置自定义vue文件模板
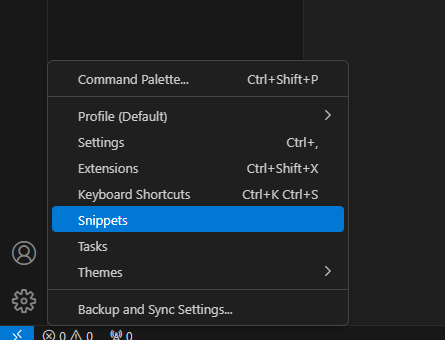
找到vue.json
{
	// Place your snippets for vue here. Each snippet is defined under a snippet name and has a prefix, body and
	// description. The prefix is what is used to trigger the snippet and the body will be expanded and inserted. Possible variables are:
	// $1, $2 for tab stops, $0 for the final cursor position, and ${1:label}, ${2:another} for placeholders. Placeholders with the
	// same ids are connected.
	// Example:
	"vue template": {
		"prefix": "vue3",
		"body": [
			"<template>",
			"",
			"</template>",
			"",
			"<script setup>",
			"import { ref,reactive,onMounted } from 'vue'",
			"",
			"</script>",
			"",
			"<style scoped>",
			"",
			"</style>"
		],
		"description": "my vue temp"
	}
}
运行服务器
可以通过vscode自带的终端 敲命令启动服务器

命令行 可以直接使用
powershell需要设置脚本权限 Set-ExecutionPolicy Bypass 之后再使用
启动的效果

注意:
终端可以开启的多个 vite服务器时 如果端口被占用 自动后移端口 默认5173
如果端口号不是5173 检查是否开启了多个
复制内容的操作:
ctrl+c 终止当前进程
复制 鼠标拖中内容 点右键
再点右键 粘贴
vite打包运行配置
import { fileURLToPath, URL } from 'node:url'
import { defineConfig } from 'vite'
import vue from '@vitejs/plugin-vue'

// https://vitejs.dev/config/
export default defineConfig({
  plugins: [vue()],
    //配置根路径,这个不配置会导致部署之后访问不到
    base: './',
    //  构建
    build: {
      outDir: 'dist', //指定打包输出路径
      assetsDir: 'assets', //指定静态资源存放路径
      cssCodeSplit: true, //css代码拆分,禁用则所有样式保存在一个css里面
      sourcemap: false, //是否构建source map 文件

      // 生产环境取消 console
      minify: 'terser',
      terserOptions: {
        compress: {
          drop_console: true,
          drop_debugger: true
        }
      },

      //会打包出 css js 等文件夹 目录显得清晰
      rollupOptions: {
        output: {
          chunkFileNames: 'js/[name]-[hash].js',
          entryFileNames: 'js/[name]-[hash].js',
          assetFileNames: '[ext]/[name]-[hash].[ext]'
        }
      }
    },
    resolve: {
      alias: {
        //别名,给./src目录,起个别名@,在文件中就可以使用@替换src了
        '@': fileURLToPath(new URL('./src', import.meta.url))
      }
    },
    // 本地服务
    server: {
      host: "0.0.0.0", // 可以通过ip访问前端服务
      port: 5173,  // 端口号
      open: true,  // 是否自动在浏览器打开
      https: false, // 是否开启 https
      cors: true, // 允许跨域
    }
})

6配置路由插件
通过url显示不同的vue文件 模拟多页面切换效果
1安装
pnpm add vue-router@4
要在当前项目目录安装
2配置
单独建立配置文件

内容
//作为路由的配置⽂件
import { createRouter, createWebHistory } from 'vue-router'


 const router = createRouter({
  history: createWebHistory(import.meta.env.BASE_URL),
  routes: [
    // 动态引入
    {
            path: '/myvue',
            component: () => import('../components/myuve.vue')
    },

  ]
 })
 export default router
main.js中启用插件
import { createApp } from 'vue'
import App from './App.vue'
//默认找目录下的index.js
import router from './router'

const myVue = createApp(App)
//启用router插件
myVue.use(router)
myVue.mount('#app')
改App.vue 作为根组件 让别的组件替换到这里显示
<template>
<!-- 指定路由 路径切换是在哪里显示  -->
  <router-view></router-view>

</template>

<script setup>

</script>


<style scoped>

</style>
可以通过路径 显示不同的组件
3配置项目入口
//作为路由的配置⽂件
import { createRouter, createWebHistory } from 'vue-router'


 const router = createRouter({
  history: createWebHistory(import.meta.env.BASE_URL),
  routes: [
    // 动态引入
    {
        path: '/home',
        component: () => import('../components/home.vue')
    },
    //配置项目入口
    {
        path:'/',
        redirect:'/home'
    }

  ]
 })
 export default router
4通过路由做页面跳转
<template>
home页面
<!-- <a href="/userInfo">去用户界面</a> -->
 <button @click="changePage" >跳转页面</button>
</template>

<script setup>
import { ref,reactive,onMounted } from 'vue'
import router from '@/router'
console.log("home页面");

const changePage = ()=>{
    console.log("我要跳转");
    router.push('/userInfo');
}


</script>

<style scoped>

</style>

 浙公网安备 33010602011771号