[qemu] qemu旧的net参数已经不再可用了,新的这样用。
老的命令:
/root/BUILD_qemu/bin/qemu-system-x86_64 -enable-kvm \
    -m 2G \
    -cpu Nehalem -smp cores=4,threads=2,sockets=2 \
        -numa node,mem=1G,cpus=0-8,nodeid=0 \
        -numa node,mem=1G,cpus=9-15,nodeid=1 \
    -display vnc=0.0.0.0:1 \
    -net nic,vlan=1,model=virtio,macaddr='00:00:00:01:00:01' \
    -net tap,vlan=1,ifname=tap-int,script=no,downscript=no \
    -device virtio-net-pci,netdev=dev1,macaddr='00:00:00:01:00:02',vectors=32,mq=on \
    -netdev tap,ifname=tap-0,id=dev1,script=no,downscript=no,vhost=on,queues=16 \
    -drive file=disk.img,if=virtio \
    -cdrom /root/CentOS-7-x86_64-DVD-1511.iso \
    -boot order=c \
在qemu-2.11-0 会报错如下:
qemu-system-x86_64: -net nic,vlan=1,model=virtio,macaddr=00:00:00:01:00:01: 'vlan' is deprecated. Please use 'netdev' instead.
详细用法:https://qemu.weilnetz.de/doc/qemu-doc.html#Network-options
摘要:
-nic [tap|bridge|user|l2tpv3|vde|netmap|vhost-user|socket][,...][,mac=macaddr][,model=mn]
This option is a shortcut for configuring both the on-board (default) guest NIC hardware and the host network backend in one go.
The host backend options are the same as with the corresponding -netdev options below. The guest NIC model can be set with model=modelname.
Use model=help to list the available device types. The hardware MAC address can be set with mac=macaddr.

The following two example do exactly the same, to show how -nic can be used to shorten the command line length (note that the e1000 is
the default on i386, so the model=e1000 parameter could even be omitted here, too):

qemu-system-i386 -netdev user,id=n1,ipv6=off -device e1000,netdev=n1,mac=52:54:98:76:54:32
qemu-system-i386 -nic user,ipv6=off,model=e1000,mac=52:54:98:76:54:32
简单解释:
两个方法:
A,用 -netdev和-device配合,-device需要志明model和mac,已经netdev的名字(这里是n1)是两个配置连接起来。
所有可选的参数见:
[root@D128 j]# /root/BUILD_qemu/bin/qemu-system-x86_64 -device help
不同的设备参数不同,需要查询详细的选项,如e1000e
[root@D128 j]# /root/BUILD_qemu/bin/qemu-system-x86_64 -device e1000e,help
e1000e.rombar=uint32
e1000e.disable_vnet_hdr=uint8 (Do not use virtio headers, perform SW offloads emulation instead)
e1000e.x-pcie-lnksta-dllla=bool (on/off)
e1000e.bootindex=int32
e1000e.multifunction=bool (on/off)
e1000e.romfile=str
e1000e.vlan=int32 (Integer VLAN id to connect to)
e1000e.command_serr_enable=bool (on/off)
e1000e.x-pcie-extcap-init=bool (on/off)
e1000e.addr=int32 (Slot and optional function number, example: 06.0 or 06)
e1000e.mac=str (Ethernet 6-byte MAC Address, example: 52:54:00:12:34:56)
e1000e.netdev=str (ID of a netdev to use as a backend)
e1000e.subsys_ven=uint16 (PCI device Subsystem Vendor ID)
e1000e.subsys=uint16 (PCI device Subsystem ID)
B, 使用简化的命令,-nic,功能同A。同样需要指明model和mac。可选参数见:
[root@D128 j]# /root/BUILD_qemu/bin/qemu-system-x86_64 -nic model=help
qemu: Supported NIC models: e1000,e1000-82544gc,e1000-82545em,e1000e,i82550,i82551,i82557a,i82557b,i82557c,i82558a,i82558b,i82559a,i82559b,i82559c,
i82559er,i82562,i82801,ne2k_pci,pcnet,rocker,rtl8139,virtio-net-pci,vmxnet3
[root@D128 j]#
改过之后的启动脚本:
/root/BUILD_qemu/bin/qemu-system-x86_64 -enable-kvm \
    -m 2G \
    -cpu Nehalem -smp cores=4,threads=2,sockets=2 \
        -numa node,mem=1G,cpus=0-8,nodeid=0 \
        -numa node,mem=1G,cpus=9-15,nodeid=1 \
    -display vnc=0.0.0.0:1 \
    -device e1000e,netdev=dev0,mac='00:00:00:01:00:01' \
    -netdev tap,ifname=tap-int,id=dev0,script=no,downscript=no,vhost=on \
    -device virtio-net-pci,netdev=dev1,mac='00:00:00:01:00:02',vectors=32,mq=on \
    -netdev tap,ifname=tap-0,id=dev1,script=no,downscript=no,vhost=on,queues=16 \
    -drive file=disk.img,if=virtio \
    -cdrom /root/CentOS-7-x86_64-DVD-1511.iso \
    -boot order=c \
    &
-----------------------------------------------------------------------------------------------------------------------
依照如下步骤。虽然能编译,也能用,但是用起来还是有问题的,不清楚为什么。
比如: 1. kvm不好用,运行起来特别慢。2。 旧的image无法boot。
----------------- update ---------------
改了些编译参数,再编译:
[root@D128 qemu-2.12.0-rc3]# yum install ncurses-devel
[root@D128 qemu-2.12.0-rc3]# ./configure --enable-curses --enable-vhost-user --prefix=/root/BUILD_qemu/ --target-list=x86_64-softmmu --disable-gtk --enable-docs --enable-numa --enable-kvm --enable-modules --enable-system --enable-linux-user
支持了什么,configure的输出里都会打印出来。
可能会造成影响的参数包括
--enable-modules --enable-system --enable-linux-user
以上的参数,对效果影响没有区别。。。。
跟其他同事又找了一组设置:
./configure \
    --disable-bluez \
    --disable-brlapi \
    --disable-curses  \
    --disable-debug-tcg \
    --disable-fdt \
    --disable-guest-agent \
--disable-live-block-migration              --disable-qom-cast-debug            \
--disable-sdl              --disable-sparse              --disable-strip         \
--disable-vnc-jpeg              --disable-xen      --enable-docs \
--enable-kvm \
--enable-lzo               --enable-seccomp              --enable-snappy \
--enable-werror           \
--block-drv-ro-whitelist=vmdk,vhdx,vpc,https   \
--block-drv-rw-whitelist=qcow2,raw,file,host_device,nbd,gluster,blkdebug,luks      \
--disable-xen-pci-passthrough --disable-guest-agent-msi              --enable-attr       \
--enable-coroutine-pool              --enable-debug-info             \
--enable-gnutls \
--enable-numa       \
--enable-system \
--enable-tools         \
--enable-vhost-net \
--enable-vhost-vsock     \
--enable-vnc \
--enable-debug \
--tls-priority=NORMAL \
--with-coroutine=ucontext       \
--extra-cflags="-O2 -g -pipe -Wall  -fexceptions \
-fstack-protector-strong --param=ssp-buffer-size=4 -m64 -mtune=generic -fPIE -DPIE"        \
--extra-ldflags=" -pie -Wl,-z,relro -Wl,-z,now" \
--target-list=x86_64-softmmu
还是不行。。。
再试一次:卸载掉qemu-2.0.0的rpm,安装自编译的qemu到系统目录。
[root@D128 qemu-2.12.0-rc3]# yum autoremove qemu qemu-kvm
[root@D128 qemu-2.12.0-rc3]# ./configure --enable-curses --enable-vhost-user --target-list=x86_64-softmmu --disable-gtk --enable-docs --enable-numa --enable-kvm --enable-system --enable-modules
还是不行。。。 算了。。。
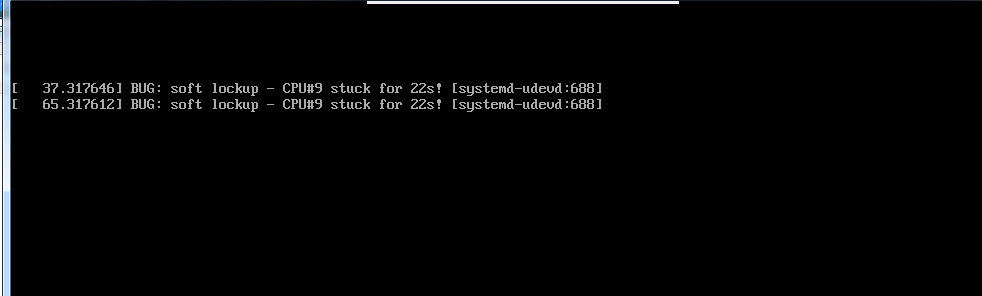
始终提示CPU STUCK
回退一个版本到2.10
[root@D128 qemu]# git branch
  master
* stable-2.10
[root@D128 qemu]# git submodule init
Submodule 'roms/QemuMacDrivers' (git://git.qemu.org/QemuMacDrivers.git) registered for path 'roms/QemuMacDrivers'
[root@D128 qemu]# git submodule update --recursive
再编译:
还是不行。。。。
错误类似:
[   28.050008] BUG: soft lockup - CPU#2 stuck for 23s! [systemd-udevd:162]
[   56.050010] BUG: soft lockup - CPU#2 stuck for 23s! [systemd-udevd:162]
[   84.050006] BUG: soft lockup - CPU#2 stuck for 23s! [systemd-udevd:162]
[  112.050007] BUG: soft lockup - CPU#2 stuck for 22s! [systemd-udevd:162]
[  140.050006] BUG: soft lockup - CPU#2 stuck for 22s! [systemd-udevd:162]
[  168.050009] BUG: soft lockup - CPU#2 stuck for 22s! [systemd-udevd:162]
[  196.050008] BUG: soft lockup - CPU#2 stuck for 22s! [systemd-udevd:162]
[  224.050006] BUG: soft lockup - CPU#2 stuck for 22s! [systemd-udevd:162]
[  252.050014] BUG: soft lockup - CPU#2 stuck for 22s! [systemd-udevd:162]
[  280.050006] BUG: soft lockup - CPU#2 stuck for 22s! [systemd-udevd:162]
退到2.9版本:
2.9也是这样。好的,放弃了。。。。
========================== 我又回来了,@ 2018-04-20 =====================
一直耿耿于怀这个问题。
那么,首先,soft lookup到底是什么问题? 见:
https://www.cnblogs.com/lyhabc/p/6640012.html
简单的说,就是内核出了问题。然后我用的是标准CentOS7的发行版,所以基本上就是驱动的问题。
那么对于一个qemu的虚拟机来说,唯一能做的就是改变硬件,如下:
我去掉了所有的网卡,并且去掉disk的virtio驱动。
果然正常运行了!
/root/BUILD_qemu/bin/qemu-system-x86_64 -enable-kvm \
    -m 2G \
    -cpu Nehalem -smp cores=4,threads=2,sockets=2 \
    -numa node,mem=1G,cpus=0-8,nodeid=0 \
    -numa node,mem=1G,cpus=9-15,nodeid=1 \
    -display vnc=0.0.0.0:1 \
    -drive file=disk.img \
查看文档,改变一下参数,重新把virtio用起来。
在那之前,再编一个qemu-2.12
[root@D128 qemu-2.12.0-rc3]# ./configure --prefix=/root/BUILD_qemu/ --target-list=x86_64-softmmu --disable-gtk --enable-virtfs
不认识virtio,换了参数也不行:
#    -device virtio-blk-pci,scsi=off,bus=pci.0,addr=0x7,drive=disk0,bootindex=1 \
#    -drive file=disk.img,if=none,id=disk0 \
kvm+virtio 就会有问题。很可能是VMware的原因。
--------------------------
差一个题外内容:
What is the difference and relationship between “xx-softmmu” and “xx-linux-user”?
To put it simply, xxx-softmmu will compile qemu-system-xxx, which is an emulated machine for xxx architecture (System Emulation).
When it resets, the starting point will be the reset vector of that architecture. While xxx-linux-user, compiles qemu-xxx,
which allows you to run user application in xxx architecture (User-mode Emulation). Which will seek the user applications'
main function, and start execution from there.

See https://en.wikipedia.org/wiki/QEMU#Operating_modes
https://stackoverflow.com/questions/32435138/what-is-the-difference-and-relationship-between-xx-softmmu-and-xx-linux-user?utm_medium=organic&utm_source=google_rich_qa&utm_campaign=google_rich_qa

 浙公网安备 33010602011771号