Spring学习笔记4----Spring IOC例子
沿着我们上一篇的学习笔记,我们继续通过代码学习IOC这一设计思想.
6.Hello类
第一步:首先创建一个类Hello
|
1
2
3
4
5
6
7
8
9
10
11
|
package cn.sxt.bean;public class Hello { private String name; public void setName(String name) { this.name = name; } public void show(){ System.out.println("hello,"+name); }} |
第二步:创建配置文件beans.xml
<?xml version="1.0" encoding="UTF-8"?>
<beans xmlns="http://www.springframework.org/schema/beans"
    xmlns:xsi="http://www.w3.org/2001/XMLSchema-instance"
    xsi:schemaLocation="http://www.springframework.org/schema/beans
        http://www.springframework.org/schema/beans/spring-beans.xsd">
    <!-- bean就是java对象,由spring容器来创建和管理 -->
    <bean name="hello" class="cn.sxt.bean.Hello">
        <property name="name" value="张三"></property>
    </bean>
</beans>
第三步:编写测试类Test
|
1
2
3
4
5
6
7
8
9
10
11
12
13
14
15
|
package cn.sxt.test;import org.springframework.context.ApplicationContext;import org.springframework.context.support.ClassPathXmlApplicationContext;import cn.sxt.bean.Hello;public class Test { public static void main(String[] args) { //解析beans.xml文件生成管理相应的bean对象 ApplicationContext context=new ClassPathXmlApplicationContext("beans.xml"); Hello hello=(Hello)context.getBean("hello"); hello.show(); }} |
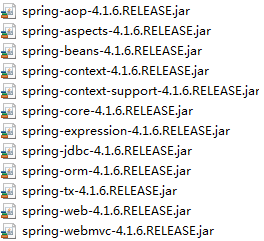
我们需要导入相关Jar包(在上一篇笔记Spring主要内容中显示的那些核心jar包)
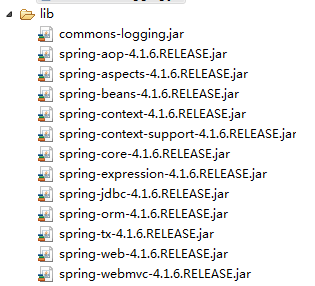
此时运行Test程序,会触发异常:Exception in thread "main" java.lang.NoClassDefFoundError: org/apache/commons/logging/LogFactory
我们需要添加commons-logging.jar文件
步骤总结:
1)导入相关jar包
2)编写spring配置文件(名称可以自定义)
思考?
Hello对象是谁创建的?
我们在Hello类中添加一个构造函数,可以确定Hello对象确定被创建:
|
1
2
3
4
5
6
7
8
9
10
11
12
13
14
|
package cn.sxt.bean;public class Hello { public Hello() { System.out.println("hello 被创建"); } private String name; public void setName(String name) { this.name = name; } public void show(){ System.out.println("hello,"+name); }} |
运行Test测试类结果显示:
hello 被创建
hello,张三
由此可以得知,Hello对象是由spring容器来创建的:bean工厂,可以包含多个bean,创建不同类的对象
<bean name="hello" class="cn.sxt.bean.Hello">
        <property name="name" value="张三"></property>
    </bean>
Hello对象的属性是怎样设置的?
Hello对象的属性是由spring容器来设置的;
这个过程就叫做控制反转:
控制的内容:指的是谁来控制对象的创建;传统的应用程序,对象的创建是由程序本身来控制,使用Spring以后是由spring来创建对象的。
反转:有反转就有正转,正转指程序来创建对象,反转指程序本身不去创建对象,而变为被动的接收容器给我们创建的对象
总结:以前对象是由程序本身来创建,使用spring后,程序变为了被动接收spring创建好的对象;
控制反转有一个别名--依赖注入(DI-dependency injection)
DI:比如在我们的Hello类中,我们的类Hello就依赖于name属性,以来的这个name属性是由spring容器来设置的,name值的设置过程就叫做依赖注入(通过setName方法进行的依赖注入)
Ioc--是一种编程思想,由主动编程变为别动接收;
Ioc的实现是通过Ioc容器(Bean工厂)来实现的。Ioc容器--BeanFactory
在第一篇学习笔记中的UserDao和UserDaoService的例子,我们在这里就可以使用spring配置文件的方式来管理对象的生命周期以及依赖对象的注入;
beanx.xml修改如下:
<?xml version="1.0" encoding="UTF-8"?>
<beans xmlns="http://www.springframework.org/schema/beans"
    xmlns:xsi="http://www.w3.org/2001/XMLSchema-instance"
    xsi:schemaLocation="http://www.springframework.org/schema/beans
        http://www.springframework.org/schema/beans/spring-beans.xsd">
    <!-- bean就是java对象,由spring容器来创建和管理 -->
    <bean id="mysqlDao" class="cn.sxt.dao.impl.UserDaoMySqlImpl"></bean>
    <bean id="oracleDao" class="cn.sxt.dao.impl.UserDaoOracleImpl"></bean>
    <bean id="service" class="cn.sxt.service.impl.UserServiceImpl">
        <!-- ref引用对象(对象是由spring来创建的) -->
        <property name="userDao" ref="mysqlDao"></property>
    </bean>
    <!-- property如何设置:name="setUserDao(去除set,并将剩余的UserDao首字母小写)" -->
</beans>
当我们需要替换具体的实现时,就可以直接在配置文件中进行修改,例如将ref="mysqlDao"修改为ref="oracleDao";
在测试类中我们就可以这样来组织代码:
|
1
2
3
4
5
6
7
8
9
10
11
12
13
14
|
package cn.sxt.test;import org.springframework.context.ApplicationContext;import org.springframework.context.support.ClassPathXmlApplicationContext;import cn.sxt.service.UserService;public class Test { public static void main(String[] args) { ApplicationContext ac=new ClassPathXmlApplicationContext("beans.xml"); UserService us=(UserService)ac.getBean("service"); us.getUser(); }} |
使用IOC来创建对象的方式:3种方式
1)通过无参的构造方法来创建;
User.java:
|
1
2
3
4
5
6
7
8
9
10
11
12
13
14
|
package cn.sxt.vo;public class User { public User(){ System.out.println("user的无参构造方法"); } private String name; public void setName(String name) { this.name = name; } public void show(){ System.out.println("name="+name); }} |
beans.xml:
<?xml version="1.0" encoding="UTF-8"?>
<beans xmlns="http://www.springframework.org/schema/beans"
    xmlns:xsi="http://www.w3.org/2001/XMLSchema-instance"
    xsi:schemaLocation="http://www.springframework.org/schema/beans
        http://www.springframework.org/schema/beans/spring-beans.xsd">
   <bean id="user" class="cn.sxt.vo.User">
           <property name="name" value="张三"></property>
   </bean>
</beans>
Test:
|
1
2
3
4
5
6
7
8
9
10
11
12
13
14
15
16
|
package cn.sxt.test;import org.springframework.context.ApplicationContext;import org.springframework.context.support.ClassPathXmlApplicationContext;import cn.sxt.vo.User;public class Test { public static void main(String[] args) { ApplicationContext ac=new ClassPathXmlApplicationContext("beans.xml"); User user=(User)ac.getBean("user"); user.show(); }} |
2)通过有参构造方法来创建;
User.java:
|
1
2
3
4
5
6
7
8
9
10
11
12
13
14
|
package cn.sxt.vo;public class User { private String name; public User(String name) { super(); this.name = name; } public void show(){ System.out.println("name="+name); }} |
beans.xml配置(有三种情况):
第一种:根据参数的下标(index)来设置;
<?xml version="1.0" encoding="UTF-8"?>
<beans xmlns="http://www.springframework.org/schema/beans"
    xmlns:xsi="http://www.w3.org/2001/XMLSchema-instance"
    xsi:schemaLocation="http://www.springframework.org/schema/beans
        http://www.springframework.org/schema/beans/spring-beans.xsd">
   <bean id="user" class="cn.sxt.vo.User">
           <!-- index指的是构造方法参数下标,从0开始 -->
           <constructor-arg index="0" value="李四"></constructor-arg>
   </bean>
</beans>
第二种:根据参数名称(name)来设置;
<bean id="user" class="cn.sxt.vo.User">
           <!-- name指的是属性值 -->
           <constructor-arg name="name" value="王五"></constructor-arg>
   </bean>
第三种:根据参数类型(type)来设置;
 <bean id="user" class="cn.sxt.vo.User">
           <constructor-arg type="java.lang.String" value="徐六"></constructor-arg>
   </bean>
3)通过工厂方法来创建对象(有两种);
第一种:静态工厂来创建;
UserFactory.java:
|
1
2
3
4
5
6
7
8
9
|
package cn.sxt.factory;import cn.sxt.vo.User;public class UserFactory { public static User newInstance(String name){ return new User(name); }} |
beans.xml配置:
<bean id="user" class="cn.sxt.factory.UserFactory" factory-method="newInstance">
           <constructor-arg index="0" value="任七"></constructor-arg>
   </bean>
第二种:动态工厂来创建
UserDynamicFacory.java:
|
1
2
3
4
5
6
7
8
9
|
package cn.sxt.factory;import cn.sxt.vo.User;public class UserDynamicFactory { public User newInstance(String name){ return new User(name); }} |
beans.xml:
<bean id="userFacotry" class="cn.sxt.factory.UserDynamicFactory"/>
    <bean id="user" factory-bean="userFacotry" factory-method="newInstance">
        <constructor-arg index="0" value="王五"/>
    </bean>

 浙公网安备 33010602011771号