8天入门docker系列 —— 第六天 搭建自己的私有镜像仓库Registry
这一篇我们来聊聊私有仓库的搭建,其实不管你是通过docker build还是compose的方式进行构建的镜像,最终还是要将生成好的镜像push到远程的仓库中,这样
多个平台可以方便的获取你registry中的镜像,否则你不还得带着你的源代码到处跑不是? 而且私有仓库还利于镜像的获取分发,反正都是内网,镜像构建的再大又能怎样?
一:registry server镜像仓库
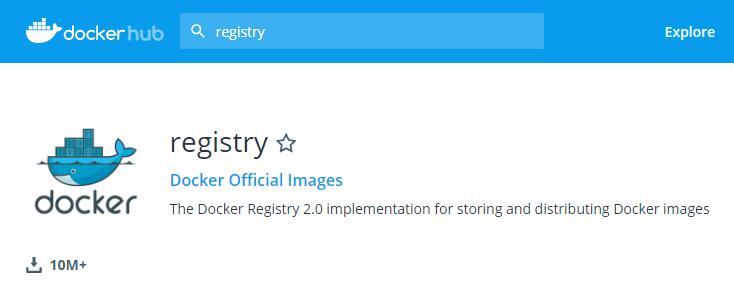
你可以到dockerhub上去找一个叫registry server的镜像,如下图: https://hub.docker.com/_/registry
这里我有两台机器:
registry: 192.168.23.147
client: 192.168.23.146
接下来根据registry的文档描述,我在147机器上执行以下docker run 命令,开放5000端口。
[root@localhost ~]# docker run -d -p 5000:5000 --restart always --name registry registry:2
Unable to find image 'registry:2' locally
2: Pulling from library/registry
c87736221ed0: Already exists
1cc8e0bb44df: Already exists
54d33bcb37f5: Already exists
e8afc091c171: Already exists
b4541f6d3db6: Already exists
Digest: sha256:8004747f1e8cd820a148fb7499d71a76d45ff66bac6a29129bfdbfdc0154d146
Status: Downloaded newer image for registry:2
80199d4030ed0c444bd27f255201b01e2f5e89abfb4e5d2cd9c61cbbd428baaf
[root@localhost ~]#
[root@localhost ~]#
[root@localhost ~]# docker ps
CONTAINER ID        IMAGE               COMMAND                  CREATED             STATUS              PORTS                    NAMES
80199d4030ed        registry:2          "/entrypoint.sh /etc…"   15 seconds ago      Up 13 seconds       0.0.0.0:5000->5000/tcp   registry
从上图可以看到 host机的5000端口已经开放,接下来我通过146机器从dockerhub上拉取一个nginx镜像,然后打包成147前缀的仓库地址,然后做push。
[root@localhost ~]# docker pull nginx
Using default tag: latest
latest: Pulling from library/nginx
fc7181108d40: Pull complete
d2e987ca2267: Pull complete
0b760b431b11: Pull complete
Digest: sha256:96fb261b66270b900ea5a2c17a26abbfabe95506e73c3a3c65869a6dbe83223a
Status: Downloaded newer image for nginx:latest
[root@localhost ~]# docker images
REPOSITORY          TAG                 IMAGE ID            CREATED             SIZE
nginx               latest              f68d6e55e065        2 days ago          109MB
[root@localhost ~]# docker tag nginx 192.168.23.147:5000/pnginx
[root@localhost ~]# docker images
REPOSITORY                   TAG                 IMAGE ID            CREATED             SIZE
192.168.23.147:5000/pnginx   latest              f68d6e55e065        2 days ago          109MB
nginx                        latest              f68d6e55e065        2 days ago          109MB
[root@localhost ~]# docker push 192.168.23.147:5000/pnginx
The push refers to repository [192.168.23.147:5000/pnginx]
Get https://192.168.23.147:5000/v2/: http: server gave HTTP response to HTTPS client
卧槽,报错了,从错误信息中可以看到,https的client不接受http的response,没办法,你得要让client端接收不安全的http应该就可以了,这个问题在官方文
档有专门的解决办法,所以在daemon.json 加上一个不安全的http地址即可,如下图: https://docs.docker.com/registry/insecure/
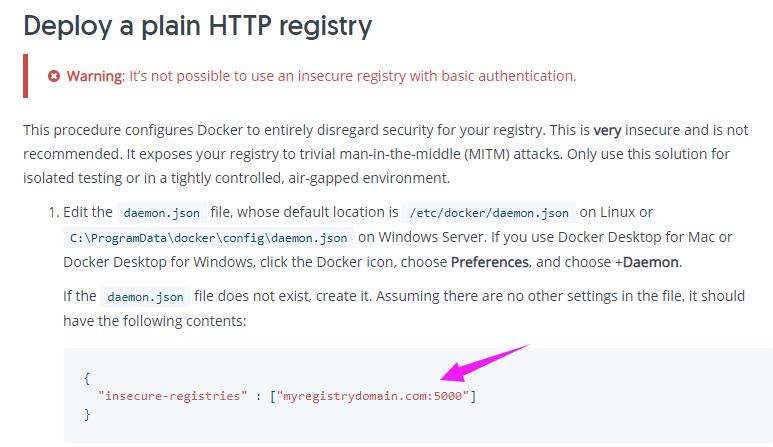
有了这个解决方案,在/etc/docker/daemon.json 中将前面的域名改成 192.168.23.147, 重启docker,从下面output可以看到推送成功。
[root@localhost ~]# vim /etc/docker/daemon.json
[root@localhost ~]# service docker restart
Redirecting to /bin/systemctl restart docker.service
[root@localhost ~]# docker push 192.168.23.147:5000/pnginx
The push refers to repository [192.168.23.147:5000/pnginx]
d2f0b6dea592: Layer already exists
197c666de9dd: Layer already exists
cf5b3c6798f7: Layer already exists
latest: digest: sha256:00be67d6ba53d5318cd91c57771530f5251cfbe028b7be2c4b70526f988cfc9f size: 948
[root@localhost ~]#
二:docker-registry-ui 可视化UI
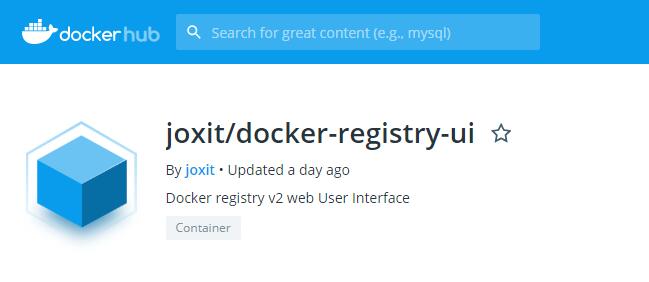
镜像是推送上去了,但在147上无法查看推送上来的镜像信息,还得求助于开源社区,在dockerhub你可以找到一款docker-registry-ui的registry的可视化UI的
工具,如下图: https://hub.docker.com/r/joxit/docker-registry-ui。
在官方文档中可以找得到一个非常简单的docker执行命令,这里就在147上执行吧。
[root@localhost ~]# docker run -d -p 80:80 joxit/docker-registry-ui
Unable to find image 'joxit/docker-registry-ui:latest' locally
latest: Pulling from joxit/docker-registry-ui
e7c96db7181b: Pull complete
3fb6217217ef: Pull complete
d5443b40bab6: Pull complete
Digest: sha256:59401aa3c3e29b721163f49f81a9be3698d269bd983a5c44d422bb6da2d263a2
Status: Downloaded newer image for joxit/docker-registry-ui:latest
31806479eb0fdff245ba5f9476bf84d28413f18ec3a96770ebf4f903034461a9
因为容器开放了80端口,所以你可以直接访问: http://192.168.23.147,然后添加上registry server的地址,如下图。
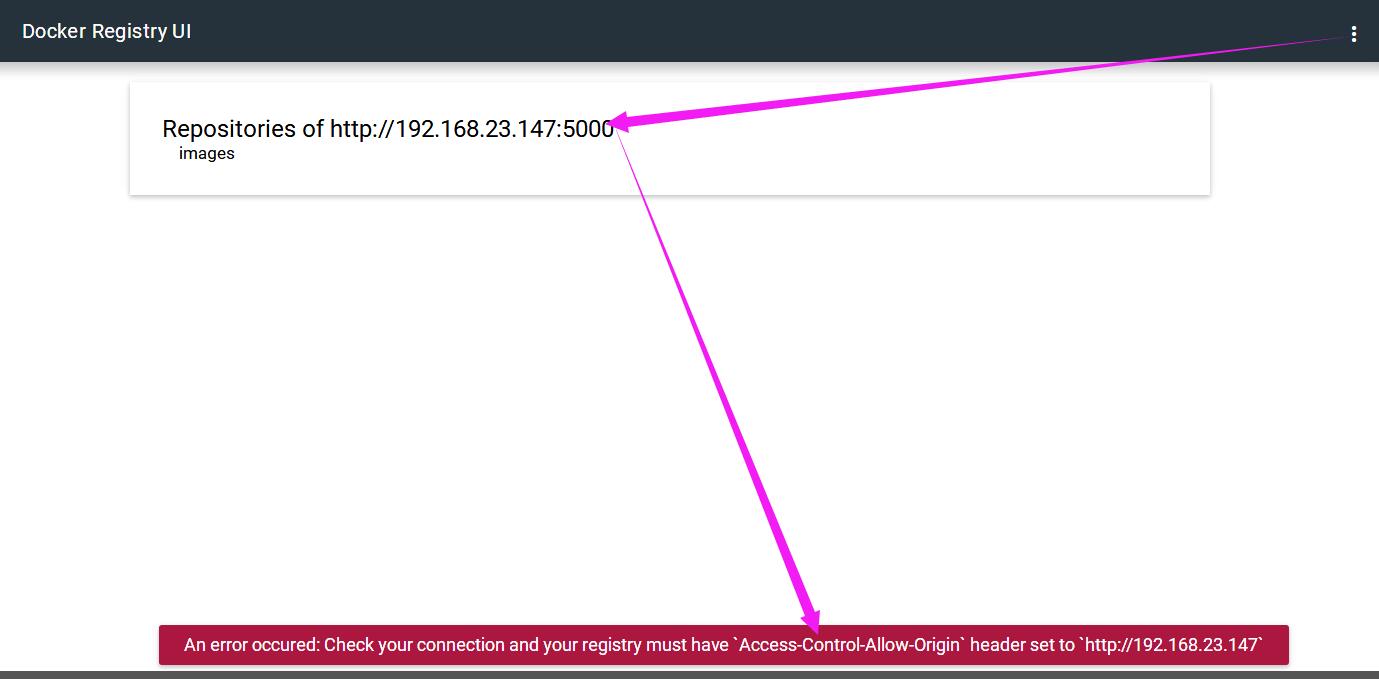
当添加完之后,你会发现有一个“跨域请求”的错误,这是因为默认的registry server不允许这么做,所以你得让registry服务器执行可跨域,其实在官方文档中
也提到了这个问题,可以在registry的config配置文件中进行修改。

接下来我根据文档定义了一个config.yml文件。
version: 0.1
log:
  fields:
    service: registry
storage:
  cache:
    blobdescriptor: inmemory
  filesystem:
    rootdirectory: /var/lib/registry
http:
  addr: :5000
  headers:
    X-Content-Type-Options: [nosniff]
    Access-Control-Allow-Origin: ['*']
    Access-Control-Allow-Methods: ['*']
    Access-Control-Max-Age: [1728000]
health:
  storagedriver:
    enabled: true
    interval: 10s
    threshold: 3
再把原来的register容器kill掉,将上面的config.yml通过文件挂载的方式送到容器里。
[root@localhost app]# docker rm -f registry
registry
[root@localhost app]# docker run -d -p 5000:5000 --name registry -v /app/config.yml:/etc/docker/registry/config.yml registry:2
c8aa9493ec2fea662c161861f6a952be3c30465deef9219e58f263db37719113
[root@localhost app]# ls
config.yml
最后我在146上重新推送一下,当然你也可以将147上的registry的目录挂载到volume上或者host filesystem。
[root@localhost ~]# docker push 192.168.23.147:5000/pnginx
The push refers to repository [192.168.23.147:5000/pnginx]
d2f0b6dea592: Pushed
197c666de9dd: Pushed
cf5b3c6798f7: Pushed
latest: digest: sha256:00be67d6ba53d5318cd91c57771530f5251cfbe028b7be2c4b70526f988cfc9f size: 948

终于可以在ui上看到client推送过来的镜像了,是不是很开心,由于是内网,就算你的image有个1,2g的又何妨呢,本篇就先说到这里,希望对你有帮助。

 浙公网安备 33010602011771号