
实现分布式服务注册及简易的netty聊天
现在很多地方都会用到zookeeper, 用到它的地方就是为了实现分布式。用到的场景就是服务注册,比如一个集群服务器,需要知道哪些服务器在线,哪些服务器不在线。
ZK有一个功能,就是创建临时节点,当机器启动应用的时候就会连接到一个ZK节点,然后创建一个临时节点,那么通过获取监听该路径,并且获取该路径下的节点数量就知道有哪些服务器在线了。当机器停止应用的时候,zk的临时节点将会自动被删除。我们通过这个机制去实现。
这次主要实现是采用springboot, zkui, swagger实现。接下来来看一下主要的代码实现:
在机器启动的时候获取本机的IP,然后将本机的IP和指定的端口号注册到程序中:
package com.hqs.zk.register;

import com.hqs.zk.register.config.AppConfig;
import com.hqs.zk.register.thread.ZKRegister;
import com.hqs.zk.register.util.ZKUtil;
import org.springframework.beans.factory.annotation.Autowired;
import org.springframework.boot.CommandLineRunner;
import org.springframework.boot.SpringApplication;
import org.springframework.boot.autoconfigure.SpringBootApplication;

import java.net.InetAddress;

@SpringBootApplication
public class ZKApplication implements CommandLineRunner{
    @Autowired
    AppConfig appConfig;

    @Autowired
    ZKUtil zkUtil;

    public static void main(String[] args) {
        SpringApplication.run(ZKApplication.class, args);
        System.out.println("启动应用成功");
    }

    @Override
    public void run(String... strings) throws Exception {
        //获得本机IP
        String addr = InetAddress.getLocalHost().getHostAddress();
        Thread thread = new Thread(new ZKRegister(appConfig, zkUtil, addr));
        thread.setName("register-thread");
        thread.start();

        Thread scanner = new Thread(new Scanner());
        scanner.start();
    }
}
创建一个工具类,工具类主要实现创建父节点,创建临时路径,监听事件,获取所有注册节点。
    /**
     * 创建临时目录
     */
    public void createEphemeralNode(String path, String value) {
        zkClient.createEphemeral(path, value);
    }

    /**
     * 监听事件
     */
    public void subscribeEvent(String path) {
        zkClient.subscribeChildChanges(path, new IZkChildListener() {
            @Override
            public void handleChildChange(String parentPath, List<String> currentChilds) throws Exception {
                System.out.println("parentPath:" + parentPath + ":list:" + currentChilds.toString());
            }
        });
    }
这块就基本完成了,下面开始创建controller,目的是为了获取所有在线机器的节点。为了方便测试和查看我使用了Swagger2, 这样界面话的发请求工具特别好用。
接下来看controller的主要内容:
    /**
     * 获取所有路由节点
     * @return
     */
    @ApiOperation("获取所有路由节点")
    @RequestMapping(value = "getAllRoute",method = RequestMethod.POST)
    @ResponseBody()
    public List<String> getAllRoute(){
        List<String> allNode = zkUtil.getAllNode();
        List<String> result = new ArrayList<>();
        for (String node : allNode) {
            String key = node.split("-")[1];
            result.add(key);
        }
        return result ;
    }
同时配置对应的Swagger2
import org.springframework.beans.factory.annotation.Value;
import org.springframework.context.annotation.Bean;
import org.springframework.context.annotation.Configuration;
import springfox.documentation.builders.ApiInfoBuilder;
import springfox.documentation.builders.PathSelectors;
import springfox.documentation.builders.RequestHandlerSelectors;
import springfox.documentation.service.ApiInfo;
import springfox.documentation.service.Contact;
import springfox.documentation.spi.DocumentationType;
import springfox.documentation.spring.web.plugins.Docket;
import springfox.documentation.swagger2.annotations.EnableSwagger2;

/**
 * Created by huangqingshi on 2019/1/8.
 */
@Configuration
@EnableSwagger2
public class SwaggerConfig {

    @Value("${swagger.switch}")
    private boolean swaggerSwitch;

    @Bean
    public Docket api() {
        Docket docket = new Docket(DocumentationType.SWAGGER_2);
        docket.enable(swaggerSwitch);
        docket
                .apiInfo(apiInfo())
                .select()
                .apis(RequestHandlerSelectors.basePackage("com.hqs.zk.register.controller")).paths(PathSelectors.any()).build();
        return docket;
    }

    private ApiInfo apiInfo() {
        return new ApiInfoBuilder()
                .title("Spring boot zk register")
                .description("测试")
                .contact(new Contact("黄青石","http://www.cnblogs.com/huangqingshi","68344150@qq.com"))
                .termsOfServiceUrl("http://www.cnblogs.com/huangqingshi")
                .version("1.0")
                .build();
    }
}
好了,接下来该启动工程了,启动之后访问: http://localhost:8080/swagger-ui.html
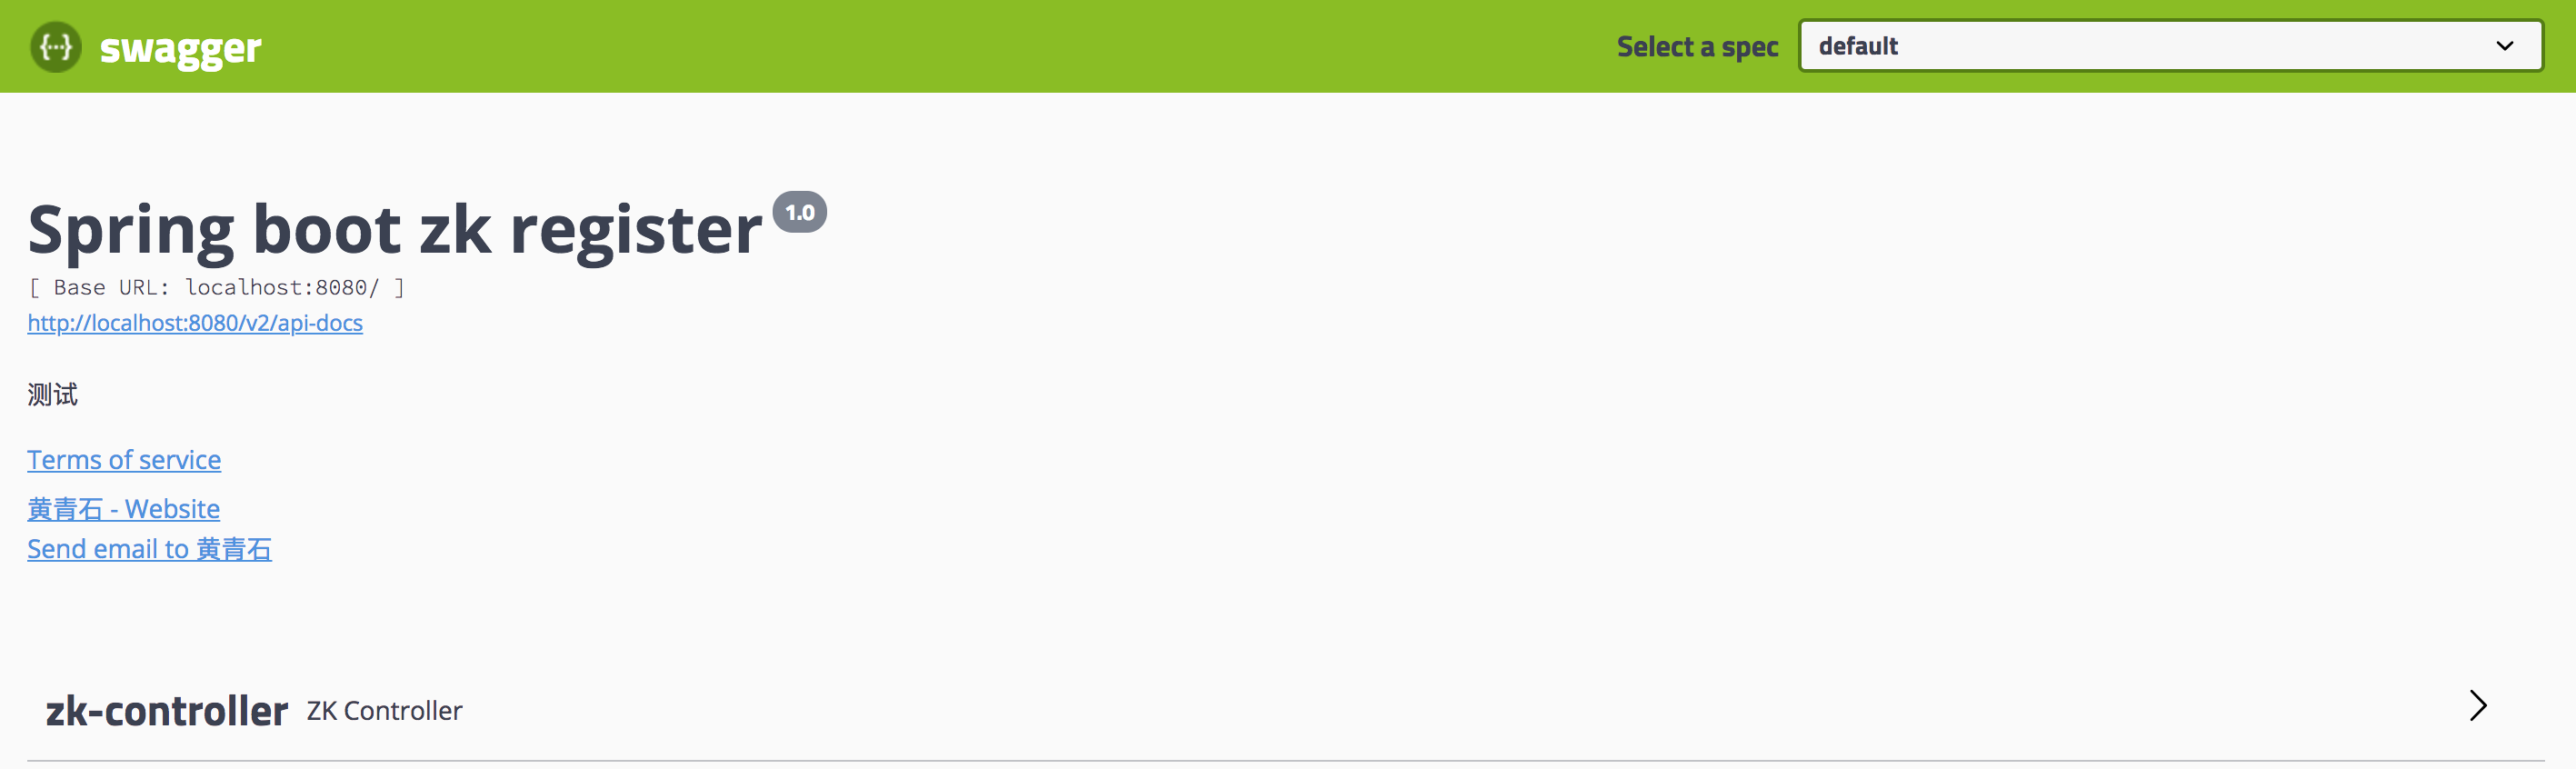
点击下面的zk-controller,对应controller的方法就会显示出来,然后点try it out, execute 相应的结果就直接出来了, 通过下面的图片,可以发现我本机的IP已经注册到里边了。 
接下来,咱们使用ZKUI连接上zookeeper,看一下是否真的有注册的机器(父节点用的monior),已经存在了,没有问题:

注册这块就算实现完了,我一直想实现一个简易的聊天,参考了各种资料然后实现了一把,也算圆梦了。下面开始实现简易netty版聊天(为什么选择netty?因为这个工具非常棒),使用google的protobuf进行序列化和反序列化:
首先从官网上下载protobuf工具,注意对应不同的操作系统,我的是WINDOWS的,直接下载一个EXE程序,你下载的哪个版本,需要使用与该版本对应的版本号,否则会出错误。
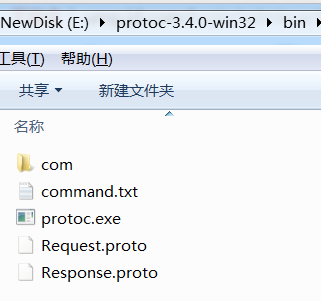
自己创建好对应的Request.proto和Response.proto,在里边指定好对应的字段和包名信息。分别执行命令即可生成对应的文件:protoc.exe ./Response.proto --java_out=./ 这个是生成Response的,还需要指定一条生成Request。
将文件夹放到工程里边,工程的大致接入如下:

Server的主要实现,主要基于protoBuf固定长度的进行实现的(序列化和反序列化一般通过固定长度或者分隔符实现),这样的话就不会造成粘包、拆包的问题。
public void bind(int port) throws Exception {
        //配置服务器端NIO线程组
        EventLoopGroup bossGroup = new NioEventLoopGroup();
        EventLoopGroup workGroup = new NioEventLoopGroup();

        try {
            ServerBootstrap b  = new ServerBootstrap();
            b.group(bossGroup, workGroup).channel(NioServerSocketChannel.class)
                    .childOption(ChannelOption.SO_KEEPALIVE, true)
                    .childHandler(new ChannelInitializer<SocketChannel>() {
                @Override
                protected void initChannel(SocketChannel socketChannel) throws Exception {
                    socketChannel.pipeline().addLast(new ProtobufVarint32FrameDecoder());
                    socketChannel.pipeline().addLast(new ProtobufDecoder(RequestProto.ReqProtocol.getDefaultInstance())).
                            addLast(new ProtobufVarint32LengthFieldPrepender()).addLast(new ProtobufEncoder());
                    socketChannel.pipeline().addLast(new ProBufServerHandler());
                }
            });
            //绑定端口,同步等待
            ChannelFuture f = b.bind(port).sync();
            if (f.isSuccess()) {
                System.out.println("启动 server 成功");
            }

        } catch (Exception  e) {
            e.printStackTrace();
        }
    }
客户端主要两个方式,一个方式是客户端向服务端发请求,一个方式是群组发消息,我为了快速实现,就直接发一条请求,并且将结果输出到日志中了。客户端使用一个线程执行两个不同的方法,然后将一个是发送给Server, 一个是发送给Group。发送给Server比较简单就直接给Server了。
    @PostConstruct
    public void start() throws Exception{
        connection(appConfig.getNettyServer(), appConfig.getNettyPort());
        for(int i = 1; i <= 1; i++) {
            int j = i;
            Runnable runnable = () -> {
                try {
                    sendMesgToServer(j);
                    sendMesgToGroup(j);
                } catch (Exception e) {
                    e.printStackTrace();
                }

            };

            new Thread(runnable).start();

        }
    }
发送给Group的话需要记住每次过来的唯一requestId,并且保存对应的channel,然后发送消息的时候遍历所有requestId,并且与之对应的发送消息:
    @Override
    protected void channelRead0(ChannelHandlerContext channelHandlerContext, RequestProto.ReqProtocol reqProtocol) throws Exception {
        RequestProto.ReqProtocol req = reqProtocol;
        CHANNEL_MAP.putIfAbsent(req.getRequestId(), (NioSocketChannel)channelHandlerContext.channel());
//        System.out.println("get Msg from Client:" + req.getReqMsg());
        handleReq(req);
    }

    @Override
    public void exceptionCaught(ChannelHandlerContext ctx, Throwable cause) throws Exception {
        System.out.println(cause.getMessage());
        ctx.close();
    }

    public void handleReq(RequestProto.ReqProtocol req) {
        Long originRequestId = req.getRequestId();

        if(req.getType() == Constants.CommandType.SERVER) {

            NioSocketChannel nioSocketChannel = CHANNEL_MAP.get(req.getRequestId());
            sendMsg(nioSocketChannel, originRequestId, originRequestId, Constants.CommandType.SERVER, "hello client");

        } else if(req.getType() == Constants.CommandType.GROUP) {
            for(Map.Entry<Long, NioSocketChannel> entry : CHANNEL_MAP.entrySet()) {
                //过滤自己收消息

                if(entry.getKey() == originRequestId) {
                    continue;
                }
                sendMsg(entry.getValue(), originRequestId, entry.getKey(), Constants.CommandType.GROUP, req.getReqMsg());
            }
        }


    }
输出的结果如下,自定义两个客户端,一个requestId是1L,另一个requestId是2L,然后都在启动的时候sleep 3秒,然后发送给server。sleep5秒发送到Group里边去,输出的结果就是如下这个样子的。
1L : send message to server successful!
2L : send message to server successful!
get Msg from Server: 2:hello client
received id:2- send to id:2
received id:1- send to id:1
get Msg from Server: 1:hello client

received id:1- send to id:2
get Msg from Group: 1:hello peoole in group
received id:2- send to id:1

get Msg from Group: 2:hello peoole in group
具体的代码可参考:https://github.com/stonehqs/ZKRegister
如果问题,欢迎留言讨论。

 浙公网安备 33010602011771号