Elasticsearch6.3 使用jdbc连接
Elasticsearch6.3开始执行sql,可以和使用数据库一样的CRUD进行操作elasticsearch,连接过程如下(安装下载Elasticsearch略):
一:项目中添加maven依赖
<repositories>
  <repository>
    <id>elastic.co</id>
    <url>https://artifacts.elastic.co/maven</url>
  </repository>
</repositories>

<dependency>
  <groupId>org.elasticsearch.plugin</groupId>
  <artifactId>jdbc</artifactId>
  <version>6.3.1</version>
</dependency>
二:使用测试代码连接
package com.hts;


import java.sql.Connection;
import java.sql.DriverManager;
import java.sql.ResultSet;
import java.sql.Statement;
import java.util.Properties;


public class ESJdbcTest {

    static String  driver = "org.elasticsearch.xpack.sql.jdbc.jdbc.JdbcDriver";
    static String elasticsearchAddress = "127.0.0.1:9200";

    public static Properties connectionProperties(){
        Properties properties = new Properties();
//        properties.put("user", "test_admin");
//        properties.put("password", "x-pack-test-password");
        return properties;
    }

    public static void main(String[] args) {

        String address = "jdbc:es://http://" + elasticsearchAddress;
        Properties connectionProperties = connectionProperties();
        try  {
            Connection connection = DriverManager.getConnection(address, connectionProperties);
            Statement statement = connection.createStatement();
            ResultSet results = statement.executeQuery(
                    "SELECT firstname, account_number FROM bank ORDER BY account_number DESC LIMIT 5");
          while(results.next()){
              System.out.println(results.getString("firstname"));
          }
        }catch (Exception e){
              e.printStackTrace();
        }

    }

}
三:发现Exception in thread "main" java.sql.SQLInvalidAuthorizationSpecException: current license is non-compliant for [jdbc] 的错误需要破解xpth,更新白金许可。
(一)在D:\elasticsearch-6.3.0\modules\x-pack\x-pack-core目录下找到x-pack-core-6.3.1.jar复制一份出来
(二)新建两个java文件分别命名为LicenseVerifier.java和XPackBuild.java,将下面代码黏贴
①:LicenseVerifier.java
package org.elasticsearch.license;

import java.nio.*;
import org.elasticsearch.common.bytes.*;
import java.util.*;
import java.security.*;
import org.elasticsearch.common.xcontent.*;
import org.apache.lucene.util.*;
import org.elasticsearch.core.internal.io.*;
import java.io.*;


public class LicenseVerifier
{
    public static boolean verifyLicense(final License license, final byte[] encryptedPublicKeyData) {
       return true;
    }

    public static boolean verifyLicense(final License license) {
         return true;
    }
}
②:XPackBuild.java
package org.elasticsearch.xpack.core;

import org.elasticsearch.common.io.*;
import java.net.*;
import org.elasticsearch.common.*;
import java.nio.file.*;
import java.io.*;
import java.util.jar.*;

public class XPackBuild
{
    public static final XPackBuild CURRENT;
    private String shortHash;
    private String date;

    @SuppressForbidden(reason = "looks up path of xpack.jar directly")
    static Path getElasticsearchCodebase() {
        final URL url = XPackBuild.class.getProtectionDomain().getCodeSource().getLocation();
        try {
            return PathUtils.get(url.toURI());
        }
        catch (URISyntaxException bogus) {
            throw new RuntimeException(bogus);
        }
    }

    XPackBuild(final String shortHash, final String date) {
        this.shortHash = shortHash;
        this.date = date;
    }

    public String shortHash() {
        return this.shortHash;
    }

    public String date() {
        return this.date;
    }

    static {
        final Path path = getElasticsearchCodebase();
        String shortHash = null;
        String date = null;
        Label_0157: {

            shortHash = "Unknown";
            date = "Unknown";
        }
        CURRENT = new XPackBuild(shortHash, date);
    }
}
(三)使用javac 编译这两个java文件,需要引入import的依赖,使用-cp参数,需要依赖原本的x-pack-core-6.3.1.jar,lucene-core-7.3.1.jar,elasticsearch-6.3.0.jar,elasticsearch-core-6.3.0.jar这四个java包(windows下使用分号分隔jar路径,linux下使用冒号分隔,后三个jar包的路径为D:\elasticsearch-6.3.0\lib) ``` javac -cp "x-pack-core-6.3.0.jar路径;lucene-core-7.3.1.jar路径;elasticsearch-6.3.0.jar路径;elasticsearch-core-6.3.0.jar路径" LicenseVerifier.java路径 javac -cp "x-pack-core-6.3.0.jar路径;lucene-core-7.3.1.jar路径;elasticsearch-6.3.0.jar路径;elasticsearch-core-6.3.0.jar路径" XPackBuild.java路径
(四)将编译生成的LicenseVerifier.class覆盖复制出来的x-pack-core-6.3.0.jar中目录org/elasticsearch/license下的LicenseVerifier.class,将生成的XPackBuild.class覆盖org/elasticsearch/xpack/code目录下的XPackBuild.class。
(五)将覆盖成功后的x-pack-core-6.3.0.jar复制回D:\elasticsearch-6.3.0\modules\x-pack\x-pack-core目录下覆盖原来的。
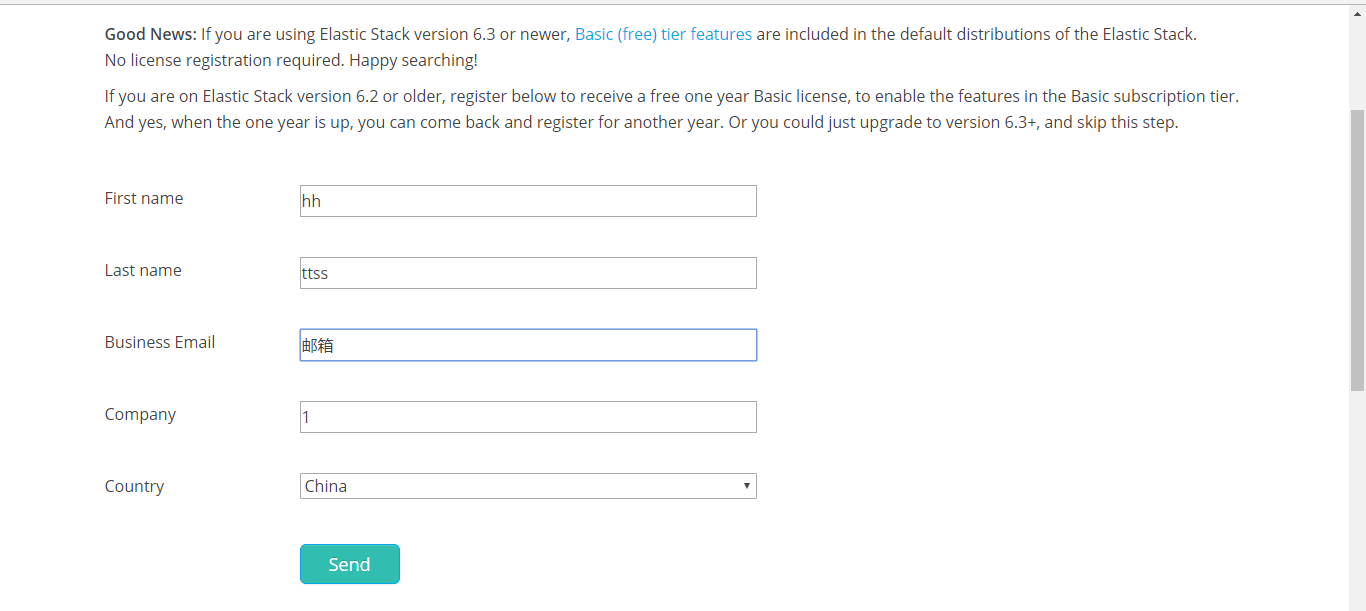
(六)获取 license 证书
①:https://license.elastic.co/registration填些用户名,邮箱(重要,获取下载链接),Country选择China,其他信息随意填写,点击Send
②打开邮箱获取的地址,将下载后的文件改名为license.json
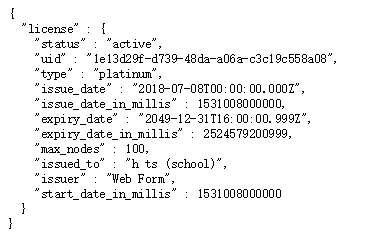
③修改文件中的内容,将两个属性改为以下
将 "type":"basic" 替换为 "type":"platinum" # 基础班变更为铂金版
将 "expiry_date_in_millis":1561420799999替换为 "expiry_date_in_millis":3107746200000# 1年变为50年
④使用curl替换 license(license.json指的是刚刚下载修改属性后的证书,要开启elasticsearch服务)
curl -XPUT 'http://127.0.0.1:9200/_xpack/license?acknowledge=true' -d @license.json
⑤可能遇到Cannot install a [PLATINUM] license unless TLS is configured or security is disabled的错误,解决方法在elasticsearch.yml新增:
xpack.security.enabled: false
⑥上传后查看证书时间http://127.0.0.1:9200/_license
##四:至此可以使用jdbc连接


 浙公网安备 33010602011771号