基于ollama使用Gradio框架调用开源大模型
本文基于ollama的接口,使用Gradio框架,调用开源大模型deepseek创建简单应用
搭建Ollama参考博文:本文安装好的模型如下
PS C:\Users\huhy> ollama list
NAME                ID              SIZE      MODIFIED
bge-large:latest    b3d71c928059    670 MB    12 days ago
deepseek-r1:32b     38056bbcbb2d    19 GB     12 days ago
deepseek-r1:14b     ea35dfe18182    9.0 GB    12 days ago
deepseek-r1:8b      28f8fd6cdc67    4.9 GB    12 days ago
deepseek-r1:7b      0a8c26691023    4.7 GB    12 days ago
deepseek-r1:1.5b    a42b25d8c10a    1.1 GB    12 days ago
如果因为网络原因下载失败,可手动以gguf导入大模型文件
创建一个名为 的文件Modelfile,其中FROM包含要导入的模型的本地文件路径的指令。(注意makefile文件和gguf文件要在同一目录)
FROM ./vicuna-33b.Q4_0.gguf
在 Ollama 中创建模型
ollama create example -f Modelfile
运行模型
ollama run example
Gradio框架
Gradio 是一个开源 Python 软件包,可以快速为机器学习模型、API 或任意 Python 函数构建演示或 Web 应用程序。然后只需几秒钟即可使用 Gradio 的内置共享功能分享演示或 Web 应用程序的链接。无需 JavaScript、CSS 或 Web 托管经验!
实验环境:Ubuntu 24.04 LTS
安装Gradio:
- 先决条件:Gradio 需要Python 3.10 或更高版本。
root@huhy:~# python3 --version
Python 3.12.3
- 安装pip3并使用虚拟环境
apt install python3-pip python3-venv -y
python3 -m venv myenv
source myenv/bin/activate
- 更新升级pip3,安装Gradio
python3 -m pip install --upgrade pip
pip install --upgrade gradio
构建第一个演示
vi demo.py
import gradio as gr

def greet(name, intensity):
    return "Hello, " + name + "!" * int(intensity)

demo = gr.Interface(
    fn=greet,
    inputs=["text", "slider"],
    outputs=["text"],
)

# 设置服务器监听地址为 0.0.0.0,允许外部访问
demo.launch(server_name="0.0.0.0", server_port=7860)
(myenv) root@huhy:~# python3 demo.py
* Running on local URL:  http://0.0.0.0:7860

To create a public link, set `share=True` in `launch()`.
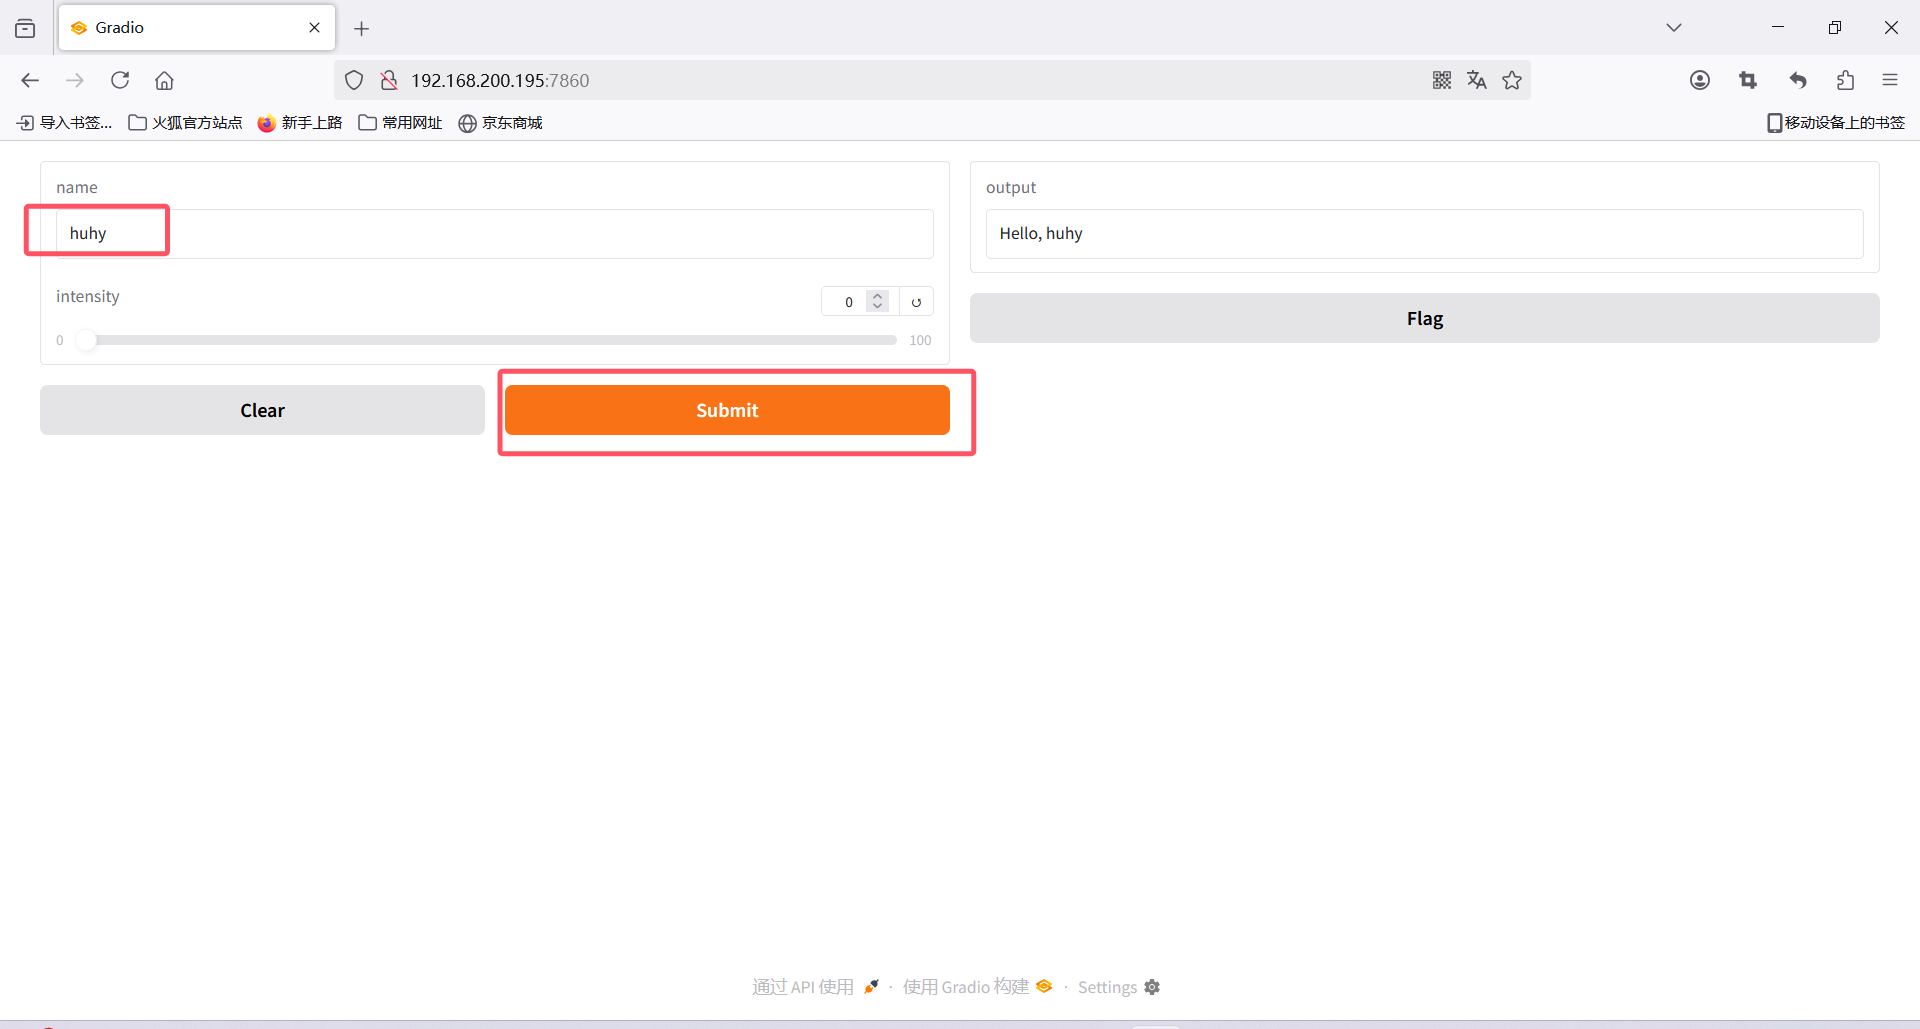
浏览器访问:http://localhost:7860
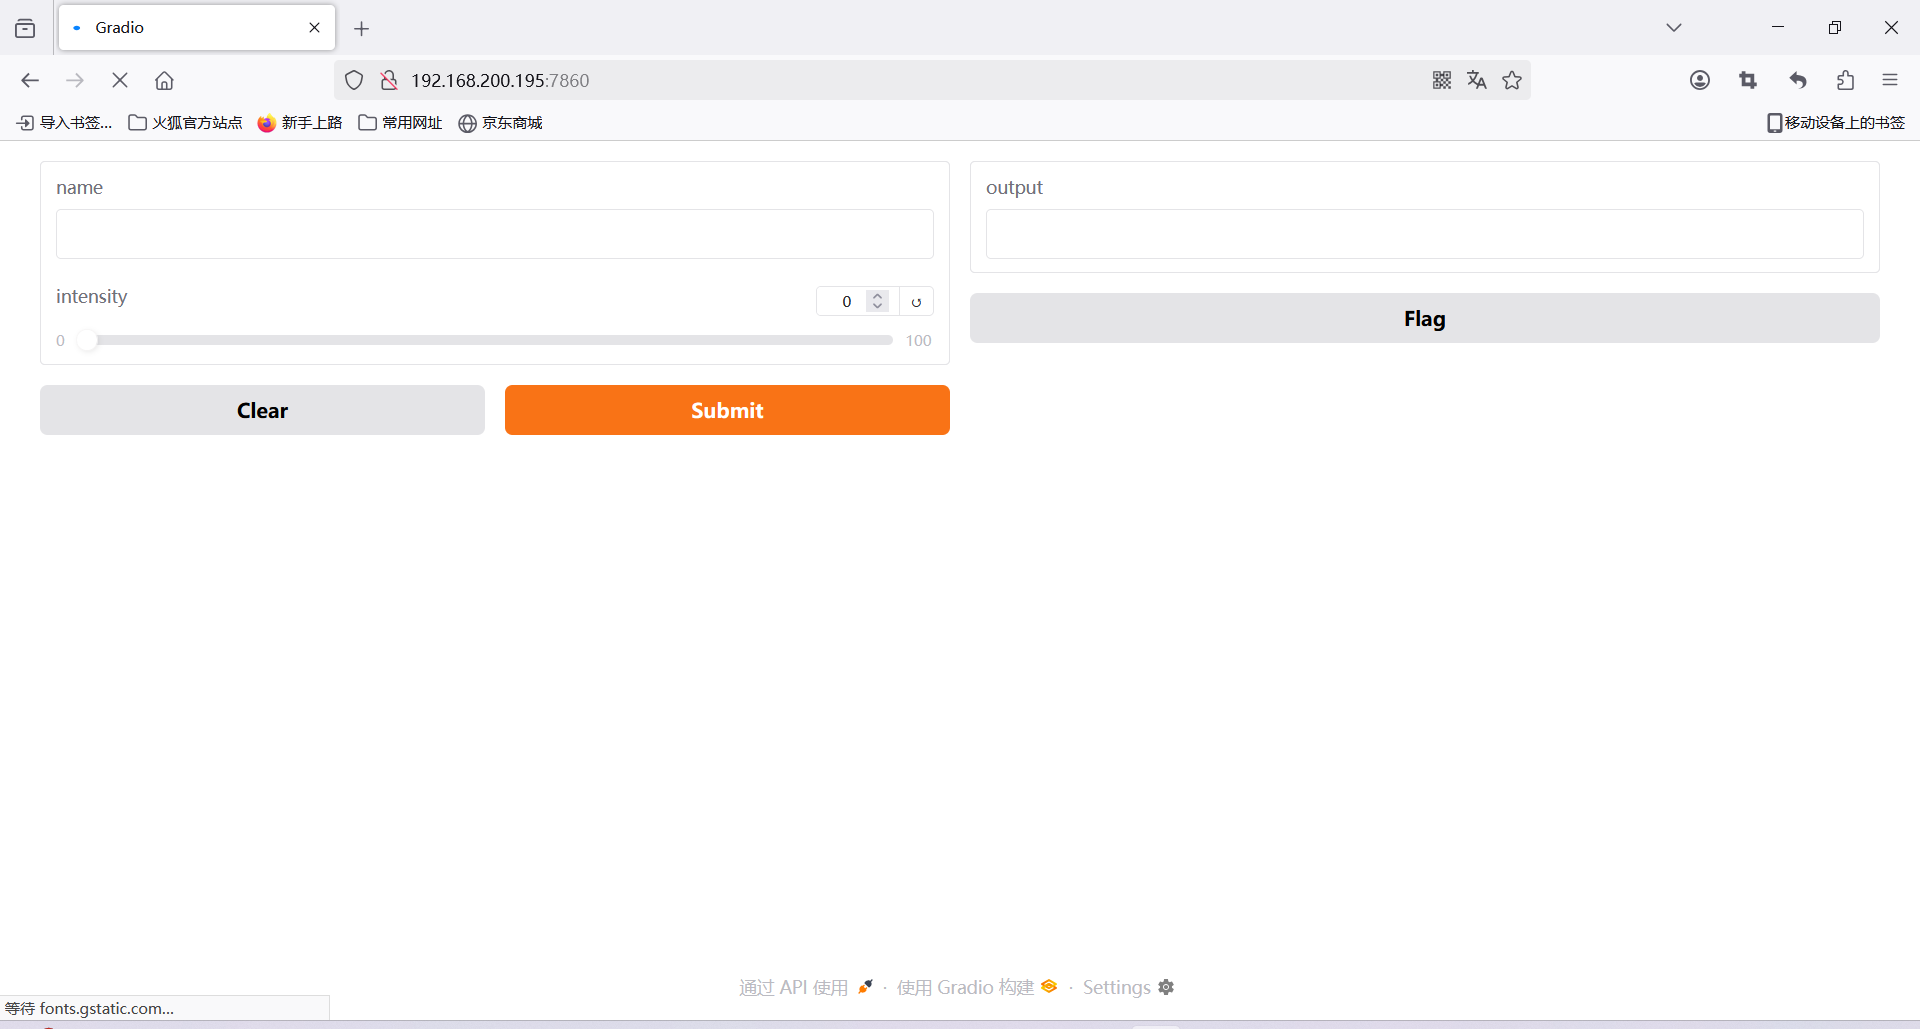
在左侧的文本框中输入您的姓名,拖动滑块,然后按“提交”按钮
如果需要设置一个公共链接,只需设置share=True,launch()就会创建一个可公开访问的 URL
import gradio as gr

def greet(name):
    return "Hello " + name + "!"

demo = gr.Interface(fn=greet, inputs="textbox", outputs="textbox")

demo.launch(share=True)
创建聊天机器人
聊天机器人是大型语言模型 (LLM) 的热门应用。使用 Gradio,可以轻松构建聊天应用程序并与用户共享,或者使用直观的 UI 亲自尝试。
本教程使用gr.ChatInterface(),这是一种高级函数,允许您快速创建聊天机器人 UI,通常只需几行 Python 代码。它可以轻松适应以支持多模式聊天机器人或需要进一步定制的聊天机器人。
为 OpenAI-API 兼容端点提供服务(例如 Ollama),则可以在一行 Python 中启动 ChatInterface。
pip install openai
vi chat.py
使用Ollama的URL、模型和可选令牌
import gradio as gr

gr.load_chat("http://192.168.0.101:11434/v1/", model="deepseek-r1:1.5b", token="***").launch(server_name="0.0.0.0", server_port=7860)
(myenv) root@huhy:~# python3 chat.py
* Running on local URL:  http://0.0.0.0:7860

To create a public link, set `share=True` in `launch()`.
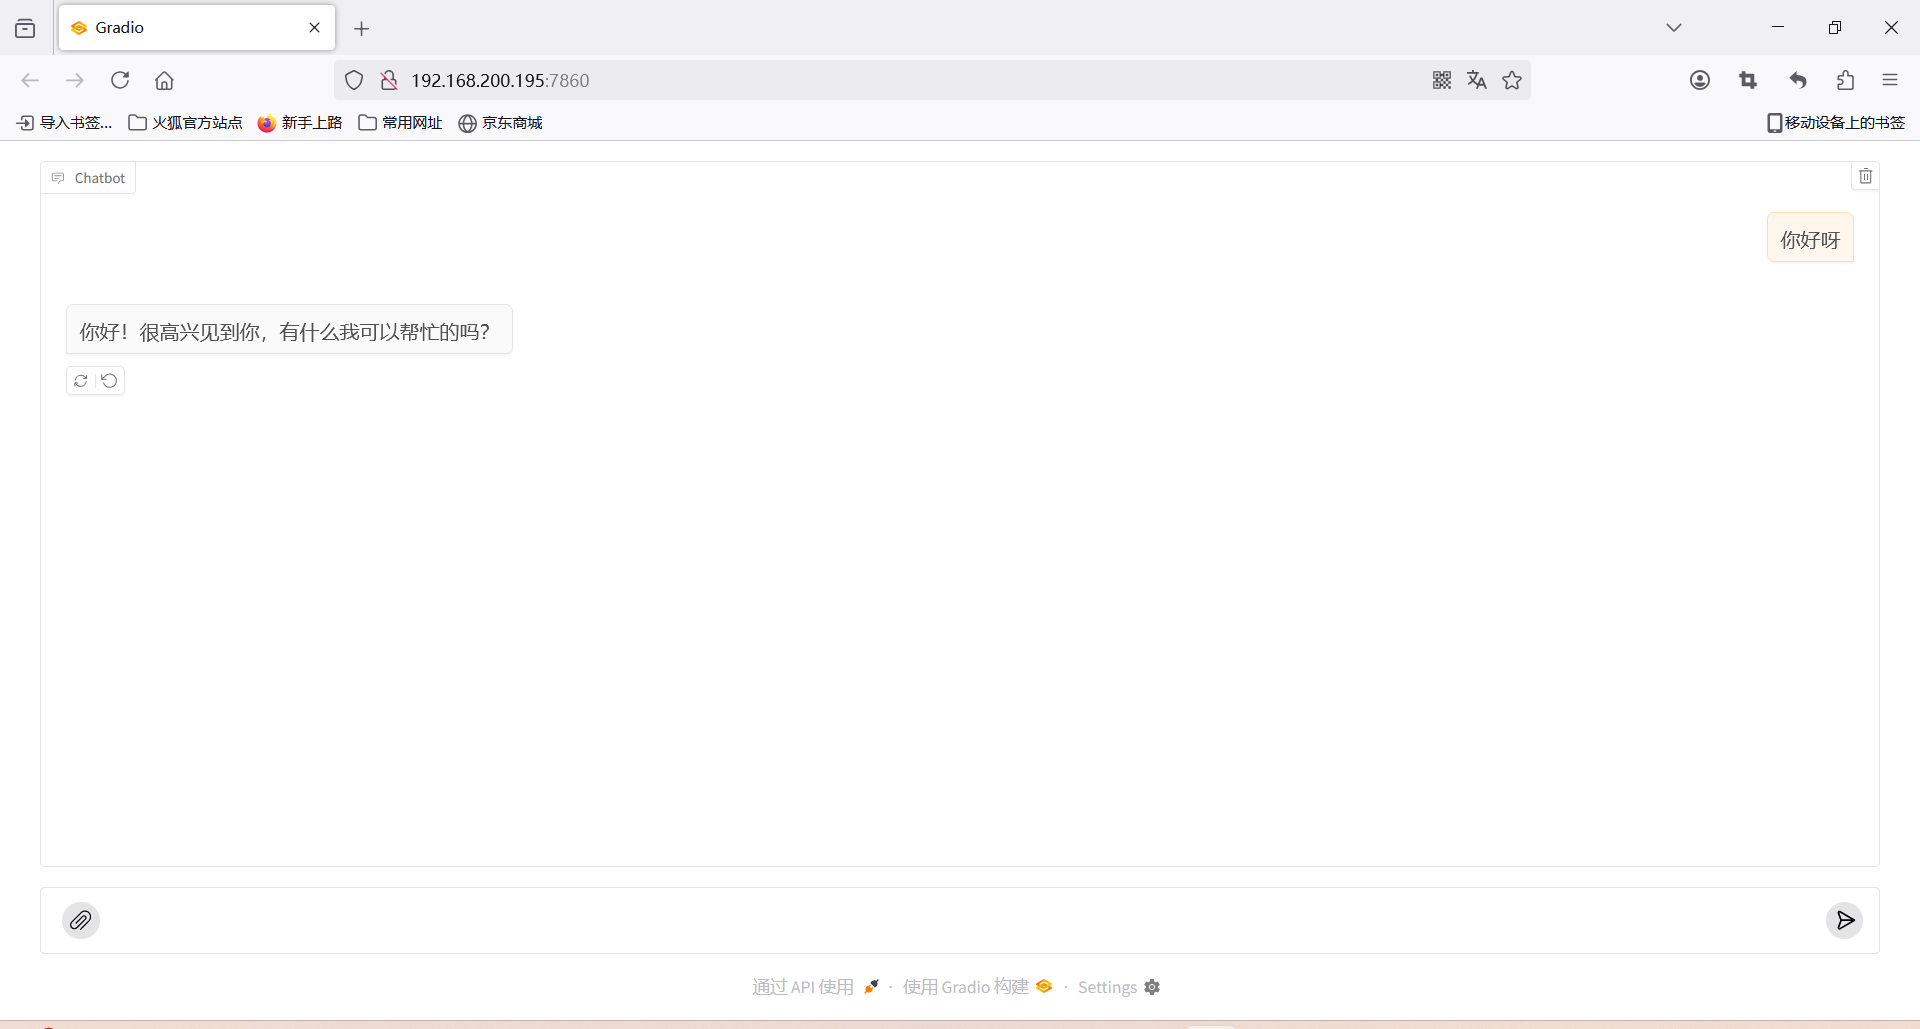
- 浏览器访问:http://192.168.200.195:7860
自定义聊天机器人或文本框组件
如果想要自定义gr.Chatbot或gr.Textbox组成ChatInterface,那么可以传入自己的聊天机器人或文本框组件。以下是应用本节讨论的参数的示例:
import gradio as gr

def yes_man(message, history):
    if message.endswith("?"):
        return "Yes"
    else:
        return "Ask me anything!"

gr.ChatInterface(
    yes_man,
    type="messages",
    chatbot=gr.Chatbot(height=300),
    textbox=gr.Textbox(placeholder="Ask me a yes or no question", container=False, scale=7),
    title="Yes Man",
    description="Ask Yes Man any question",
    theme="ocean",
    examples=["Hello", "Am I cool?", "Are tomatoes vegetables?"],
    cache_examples=True,
).launch(server_name="0.0.0.0", server_port=7860)
代码解读
import gradio as gr
def yes_man(message, history):
"""
定义一个名为yes_man的函数,用于处理用户输入的消息。
参数:
- message: 用户输入的当前消息。
- history: 聊天历史记录(在这个例子中未使用)。
返回值:
- 如果用户的消息以问号结尾,返回"Yes"。
- 否则,返回"Ask me anything!"。
"""
if message.endswith("?"): # 检查用户的消息是否以问号结尾
return "Yes" # 如果是,返回"Yes"
else:
return "Ask me anything!" # 否则,返回提示信息
# 使用gr.ChatInterface创建一个聊天界面
gr.ChatInterface(
yes_man, # 指定处理用户输入的函数
type="messages", # 设置界面类型为聊天消息形式
chatbot=gr.Chatbot(height=300), # 创建一个高度为300像素的聊天机器人组件
textbox=gr.Textbox(placeholder="Ask me a yes or no question", container=False, scale=7), # 创建一个文本框,提示用户输入问题
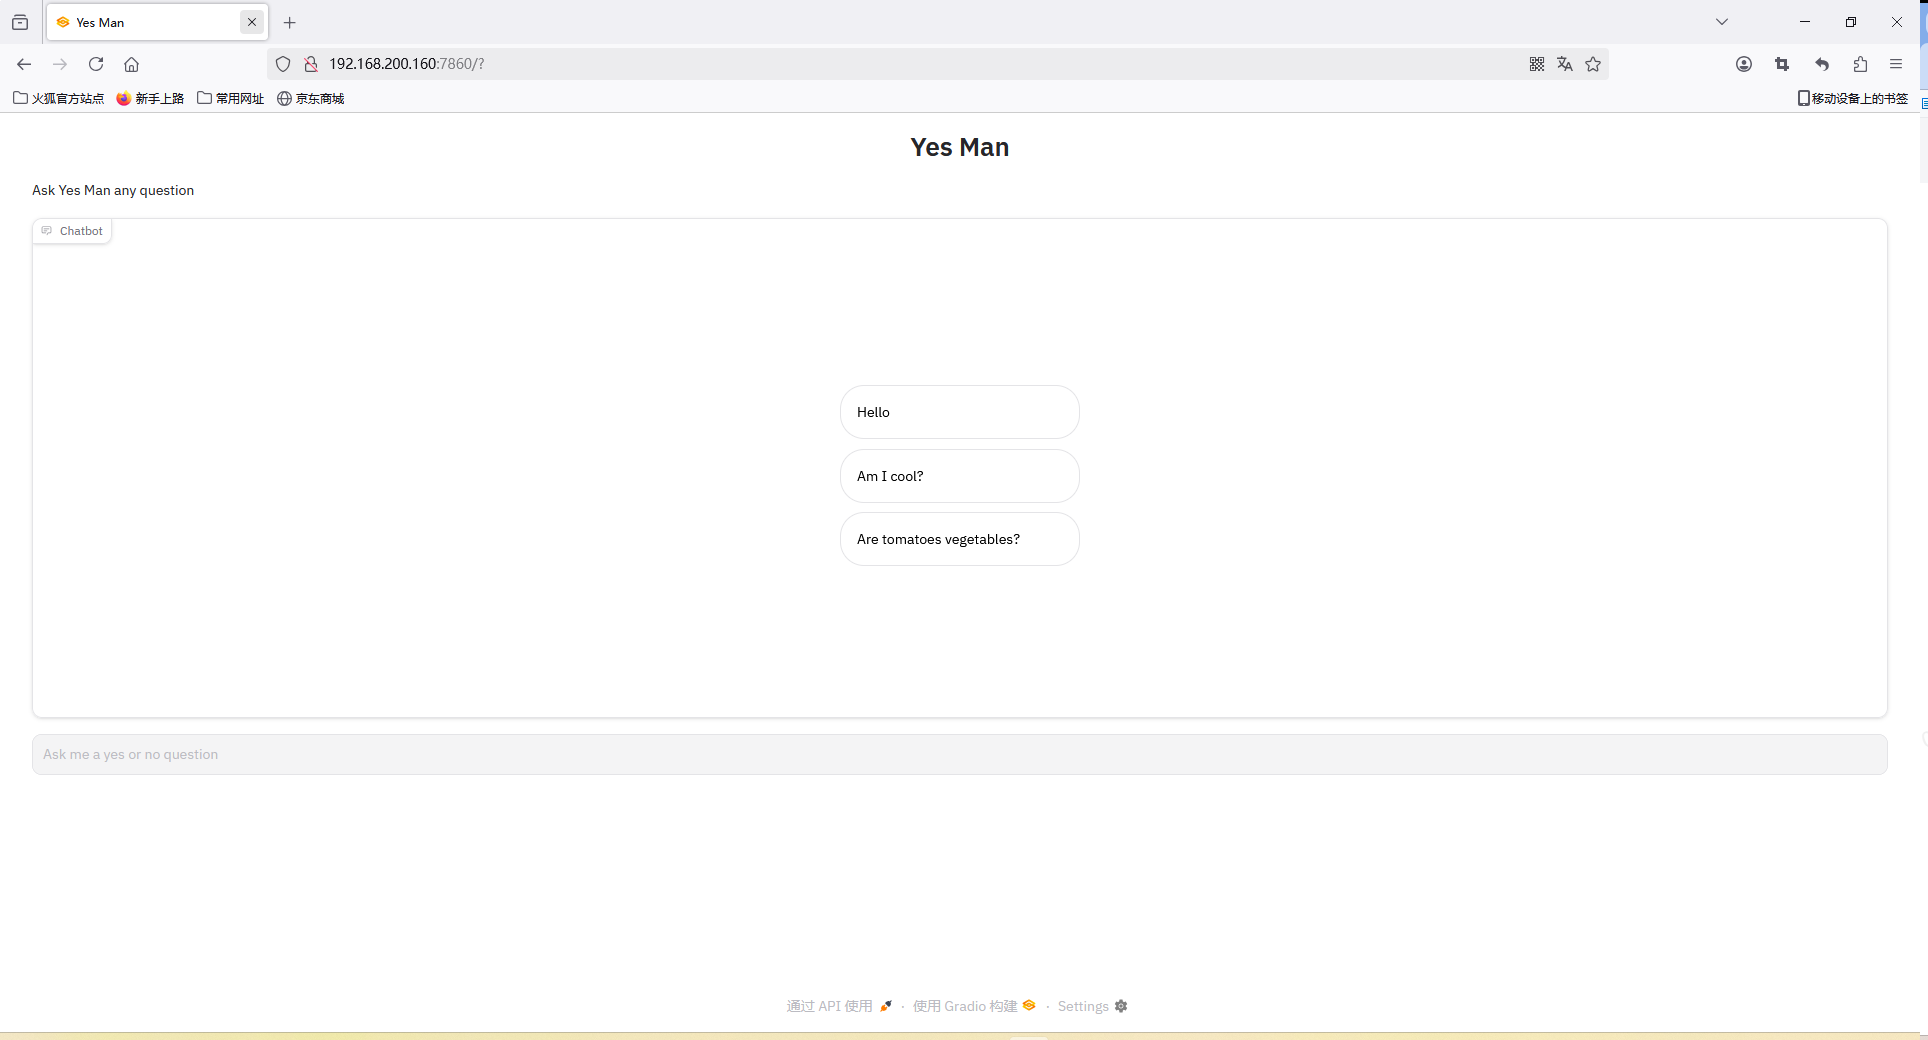
title="Yes Man", # 设置界面的标题为"Yes Man"
description="Ask Yes Man any question", # 设置界面的描述信息
theme="ocean", # 设置界面主题为"ocean"
examples=["Hello", "Am I cool?", "Are tomatoes vegetables?"], # 提供一些示例问题
cache_examples=True, # 缓存示例问题以提高性能
).launch(server_name="0.0.0.0", server_port=7860) # 启动Web服务,监听所有IP地址的7860端口
- 界面访问
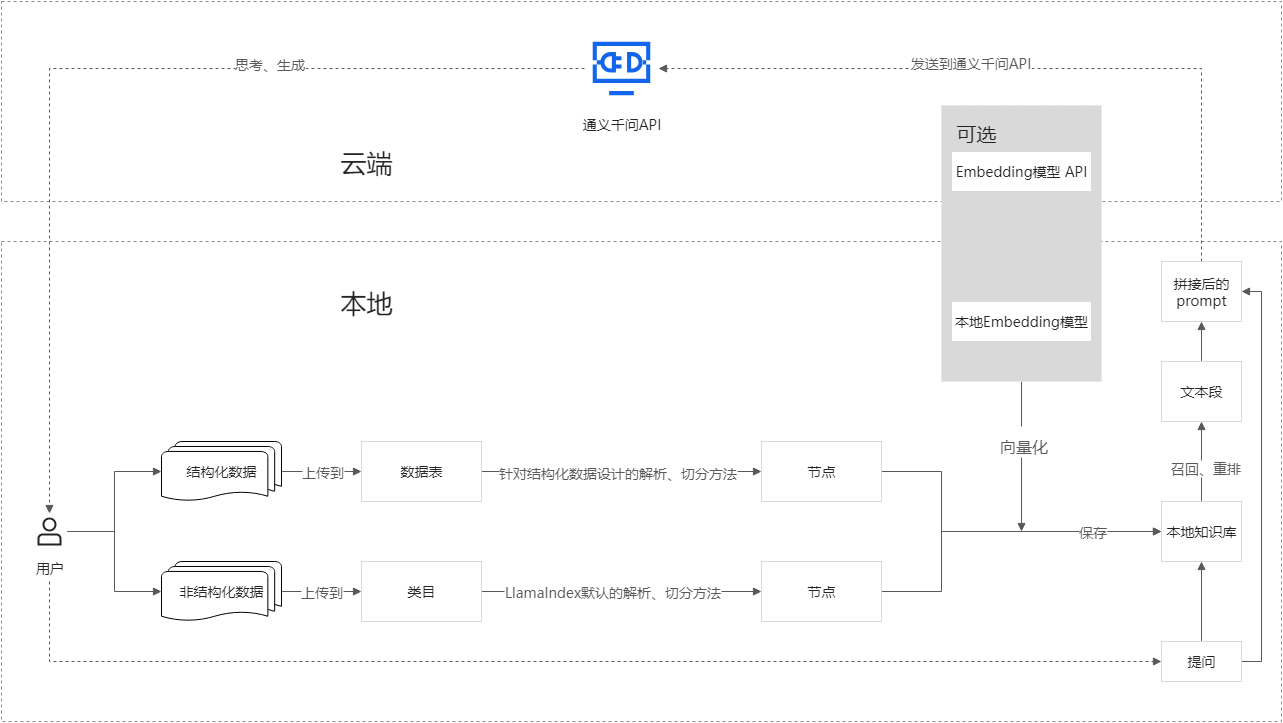
基于本地知识库构建RAG应用
官网:该应用由Gradio实现
在本应用中,检索环节在本地执行,能够便捷地管理和维护知识文档、灵活定义文档切分方法,同时避免因文件体积庞大而导致的上传失败问题;生成环节则默认调用由百炼提供的通义千问API(注意:该应用不适配于r1的推理模型)
- 下载软件包
apt install -y unzip
unzip local_rag.zip
- 该文件目录结构如下:
File文件夹下有Structured 喝Unstructured文件夹,存储结构化数据(数据库表等)和非结构化数据(文档图片视频等)
VectorStore用于存储知识库
images存储聊天头像的图片
html_string.py用于配置前端web样式
chat.py和main.py定义整体的大模型逻辑结构
root@huhy:~/local_rag# ls
chat.py       File            images   __pycache__  requirements.txt  VectorStore
create_kb.py  html_string.py  main.py  README.md    upload_file.py
- 安装python虚拟环境:注意Python版本需要不低于3.8
apt install python3-venv -y
python3 -m venv myenv
source /root/myenv/bin/activate
- 安装依赖
cd /root/local_rag
pip install -r requirements.txt
- 将API Key配置到环境变量

# 用你的百炼API Key代替YOUR_DASHSCOPE_API_KEY
echo "export DASHSCOPE_API_KEY='YOUR_DASHSCOPE_API_KEY'" >> ~/.bashrc
source ~/.bashrc
- 运行应用:在local_rag目录下运行:
uvicorn main:app --host 0.0.0.0 --port 80
(myenv) root@huhy:~/local_rag# uvicorn main:app --host 0.0.0.0 --port 80
INFO:     Started server process [328929]
INFO:     Waiting for application startup.
INFO:     Application startup complete.
INFO:     Uvicorn running on http://0.0.0.0:80 (Press CTRL+C to quit)
- 浏览器访问界面IP即可使用
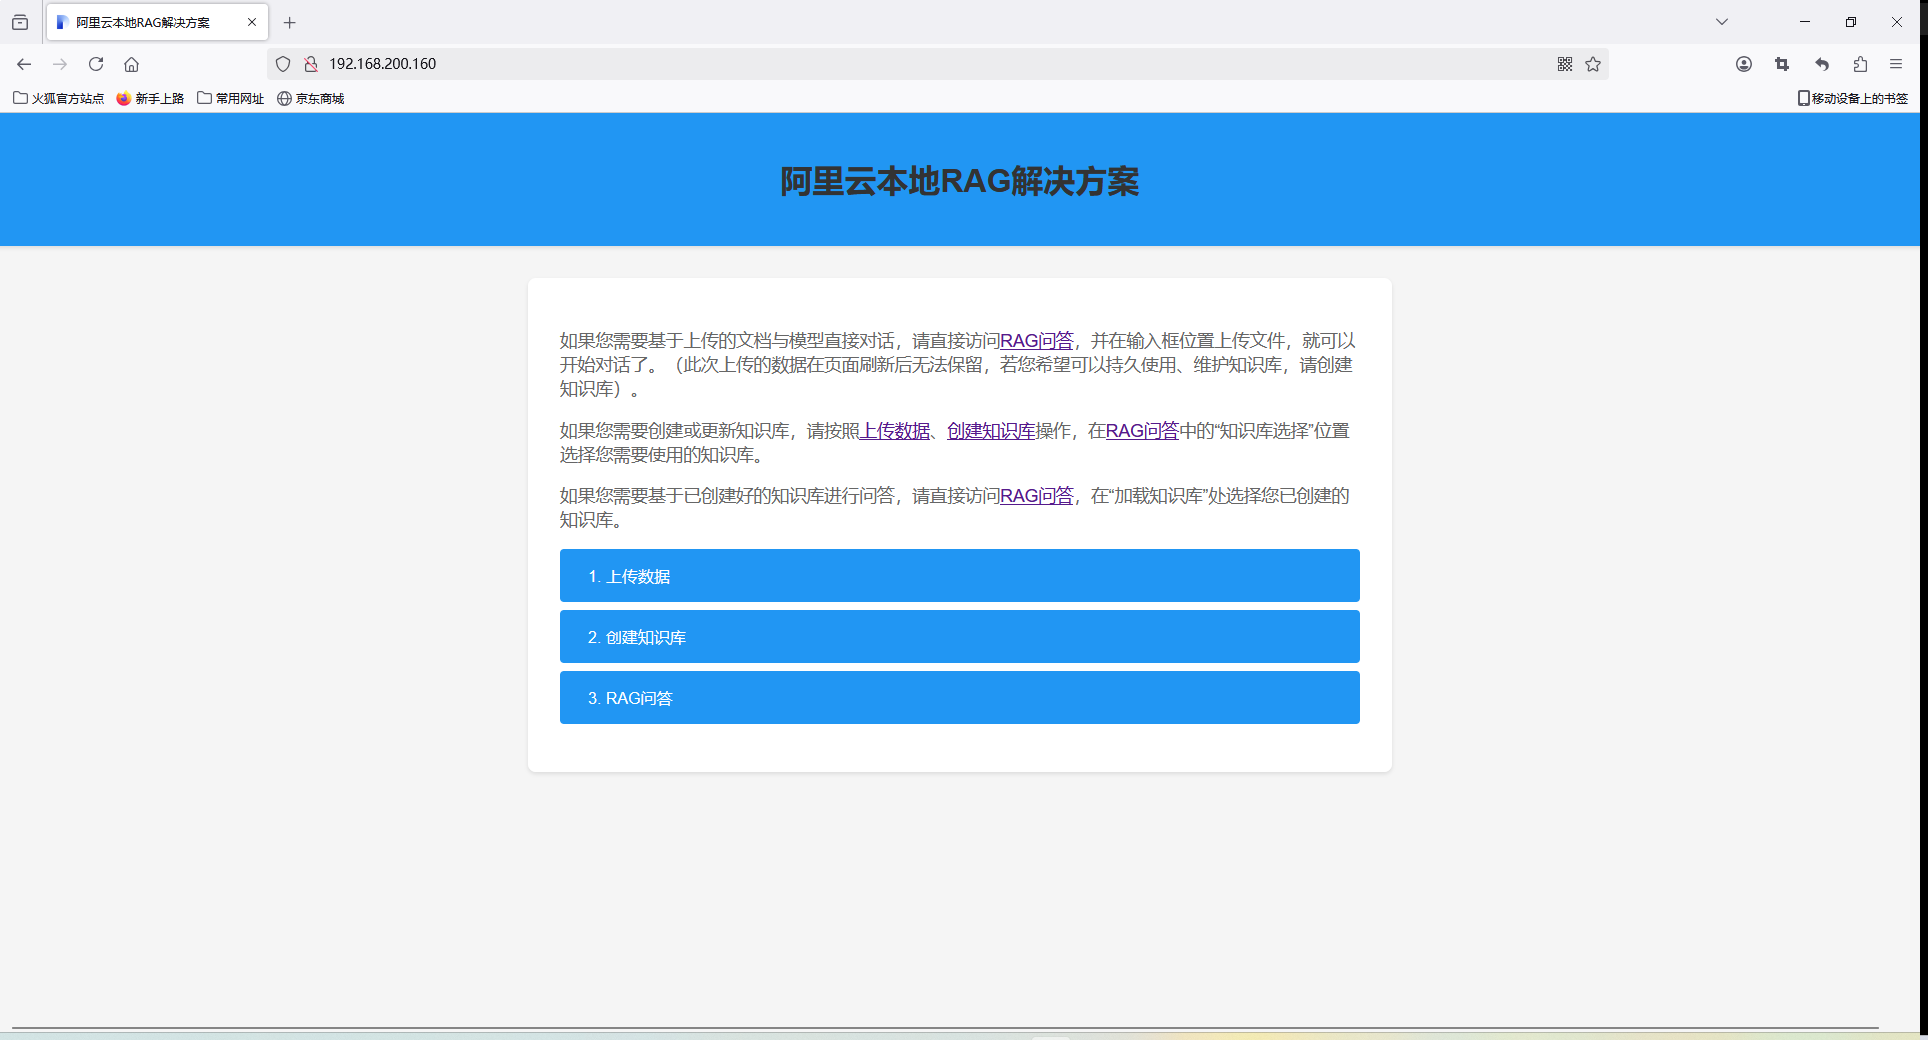
该应用默认使用阿里云嵌入的本地大模型,提供默认的千问模型,例如qwen:max等,需要按照token收费,有免费额度使用,如果需要修改模型接口,则修改以下文件:
- 本地Oallam提供的模型如下
PS C:\Users\huhy> ollama list
NAME                ID              SIZE      MODIFIED
qwen2.5:latest      845dbda0ea48    4.7 GB    27 hours ago
- 修改接口地址
vim chat.py
 # 改为Ollame接口地址
 72         base_url="http://172.29.0.145:11434/v1",
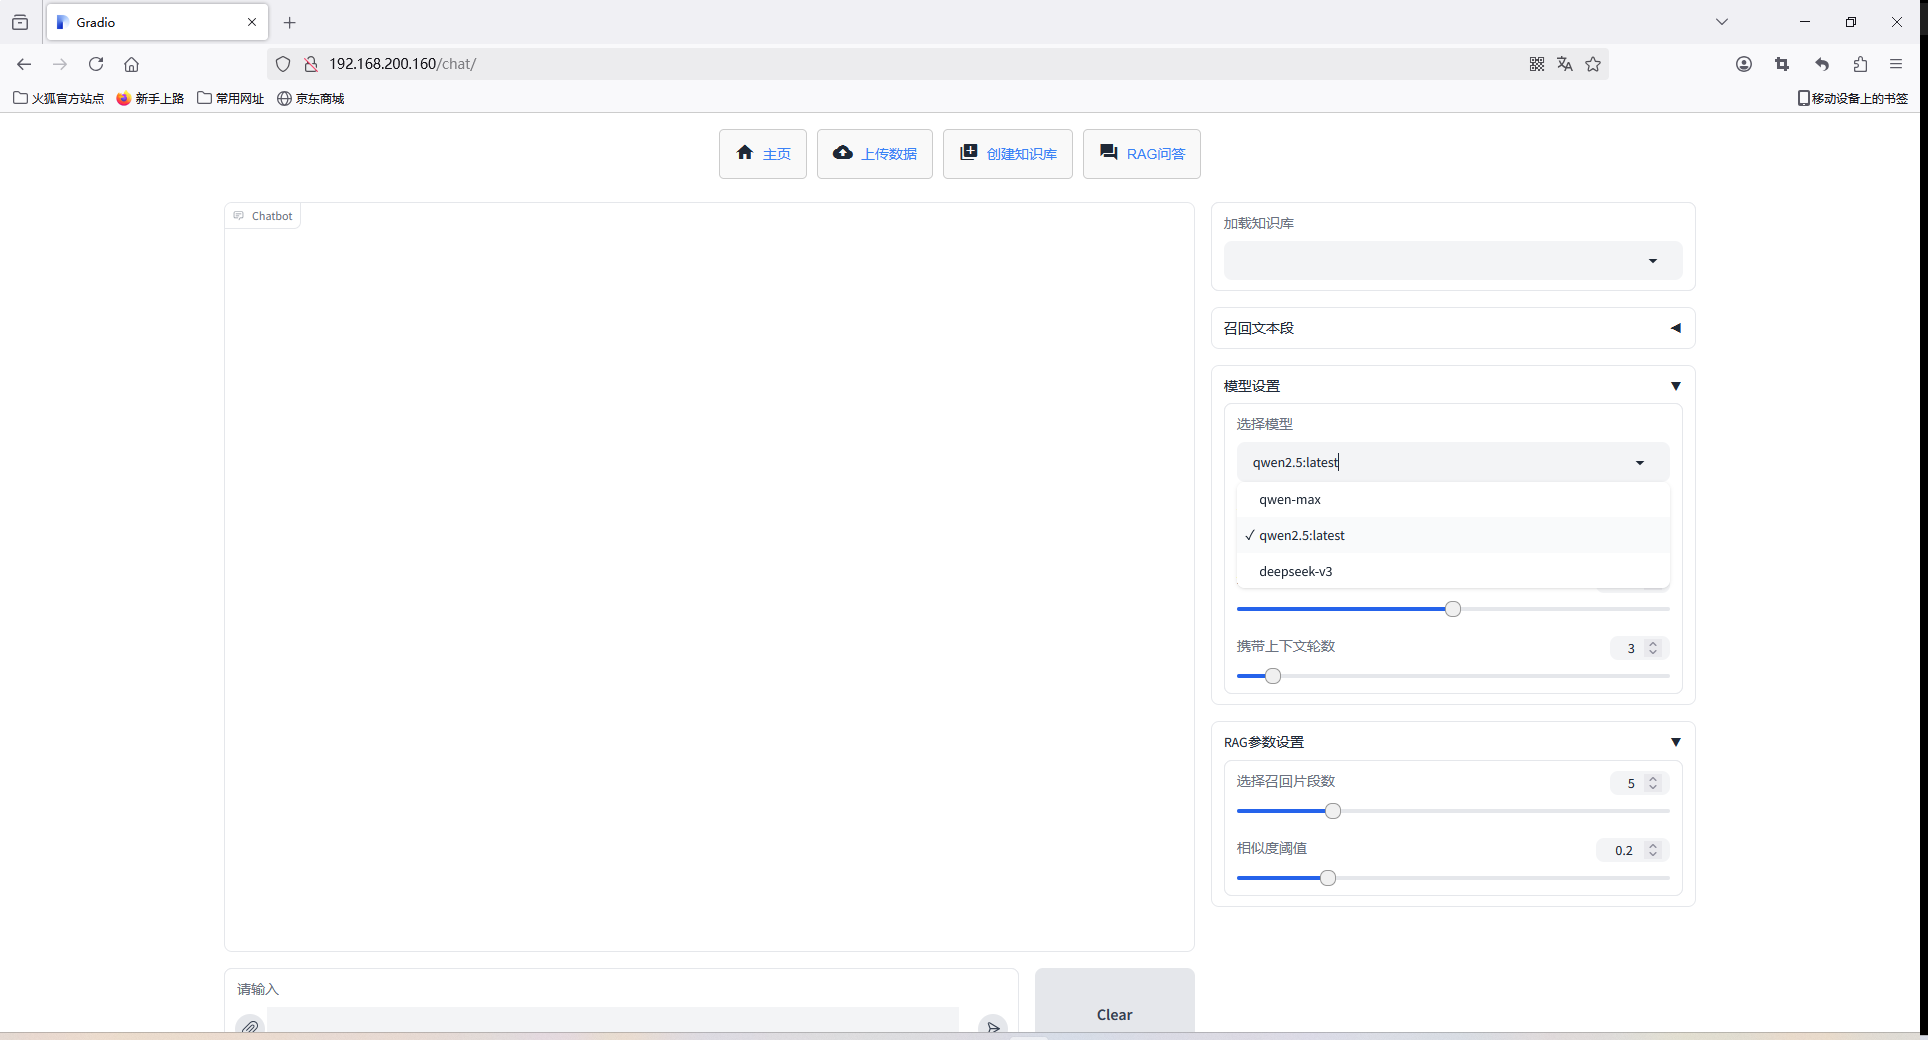
- 修改模型名称:
vim main.py
# 将默认的模型名称改为本地模型名称,例如qwen2.5:latest
 33                     model =gr.Dropdown(choices=['qwen-max','qwen2.5:latest','deepseek-v3'],label="选择模型",interact    ive=True,value="qwen-max",scale=2)
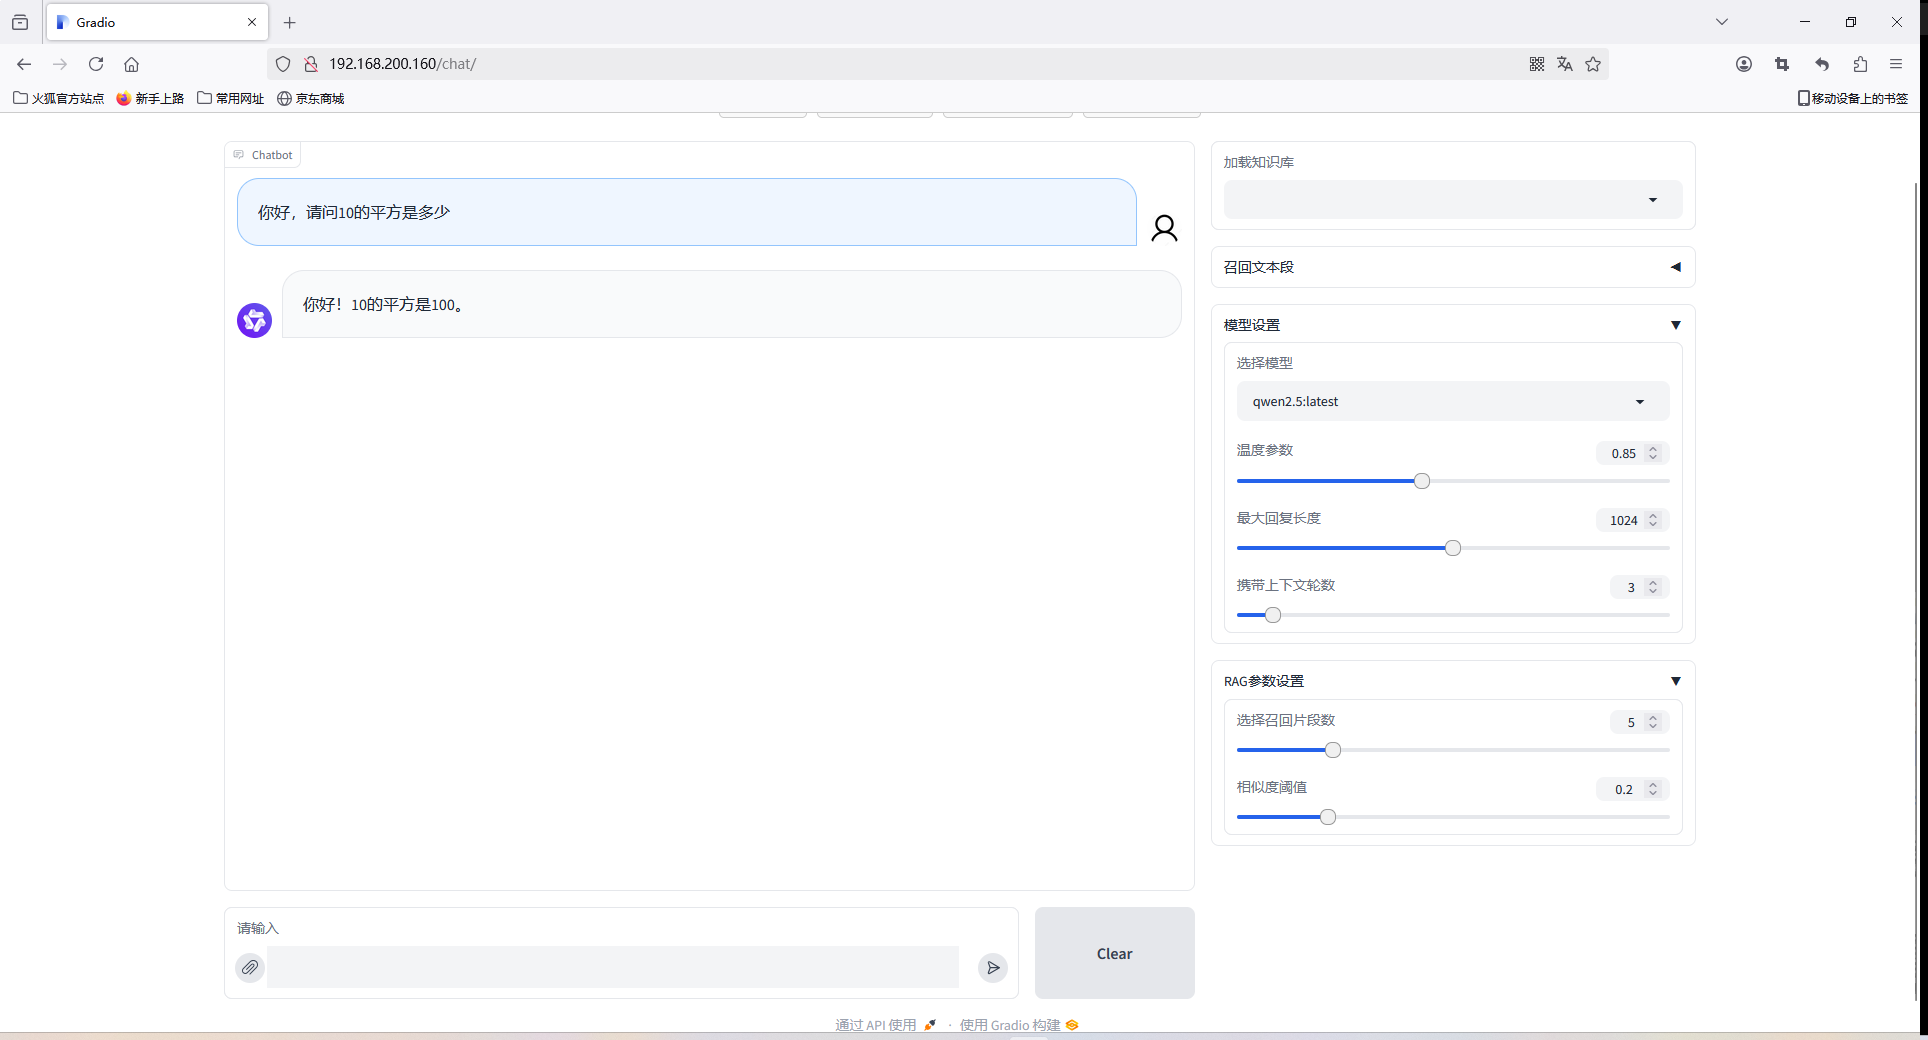
- 重启服务即可使用

 浙公网安备 33010602011771号