


spring security结合数据库验证用户-XML配置方式
之前的用户信息我们都是使用的内存用户,测试例子可以,实际中使用肯定不行,需要结合数据库进行验证用户。这就是本节的重点:
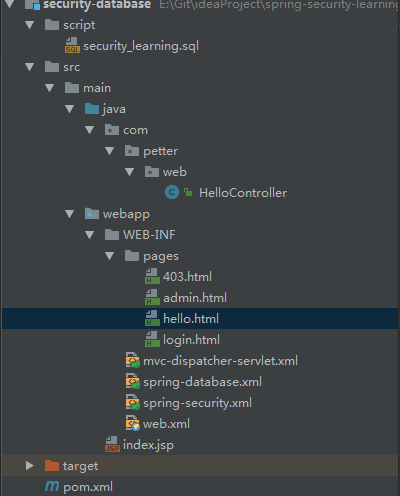
项目目录如下:
在之前的项目中的依赖中添加两个依赖:
<dependency>
    <groupId>org.springframework</groupId>
    <artifactId>spring-jdbc</artifactId>
    <version>${spring.version}</version>
</dependency>
<!-- 用于thymeleaf中使用security的标签 -->
<dependency>
     <groupId>org.thymeleaf.extras</groupId>
     <artifactId>thymeleaf-extras-springsecurity4</artifactId>
     <version>3.0.2.RELEASE</version>
</dependency>
<!-- mysql -->
 <dependency>
      <groupId>mysql</groupId>
      <artifactId>mysql-connector-java</artifactId>
      <version>${mysql.connector.version}</version>
 </dependency>
spring-jdbc依赖用于数据库查询,thymeleaf-extras-springsecurity4是thymeleaf对security标签的支持
在数据库中添加两张表:
CREATE TABLE users (
  username VARCHAR(45) NOT NULL ,
  password VARCHAR(45) NOT NULL ,
  enabled BOOLEAN DEFAULT TRUE NOT NULL,
  PRIMARY KEY (username)
);
CREATE TABLE user_roles (
  user_role_id int(11) NOT NULL AUTO_INCREMENT,
  username varchar(45) NOT NULL,
  role varchar(45) NOT NULL,
  PRIMARY KEY (user_role_id),
  UNIQUE KEY uni_username_role (role,username),
  KEY fk_username_idx (username),
  CONSTRAINT fk_username FOREIGN KEY (username) REFERENCES users (username)
);
INSERT INTO users(username,password,enabled) VALUES ('hxf','123456', true);
INSERT INTO users(username,password,enabled) VALUES ('wpp','123456', true);
INSERT INTO user_roles (username, role) VALUES ('hxf', 'ROLE_USER');
INSERT INTO user_roles (username, role) VALUES ('hxf', 'ROLE_ADMIN');
INSERT INTO user_roles (username, role) VALUES ('wpp', 'ROLE_USER');
这里参考 http://docs.spring.io/spring-security/site/docs/4.2.1.RELEASE/reference/htmlsingle/#user-schema 官网给的配置
一、添加数据库配置文件spring-database.xml
<?xml version="1.0" encoding="UTF-8"?>
<beans xmlns="http://www.springframework.org/schema/beans"
       xmlns:xsi="http://www.w3.org/2001/XMLSchema-instance"
       xsi:schemaLocation="http://www.springframework.org/schema/beans http://www.springframework.org/schema/beans/spring-beans.xsd http://www.springframework.org/schema/security http://www.springframework.org/schema/security/spring-security.xsd">
    <bean id="datasource" class="org.springframework.jdbc.datasource.DriverManagerDataSource">
        <property name="driverClassName" value="com.mysql.jdbc.Driver"/>
        <property name="url" value="jdbc:mysql://localhost:3306/security_learning"/>
        <property name="username" value="petter"/>
        <property name="password" value="petter"/>
    </bean>
</beans>
添加完成以后需要在web.xml文件中指定:
<!-- Loads Spring config file -->
    <context-param>
        <param-name>contextConfigLocation</param-name>
        <param-value>
            /WEB-INF/spring-security.xml
            /WEB-INF/spring-database.xml
        </param-value>
    </context-param>
二、修改spring-security.xml配置文件:
<?xml version="1.0" encoding="UTF-8"?>
<beans xmlns="http://www.springframework.org/schema/beans"
       xmlns:xsi="http://www.w3.org/2001/XMLSchema-instance"
       xmlns:security="http://www.springframework.org/schema/security"
       xsi:schemaLocation="http://www.springframework.org/schema/beans http://www.springframework.org/schema/beans/spring-beans.xsd http://www.springframework.org/schema/security http://www.springframework.org/schema/security/spring-security.xsd">
    <!-- use-expressions 允许使用表达式 -->
    <security:http auto-config="true" use-expressions="true">
        <security:intercept-url pattern="/admin**" access="hasRole('ROLE_ADMIN')"/>
        <!-- 拒绝访问页面 -->
        <security:access-denied-handler error-page="/403"/>
        <security:form-login
                login-page="/login"
                default-target-url="/welcome"
                authentication-failure-url="/login?error"
                username-parameter="user-name"
                password-parameter="pwd"/>
        <security:logout
                logout-success-url="/login?logout"/>
        <!-- XML 配置中默认csrf是关闭的,此处设置为打开
            如果这里打开csrf,则在form表单中需要添加
            <input type="hidden" th:name="${_csrf.parameterName}" th:value="${_csrf.token}" />
        -->
        <security:csrf />
    </security:http>
    <security:authentication-manager>
        <security:authentication-provider>
            <security:jdbc-user-service data-source-ref="datasource"
                                        users-by-username-query="select username,password, enabled from users where username = ?"
                                        authorities-by-username-query="select username, role from user_roles where username = ?"/>
        </security:authentication-provider>
    </security:authentication-manager>
</beans>
三、修改登录以后默认进入的页面hello.html
<!DOCTYPE html>
<html xmlns="http://www.w3.org/1999/xhtml"
      xmlns:th="http://www.thymeleaf.org"
      xmlns:sec="http://www.thymeleaf.org/thymeleaf-extras-springsecurity4">
<head>
    <meta charset="UTF-8" />
    <title>hello</title>
</head>
<body>
    <h1 th:text="|标题: ${title}|">Title : XXX</h1>
    <h1 th:text="|信息: ${message}|">Message : XXX</h1>
    <div sec:authentication="name">
        验证用户的名称显示在这里
    </div>
    <div sec:authentication="principal.authorities">
        验证用户的权限显示在这里
    </div>
    <!-- 下面注释掉的两种写法是等价的,但是不起作用,暂时使用第三种方式 -->
    <!--<div sec:authorize="hasRole('ROLE_USER')">-->
    <!--<div sec:authorize="hasAuthority('ROLE_USER')">-->
    <div th:if="${#strings.contains(#authentication.principal.authorities,'ROLE_USER')}">
        <form action="/logout" method="post" id="logoutForm">
            <input type="hidden" th:name="${_csrf.parameterName}" th:value="${_csrf.token}" />
        </form>
        <h2><a href="javascript:formSubmit()">退出</a></h2>
        <script>
            function formSubmit() {
                document.getElementById("logoutForm").submit();
            }
        </script>
    </div>
</body>
</html>
这里需要注意:
1、由于采用的是thymeleaf模板,所有不能使用spring security的标签库,需要使用thymeleaf扩展的库,即pom文件中添加的依赖thymeleaf-extras-springsecurity4
2、在mvc-dispather-servlet.xml文件修改配置把库加入:
<bean id="templateEngine" class="org.thymeleaf.spring4.SpringTemplateEngine">
        <property name="templateResolver" ref="templateResolver"/>
        <property name="additionalDialects">
            <set>
                <!-- Note the package would change to 'springsecurity3' if you are using that version -->
                <bean class="org.thymeleaf.extras.springsecurity4.dialect.SpringSecurityDialect"/>
            </set>
        </property>
    </bean>
3、如上注释所示,两种写法判断只用含有USER角色的用户会显示,不起作用,可能只会会修复。
PS:要想起作用,thymeleaf-spring4 版本必须是 3.0.3.RELEASE以上
记住,role就是一种约定的前面加上ROLE_作为前缀的特殊的authority,所以它们是等价的,具体可以参考http://stackoverflow.com/questions/19525380/difference-between-role-and-grantedauthority-in-spring-security
四、添加403.html页面
<!DOCTYPE html>
<html xmlns:th="http://www.thymeleaf.org">
<head>
    <meta charset="UTF-8"/>
    <title>403</title>
</head>
<body>
<h1>HTTP Status 403 - Access is denied</h1>
<div>
    <h2 th:if="username eq null" th:text="您没有权限访问这个页面"></h2>
    <h2 th:if="username ne null" th:text="|用户:${username},您没有权限访问这个页面|"></h2>
</div>
</body>
</html>
并且在HelloController中添加代码:
@RequestMapping(value = "/403", method = RequestMethod.GET)
    public ModelAndView accessDenied() {
        ModelAndView model = new ModelAndView();
        //检查用户是否已经登录
        Authentication auth = SecurityContextHolder.getContext().getAuthentication();
        if (!(auth instanceof AnonymousAuthenticationToken)) {
            UserDetails userDetail = (UserDetails) auth.getPrincipal();
            model.addObject("username", userDetail.getUsername());
        }
        model.setViewName("403");
        return model;
    }
启动程序,访问http://localhost:8080/login http://localhost:8080/admin 登录不同角色的用户进行自行测试

 浙公网安备 33010602011771号