
【学习笔记】Spring Boot+Mybatis-1:集成 Mybatis 并实现 CRUD(1)
读前需知:此系列属于个人学习过程中的学习记录,不保证是最优方案,请读者大佬们带点批判进行阅读。如有技术上的错误望不吝赐教~
1. 前言
MyBatis 是一款持久层框架,它支持自定义 SQL、存储过程以及高级映射。其免除了几乎所有的 JDBC 代码以及设置参数和获取结果集的工作。MyBatis 可以通过简单的 XML 或注解来配置和映射原始类型、接口和 Java POJO 为数据库中的记录。
环境:
- MySQL 8.0.21
- JDK 1.8
- Spring Boot 2.7.8
2. 具体操作
这里有注解和 xml 配置两种方式来实现在 Spring Boot 中集成 Mybatis,这篇先学习注解方式。
在操作之前先建好库表:
DROP DATABASE `demo_mybatis`;
CREATE DATABASE `demo_mybatis`;

CREATE TABLE `user` (
	`id` INT(20) NOT NULL,
	`name` VARCHAR(30) DEFAULT NULL,
	`pwd` VARCHAR(30) DEFAULT NULL,
    PRIMARY KEY (id)
)

INSERT INTO `USER`(`id`, `NAME`, `pwd`) VALUES
(1, 'a', '123'),
(2, 'b', '123'),
(3, 'c', '123')
2.1 导入依赖
在 Maven 的 pom.xml 文件中导入两个依赖
<!-- 要连接 MySQL 所用到的驱动 -->
<!-- 官方建议用 8.0 的版本,支持 MySQL 8 和 MySQL 5.7  -->
<!-- 注意:MySQL Connector/J 8.0 最少需要使用 Java 8 -->
<!-- 参考:https://dev.mysql.com/doc/connector-j/8.0/en/connector-j-versions.html -->
<dependency>
    <groupId>mysql</groupId>
    <artifactId>mysql-connector-java</artifactId>
    <version>8.0.21</version>
</dependency>

<!-- MyBatis 的相关依赖 -->
<!-- 对应版本可以在这里查看:https://github.com/mybatis/spring-boot-starter/blob/master/mybatis-spring-boot-autoconfigure/src/site/zh/markdown/index.md -->
<dependency>
    <groupId>org.mybatis.spring.boot</groupId>
    <artifactId>mybatis-spring-boot-starter</artifactId>
    <version>2.3.0</version>
</dependency>
2.2 创建实体类
在你包名目录下新建一个包,命名为 entity ,并在 entity 中创建一个与表对应的实体类 User.java。
// User.java

public class User {
    private Integer id;
    private String name;
    private String pwd;

    // MinimalConstructor、FullConstructor
    // Getter、Setter
}
2.3 创建实体类的 Mapper
这里采用两种方法来构造 Mapper:
- 注解(SQL 语句直接写在注解中,无需 xml 配置)
- xml 配置(对于一些复杂的 SQL 操作可以用 xml 来配置以增强代码的可读性)
在entity同级目录中新建叫mapper的包,并在mapper中创建UserMapper.java。
// UserMapper.java

// @Repository 不加也能用,不过在用 @Autowired 注入的时候会提示 Bean 没有被注册而报红,Spring 规定持久层要用注解 @Repository
@Repository
@Mapper
public interface UserMapper {

    // 注解方式(无需 xml 配置文件)
    // 默认情况下,使用 #{} 参数语法时,MyBatis 会创建 PreparedStatement 参数占位符,并通过占位符安全地设置参数。相应的,在方法参数前要加上 @Param 注解
    @Select("select * from user where id=#{id}")
    User findUserById(@Param("id") Integer id);

    // xml 配置方式(SQL 需写在 xml 文件中)
    // 成功:return 1
    // 失败:return 0
    int addUser(User user);

    // 注解方式
    // 成功:return 1
    // 失败:return 0
    @Delete("delete from `user` where `id`=#{id}")
    int deleteUser(@Param("id") Integer id);

    // xml 配置方式
    // 成功:return 1
    // 失败:return 0
    int editUser(@Param("id") Integer id,
                  @Param("name") String name,
                  @Param("pwd") String pwd);
  	// xml 配置方式
    // 成功:return 1
    // 失败:return 0
  	List<User> findAllUser();
}
当需要 xml 配置文件时,为了项目目录清晰将 xml 配置文件和 Mapper 接口放在同一目录下。
<!-- UserMapper.xml -->

<?xml version="1.0" encoding="UTF-8" ?>
<!DOCTYPE mapper
        PUBLIC "-//mybatis.org//DTD Mapper 3.0//EN"
        "https://mybatis.org/dtd/mybatis-3-mapper.dtd">
<!-- MyBatis 要求必需指定命名空间 -->
<!--
    命名空间的好处:
    命名空间的作用有两个,一个是利用更长的全限定名来将不同的语句隔离开来,同时也实现了你上面见到的接口绑定。就算你觉得暂时用不到接口绑定,你也应该遵循这里的规定,以防哪天你改变了主意。 长远来看,只要将命名空间置于合适的 Java 包命名空间之中,你的代码会变得更加整洁,也有利于你更方便地使用 MyBatis。
 -->
<mapper namespace="{你的包名}.mapper.UserMapper">
    <!-- id 属性:对应命名空间中方法名 -->
    <!-- parameterType 属性是选填的,因为MyBatis 可以通过类型处理器(TypeHandler)推断出具体传入语句的参数 -->
    <insert id="addUser">
        INSERT INTO `user` (`id`, `name`, `pwd`)
        VALUES (#{id}, #{name}, #{pwd})
    </insert>

    <update id="editUser" >
        UPDATE user SET
            `name` = #{name},
            `pwd` = #{pwd}
        WHERE `id` = #{id}
    </update>

		<!-- select 一定要加上返回的属性(resultType/resultMap) -->
  	<!-- 不然会报错:Caused by: org.apache.ibatis.executor.ExecutorException: A query was run and no Result Maps were found for the Mapped Statement 'xxx'.  It's likely that neither a Result Type nor a Result Map was specified.
 -->
  	<select id="findAllUser" resultType="{你的包名}.entity.User">
 				SELECT * FROM `user`
  	</select>
</mapper>
2.4 编写全局配置文件
全局配置文件中需要指定 2 个东西:
- 数据源
- MyBatis 的 Mapper xml 配置文件的路径
在 resources 文件夹中新建 application.yml 文件(原来的 application.properties 也可,个人偏爱使用 YAML)
# application.yml

spring:
  datasource:
    driver-class-name: com.mysql.cj.jdbc.Driver
    url: jdbc:mysql://localhost:3306/{你的数据库名}?useSSL=false&useUnicode=true&characterEncoding=UTF-8&serverTimezone=GMT
    username: {你的 MySQL 用户名}
    password: {你的 MySQL 密码}
mybatis:
  mapper-locations: classpath:{你的包路径}/mapper/*.xml
数据源的重要性不必多说,这里讲讲如果没有配置 mybatis.mapper-locations(Mapper 路径)的话,会有如下错误:
org.apache.ibatis.binding.BindingException: Invalid bound statement (not found): {你的包名}.mapper.UserMapper.addUser
而导致错误的原因是:mapper 包中的 UserMapper.xml 没有被成功地编译到 target 目录下相应的包中,使得 UserMapper.java 接口中需要 xml 配置文件的方法无法绑定到对应的实现(注解修饰的方法不受影响)。
可能你设置了 Mapper 路径也出现了这个错误,此时可以试着把 UserMapper.xml 文件复制到 target/classes/{你的包名}/mapper 下,再测试一遍就会通过。
2.5 测试
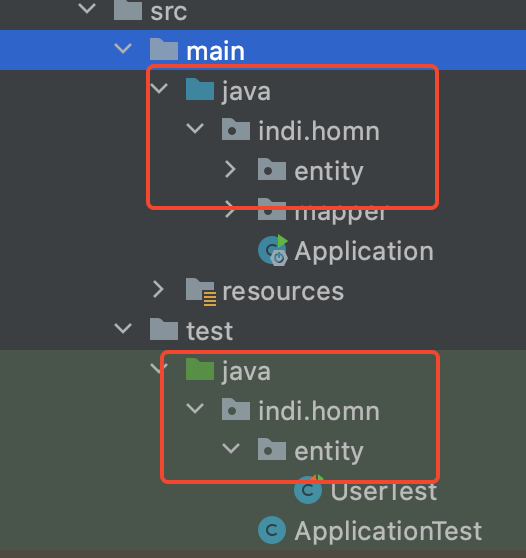
在和 main 同级的 test/java 目录下新建和程序目录相同的包结构:
新建一个 UserTest.java 文件作为测试类(IDEA 用户也可直接在 User.java 中使用 cmd+N 在弹出的框中选择 Test 快速创建)
// UserTest.java

import {你的包名}.mapper.UserMapper;
import org.junit.jupiter.api.Test;
import org.springframework.beans.factory.annotation.Autowired;
import org.springframework.boot.test.context.SpringBootTest;

// 不加的话会报空指针异常
@SpringBootTest
class UserTest {

    @Autowired
    private UserMapper userMapper;

    @Test
    public void testEdit() {
        int result = userMapper.editUser(4, "d", "123");
        System.out.println(result);
    }

    @Test
    public void testDelete() {
        int result = userMapper.deleteUser(4);
        System.out.println(result);
    }

    @Test
    public void testAdd() {
        int result = userMapper.addUser(new User(5, "e", "123"));
        System.out.println(result);
    }

    @Test
    public void testFind() {
        User user = userMapper.findUserById(1);
        System.out.println(user);
    }
}
在测试的时候我是踩了大坑(不过一切还是源于自己的无知):
由于我写这个项目的时候创建的是 Maven 项目,默认不带 Spring Boot 启动类,于是遇到 2 个问题:
userMapper无法注入:
- 且做单元测试的时候一直报错:
java.lang.IllegalStateException: Unable to find a @SpringBootConfiguration, you need to use @ContextConfiguration or @SpringBootTest(classes=...) with your test其实这只有一个问题,就是第二点,字面上来看说是找不到
@SpringBootConfiguration,因为 Spring Boot 的启动类有@SpringBootApplication注解,点进这个注解里面看到它是包含@SpringBootConfiguration的,所以解决方法就明确了:在src/main/java/{你的包名}目录下新建一个 Spring Boot 启动类// Application.java import org.springframework.boot.SpringApplication; import org.springframework.boot.autoconfigure.SpringBootApplication; @SpringBootApplication public class Application { public static void main(String[] args) { SpringApplication.run(SpringBootApplication.class, args); } }这样就没问题了~

2.6 真的没问题了吗?
还是否记得在 2.1.4 中我们手动把 UserMapper.xml 复制到了 target 目录下相应的包中。但不能每次都手动吧?
这是因为基于 Maven 的资源过滤机制,在编译时默认只会加载 resources 目录下的配置文件,其他目录则不会加载。我们需要在当前项目 pom.xml 文件中和 dependencies 标签同级的 build 标签中加入:
<build>
    <resources>
        <resource>
            <directory>src/main/java</directory>
            <includes>
                <include>**/*.xml</include>
            </includes>
            <filtering>true</filtering>
        </resource>
    </resources>
</build>
这样就能告诉 Maven java 文件夹下任意包的 xml 文件都要加载进 target,这样就不用手动复制了~
3. 结语
本来想把不用注解的方法一起写下,但发现文章有点过长了,放下篇吧!
4. 参考
Mybatis注解用法
Invalid bound statement (not found) 解决办法汇总
MyBatis 官方文档
springboot集成MyBatis
Could not autowire.No beans of ‘XXXX‘type found的解决方法(详细解析其用法注解)

 浙公网安备 33010602011771号