


腾讯云(Linux)部署core Nginx代理配置02
1 设置代理:
进入 etc/nginx文件夹下,创建新的文件夹 hosts,用来存放配置文件的信息
命令 mkdir hosts
创建成功之后进入 hosts目录 cd hosts
继续执行命令 vi ossofical ,创建文件ossofical,按 ‘i’ 进行编辑
复制下面内容:
server {
listen 80;
index index.html index.htm;
server_name www.osscoder.com; #域名()
location / {
proxy_pass http://127.0.0.1:8000; # 刚才设置的地址端口,前面是Ip,如果是云的话是公网Ip ,后面是端口号,即core项目中设置的端口号,默认是5000
proxy_http_version 1.1;
proxy_set_header Upgrade $http_upgrade;
proxy_set_header Connection keep-alive;
proxy_set_header Host $host;
proxy_cache_bypass $http_upgrade;
}
}
完成之后 ‘’shift +:‘’。执行wq保存
进入目录,可以看到新建的文件,如下图

2、修改nginx的配置文件,将我们刚才的配置信息,加入进去
执行命令:vi /etc/nginx/nginx.conf,进入编辑模式
在http节点加入 :include /etc/nginx/hosts/*; (注意最后的‘;’号),如下图
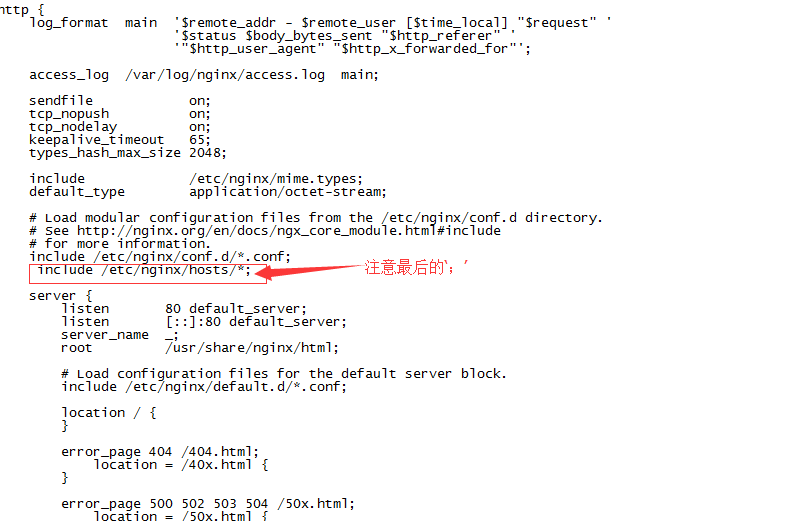
完成之后保存,退出
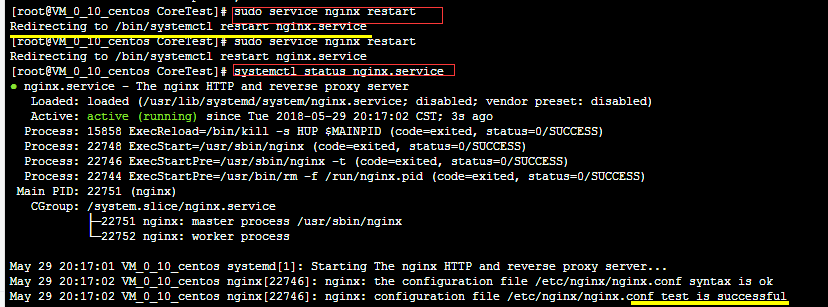
3 重新启动nginx服务器
启动命令:sudo service nginx restart(reload)
查看启动信息:systemctl status nginx.service
如下图,说明启动成功
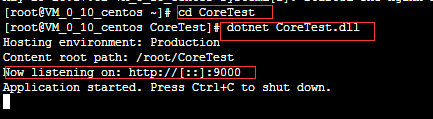
接下来,启动core项目
如下图,启动成功
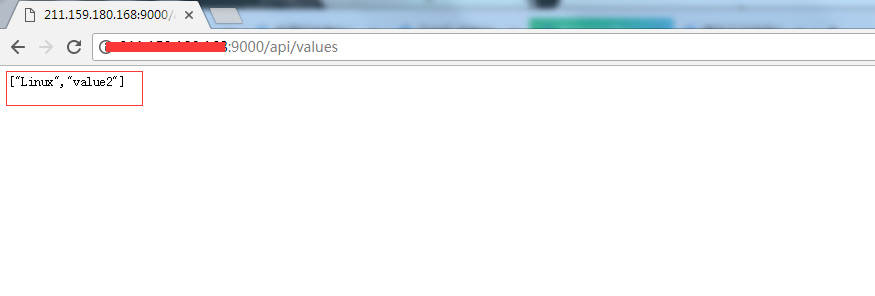
访问,我这里用的是Core Api项目测试的


 浙公网安备 33010602011771号