Spring5源码深度解析(一)之理解Configuration注解
代码地址:https://github.com/showkawa/spring-annotation/tree/master/src/main/java/com/brian
1.Spring体系结构
1.1、Spring Core:主要组件是BeanFactory,创建JavaBean的工厂,使用控制反转(IOC) 模式 将应用程序的配置和依赖性规范与实际的应用程序代码分开。
1.2、Spring AOP:集成了面向切面的编程功能(AOP把一个业务流程分成几部分,例如权限检查、业务处理、日志记录,每个部分单独处理,然后把它们组装成完整的业务流程。每个部分被称为切面),可以将声明性事物管理集成到应用程序中。
1.3、Spring Cntext:一个核心配置文件,为Spring框架提供上下文信息。
1.4、Spring Data:Spring操作数据库的模块。
1.5、Spring ORM:Spring集成了各种orm(object relationship mapping 对象关系映射)框架的模块,集成mybatis
1.6、Spring Web集成各种优秀的web层框架的模块(Struts、Springmvc)
1.7、Spring web MVC:Spring web层框架
2.Configuration注解分析内容(@Configuration,@ComponentScan,@Scope,@Lazy)
2.1 @Configuration
@Configuration用于定义配置类,可替换xml配置文件,被注解的类内部包含有一个或多个被@Bean注解的方法,这些方法将会被AnnotationConfigApplicationContext或AnnotationConfigWebApplicationContext类进行扫描,并用于构建bean定义,初始化Spring容器。
2.1.1 @Configuration标注在类上,相当于把该类作为spring的xml配置文件中的<beans>,作用为:配置spring容器(应用上下文)
@Configuration
public class MainConfigOfLifeCycle {
}
//测试方法
public static void main(String[] args) {
         ApplicationContext acac =
                 new AnnotationConfigApplicationContext(MainConfigOfLifeCycle.class);
        System.out.println("ioc容器创建成功");

        //关闭ioc容器
        ((AnnotationConfigApplicationContext) acac).close();
    }
相当于spring的xml配置
<?xml version="1.0" encoding="UTF-8"?>
<beans xmlns="http://www.springframework.org/schema/beans" xmlns:xsi="http://www.w3.org/2001/XMLSchema-instance"
    xmlns:context="http://www.springframework.org/schema/context" xmlns:jdbc="http://www.springframework.org/schema/jdbc"
    xmlns:jee="http://www.springframework.org/schema/jee" xmlns:tx="http://www.springframework.org/schema/tx"
    xmlns:util="http://www.springframework.org/schema/util" xmlns:task="http://www.springframework.org/schema/task" xsi:schemaLocation="
        http://www.springframework.org/schema/beans http://www.springframework.org/schema/beans/spring-beans-5.0.xsd
        http://www.springframework.org/schema/context http://www.springframework.org/schema/context/spring-context-5.0.xsd
        http://www.springframework.org/schema/jdbc http://www.springframework.org/schema/jdbc/spring-jdbc-5.0.xsd
        http://www.springframework.org/schema/jee http://www.springframework.org/schema/jee/spring-jee-5.0.xsd
        http://www.springframework.org/schema/tx http://www.springframework.org/schema/tx/spring-tx-5.0.xsd
        http://www.springframework.org/schema/util http://www.springframework.org/schema/util/spring-util-5.0.xsd
        http://www.springframework.org/schema/task http://www.springframework.org/schema/task/spring-task-5.0.xsd" default-lazy-init="false">


</beans>
2.2 @ComponentScan用法
ComponentScan字面意思就是组件扫描,就是根据定义的扫描路径,把符合扫描规则的类装配到spring容器中
2.2.1 ComponentScan参数说明
/*
* @ComponentScan
*   value:只当于扫描的的包
*   excludeFilters = 指定扫描的时候按照什么规则排除哪些组件
*   includeFilters = 指定扫描的时候只需要包含哪些组件
*   Filter.ANNOTATION:按照注解
*   Filter.ASSIGNABLE_TYPE: 按照给定的类型
* */
FilterType 有五种类型
ANNOTATION:注解类型
ASSIGNABLE_TYPE:ANNOTATION:指定的类型
ASPECTJ:按照Aspectj的表达式,基本上不会用到
REGEX:按照正则表达式
CUSTOM:自定义规则
package com.brian.config;

import com.brian.bean.Alan;
import com.brian.bean.Brian;
import com.brian.bean.BrianBeanFactory;
import com.brian.bean.Person;
import com.brian.condition.BrianCondition;
import com.brian.condition.BrianSelector;
import com.brian.service.BookService;
import org.springframework.context.annotation.*;
import org.springframework.stereotype.Controller;

@Configuration //告诉spring这是一个配置类
/*
* @ComponentScan
*   value:只当于扫描的的包
*   excludeFilters = 指定扫描的时候按照什么规则排除哪些组件
*   includeFilters = 指定扫描的时候只需要包含哪些组件
*   Filter.ANNOTATION:按照注解
*   Filter.ASSIGNABLE_TYPE: 按照给定的类型
* */

@ComponentScans(value = {
        @ComponentScan(value = "com.brian",includeFilters = {
//                @ComponentScan.Filter(type = FilterType.ANNOTATION,classes = {Controller.class}),
//                @ComponentScan.Filter(type=FilterType.ASSIGNABLE_TYPE,classes = {BookService.class}),
                @ComponentScan.Filter(type = FilterType.CUSTOM,classes = {BrianTypeFilter.class})
        },useDefaultFilters = false)
})
@Import({Brian.class,Alan.class,BrianSelector.class})
public class MainConfig {

    @Bean("person") //给容器中注册一个Bean;类型为返回值的类型;id默认是方法名作为id
    public Person person(){
        return new Person("Alan",18);
    }


    /*
    * @Conditional() 按照条件注册
    *
    * */
    @Conditional({BrianCondition.class})
    @Bean("person01")
    public Person person01() {
        return new Person("Brian",17);
    }

    @Conditional({BrianCondition.class})
    @Bean("person02")
    public Person person02() {
        return new Person("wenTao",19);
    }

    /*
    *
    *给容器中注册组件
    * 1,包扫描+ 组件标注注解(@Controller/@Service/@Repository/@Component)[自己写的方法]
    * 2, @Bean [导入的第三方包里面的组件]
    * 3,@Import [快速的给容器导入一个组件]
    *       1.@Import(要导入的组件class)
    *       2.ImportSelector:返回需要导入的组件的全类名数组
    *       3.ImportBeanDefinitionRegistrar: 手动注册bean到容器
    *  4. 使用Spring提供的FactoryBean
    * */
    @Bean
    public BrianBeanFactory brianBeanFactory() {
        return new BrianBeanFactory();
    }

}
2.3 @Scope
默认情况Spring容器是单例的
singleton单例模式:全局有且仅有一个实例。
prototype原型模式:每次获取Bean的时候都会有一个新的实例。
request
request表示针对每次请求都会产生一个新的Bean对象,并且该Bean对象仅在当前Http请求内有效。
session
session作用域表示煤气请求都会产生一个新的Bean对象,并且该Bean仅在当前Http session内有效。
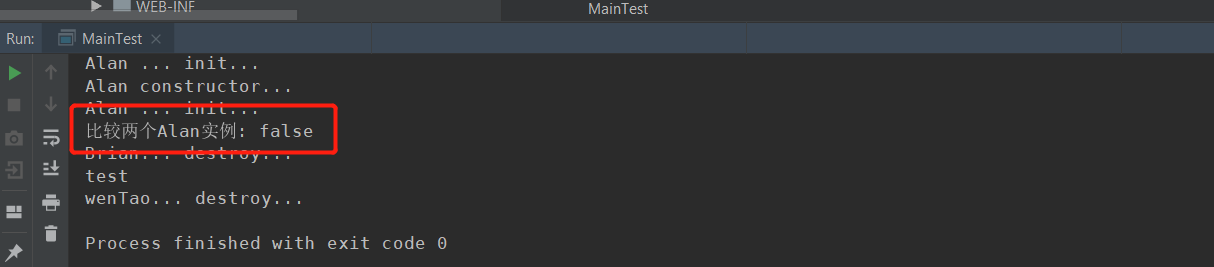
测试@Scopeprototype原型模式
Configuration配置类
@Configuration
@ComponentScan("com.brian.bean")
public class MainConfigOfLifeCycle {
    @Scope("prototype")
    @Bean(initMethod = "init", destroyMethod = "destroy")
    public Alan getAlan () {
        return new Alan();
    }
}
测试类
public class MainTest {
    public static void main(String[] args) {
         /*ApplicationContext acac =
                 new AnnotationConfigApplicationContext(MainConfig.class);*/
         ApplicationContext acac =
                 new AnnotationConfigApplicationContext(MainConfigOfLifeCycle.class);
        System.out.println("ioc容器创建成功");
        Alan alan1 =  acac.getBean(Alan.class);
        Alan alan2 =  acac.getBean(Alan.class);
        System.out.println("比较两个Alan实例: " + (alan1 == alan2));

        //关闭ioc容器
        ((AnnotationConfigApplicationContext) acac).close();
    }
}
2.4 @Lazy
Lazy表示为懒加载,当真正需要引用获取的时候才会被加载
True 表示为懒加载 false表示为在IOC容器加载的时候被创建。
测试@Lazy(false)饿汉模式加载
Configuration配置类
@Configuration
@ComponentScan("com.brian.bean")
public class MainConfigOfLifeCycle {
    //@Scope("prototype")
    @Lazy(false)
    @Bean(initMethod = "init", destroyMethod = "destroy")
    public Alan getAlan () {
        return new Alan();
    }


}
测试类
public class MainTest {
    public static void main(String[] args) {
         /*ApplicationContext acac =
                 new AnnotationConfigApplicationContext(MainConfig.class);*/
         ApplicationContext acac =
                 new AnnotationConfigApplicationContext(MainConfigOfLifeCycle.class);
        System.out.println("ioc容器创建成功");
      //  Alan alan1 =  acac.getBean(Alan.class);
       // Alan alan2 =  acac.getBean(Alan.class);
        //System.out.println("比较两个Alan实例: " + (alan1 == alan2));

        //关闭ioc容器
        ((AnnotationConfigApplicationContext) acac).close();
    }
}
看下结果会发现在饿汉模式下,即使没用使用AnnotationConfigApplicationContext.getBean()获取对象,对象也被加载进了IOC容器

测试@Lazy默认懒加载
Configuration配置类
@Configuration
@ComponentScan("com.brian.bean")
public class MainConfigOfLifeCycle {
    //@Scope("prototype")
    @Lazy
    @Bean(initMethod = "init", destroyMethod = "destroy")
    public Alan getAlan () {
        return new Alan();
    }


}
测试类保持不表
测试结果中,没有输出Alan这个对象创建和销毁的打印信息


 浙公网安备 33010602011771号