


Spring Cloud Config 配置中心 自动加解密功能 jasypt方式
使用此种方式会存在一种问题:如果我配置了自动配置刷新,则刷新过后,加密过后的密文无法被解密。具体原因分析,看 SpringCloud 详解配置刷新的原理
使用 jasypt-spring-boot-starter 进行加解密功能。
整个流程说明:
配置一个 spring cloud config server ,将要使用的配置文件存放到github上,然后从这个配置源拿配置。
我们使用 jasypt 进行自动加解密,将需要加密的数据,通过jasypt进行加密,然后将该内容放入 github。如下图:
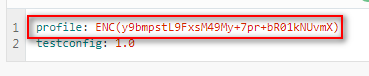
使用 ENC() 将加密后的原文包裹,这样spring cloud config client 客户端拿到这个串之后,会自动解密,拿到原文。
下面看一下整体步骤:
1、首先创建spring cloud config server 服务端程序
此处我就不写步骤了,更普通的服务端没有任何区别,唯一的不同就是,在github上面存储的配置文件中的信息,是经过加密的。如上图。
2.、创建客户端(使用spring boot 1.5.10, jasypt 1.16)
项目按照普通结构创建即可,额外需要加入 jasypt-spring-boot-starter 包。
pom.xml文件如下:
<?xml version="1.0" encoding="UTF-8"?>
<project xmlns="http://maven.apache.org/POM/4.0.0" xmlns:xsi="http://www.w3.org/2001/XMLSchema-instance"
	xsi:schemaLocation="http://maven.apache.org/POM/4.0.0 http://maven.apache.org/xsd/maven-4.0.0.xsd">
	<modelVersion>4.0.0</modelVersion>

	<groupId>com.thunisoft</groupId>
	<artifactId>thunisoft-microservice-testconfig</artifactId>
	<version>0.0.1-SNAPSHOT</version>
	<packaging>jar</packaging>

	<name>thunisoft-microservice-testconfig</name>
	<description>Demo project for Spring Boot</description>

	<parent>
		<groupId>org.springframework.boot</groupId>
		<artifactId>spring-boot-starter-parent</artifactId>
		<version>1.5.10.RELEASE</version>
		<relativePath/> <!-- lookup parent from repository -->
	</parent>

	<properties>
		<project.build.sourceEncoding>UTF-8</project.build.sourceEncoding>
		<project.reporting.outputEncoding>UTF-8</project.reporting.outputEncoding>
		<java.version>1.8</java.version>
		<spring-cloud.version>Edgware.SR2</spring-cloud.version>
	</properties>

	<dependencies>
		<dependency>
			<groupId>org.springframework.boot</groupId>
			<artifactId>spring-boot-starter-web</artifactId>
		</dependency>

		<dependency>
			<groupId>org.springframework.cloud</groupId>
			<artifactId>spring-cloud-starter-config</artifactId>
		</dependency>

		<dependency>
			<groupId>org.springframework.boot</groupId>
			<artifactId>spring-boot-starter-test</artifactId>
			<scope>test</scope>
		</dependency>

        <dependency>
            <groupId>com.github.ulisesbocchio</groupId>
            <artifactId>jasypt-spring-boot-starter</artifactId>
            <version>1.16</version>
        </dependency>
	</dependencies>

	<dependencyManagement>
		<dependencies>
			<dependency>
				<groupId>org.springframework.cloud</groupId>
				<artifactId>spring-cloud-dependencies</artifactId>
				<version>${spring-cloud.version}</version>
				<type>pom</type>
				<scope>import</scope>
			</dependency>
		</dependencies>
	</dependencyManagement>

	<build>
		<plugins>
			<plugin>
				<groupId>org.springframework.boot</groupId>
				<artifactId>spring-boot-maven-plugin</artifactId>
			</plugin>
		</plugins>
	</build>


</project>
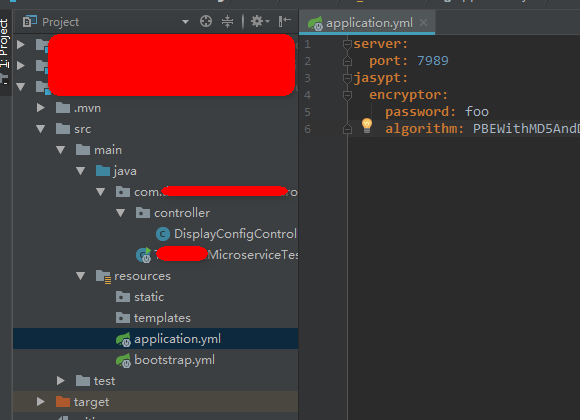
3、添加配置:在application.yml / application.properties中添加如下配置:
jasypt:
  encryptor:
    password: foo
    algorithm: PBEWithMD5AndDES
algorithm :配置要使用的加密算法,默认值是 PBEWithMD5AndDES
password:相当于是 加密中的 “盐(salt)”
4、之后就可以按照正常取配置文件的流程进行了。
package com.thunisoft.thunisoftmicroservicetestconfig.controller;

import org.springframework.beans.factory.annotation.Value;
import org.springframework.web.bind.annotation.GetMapping;
import org.springframework.web.bind.annotation.RestController;

@RestController
public class DisplayConfigController {

    @Value("${profile}")
    private String profile;

	@GetMapping("/")
	public String showConfig() {
        return this.profile;
	}
}


 浙公网安备 33010602011771号