ElasticSearch学习笔记_2
首先记录一个学习es的时候遇到的一个坑,错误是
[1]: max file descriptors [4096] for elasticsearch process is too low, increase to at least [65536]

网上的解答都是修改
etc/security/limits.conf

sudo vi /etc/security/limits.conf
在文件最后面加上

soft nofile 65536
hard nofile 65536
soft nproc 4096
hard nproc 4096
注:*后面有空格
可是修改后,发现root用户的值变大了,可是普通用户还是4096,那还是不能运行es啊,网上基本没有说如何让普通用户的值发生变化,卡了我很长时间,直到我在知乎上看到下面的内容,
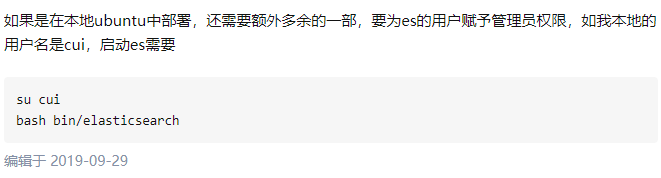
才清楚原来我是本地部署还要有普通用户权限才行,哎,怪自己linux学的不好,只要su + 普通用户的名字就可以让普通用户有管理员权限,之后就可成功运行es.
在网上看到了一个博主写的关于es的安装和相关软件的安装的教程,比如安装node.js,ik分词器,可视化工具head。和kibana,转载一下。
https://www.cnblogs.com/yijialong/p/9717593.html
#通配符查询?用来匹配一个任意的字符*用来匹配多个字符
GET /ems/_search
{
  "query": {
    "wildcard": {
      "content": {
        "value": "sp*"
      }
    }
  }
}
GET /ems/_search
{
  "query": {
    "wildcard": {
      "content": {
        "value": "框*"
      }
    }
  }
}
#多id进行查询,不过一般不会声明id
GET ems/_search
{
  "query": {
    "ids": {
      "values": [
        "AoUFPHUBwStJbspbRiwc","A4UFPHUBwStJbspbRiwc"]
    }
  }
}
#模糊查询。此时当查询的内容与被查询的内容之间的编辑距离不大于2时可以成功的进行模糊匹配,具体是2个字符一下的要完全正确,2到4个只能错1个,五个以上最多错2个,其中编辑距离的概念是是指两个字串之间,由一个转成另一个(增删改)所需的最少编辑操作次数
GET /ems/_search
{
  "query": {
    "fuzzy": {
      "content": "架构"
    }
  }
}
#布尔查询,是对多个条件实现复杂查询,bool表达式
#must 相当于&&同时成立,should: 相当于||成立一个就可以
#must not: 相当于!不能满足任何一个

GET /ems/_search
{
  "query": {
    "bool": {
      "must": [
        {"term": {
          "content": "语"

        }}
      ]
      , "must_not": [
        {"term": {
          "age": {
            "value": "43"
          }
        }}
      ]
    }
  }
}
#多字段查询。得分是根据文章长度,和匹配到的次数,文章越短匹配次数越多越正确
#对于字段来说类型是text的需要对query进行分词处理,对于address则需要整体进行匹配
GET /ems/_search
{
  "query": {
    "multi_match": {
      "query": "上海框架",
      "fields": ["content","address"]
    }
  }
}
#多字段分词查询,这种查询方式需要先设定好分词器的类型
GET /ems/_search
{
  "query": {
    "multi_match": {
      "analyzer": "simple",
      "query": "架构",
      "fields": ["content","address"]
    }
  }
}
GET _analyze#分成的结果是一个字或一个词
{
  "analyzer": "standard",
  "text": "spring is a "
}
GET _analyze#做最细粒度分词
{
  "analyzer": "ik_max_word",
  "text": "五常大米"
}
GET _analyze#做粗粒度分词
{
  "analyzer": "ik_max_word",
  "text": "五常大米"
}
GET _analyze#分成的结果是个整体,对中文不分词,对英文分成单词,去掉数字
{
  "analyzer": "simple",
  "text": "这是个框架"
}
#高亮查询,一般把类型设置为text方便进行匹配
GET /ems/_search
{
  "query": {"term": {
    "content": {
      "value": "开"
    }
  }},
   "highlight": {

    "fields": {"*": {}},
    "pre_tags": ["<span style='color:red'>"],
    "post_tags": ["</span>"],
    "require_field_match": "false"
  }
}

PUT /log  #给数据库提前声明使用的分词器是ik
{
  "mappings": {
    "properties": {
      "id":{
        "type": "integer"
      },
      "ip":{
        "type": "text"
        , "analyzer": "ik_max_word"
      },
      "content":{
        "type": "text"
        , "analyzer": "ik_max_word"

      }
    }
    }
}
PUT /log/_doc/_bulk
{"index":{}}
{"id":12,"ip":"1.1.1.1","content":"我想看刘德华演的电视剧"}
GET /log/_search
{
  "query": {
    "term": {
      "content": {
        "value": "电视剧"
      }
    }
  }
}
GET _analyze#碰瓷被拆开了,要引入扩展词。包括静态扩展和动态扩展
{
  "analyzer": "ik_max_word",
  "text": "打击估计碰瓷的违法犯罪人员"
}
GET _analyze#碰瓷被拆开了,要引入扩展词。包括静态扩展和动态扩展
{
  "analyzer": "ik_max_word",
  "text": "no space in the queue"
}
GET _analyze#去停用词,同样在ik的yml文件里面进行配置,这次把百里守约当做停用词,百里守约被去除
{
  "analyzer": "ik_max_word",
  "text": "hello world 好学生,真的很优秀"
}

#更多的是使用远程扩展词典和去停用词,动态进行更新,不需要每次都启动es,但是需要开启一个服务,如Tomcat、具体操作可以百度,就是在配置文件里面加一个URL
DELETE b_log
PUT /b_log
{
  "mappings": {
    "properties": {
      "id":{
        "type": "integer"
      },
      "log_id":{
        "type":"keyword"
      },
      "ip":{
        "type": "ip"
      },
      "sysname":{
        "type": "keyword"
      },
      "modulename":{
        "type": "text"
      },
      "level":{
        "type": "keyword"
      },
      "logtime":{
        "type": "date",
        "format": "yyyy-MM-dd HH:mm:ss||yyyy-MM-dd||epoch_millis"
      },
      "createtime":{
        "type": "date",
        "format": "yyyy-MM-dd HH:mm:ss||yyyy-MM-dd||epoch_millis"
      },
      "content":{
        "analyzer": "ik_max_word",
        "type": "text"
      }
    }
  }
}

PUT /b_log/_bulk
  {"index":{}}
  {"id":16,"ip":"1.1.1.1","sysname":"abc","modulename":"module1","level":"1","logtime":"2019-10-10 10:10:10","createtime":"2019-10-10 10:10:10","content":"我想看刘德华演的电视剧"}
  {"index":{}}
  {"id":17,"ip":"1.1.1.1","sysname":"abc","modulename":"module2","level":"2","logtime":"2020-10-10 10:10:10","createtime":"2020-10-10 10:10:10","content":"this is a test."}
  {"index":{}}
  {"id":18,"ip":"1.1.1.1","sysname":"abc","modulename":"module3","level":"1","logtime":"2019-10-10 10:10:10","createtime":"2019-10-10 10:10:10","content":"no space in the queue"}
  {"index":{}}
  {"id":19,"ip":"1.1.1.1","sysname":"abc","modulename":"module1","level":"1","logtime":"2018-10-10 10:10:10","createtime":"2018-10-10 10:10:10","content":"linkindex=0,connindex=0,Proto_Connect: socket connect failed. HostName=127.0.0.1, port=10004,socketid=1964"}
  {"index":{}}
  {"id":20,"ip":"1.1.1.1","sysname":"abc","modulename":"module1","level":"1","logtime":"2018-10-10 10:10:10","createtime":"2018-10-10 10:10:10","content":"linkindex=0,connindex=0,Proto_Connect: socket connect failed. HostName=127.0.0.1, port=10004,socketid=1964"}
  {"index":{}}
  {"id":21,"ip":"1.1.1.1","sysname":"abc","modulename":"module1","level":"1","logtime":"2018-10-10 10:10:10","createtime":"2018-10-10 10:10:10","content":"linkindex=0,connindex=0,Proto_Connect: socket connect failed. HostName=127.0.0.1, port=10004,socketid=1964"}
  {"index":{}}
  {"id":22,"ip":"10.3.8.211","sysname":"sys1","modulename":"child.c","level":"2","logtime":"2020-10-10 10:10:10","createtime":"2020-10-10 10:10:10","content":"[2836] ThreadID[0] SocketCount[0] Status[2]"}
  {"index":{}}
  {"id":23,"ip":"10.3.8.211","sysname":"sys1","modulename":"child.c","level":"2","logtime":"2020-10-10 10:10:10","createtime":"2020-10-10 10:10:10","content":"[2836] ThreadID[0] SocketCount[0] Status[2]"}
   {"index":{}}
  {"id":24,"ip":"10.3.8.211","sysname":"sys1","modulename":"child.c","level":"2","logtime":"2020-10-10 10:10:10","createtime":"2020-10-10 10:10:10","content":"[2836] ThreadID[0] SocketCount[0] Status[2]"}
   {"index":{}}
   {"id":25,"ip":"10.3.8.211","sysname":"sys1","modulename":"child.c","level":"2","logtime":"2020-10-10 10:10:10","createtime":"2020-10-10 10:10:10","content":"[2836] ThreadID[0] SocketCount[0] Status[2]"}
      {"index":{}}
   {"id":26,"ip":"10.3.8.211","sysname":"sys1","modulename":"child.c","level":"2","logtime":"2020-10-10 10:10:10","createtime":"2020-10-10 10:10:10","content":"[2836] ThreadID[0] SocketCount[0] Status[2]"}
      {"index":{}}
   {"id":22,"ip":"10.3.8.211","sysname":"sys1","modulename":"child.c","level":"2","logtime":"2020-10-10 10:10:10","createtime":"2020-10-10 10:10:10","content":"[2836] ThreadID[0] SocketCount[0] Status[2]"}
      {"index":{}}
   {"id":22,"ip":"10.3.8.211","sysname":"sys1","modulename":"child.c","level":"2","logtime":"2020-10-10 10:10:10","createtime":"2020-10-10 10:10:10","content":"[2836] ThreadID[0] SocketCount[0] Status[2]"}
      {"index":{}}
   {"id":22,"ip":"10.3.8.211","sysname":"sys1","modulename":"child.c","level":"2","logtime":"2020-10-10 10:10:10","createtime":"2020-10-10 10:10:10","content":  "[2836] ThreadID[0] SocketCount[0] Status[2]"}
      {"index":{}}
   {"id":22,"ip":"10.3.8.211","sysname":"sys1","modulename":"child.c","level":"2","logtime":"2020-10-10 10:10:10","createtime":"2020-10-10 10:10:10","content":"[2836] ThreadID[0] SocketCount[0] Status[2]"}
      {"index":{}}
   {"id":22,"ip":"10.3.8.211","sysname":"sys1","modulename":"child.c","level":"2","logtime":"2020-10-10 10:10:10","createtime":"2020-10-10 10:10:10","content":"[2836] ThreadID[0] SocketCount[0] Status[2]"}
      {"index":{}}
   {"id":22,"ip":"10.3.8.211","sysname":"sys1","modulename":"child.c","level":"2","logtime":"2020-10-10 10:10:10","createtime":"2020-10-10 10:10:10","content":"[2836] ThreadID[0] SocketCount[0] Status[2]"}
   {"index":{}}
   {"id": 10009, "ip": "127.0.0.1", "sysname": "systest", "modulename": "MsgLocQue.c", "level": "4", "logtime": "2020-10-16 12:45:12", "createtime": "2020-11-03 17:59:57", "content": "MoniLocMsgDes:msg[54] msgid=[ID:d6a9581f800035f89216f29800000] que[lq] Expire is over,will delete msg}\x"}


GET /b_log/_search
{
    "query": {
        "term": {
            "content": "电视剧"
        }
    }
}


GET /b_log/_search
{"query": {"bool":{"must":[
  {"match_phrase":{"content":"linkindex=0,connindex=0,Proto_Connect: socket connect failed. HostName=127.0.0.1, port=10004,socketid="}}
]}}}
GET /b_log/_search
{
  "query": {
    "bool": {
      "must": [
        {"term": {
          "content": "语"}},
          {"age": {
            "value": "43"

        }}
      ]
    }
  }
}
GET /b_log/_count
{

}

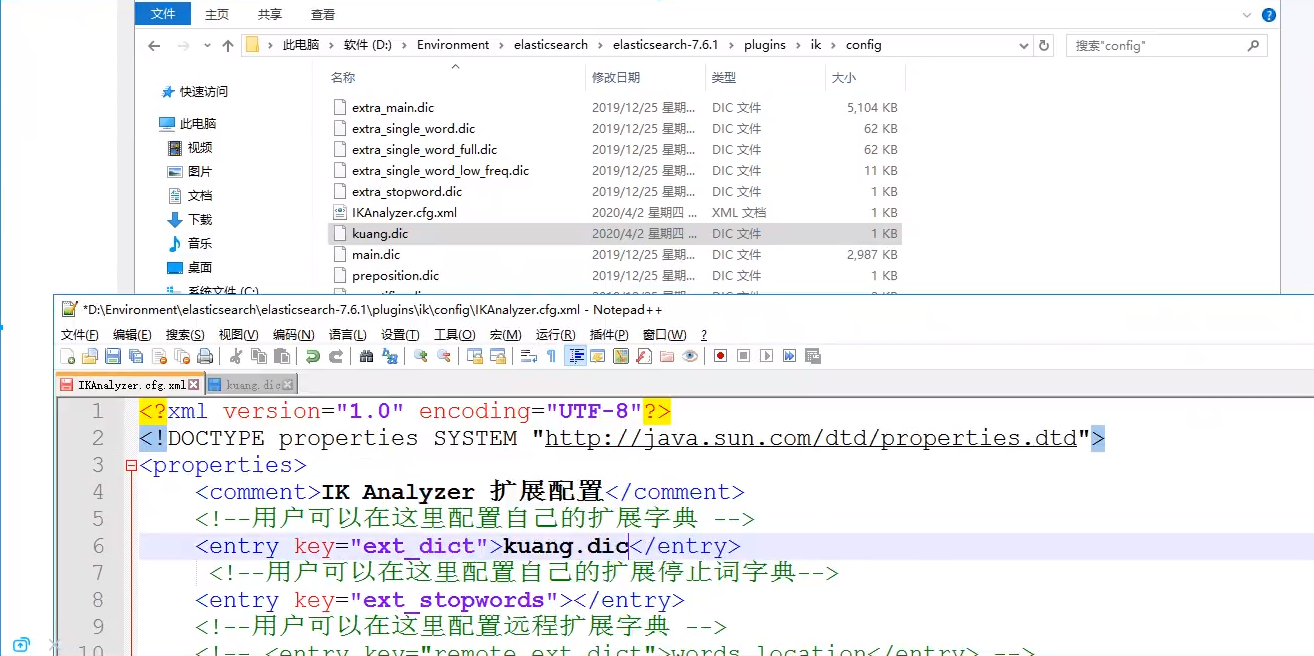
可以在ik中添加自定义的词
更新后就可以切换为和安装的elasticsearch版本一致
4、springboot集成
4.1 引入依赖包
创建一个springboot的项目 同时勾选上springboot-web的包以及Nosql的elasticsearch的包
如果没有就手动引入
<!--es客户端-->
<dependency>
    <groupId>org.elasticsearch.client</groupId>
    <artifactId>elasticsearch-rest-high-level-client</artifactId>
    <version>7.6.2</version>
</dependency>

<!--springboot的elasticsearch服务-->
<dependency>
    <groupId>org.springframework.boot</groupId>
    <artifactId>spring-boot-starter-data-elasticsearch</artifactId>
</dependency>
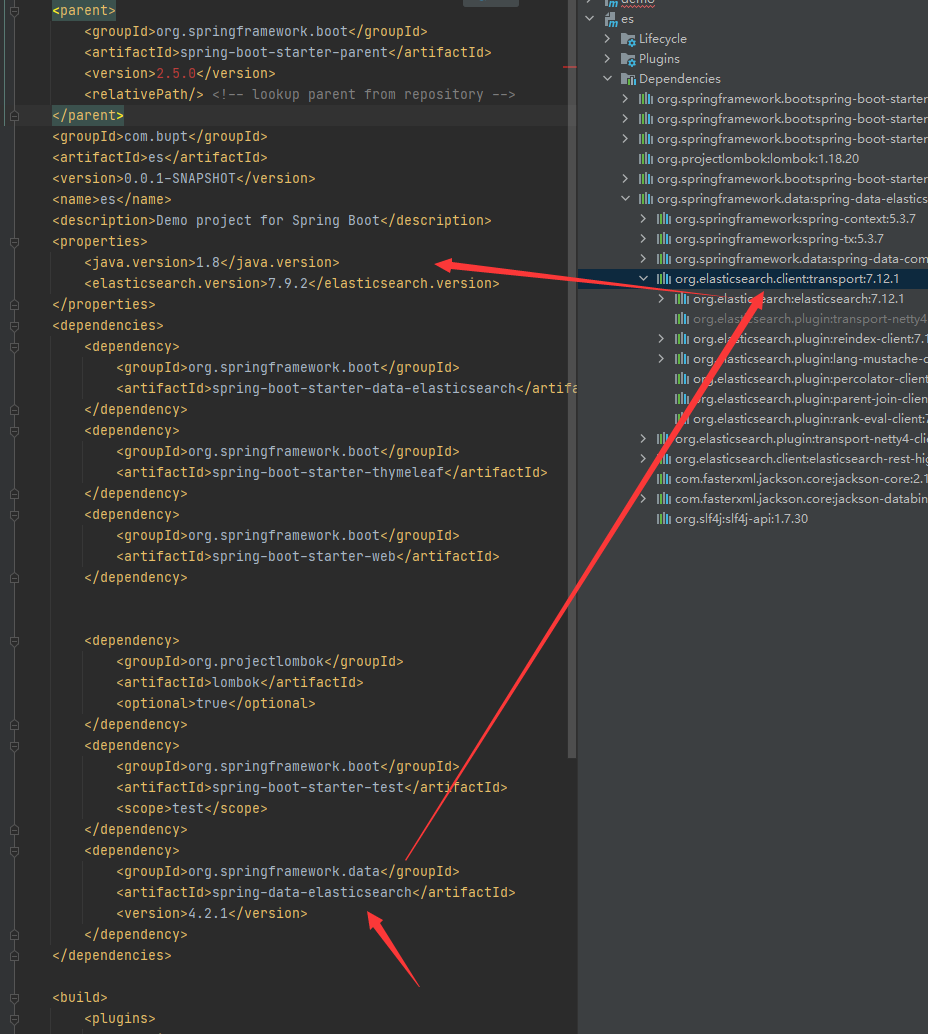
注意下spring-boot的parent包内的依赖的es的版本是不是你对应的版本
不是的话就在pom文件下写个properties的版本
<!--这边配置下自己对应的版本-->
<properties>
    <java.version>1.8</java.version>
    <elasticsearch.version>7.6.2</elasticsearch.version>
</properties>
4.2 注入RestHighLevelClient 客户端
@Configuration
public class ElasticSearchClientConfig {
    @Bean
    public RestHighLevelClient restHighLevelClient(){
        RestHighLevelClient client = new RestHighLevelClient(
                RestClient.builder(new HttpHost("127.0.0.1",9200,"http"))
        );
        return client;
    }
}
4.3 索引的增、删、是否存在
//测试索引的创建
@Test
void testCreateIndex() throws IOException {
    //1.创建索引的请求
    CreateIndexRequest request = new CreateIndexRequest("lisen_index");
    //2客户端执行请求,请求后获得响应
    CreateIndexResponse response = client.indices().create(request, RequestOptions.DEFAULT);
    System.out.println(response);
}

//测试索引是否存在
@Test
void testExistIndex() throws IOException {
    //1.创建索引的请求
    GetIndexRequest request = new GetIndexRequest("lisen_index");
    //2客户端执行请求,请求后获得响应
    boolean exist =  client.indices().exists(request, RequestOptions.DEFAULT);
    System.out.println("测试索引是否存在-----"+exist);
}

//删除索引
@Test
void testDeleteIndex() throws IOException {
    DeleteIndexRequest request = new DeleteIndexRequest("lisen_index");
    AcknowledgedResponse delete = client.indices().delete(request,RequestOptions.DEFAULT);
    System.out.println("删除索引--------"+delete.isAcknowledged());
}
4.4 文档的操作
//测试添加文档
    @Test
    void testAddDocument() throws IOException {
        User user = new User("lisen",27);
        IndexRequest request = new IndexRequest("lisen_index");
        request.id("1");
        //设置超时时间
        request.timeout("1s");
        //将数据放到json字符串
        request.source(JSON.toJSONString(user), XContentType.JSON);
        //发送请求
        IndexResponse response = client.index(request,RequestOptions.DEFAULT);
        System.out.println("添加文档-------"+response.toString());
        System.out.println("添加文档-------"+response.status());
//        结果
//        添加文档-------IndexResponse[index=lisen_index,type=_doc,id=1,version=1,result=created,seqNo=0,primaryTerm=1,shards={"total":2,"successful":1,"failed":0}]
//        添加文档-------CREATED
    }

    //测试文档是否存在
    @Test
    void testExistDocument() throws IOException {
        //测试文档的 没有index
        GetRequest request= new GetRequest("lisen_index","1");
        //没有indices()了
        boolean exist = client.exists(request, RequestOptions.DEFAULT);
        System.out.println("测试文档是否存在-----"+exist);
    }

    //测试获取文档
    @Test
    void testGetDocument() throws IOException {
        GetRequest request= new GetRequest("lisen_index","1");
        GetResponse response = client.get(request, RequestOptions.DEFAULT);
        System.out.println("测试获取文档-----"+response.getSourceAsString());
        System.out.println("测试获取文档-----"+response);

//        结果
//        测试获取文档-----{"age":27,"name":"lisen"}
//        测试获取文档-----{"_index":"lisen_index","_type":"_doc","_id":"1","_version":1,"_seq_no":0,"_primary_term":1,"found":true,"_source":{"age":27,"name":"lisen"}}

    }

    //测试修改文档
    @Test
    void testUpdateDocument() throws IOException {
        User user = new User("李逍遥", 55);
        //修改是id为1的
        UpdateRequest request= new UpdateRequest("lisen_index","1");
        request.timeout("1s");
        request.doc(JSON.toJSONString(user),XContentType.JSON);

        UpdateResponse response = client.update(request, RequestOptions.DEFAULT);
        System.out.println("测试修改文档-----"+response);
        System.out.println("测试修改文档-----"+response.status());

//        结果
//        测试修改文档-----UpdateResponse[index=lisen_index,type=_doc,id=1,version=2,seqNo=1,primaryTerm=1,result=updated,shards=ShardInfo{total=2, successful=1, failures=[]}]
//        测试修改文档-----OK

//        被删除的
//        测试获取文档-----null
//        测试获取文档-----{"_index":"lisen_index","_type":"_doc","_id":"1","found":false}
    }


    //测试删除文档
    @Test
    void testDeleteDocument() throws IOException {
        DeleteRequest request= new DeleteRequest("lisen_index","1");
        request.timeout("1s");
        DeleteResponse response = client.delete(request, RequestOptions.DEFAULT);
        System.out.println("测试删除文档------"+response.status());
    }

    //测试批量添加文档
    @Test
    void testBulkAddDocument() throws IOException {
        ArrayList<User> userlist=new ArrayList<User>();
        userlist.add(new User("cyx1",5));
        userlist.add(new User("cyx2",6));
        userlist.add(new User("cyx3",40));
        userlist.add(new User("cyx4",25));
        userlist.add(new User("cyx5",15));
        userlist.add(new User("cyx6",35));

        //批量操作的Request
        BulkRequest request = new BulkRequest();
        request.timeout("1s");

        //批量处理请求
        for (int i = 0; i < userlist.size(); i++) {
            request.add(
                    new IndexRequest("lisen_index")
                            .id(""+(i+1))
                            .source(JSON.toJSONString(userlist.get(i)),XContentType.JSON)
            );
        }
        BulkResponse response = client.bulk(request, RequestOptions.DEFAULT);
        //response.hasFailures()是否是失败的
        System.out.println("测试批量添加文档-----"+response.hasFailures());

//        结果:false为成功 true为失败
//        测试批量添加文档-----false
    }


    //测试查询文档
    @Test
    void testSearchDocument() throws IOException {
        SearchRequest request = new SearchRequest("lisen_index");
        //构建搜索条件
        SearchSourceBuilder sourceBuilder = new SearchSourceBuilder();
        //设置了高亮
        sourceBuilder.highlighter();
        //term name为cyx1的
        TermQueryBuilder termQueryBuilder = QueryBuilders.termQuery("name", "cyx1");
        sourceBuilder.query(termQueryBuilder);
        sourceBuilder.timeout(new TimeValue(60, TimeUnit.SECONDS));

        request.source(sourceBuilder);
        SearchResponse response = client.search(request, RequestOptions.DEFAULT);

        System.out.println("测试查询文档-----"+JSON.toJSONString(response.getHits()));
        System.out.println("=====================");
        for (SearchHit documentFields : response.getHits().getHits()) {
            System.out.println("测试查询文档--遍历参数--"+documentFields.getSourceAsMap());
        }

//        测试查询文档-----{"fragment":true,"hits":[{"fields":{},"fragment":false,"highlightFields":{},"id":"1","matchedQueries":[],"primaryTerm":0,"rawSortValues":[],"score":1.8413742,"seqNo":-2,"sortValues":[],"sourceAsMap":{"name":"cyx1","age":5},"sourceAsString":"{\"age\":5,\"name\":\"cyx1\"}","sourceRef":{"fragment":true},"type":"_doc","version":-1}],"maxScore":1.8413742,"totalHits":{"relation":"EQUAL_TO","value":1}}
//        =====================
//        测试查询文档--遍历参数--{name=cyx1, age=5}
    }
多条件查询
 @Test
    void testSearchDocument2() throws IOException {
        SearchRequest request = new SearchRequest("mq_ai");
        SearchSourceBuilder searchSourceBuilder = new SearchSourceBuilder();
        searchSourceBuilder.highlighter();
        searchSourceBuilder.size(8).from(0);
        BoolQueryBuilder boolQueryBuilder = new BoolQueryBuilder();

        boolQueryBuilder.must(QueryBuilders.termQuery("sysname", "Service2"));
        boolQueryBuilder.must(QueryBuilders.termQuery("modulename","MsgLocQue.c"));
        boolQueryBuilder.must(QueryBuilders.termQuery("level",4));
        boolQueryBuilder.must(QueryBuilders.rangeQuery("logtime").gt("2020-09-24 20:00:15").lt("2020-12-24 20:04:15"));

        boolQueryBuilder.must(QueryBuilders.termQuery("content","Expire".toLowerCase())); //所有大写字母都要变成小写再查找
        boolQueryBuilder.must(QueryBuilders.matchPhraseQuery("fullcontent","Service2,M 1016"));
        searchSourceBuilder.query(boolQueryBuilder);
        request.source(searchSourceBuilder);
        SearchResponse response = restHighLevelClient.search(request, RequestOptions.DEFAULT);
        System.out.println(JSON.toJSONString(response.getHits()));
        for (SearchHit documentFields : response.getHits().getHits()) {
            System.out.println(documentFields.getSourceAsMap());
        }


    }
/**
* (1)在es里面,不存在大写字母,所以大写字母要转为小写去查询
* (2)text是可以分词去匹配,其他的类型(ip,boolean,integer,data,double,keyword等都是根据value的全部内容进行匹配
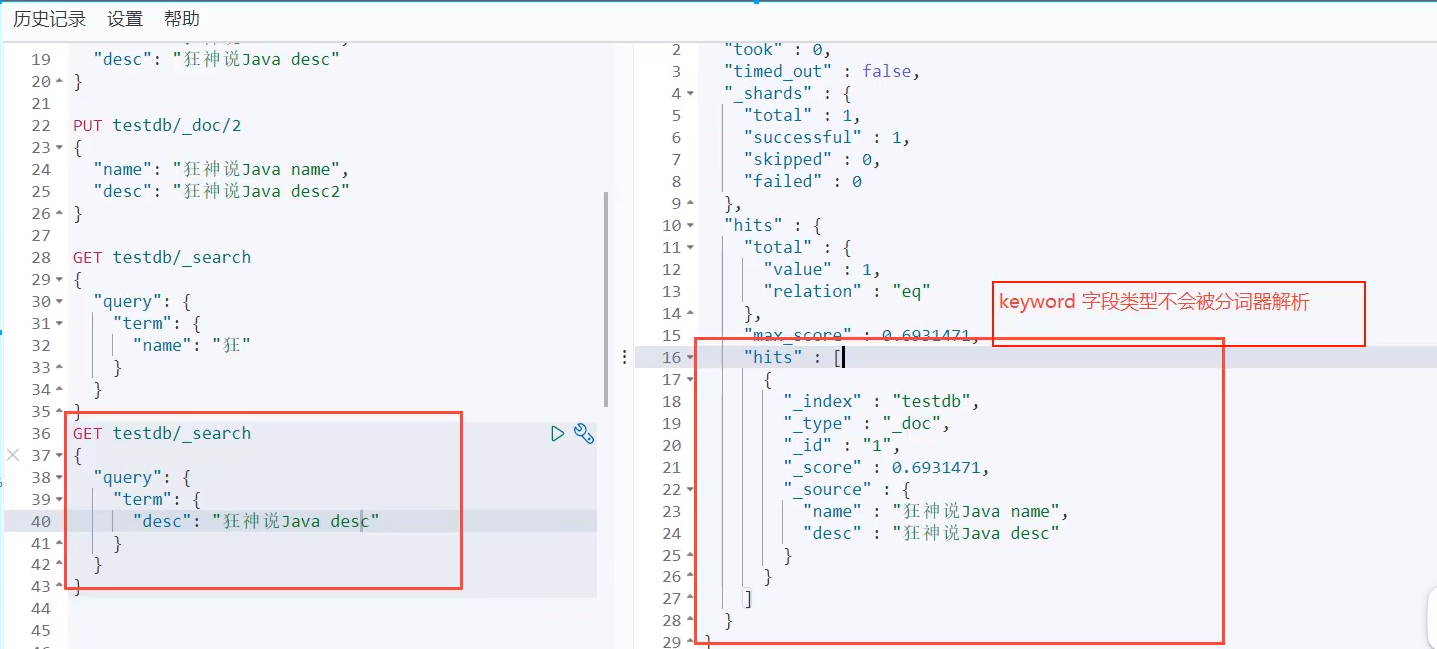
* (3)es中的text默认使用standard进行分词,也就是分成一个个的单词或汉字,所以当使用term的时候,term默认是全文匹配,那么你用一个句子去查询肯定失败了,因为
* 一个句子没办法和一个字去相等是吧,但是你可以在创建text的时候使用分词器代替standard去做完全匹配。
* (4)match则是多字段分词查询,得分是根据文章长度,和匹配到的次数,文章越短匹配次数越多越正确,默认使用的是standard对查询的内容
* 进行拆分和text进行匹配。
* (5)因为term是做整体匹配,对于text可能分词的原因导致查询的句子被拆分了,匹配不到,这时候可以使用match_phrase可以做到
* 查询内容和text文本进行整体匹配,忽视分词的效果。
*/
作者:你的雷哥
本文版权归作者和博客园共有,欢迎转载,但未经作者同意必须在文章页面给出原文连接,否则保留追究法律责任的权利。

 浙公网安备 33010602011771号