ElasticSearch6.3.2源码分析之节点连接实现
ElasticSearch6.3.2源码分析之节点连接实现
这篇文章主要分析ES节点之间如何维持连接的。在开始之前,先扯一下ES源码阅读的一些心得:在使用ES过程中碰到某个问题,想要深入了解一下,可源码又太多了,不知道从哪里入手,怎么办?ES启动的入口类是Elasticsearch.java,顺着这个启动流程,到Node类的构造方法:org.elasticsearch.node.Node#Node(org.elasticsearch.env.Environment, java.util.Collection<java.lang.Class<? extends org.elasticsearch.plugins.Plugin>>),在构造方法中开始初始化各种模块(插件)。如果想了解某个分词插件是如何被载的?又或者是线程池模块、搜索模块是如何初始化的,那么就在Node的构造方法里面看相关的代码。
初始化完成之后,就开始启动各种服务,这是在org.elasticsearch.node.Node#start方法中实现。比如本文要介绍的节点连接服务NodeConnectionsService、用于节点之间数据传输的TransportService、用于master选主,节点发现的ZenDiscovery服务。因此,要想了解ES某个功能的运行机制,那就从start方法开始跟踪调试吧。。
对于不同的服务而言,有着各自的启动逻辑,这都在它们自己的doStart()方法中实现:比如ZenDiscovery#doStart()、NodeConnectionsService#doStart()、org.elasticsearch.cluster.service.ClusterService#doStart 等等……
现在进入正题,ES各个节点是如何连接,并保持连接状态的。
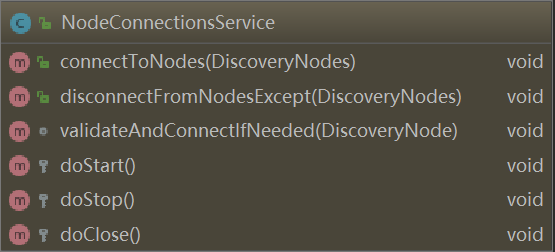
This component is responsible for connecting to nodes once they are added to the cluster state, and disconnect when they are removed. Also, it periodically checks that all connections are still open and if needed restores them.
当有新节点加入集群时,集群状态会更新,NodeConnectionsService 就会尝试连接这个节点,这在:org.elasticsearch.cluster.NodeConnectionsService#connectToNodes方法中实现。此外,NodeConnectionsService 还会周期性检测节点之间的连接是否是open的,如果节点连接出现了故障,则尝试恢复连接,这是通过后台的周期性任务org.elasticsearch.cluster.NodeConnectionsService.ConnectionChecker实现的。
Note that this component is *not* responsible for removing nodes from the cluster if they disconnect / do not respond to pings. This is done by NodesFaultDetection Master fault detection is done by MasterFaultDetection
如果节点之间的连接发生了故障,NodeConnectionsService 并不负责移除节点,移除节点的任务交给:NodesFaultDetection 和 MasterFaultDetection(处理master节点的故障)实现。
现在看具体源码:在Node#start方法中创建NodeConnectionsService并启动连接服务:
final NodeConnectionsService nodeConnectionsService = injector.getInstance(NodeConnectionsService.class);
nodeConnectionsService.start();
各个Service都是AbstractLifecycleComponent的子类,重写了 AbstractLifecycleComponent#doStart,具体的启动逻辑都在doStart方法中:
NodeConnectionsService节点连接启动非常简单,就是一个定时任务尝试连接目标节点:org.elasticsearch.cluster.NodeConnectionsService#doStart
@Override
protected void doStart() {
    //threadPool.schedule 启动一个定时任务,任务的执行逻辑封装在Runnable任务:ConnectionChecker中
    backgroundFuture = threadPool.schedule(reconnectInterval, ThreadPool.Names.GENERIC, new ConnectionChecker());
}
那具体看org.elasticsearch.cluster.NodeConnectionsService.ConnectionChecker的实现:
    class ConnectionChecker extends AbstractRunnable {

        @Override
        public void onFailure(Exception e) {
            logger.warn("unexpected error while checking for node reconnects", e);
        }

        protected void doRun() {
            for (DiscoveryNode node : nodes.keySet()) {
                try (Releasable ignored = nodeLocks.acquire(node)) {
                    //遍历每个节点,验证连接(当新节点加入时,集群状态会更新)
                    validateAndConnectIfNeeded(node);
                }
            }
        }

        @Override
        public void onAfter() {
            if (lifecycle.started()) {
                //每一次验证完连接后,在这里重新执行定时任务开启下一轮的连接验证
                //从而实现了节点之间周期性验证连接(周期性地检测节点是存在的)
                backgroundFuture = threadPool.schedule(reconnectInterval, ThreadPool.Names.GENERIC, this);
            }
        }
    }
ConnectionChecker 就是一个Runnable任务,如果熟悉ES线程池实现的话,ES使用 AbstractRunnable的doRun方法中 封装各种异步操作执行逻辑,即任务的处理在doRun方法中执行,执行成功后由onAfter方法统一处理,如果Runnable任务执行过程中出现了异常则由onFailure统一处理。因此,当一个定时任务执行完成,检测连接成功后,在onAfter方法里面,又开始下一次的连接检测。
再来看具体是如何建立连接的:
    void validateAndConnectIfNeeded(DiscoveryNode node) {
        assert nodeLocks.isHeldByCurrentThread(node) : "validateAndConnectIfNeeded must be called under lock";
        //先判断要不要发起一次连接/连接检测
        if (lifecycle.stoppedOrClosed() || nodes.containsKey(node) == false) { // we double check existence of node since connectToNode might take time...
            // nothing to do
        } else {
            //发起一次连接检测
            try {
                // connecting to an already connected node is a noop
                transportService.connectToNode(node);
                nodes.put(node, 0);//如果连接成功了,将失败次数设置成0
            } catch (Exception e) {
                Integer nodeFailureCount = nodes.get(node);
                assert nodeFailureCount != null : node + " didn't have a counter in nodes map";
                nodeFailureCount = nodeFailureCount + 1;//连接未成功,失败次数加1
                // log every 6th failure
                if ((nodeFailureCount % 6) == 1) {
                    final int finalNodeFailureCount = nodeFailureCount;
                    //每6次 连接失败 就尝试打印告警日志(默认是10s钟发起一次连接检测任务)
                    logger.warn(() -> new ParameterizedMessage(
                                "failed to connect to node {} (tried [{}] times)", node, finalNodeFailureCount), e);
                }
                nodes.put(node, nodeFailureCount);//保存node节点已经连接失败的次数
            }
        }
    }
重点是这行代码:transportService.connectToNode(node);,实际的连接请求在TcpTransport类中:org.elasticsearch.transport.TcpTransport#connectToNode,看这里面的代码,就知道ES节点是如何连接到另一个节点上去的了。
另外,为了防止多线程并发连接某个节点,在发起连接时,需要先获取这个节点所对应的锁,才能发起连接。ES在ReentrantLock功能基础上,实现了自己的锁,里面的实现细节也非常值得借鉴。
    private static final class KeyLock extends ReentrantLock {
        KeyLock(boolean fair) {
            super(fair);
        }

        private final AtomicInteger count = new AtomicInteger(1);
    }
KeyLock是可重入锁,count 保存当前线程获取锁的次数(重入次数)
当向某个节点发起连接时,如果这个节点所对应的锁不存在,会为该节点创建一把锁,并保存到ConcurrentHashMap中。获取锁的实现逻辑如下:org.elasticsearch.common.util.concurrent.KeyedLock#acquire
    public Releasable acquire(T key) {
        while (true) {//注意while true循环, ha ha ....
            KeyLock perNodeLock = map.get(key);
            if (perNodeLock == null) {
                //锁不存在,为这个节点创建一把锁
                ReleasableLock newLock = tryCreateNewLock(key);
                if (newLock != null) {
                    return newLock;
                }
            } else {//锁已经存在了
                assert perNodeLock != null;
                int i = perNodeLock.count.get();//目前锁的重入次数
                //外面是个while true循环, CAS一定会成功
                if (i > 0 && perNodeLock.count.compareAndSet(i, i + 1)) {
                    perNodeLock.lock();
                    return new ReleasableLock(key, perNodeLock);
                }
            }
        }
    }
NodeConnectionsService 初始化了一个KeyedLock对象,用来保存向目标节点发起连接时所创建的锁。
private final KeyedLock<DiscoveryNode> nodeLocks = new KeyedLock<>();
总结:
整个检测连接流程:在Node#start()中启动连接服务,接着向ThreadPool的GENERIC线程池提交一个 检测连接的任务,在 ConnectionChecker#onAfter()方法中 执行下一轮的连接检测(从而实现周期性检测),发送实现的连接请求在:TcpTransport#connectToNode中实现
另外,ES各个节点之间的连接机制的具体实现几乎都在TcpTransport这个类中,心跳发送、断开连接、建立连接等。有时间的可继续深究。
原文:https://www.cnblogs.com/hapjin/p/11395422.html
其他一些文章:
Elasticsearch Transport 模块创建及启动分析
ElasticSearch 线程池类型分析之SizeBlockingQueue

 浙公网安备 33010602011771号