goframe v2.1.0 gf-cli的使用
1.视频教程
https://www.bilibili.com/video/BV1YK4y1b7W8?p=1
2.官方文档
https://goframe.org/pages/viewpage.action?pageId=1115782
3.下载
工具开源项目地址:https://github.com/gogf/gf
GF版本 GF Version: v2.1.0-rc4
linux系统安装环境
aima@haima-PC:~/Desktop$ uname -a
Linux haima-PC 4.15.0-30deepin-generic #31 SMP Fri Nov 30 04:29:02 UTC 2018 x86_64 GNU/Linux
haima@haima-PC:~/Desktop$ lsb_release -a
No LSB modules are available.
Distributor ID:	Deepin
Description:	Deepin 15.11
Release:	15.11
Codename:	stable
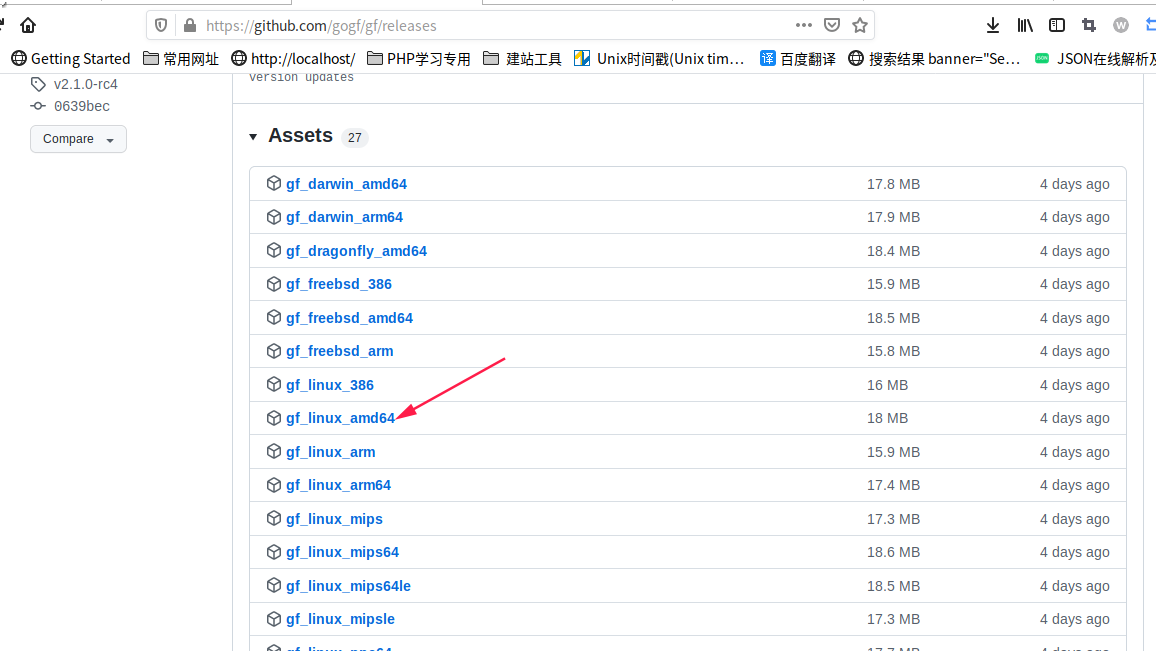
打开下载连接页面
https://github.com/gogf/gf/releases
这里我选择gf_linux_amd64,大家根据自己的系统下载.
wget https://github.com/gogf/gf/releases/download/v2.1.0-rc4/gf_linux_amd64
root@haima-PC:/home/haima/opt$ wget https://github.com/gogf/gf/releases/download/v2.1.0-rc4/gf_linux_amd64 #下载
root@haima-PC:/home/haima/opt# ./gf_linux_amd64 install #执行安装命令
I found some installable paths for you(from $PATH):
  Id | Writable | Installed | Path
   0 |     true |     false | /usr/local/sbin
   1 |     true |     false | /usr/local/bin
   2 |     true |     false | /usr/sbin
   3 |     true |     false | /usr/bin
   4 |     true |     false | /sbin
   5 |     true |     false | /bin
please choose one installation destination [default 1]: 1  #选择安装的位置,这里选择1
gf binary is successfully installed to: /usr/local/bin

haima@haima-PC:~/opt$ ll /usr/local/bin/
-rwxrwxrwx 1 root staff 18921081 6月   5 16:44 gf #已经在目标下生成gf工具


root@haima-PC:/home/haima/opt# gf -v #查看版本
GoFrame CLI Tool v2.1.0-rc4, https://goframe.org
GoFrame Version: cannot find go.mod
CLI Installed At: /usr/local/bin/gf
CLI Built Detail:
  Go Version:  go1.17.10
  GF Version:  v2.1.0-rc4
  Git Commit:  2022-06-01 16:36:40 0639becccc486fda179b81e7a685f67c91b173a4
  Build Time:  2022-06-01 16:34:52


root@haima-PC:/home/haima/opt# gf -h #查看帮助
root@haima-PC:/home/haima/opt# gf gen -h #查看gen帮助
windows系统安装环境
从 https://github.com/gogf/gf/releases 下载gf_windows_amd64.exe
Windows (amd64): https://github.com/gogf/gf/releases/download/v2.1.0-rc4/gf_windows_amd64.exe
双击 gf_windows_amd64.exe 安装
选择 y 和 0 安装到 D:\code\go\bin
hi, it seams it's the first time you installing gf cli.
do you want to install gf binary to your system? [y/n]: y
I found some installable paths for you(from $PATH):
  Id | Writable | Installed | Path
   0 |     true |     false | D:\code\go\bin
   1 |     true |     false | C:\Windows\system32
   2 |     true |     false | C:\Windows
   3 |     true |     false | C:\Windows\System32\Wbem
   4 |     true |     false | C:\Windows\System32\WindowsPowerShell\v1.0\
   5 |     true |     false | C:\Program Files\Git\cmd
   6 |     true |     false | C:\Program Files\Go\bin
   7 |     true |     false | C:\Program Files\nodejs\
   8 |     true |     false | F:\Program Files (x86)\cwrsync_6.2.4_x64_free\bin
   9 |     true |     false | C:\Users\Administrator\AppData\Local\Microsoft\WindowsApps
  10 |     true |     false | C:\Program Files (x86)\Microsoft VS Code\bin
  11 |     true |     false | C:\Users\Administrator\AppData\Roaming\npm
please choose one installation destination [default 0]: 0
gf binary is successfully installed to: D:\code\go\bin
press `Enter` to exit...
按enter·键退出
查看 D:\code\go\bin 目录里已经有安装好的 gf.exe

再打开cmd窗口执行gf -v查看版本
Administrator@haima-PC MINGW64 /d/code/go/src/goframe
$ gf -v
GoFrame CLI Tool v2.1.0-rc4, https://goframe.org
GoFrame Version: cannot find go.mod
CLI Installed At: D:\code\go\bin\gf.exe
CLI Built Detail:
  Go Version:  go1.17.10
  GF Version:  v2.1.0-rc4
  Git Commit:  2022-06-01 16:36:40 0639becccc486fda179b81e7a685f67c91b173a4
  Build Time:  2022-06-01 16:34:52
到此gocli已经安装完成
建议创建项目的时候,把当前最新适配的 gf 工具也创建一份到当前的项目目录,避免后续工具升级后,新的工具操作项目造成代码不兼容,1.15、1.16在这个问题上吃了不少亏了。不管系统的 gf 工具是哪个版本,都可以使用项目里面保存的 gf 工具来操作这个项目,这样就不会乱了
4.创建项目
Administrator@haima-PC MINGW64 /d/code/go/src/goframe
$ gf init gf_demo01 #在当前目录里创建项目名为gf01的项目
initializing...
initialization done!
you can now run "cd gf_demo01 && gf run main.go" to start your journey, enjoy!
5.启动项目
下载依赖
go mod tidy
运行程序
gf run main.go
Administrator@haima-PC MINGW64 /d/code/go/src/goframe/gf_demo01
$ gf run main.go
build: main.go
go build -o ./\main.exe  main.go
./\main.exe
build running pid: 18836
2022-06-14 06:00:43.390 [INFO] swagger ui is serving at address: http://127.0.0.1:8000/swagger/
2022-06-14 06:00:43.394 [INFO] openapi specification is serving at address: http://127.0.0.1:8000/api.json
2022-06-14 06:00:43.397 [INFO] pid[18836]: http server started listening on [:8000]

  ADDRESS | METHOD |   ROUTE    |                             HANDLER                             |           MIDDLEWARE
----------|--------|------------|-----------------------------------------------------------------|----------------------------------
  :8000   | ALL    | /*         | github.com/gogf/gf/v2/net/ghttp.internalMiddlewareServerTracing | GLOBAL MIDDLEWARE
----------|--------|------------|-----------------------------------------------------------------|----------------------------------
  :8000   | ALL    | /api.json  | github.com/gogf/gf/v2/net/ghttp.(*Server).openapiSpec           |
----------|--------|------------|-----------------------------------------------------------------|----------------------------------
  :8000   | GET    | /hello     | gf_demo01/internal/controller.(*cHello).Hello                   | ghttp.MiddlewareHandlerResponse
----------|--------|------------|-----------------------------------------------------------------|----------------------------------
  :8000   | ALL    | /swagger/* | github.com/gogf/gf/v2/net/ghttp.(*Server).swaggerUI             | HOOK_BEFORE_SERVE
----------|--------|------------|-----------------------------------------------------------------|----------------------------------
此命令支持热编译(自动编译)
浏览器访问 http://127.0.0.1:8000/hello 已经可以正常输出
Hello World!
6.交叉编译
文档说明:
https://goframe.org/pages/viewpage.action?pageId=1115788
a.在 manifest/config/config.yaml 文件里加入下面的编译配置信息
# GoFrame CLI tool configuration.
gfcli:

  build:
    name: "gf11" #编译后的文件名称
    arch: "386,amd64,arm"
    system: "linux,windows,darwin"
    mod: "none"
    pack: ""
    version: "v1.0.1"  # 编译后的文件会生成到/bin/v1.0.0目录里
    #path: "./bin"  # 输出的可执行文件路径,
    output: "./bin"  # 输出的可执行文件路径,会输出到temp/v1.0.0   这里写bin没有用
    extra: ""
    varMap:   # 自定义编译时内置变量
      k1: v1
      k2: v2
b.执行编译命令
$ gf build main.go
2022-06-14 07:06:08.557 start building...
2022-06-14 07:06:08.559 go build -o ./temp/v1.0.1/windows_386/gf11.exe main.go
2022-06-14 07:06:11.786 go build -o ./temp/v1.0.1/windows_amd64/gf11.exe main.go
2022-06-14 07:06:14.878 go build -o ./temp/v1.0.1/darwin_amd64/gf11 main.go
2022-06-14 07:06:16.215 go build -o ./temp/v1.0.1/linux_arm/gf11 main.go
2022-06-14 07:06:19.816 go build -o ./temp/v1.0.1/linux_amd64/gf11 main.go
2022-06-14 07:06:22.948 go build -o ./temp/v1.0.1/linux_386/gf11 main.go
2022-06-14 07:06:26.065 done!
c.打包好之后的文件
Administrator@haima-PC MINGW64 /d/code/go/src/goframe/gf_demo01/temp/v1.0.1
$ ls -al
total 0
drwxr-xr-x 1 Administrator 197121 0 Jun 14 06:50 .
drwxr-xr-x 1 Administrator 197121 0 Jun 14 07:03 ..
drwxr-xr-x 1 Administrator 197121 0 Jun 14 07:06 darwin_amd64
drwxr-xr-x 1 Administrator 197121 0 Jun 14 07:06 linux_386
drwxr-xr-x 1 Administrator 197121 0 Jun 14 07:06 linux_amd64
drwxr-xr-x 1 Administrator 197121 0 Jun 14 07:06 linux_arm
drwxr-xr-x 1 Administrator 197121 0 Jun 14 07:06 windows_386
drwxr-xr-x 1 Administrator 197121 0 Jun 14 07:06 windows_amd64
output参数没有用
会输出到temp/v1.0.1 目标里
可以使用path参数
d.运行编译后的文件
这里本人的系统是linux_amd64,
所以运行temp/v1.0.1/windows_amd64/gf11.exe
Administrator@haima-PC MINGW64 /d/code/go/src/goframe/gf_demo01/temp/v1.0.1/windows_amd64
$ ./gf11.exe
2022-06-14 07:12:28.595 [INFO] swagger ui is serving at address: http://127.0.0.1:8000/swagger/
2022-06-14 07:12:28.598 [INFO] openapi specification is serving at address: http://127.0.0.1:8000/api.json
2022-06-14 07:12:28.601 [INFO] pid[11988]: http server started listening on [:8000]

  ADDRESS | METHOD |   ROUTE    |                             HANDLER                             |           MIDDLEWARE
----------|--------|------------|-----------------------------------------------------------------|----------------------------------
  :8000   | ALL    | /*         | github.com/gogf/gf/v2/net/ghttp.internalMiddlewareServerTracing | GLOBAL MIDDLEWARE
----------|--------|------------|-----------------------------------------------------------------|----------------------------------
  :8000   | ALL    | /api.json  | github.com/gogf/gf/v2/net/ghttp.(*Server).openapiSpec           |
----------|--------|------------|-----------------------------------------------------------------|----------------------------------
  :8000   | GET    | /hello     | gf_demo01/internal/controller.(*cHello).Hello                   | ghttp.MiddlewareHandlerResponse
----------|--------|------------|-----------------------------------------------------------------|----------------------------------
  :8000   | ALL    | /swagger/* | github.com/gogf/gf/v2/net/ghttp.(*Server).swaggerUI             | HOOK_BEFORE_SERVE
----------|--------|------------|-----------------------------------------------------------------|----------------------------------
浏览器访问http://127.0.0.1:8000/hello已经可以正常输出
Hello World!
7.gen命令的使用
gen命令用以自动化从数据库直接生成模型文件。
注意:所以要先在数据里建好表
操作步骤
a.新建表
sys_users表
CREATE TABLE `user` (
  `id` int(10) unsigned NOT NULL AUTO_INCREMENT COMMENT 'User ID',
  `passport` varchar(45) NOT NULL COMMENT 'User Passport',
  `password` varchar(45) NOT NULL COMMENT 'User Password',
  `nickname` varchar(45) NOT NULL COMMENT 'User Nickname',
  `create_at` datetime DEFAULT NULL COMMENT 'Created Time',
  `update_at` datetime DEFAULT NULL COMMENT 'Updated Time',
  PRIMARY KEY (`id`)
) ENGINE=InnoDB AUTO_INCREMENT=2 DEFAULT CHARSET=utf8;
CREATE TABLE `sys_category` (
  `id` int(10) unsigned NOT NULL AUTO_INCREMENT,
  `created_at` timestamp NULL DEFAULT NULL,
  `updated_at` timestamp NULL DEFAULT NULL,
  `deleted_at` timestamp NULL DEFAULT NULL,
  `name` varchar(255) DEFAULT NULL COMMENT '所属公司',
  PRIMARY KEY (`id`)
) ENGINE=InnoDB AUTO_INCREMENT=13 DEFAULT CHARSET=utf8;
b.重建配置
文档说明:
https://goframe.org/pages/viewpage.action?pageId=3673173
新建配置文件:
hack/config.yaml
# GoFrame CLI tool configuration.
gfcli:
  gen:
    dao:
      - link: "mysql:root:123456@tcp(127.0.0.1:3306)/gf_demo01"
        tables: "user,sys_category"
        removePrefix: "sys_"  #去除生成文件的sys前缀
        descriptionTag: true
        noModelComment: true
b.生成model
查看帮助命令:
gf gen dao -h
执行命令:
gf gen dao
Administrator@haima-PC MINGW64 /d/code/go/src/goframe/gf_demo01
$ gf gen dao
generated: internal\dao\user.go   #每次执行都会重新生成
generated: internal\dao\internal\user.go #只会生成一次
generated: internal\dao\category.go
generated: internal\dao\internal\category.go
generated: internal\model/do\user.go #每次执行都会重新生成
generated: internal\model/do\category.go
generated: internal\model/entity\user.go #每次执行都会重新生成
generated: internal\model/entity\category.go
done!
添加数据库配置 manifest/config/config.yaml文件
# Database.
database:
  logger:
    level:   "all"
    stdout:  true

  default:
    link:   "mysql:root:12345678@tcp(127.0.0.1:3306)/gf_demo01"
    debug:  true
c.调用生成的users model
修改 app/api/hello/hello.go文件
// Hello is a demonstration route handler for output "Hello World!".
func Hello(r *ghttp.Request) {
    r.Response.Writeln("Hello World!")
    userInfo, err := users.FindOne("username = ?", "admin")
    if err !=nil {
        //glog.Error(err)
        fmt.Println(err)
        r.Response.Writefln("err")
        r.Exit()
    }
    r.Response.Writefln(userInfo.NickName)
}
运行 gf run main.go
浏览器访问http://localhost:8199/已经可以正常输出
Hello World!
超级管理员
8.orm的操作
package main

import (
    "fmt"
    "github.com/gogf/gf/frame/g"
    "p3/app/model/mytable"
)


func main() {
    // 查询所有数据
    result, err := mytable.FindAll()
    if err != nil {
        panic(err)
    }

    // 遍历数据
    for _, val := range result{
        fmt.Printf("id: %d  name:%s\n", val.Id, val.Name)
    }

    // 查询单条数据
    data, err := mytable.FindOne()
    if err != nil {
        panic(err)
    }
    fmt.Printf("id: %d  name:%s\n", data.Id, data.Name)


    // 条件查询, 查询name为王哈哈的
    dataList, err := mytable.FindAll(g.Map{
        "name": "王哈哈",
    })
    if err != nil {
        panic(err)
    }

    for _, val := range dataList {
        fmt.Printf("id: %d  name:%s\n", val.Id, val.Name)
    }

    // 查询数据总条数
    num, err := mytable.FindCount()
    if err != nil {
        panic(err)
    }
    fmt.Printf("共有 %d 条数据\n", num)


    // 插入数据
    _, err = mytable.Insert(g.Map{
        "name": "王哈哈",
    })

    if err != nil {
        panic(err)
    } else {
        fmt.Println("插入数据成功")
    }

    // 删除数据
    _, err  = mytable.Delete(g.Map{
        "id": 3,
    })
    if err != nil {
        panic(err)
    } else {
        fmt.Println("删除数据成功")
    }

    // 修改数据, 把id为8的name改为王大炮
    mytable.Update(g.Map{"name": "王大炮"}, "id", 8)

    // 修改多个字段, 把id为9的数据name改为小可爱,id改为10000
    mytable.Update(g.Map{"name": "小可爱", "id": 10000}, "id", 9)
}

 浙公网安备 33010602011771号