python学习笔记:pytest单元测试框架
一、安装配置和运行规则
1、安装:pip install pytest
查看安装版本:pytest --version
2、Pytest用例运行规则
用Pytest写用例时候,一定要按照下面的规则去写,否则不符合规则的测试用例是不会执行的。
文件名以 test_*.py 文件或*_test.py;
以 test_ 开头的函数;
以 Test 开头的类,不能包含 __init__ 方法;
以 test_ 开头的类里面的方法;
所有的包(package)必项要有__init__.py 文件。
二、常见报错处理
1、运行测试用例时报错:AttributeError: 'Function' object has no attribute 'get_marker'
解决方案:升级pytest_remotedata版本
cmd --> 升级命令:pip install -U pytest_remotedata
三、基本case编写
在unittest中,写case必须得定义类,继承TestCase,而pytest不需要,类和函数都支持,函数需要以test开头,类需要以Test开头,断言只使用assert关键字即可, 代码如下:
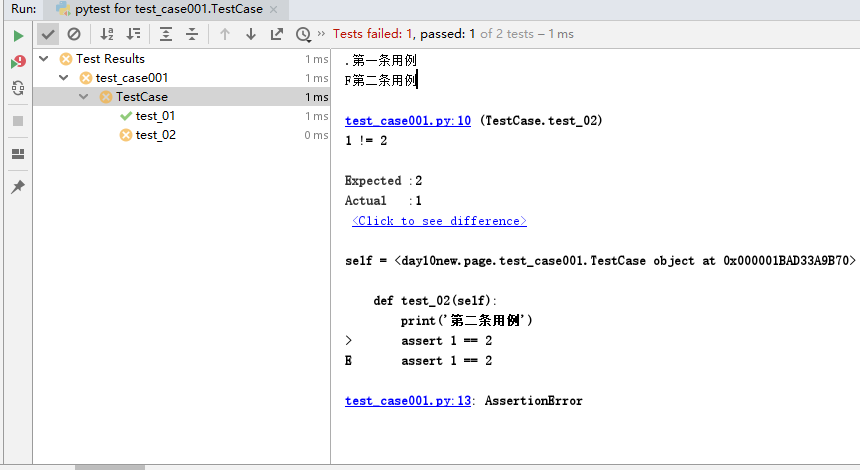
import  pytest

class TestCase:

    #正确的用例
    def test_01(self):
        print('第一条用例')
        assert  1==1

    #不正确的用例
    def test_02(self):
        print('第二条用例')
        assert 1 == 2

# 运行用例 2种方式 命令运行pytest, main方法运行
if __name__ =='__main__':
    pytest.main()
运行结果如下
四、装饰器:用例执行的优先级、用例标签、用例跳过
1、用例优先级:使用@pytest.mark.run(order=xx)装饰器,数字越小,优先级越高。
注解不能控制执行顺序,原因为当前python环境未安装pytest-ordering
pip install pytest-ordering
2、用例标签:多条用例,只想执行某一条、某几条用例,可以使用装饰器@pytest.mark.smoke(smoke是名字随便取,在运行时需要加上'-m‘,’smoke'进行标记)
3、用例跳过:使用装饰器@pytest.mark.skip("无条件跳过"),需要传一个字符串,说明跳过原因
import  pytest

class TestCase001:

    #正确的用例
    @pytest.mark.smoke #只执行该条用例,执行时需要加上'-m','smoke'
    def test_01(self):
        print('第一条用例')
        assert  1==1

    # @pytest.mark.skip("无条件跳过") #跳过此条用例,不执行
    def test_02(self):
        print('第二条用例')
        assert 1 == 2


    # @pytest.mark.run(order=1)#此条用例优先级为1,数字越小最早执行
    def test_03(self):
        print('第三条用例')
        assert 1 == '1'

if __name__ =='__main__':
    pytest.main(['-m','smoke','test_case001'])
五、前置/后置操作
import  pytest

class TestCase:

    # 前置条件类
    def setup_class(self):
        print('一个case执行之前做的事情')
    #后置条件类
    def teardown_class(self):
        print('一个case执行之后做的事情')

    # 前置条件方法
    def setup(self):
        print('所有case例执行之前做的事情')
    #后置条件方法
    def teardown(self):
        print('所有case执行之后做的事情')

    def test_01(self):
        print('第一条用例')

    def test_02(self):
        print('第二条用例')


if __name__ =='__main__':
    pytest.main([])
六、测试报告
1、生成HTML报告
1)pytest-html
安装:pip install pytest-html
使用:pytest.main(["--html=./report.html","--self-contained-html"])
2)PyTestReport(推荐)
安装:pip install PyTestReport
使用:pytest.main(["--pytest_report","py_test_report.html","--pytest_title","这是测试报告的标题","--pytest_desc","测试报告描述"])
3)pytest-html-reporter
安装:pip install pytest-html-reporter
使用:pytest.main(["--html-report=./report_new.html"])
2、集成Allure报告(推荐)
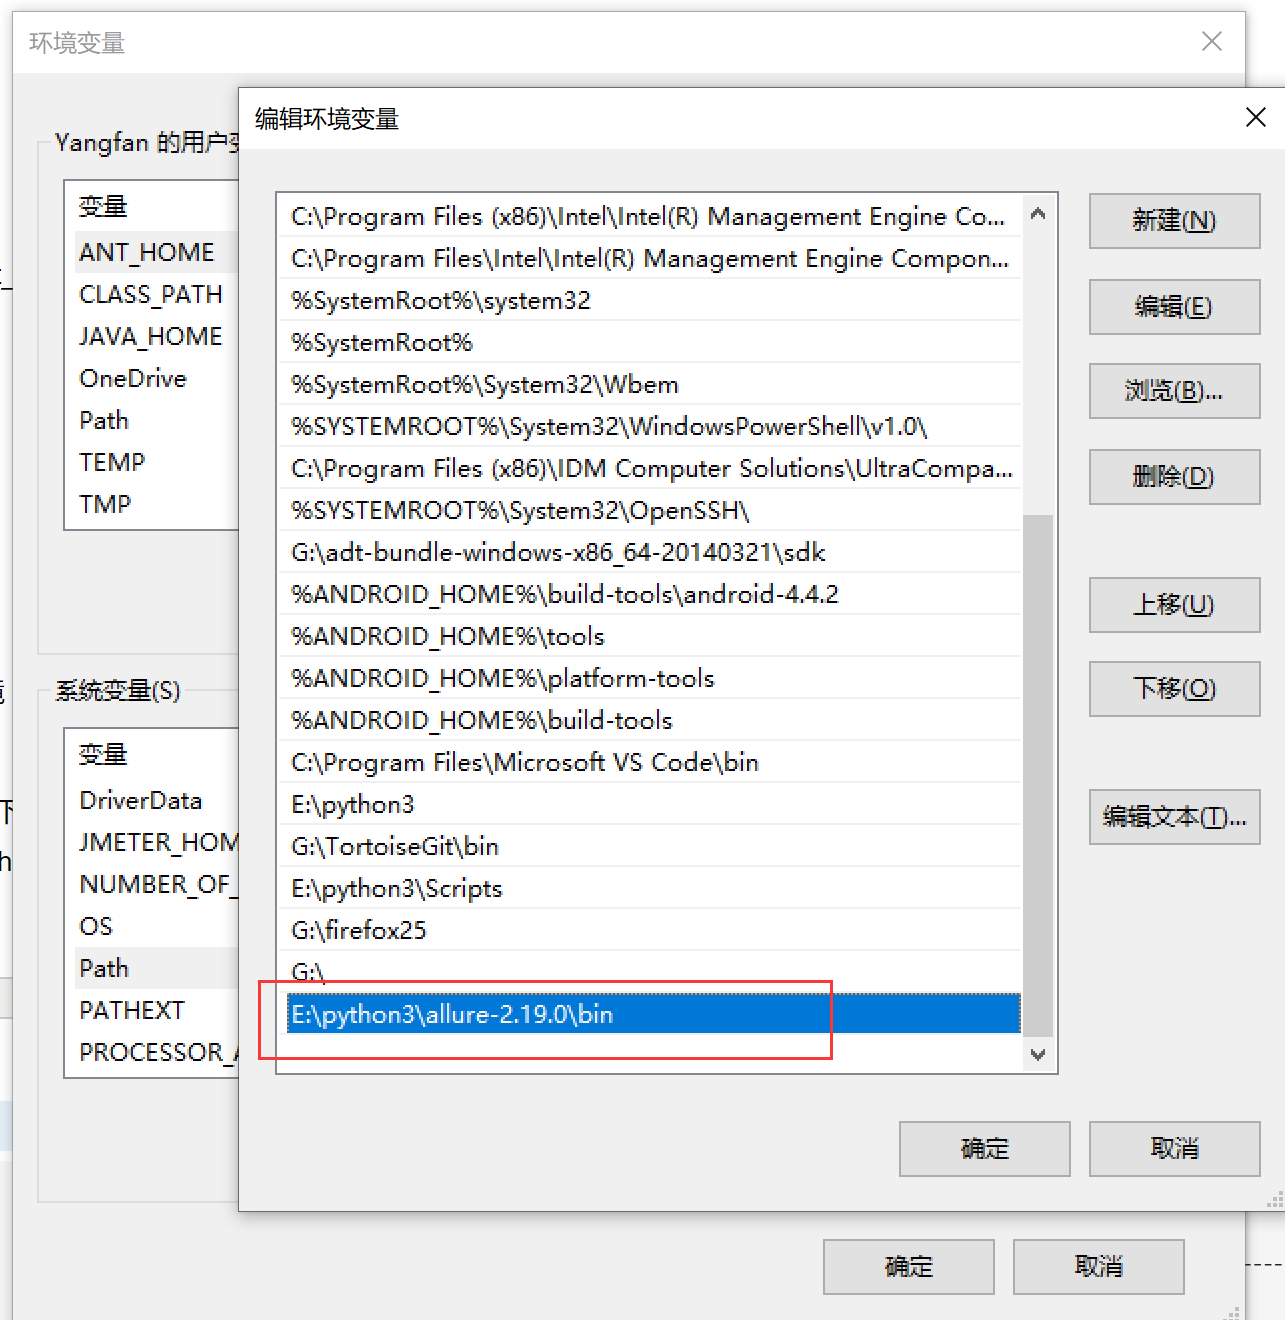
如果要在pytest中集成allure报告,首先得下载allure,并配置好环境
4)生成测试报告,新建py文件run.py,键入以下代码。
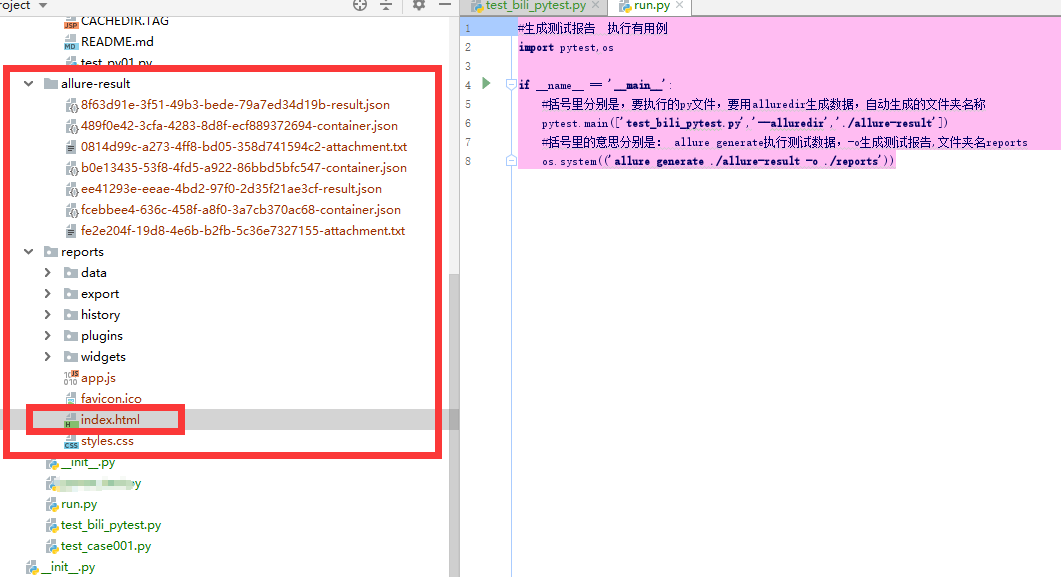
#生成测试报告  执行有用例
import pytest,os

if __name__ == '__main__':
    #括号里分别是,要执行的py文件,要用alluredir生成数据,自动生成的文件夹名称
    pytest.main(['test_bili_pytest.py','--alluredir','./allure-result'])
    #括号里的意思分别是: allure generate执行测试数据,-o生成测试报告,文件夹名reports
    os.system(('allure generate ./allure-result -o ./reports'))
5)生成的测试数据如下,不需要动,否则会影响报告。
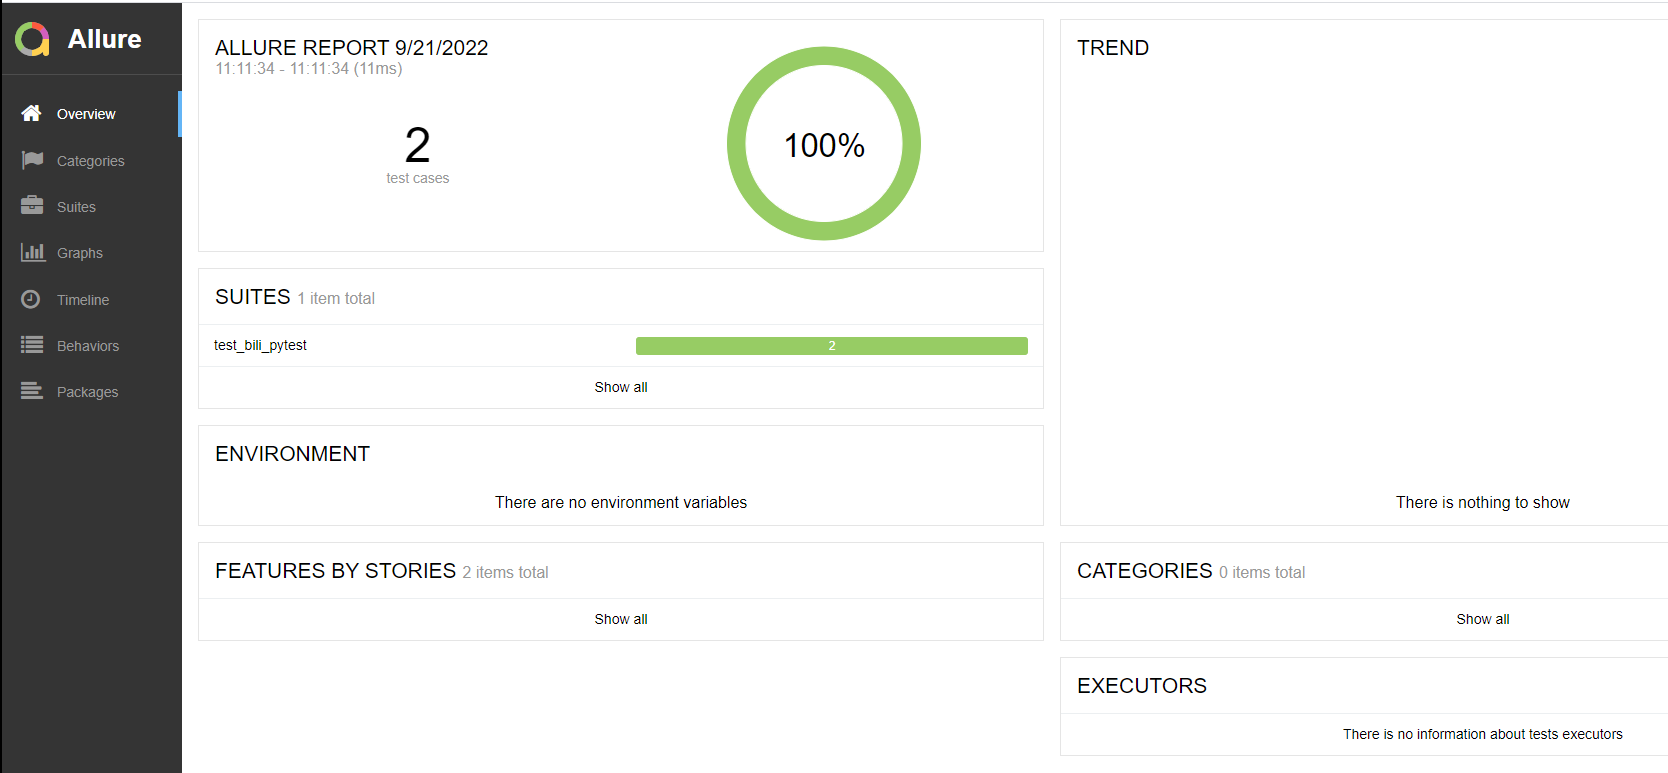
在index.html点右键→open in browser→选择浏览器,打开报告
七、pytest之fixture
1、完整方法如下
@pytest.fixture(scope="function", params=None, autouse=False, ids=None, name=None)
2、参数说明
1)scope参数
标记方法的作用域,有四个可选值 "function" (默认,函数), "class"(类), "module"(模块,多个类) or "package/session"(包)。
--"function" 每一个函数或方法都会调用
--"class",每一个类调用一次,一个类中可以有多个方法
--"module",每一个.py文件调用一次,该文件内又有多个function和class
--"session",是多个文件调用一次,可以跨.py文件调用,每个.py文件就是module。
2)params参数: 一个可选的参数列表,实现参数化功能
3)autouse参数::如果为False(默认值),需要调用来激活fixture,如果为True,则所有用例自动调用fixture。
4)id:用例标识ID,每个ids对应于params,如果没有id他们 将从params自动产生。
5)name:fixture的重命名,如果使用了name,呐只能将name传入,函数名不再生效。
yield关键字
写在yield前面的就是前置条件,写在后面的就是后置条件。可以只有前置或后置条件。
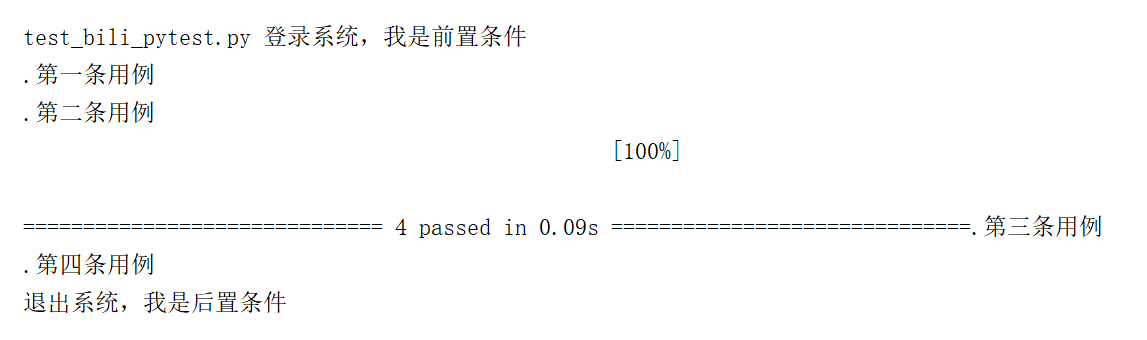
import  pytest

@pytest.fixture(scope='module',autouse=True)
def login():
    print("登录系统,我是前置条件")
    yield
    print("退出系统,我是后置条件")

class TestCase1:

    def test_01(self):
        print('第一条用例')

    def test_02(self):
        print('第二条用例')

class TestCase2:

    def test_03(self):
        print('第三条用例')

    def test_04(self):
        print('第四条用例')

if __name__ =='__main__':
    pytest.main([])
执行后效果如下
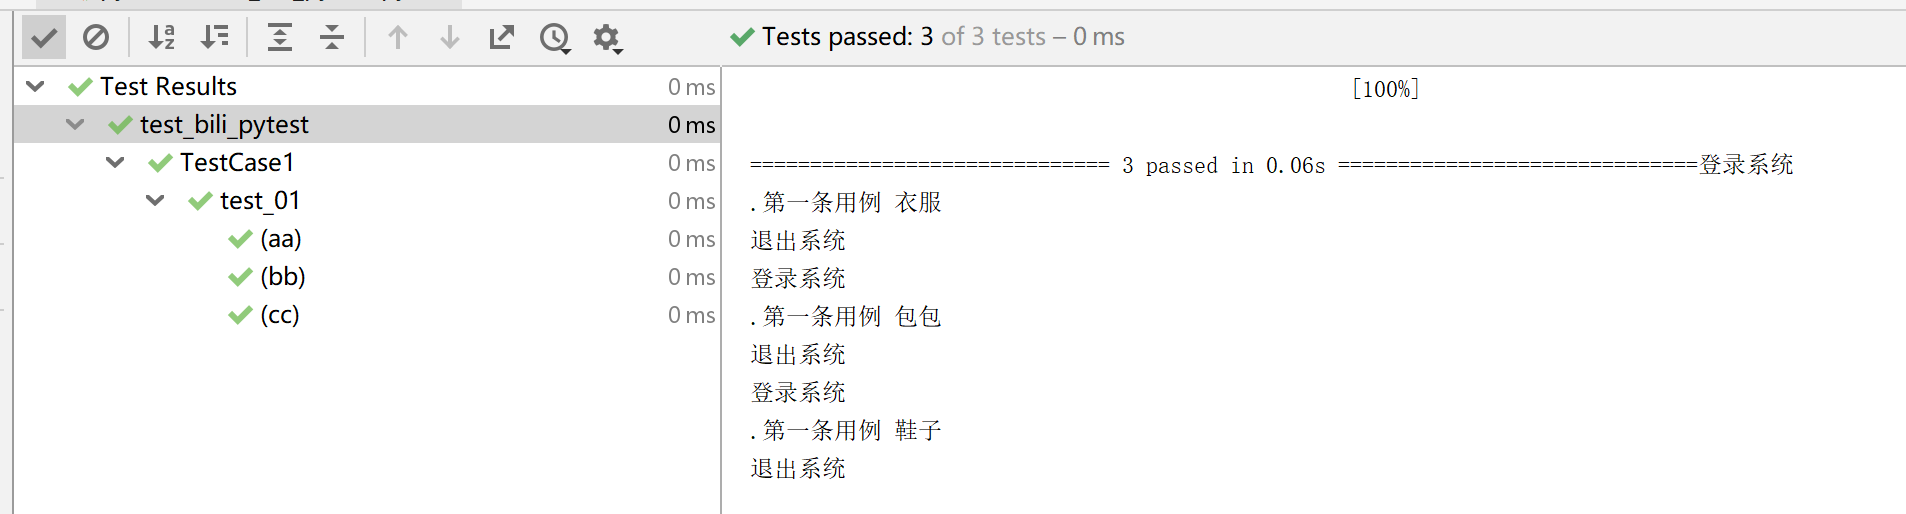
import  pytest

@pytest.fixture(scope='function',autouse=True,params=['衣服','包包','鞋子'],ids=['aa','bb','cc'],name='l')
def login(request):
    print("登录系统")
    yield request.param
    print("退出系统")

class TestCase1:

    def test_01(self,l):
        print('第一条用例',l)


if __name__ =='__main__':
    pytest.main([])
#params实现参数化,可以传不同的数据,元祖、列表、元祖加字典、列表加字典,注意写法params .param是固定的
#ids用例取名
#name是给fixture取小名,这里login取小名为l
效果如下
conftest结合fixture的使用
conftest的特点:
- 可以跨.py文件调用,有多个.py文件调用时,可让conftest.py只调用了一次fixture,或调用多次fixture
- conftest.py与运行的用例要在同一个pakage下,并且有__init__.py文件
- 不需要import导入 conftest.py,pytest用例会自动识别该文件,放到项目的根目录下就可以全局目录调用了,如果放到某个package下,那就在改package内有效,可有多个conftest.py
- conftest.py配置脚本名称是固定的,不能改名称
- conftest.py文件不能被其他文件导入
- 所有同目录测试文件运行前都会执行conftest.py文件
'''
1、conftest在用例的同目录下
2、conftest名字不能改变
3、不需要导入,自动查找fixture
'''
import pytest
@pytest.fixture(scope='function',autouse=True)
def login():
    print("登录系统")
    yield
    print("退出系统")

 浙公网安备 33010602011771号