
element-ui分页器简单使用
- 引入element-ui
- 写入标签
<el-pagination
//每页的条数
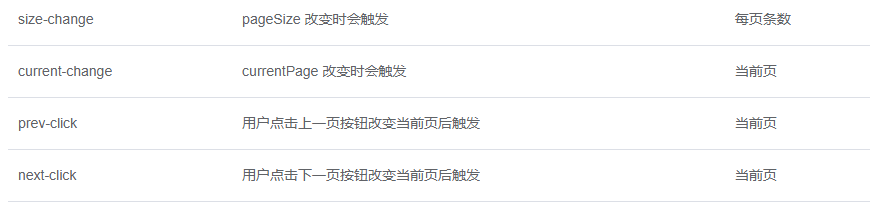
@size-change="handleSizeChange"
//当前页
@current-change="handleCurrentChange"
//当前页数
:current-page.sync="currentPage2"
:page-sizes="[100, 200, 300, 400]"
:page-size="100"``
//按钮
layout="sizes, prev, pager, next"
//总条数
:total="1000">
</el-pagination>
事件
          <el-pagination
            @prev-click="prePage"
            @next-click="nextPage"
            @current-change="handleCurrentChange"
            :current-page.sync="queryParams.pageNum"
            layout="prev, pager, next, jumper"
            :total="totalPage">
          </el-pagination>
    //分页器事件
    //前进
    prePage(){
      this.queryParams.pageNum -= 1
      console.log(this.queryParams.pageNum,'前进')
      this.queryCrouse()
    },
    //后退
    nextPage(){
      this.queryParams.pageNum += 1
      console.log(this.queryParams.pageNum,'后退')
      this.queryCrouse()
    },
    //直接输页码跳转
    handleCurrentChange(val){
      this.queryParams.pageNum = val
      this.queryCrouse()
    }
没有什么是一蹴而就的。


 浙公网安备 33010602011771号