
Centos7部署Kubernetes集群(单工作节点)+配置dashboard可视化UI
目标:docker+kubernetes+cadvosor+dashboard
一:物理硬件
两台虚拟机(centos7):一台做为主节点(master),一台做为工作节点(node)
[root@MyCentos7 ~]# uname -a
Linux MyCentos7 3.10.0-693.el7.x86_64 #1 SMP Tue Aug 22 21:09:27 UTC 2017 x86_64 x86_64 x86_64 GNU/Linux
[root@MyCentos7 ~]# cat /etc/redhat-release
CentOS Linux release 7.4.1708 (Core)
二:安装说明
两台服务器:
MyCentos7 192.168.126.130
MyCentos7-1 192.168.126.131
- MyCentos7 做为主节点(master),为控制节点,运行
kube-apiserver,kube-controller-manager,kube-scheduler和etcd四个服务,外加flanneld,dashboard - MyCentos7-1 做为工作节点(node),实际运行容器的地方,运行
kubelet,proxy,docker,cadvisor,flanneld
服务说明:
- etcd 是一个高可用的
Key/Value存储系统,主要用于分享配置和服务发现。 - kubelet是主节点代理,负责每个节点的运行状态,确保节点中的所有容器正常运行。
- cAdvisor 是谷歌公司用来分析运行中的
Docker容器的资源占用以及性能特性的工具。 - docker是容器
- dashboard,kubernetes的可视化Web监控和操作界面,可以处理所有的工作负载资源(指 Service、Pod 等这些 k8s 中的资源)。注:在master和node上都需要安装flannel
- flanneld,管理Containers网络
三:安装步骤
1.准备
在MyCentos7(master)和MyCentos7-1(node)上均进行以下操作
- 设置hosts
在/etc/hosts中添加
192.168.126.130   MyCentos7
192.168.126.131   MyCentos7-1
- 关闭防火墙
systemctl disable firewalld.service   #禁止firewall开机启动
systemctl stop firewalld.service      #停止firewall
或
service iptables stop     #临时关闭
chkconfig iptables off    #禁止开机启动
2.安装
2.1:master节点上部署etcd
k8s运行依赖etcd,需要先部署,此处采用yum方式安装
[root@MyCentos7 ~]# yum install etcd -y
yum安装的etcd默认配置文件在/etc/etcd/etcd.conf。编辑配置文件,更改以下带颜色部分信息:
[root@MyCentos7 ~]# vim /etc/etcd/etcd.conf
#[Member]
#ETCD_CORS=""
ETCD_DATA_DIR="/var/lib/etcd/default.etcd"
#ETCD_WAL_DIR=""
ETCD_LISTEN_PEER_URLS="http://0.0.0.0:2380"
ETCD_LISTEN_CLIENT_URLS="http://0.0.0.0:2379,http://0.0.0.0:4001"
#ETCD_MAX_SNAPSHOTS="5"
#ETCD_MAX_WALS="5"
ETCD_NAME=MyCentos7
#ETCD_SNAPSHOT_COUNT="100000"
#ETCD_HEARTBEAT_INTERVAL="100"
#ETCD_ELECTION_TIMEOUT="1000"
#ETCD_QUOTA_BACKEND_BYTES="0"
#ETCD_MAX_REQUEST_BYTES="1572864"
#ETCD_GRPC_KEEPALIVE_MIN_TIME="5s"
#ETCD_GRPC_KEEPALIVE_INTERVAL="2h0m0s"
#ETCD_GRPC_KEEPALIVE_TIMEOUT="20s"
#
#[Clustering]
#ETCD_INITIAL_ADVERTISE_PEER_URLS="http://localhost:2380"
ETCD_ADVERTISE_CLIENT_URLS="http://MyCentos7:2379,http://MyCentos7:4001"
#ETCD_DISCOVERY=""
#ETCD_DISCOVERY_FALLBACK="proxy"
#ETCD_DISCOVERY_PROXY=""
#ETCD_DISCOVERY_SRV=""
#ETCD_INITIAL_CLUSTER="MyCentos7=localhost:2380"
#ETCD_INITIAL_CLUSTER_TOKEN="etcd-cluster"
#ETCD_INITIAL_CLUSTER_STATE="new"
#ETCD_STRICT_RECONFIG_CHECK="true"
#ETCD_ENABLE_V2="true"
#
#[Proxy]
#ETCD_PROXY="off"
#ETCD_PROXY_FAILURE_WAIT="5000"
#ETCD_PROXY_REFRESH_INTERVAL="30000"
#ETCD_PROXY_DIAL_TIMEOUT="1000"
#ETCD_PROXY_WRITE_TIMEOUT="5000"
#ETCD_PROXY_READ_TIMEOUT="0"
#
#[Security]
#ETCD_CERT_FILE=""
#ETCD_KEY_FILE=""
#ETCD_CLIENT_CERT_AUTH="false"
#ETCD_TRUSTED_CA_FILE=""
#ETCD_AUTO_TLS="false"
#ETCD_PEER_CERT_FILE=""
#ETCD_PEER_KEY_FILE=""
#ETCD_PEER_CLIENT_CERT_AUTH="false"
#ETCD_PEER_TRUSTED_CA_FILE=""
#ETCD_PEER_AUTO_TLS="false"
启动etcd,设置开机自启动,并进行验证
[root@MyCentos7 ~]# systemctl start etcd
[root@MyCentos7 ~]# systemctl enable etcd
[root@MyCentos7 ~]#  etcdctl set test/test0 0
0
[root@MyCentos7 ~]#  etcdctl get test/test0
0
[root@MyCentos7 ~]# etcdctl -C http://MyCentos7:4001 cluster-health
member 8e9e05c52164694d is healthy: got healthy result from http://MyCentos7:2379
cluster is healthy
[root@MyCentos7 ~]# etcdctl -C http://MyCentos7:2379 cluster-health
member 8e9e05c52164694d is healthy: got healthy result from http://MyCentos7:2379
cluster is healthy
至此,etcd安装及配置完成
2.2安装docker(master和node均安装)
修改镜像拉取地址,见:https://www.cnblogs.com/guyeshanrenshiwoshifu/p/9025104.html
1:安装
    yum install docker
2:启动docker并设置开机自启动
    systemctl start docker.service
    systemctl enable docker.service
至此,docker安装及镜像配置完成
2.3安装kubernetes(master和node均安装)
yum install kubernetes
yum安装的kubernetes默认配置文件在/etc/kubernetes
[root@MyCentos7 ~]# cd /etc/kubernetes/
[root@MyCentos7 kubernetes]# ll
-rw-r--r--. 1 root root 943 6月 6 10:57 apiserve  (kubernetes api配置文件)
-rw-r--r--. 1 root root 702 6月 5 16:14 config  (kubernetes主配置文件)
-rw-r--r--. 1 root root 189 7月 3 2017 controller-manager  (集群管理配置文件)
-rw-r--r--. 1 root root 615 7月 3 2017 kubelet  (kubelet node配置文件)
-rw-r--r--. 1 root root 103 7月 3 2017 proxy  (kubernetes proxy配置文件)
-rw-r--r--. 1 root root 111 7月 3 2017 scheduler  (kubernetes scheduler配置文件)
其中:
kubernetes在master上需要运行以下组件:
Kubernets API Server
Kubernets Controller Manager
Kubernets Scheduler
-------master上要修改:(红色字体为改动部分)
apiserver和config两个文件,controller-manager和scheduler这两个文件采用默认配置即可,其余没用到
-
修改apiserver
[root@MyCentos7 kubernetes]# vim /etc/kubernetes/apiserver

###
# kubernetes system config
#
# The following values are used to configure the kube-apiserver
#

# The address on the local server to listen to.
#KUBE_API_ADDRESS="--insecure-bind-address=127.0.0.1"
KUBE_API_ADDRESS="--insecure-bind-address=0.0.0.0"      ## kube启动时绑定的地址


# The port on the local server to listen on.
KUBE_API_PORT="--port=8080"

# Port minions listen on
KUBELET_PORT="--kubelet-port=10250"

# Comma separated list of nodes in the etcd cluster
KUBE_ETCD_SERVERS="--etcd-servers=http://MyCentos7:2379"  ## kube调用etcd的url

# Address range to use for services
KUBE_SERVICE_ADDRESSES="--service-cluster-ip-range=10.254.0.0/16"  ## 此地址是docker容器的地址段,也是Kubernetes可分配的IP范围,Kubernetes启动的每一个pod和service都会从这个范围中为其分配一个IP地址。  配置flanneld时会用到,需将其写入etcd中!!!!
# default admission control policies
# KUBE_ADMISSION_CONTROL="--admission-control=NamespaceLifecycle,NamespaceExists,LimitRanger,SecurityContextDeny,ServiceAccount,ResourceQuota"
KUBE_ADMISSION_CONTROL="--admission-control=NamespaceLifecycle,NamespaceExists,LimitRanger,SecurityContextDeny,ResourceQuota"  ##移除ServiceAccount 项目,否则在后期中会报出没有认证错误
# Add your own! KUBE_API_ARGS=""
-
修改config
[root@MyCentos7 kubernetes]# vim /etc/kubernetes/config
###
# kubernetes system config
#
# The following values are used to configure various aspects of all
# kubernetes services, including
#
#   kube-apiserver.service
#   kube-controller-manager.service
#   kube-scheduler.service
#   kubelet.service
#   kube-proxy.service
# logging to stderr means we get it in the systemd journal
KUBE_LOGTOSTDERR="--logtostderr=true"

# journal message level, 0 is debug
KUBE_LOG_LEVEL="--v=0"

# Should this cluster be allowed to run privileged docker containers
KUBE_ALLOW_PRIV="--allow-privileged=false"

# How the controller-manager, scheduler, and proxy find the apiserver
#KUBE_MASTER="--master=http://127.0.0.1:8080"
KUBE_MASTER="--master=http://MyCentos7:8080"
-------node上要修改:(红色字体为改动部分)
kubelet和config两个文件,其余没用到
-
修改kubelet
[root@MyCentos7-1 kubernetes]# vim /etc/kubernetes/kubelet

###
# kubernetes kubelet (minion) config

# The address for the info server to serve on (set to 0.0.0.0 or "" for all interfaces)
#KUBELET_ADDRESS="--address=127.0.0.1"
KUBELET_ADDRESS="--address=0.0.0.0"

# The port for the info server to serve on
#KUBELET_PORT="--port=10250"

# You may leave this blank to use the actual hostname
#KUBELET_HOSTNAME="--hostname-override=127.0.0.1"
KUBELET_HOSTNAME="--hostname-override=MyCentos7-1"

# location of the api-server
#KUBELET_API_SERVER="--api-servers=http://127.0.0.1:8080"
KUBELET_API_SERVER="--api-servers=http://MyCentos7:8080"

# pod infrastructure container
KUBELET_POD_INFRA_CONTAINER="--pod-infra-container-image=registry.access.redhat.com/rhel7/pod-infrastructure:latest"

# Add your own!
KUBELET_ARGS=""
-
修改config
[root@MyCentos7-1 kubernetes]# vim /etc/kubernetes/config

###
# kubernetes system config
#
# The following values are used to configure various aspects of all
# kubernetes services, including
#
#   kube-apiserver.service
#   kube-controller-manager.service
#   kube-scheduler.service
#   kubelet.service
#   kube-proxy.service
# logging to stderr means we get it in the systemd journal
KUBE_LOGTOSTDERR="--logtostderr=true"

# journal message level, 0 is debug
KUBE_LOG_LEVEL="--v=0"

# Should this cluster be allowed to run privileged docker containers
KUBE_ALLOW_PRIV="--allow-privileged=false"

# How the controller-manager, scheduler, and proxy find the apiserver
KUBE_MASTER="--master=http://MyCentos7:8080"
至此,kubernetes集群安装及配置完成
2.4安装Fanneld并配置,创建覆盖网络
在master和node上均执行以下命令进行安装
yum install flannel
且都对配置文件/etc/sysconfig/flanneld做如下修改(红色字体为改动部分)
[root@MyCentos7 ~]# vim /etc/sysconfig/flanneld

# Flanneld configuration options

# etcd url location.  Point this to the server where etcd runs
#FLANNEL_ETCD_ENDPOINTS="http://127.0.0.1:2379"
FLANNEL_ETCD_ENDPOINTS="http://MyCentos7:2379"

# etcd config key.  This is the configuration key that flannel queries
# For address range assignment
FLANNEL_ETCD_PREFIX="/atomic.io/network"

# Any additional options that you want to pass
#FLANNEL_OPTIONS=""
在master上配置etcd中关于flannel的key
Flannel使用etcd来配置,以确保多个flannel实例直接的配置一致性
使用命令:
[root@MyCentos7 ~]# etcdctl mk /atomic.io/network/config '{ "Network": "10.254.0.0/16" }'
{ "Network": "10.254.0.0/16" }
其中:
‘/atomic.io/network/config’这个key与上文/etc/sysconfig/flannel中的配置项FLANNEL_ETCD_PREFIX是相对应的,错误的话启动就会出错;
ip和上文中出现的/etc/kubernetes/apiserver中的配置项KUBE_SERVICE_ADDRESSES中的ip地址保持一致;
分别在master和node上启动flanneld服务,并设置开机自启动
systemctl enable flanneld.service

systemctl start flanneld.service
Flannel启动之后,docker需要重启
service docker restart ##master和node上都重启
使用ifconfig查看Flannel状态,flannel的网段必须一致
master节点
[root@MyCentos7 ~]# ifconfig
docker0: flags=4163<UP,BROADCAST,RUNNING,MULTICAST>  mtu 1472
        inet 10.254.79.1  netmask 255.255.255.0  broadcast 0.0.0.0
        inet6 fe80::42:9aff:fe17:f633  prefixlen 64  scopeid 0x20<link>
        ether 02:42:9a:17:f6:33  txqueuelen 0  (Ethernet)
        RX packets 32  bytes 2144 (2.0 KiB)
        RX errors 0  dropped 0  overruns 0  frame 0
        TX packets 31  bytes 6088 (5.9 KiB)
        TX errors 0  dropped 0 overruns 0  carrier 0  collisions 0

ens32: flags=4163<UP,BROADCAST,RUNNING,MULTICAST>  mtu 1500
        inet 192.168.126.130  netmask 255.255.255.0  broadcast 192.168.126.255
        inet6 fe80::20c:29ff:fedb:8621  prefixlen 64  scopeid 0x20<link>
        ether 00:0c:29:db:86:21  txqueuelen 1000  (Ethernet)
        RX packets 708254  bytes 141038357 (134.5 MiB)
        RX errors 0  dropped 0  overruns 0  frame 0
        TX packets 538862  bytes 210767398 (201.0 MiB)
        TX errors 0  dropped 0 overruns 0  carrier 0  collisions 0

flannel0: flags=4305<UP,POINTOPOINT,RUNNING,NOARP,MULTICAST>  mtu 1472
        inet 10.254.79.0  netmask 255.255.0.0  destination 10.254.79.0
        inet6 fe80::d331:f10c:e8d8:4015  prefixlen 64  scopeid 0x20<link>
        unspec 00-00-00-00-00-00-00-00-00-00-00-00-00-00-00-00  txqueuelen 500  (UNSPEC)
        RX packets 3467  bytes 2491574 (2.3 MiB)
        RX errors 0  dropped 0  overruns 0  frame 0
        TX packets 3690  bytes 755714 (738.0 KiB)
        TX errors 0  dropped 0 overruns 0  carrier 0  collisions 0

lo: flags=73<UP,LOOPBACK,RUNNING>  mtu 65536
        inet 127.0.0.1  netmask 255.0.0.0
        inet6 ::1  prefixlen 128  scopeid 0x10<host>
        loop  txqueuelen 1  (Local Loopback)
        RX packets 3493464  bytes 1530884404 (1.4 GiB)
        RX errors 0  dropped 0  overruns 0  frame 0
        TX packets 3493464  bytes 1530884404 (1.4 GiB)
        TX errors 0  dropped 0 overruns 0  carrier 0  collisions 0

veth857ce98: flags=4163<UP,BROADCAST,RUNNING,MULTICAST>  mtu 1472
        inet6 fe80::b09b:faff:fe53:25d4  prefixlen 64  scopeid 0x20<link>
        ether b2:9b:fa:53:25:d4  txqueuelen 0  (Ethernet)
        RX packets 8  bytes 648 (648.0 B)
        RX errors 0  dropped 0  overruns 0  frame 0
        TX packets 8  bytes 648 (648.0 B)
        TX errors 0  dropped 0 overruns 0  carrier 0  collisions 0

virbr0: flags=4099<UP,BROADCAST,MULTICAST>  mtu 1500
        inet 192.168.122.1  netmask 255.255.255.0  broadcast 192.168.122.255
        ether 52:54:00:a5:ef:23  txqueuelen 1000  (Ethernet)
        RX packets 0  bytes 0 (0.0 B)
        RX errors 0  dropped 0  overruns 0  frame 0
        TX packets 0  bytes 0 (0.0 B)
        TX errors 0  dropped 0 overruns 0  carrier 0  collisions 0
node节点
[root@MyCentos7-1 kubernetes]# ifconfig
docker0: flags=4163<UP,BROADCAST,RUNNING,MULTICAST>  mtu 1472
        inet 10.254.40.1  netmask 255.255.255.0  broadcast 0.0.0.0
        inet6 fe80::42:64ff:fe10:7e79  prefixlen 64  scopeid 0x20<link>
        ether 02:42:64:10:7e:79  txqueuelen 0  (Ethernet)
        RX packets 71758  bytes 13564840 (12.9 MiB)
        RX errors 0  dropped 0  overruns 0  frame 0
        TX packets 62513  bytes 18941202 (18.0 MiB)
        TX errors 0  dropped 0 overruns 0  carrier 0  collisions 0

ens32: flags=4163<UP,BROADCAST,RUNNING,MULTICAST>  mtu 1500
        inet 192.168.126.131  netmask 255.255.255.0  broadcast 192.168.126.255
        inet6 fe80::20c:29ff:fe62:4928  prefixlen 64  scopeid 0x20<link>
        ether 00:0c:29:62:49:28  txqueuelen 1000  (Ethernet)
        RX packets 665714  bytes 364751429 (347.8 MiB)
        RX errors 0  dropped 0  overruns 0  frame 0
        TX packets 713961  bytes 112909944 (107.6 MiB)
        TX errors 0  dropped 0 overruns 0  carrier 0  collisions 0

flannel0: flags=4305<UP,POINTOPOINT,RUNNING,NOARP,MULTICAST>  mtu 1472
        inet 10.254.40.0  netmask 255.255.0.0  destination 10.254.40.0
        inet6 fe80::4db5:581:930d:4945  prefixlen 64  scopeid 0x20<link>
        unspec 00-00-00-00-00-00-00-00-00-00-00-00-00-00-00-00  txqueuelen 500  (UNSPEC)
        RX packets 366  bytes 56830 (55.4 KiB)
        RX errors 0  dropped 0  overruns 0  frame 0
        TX packets 311  bytes 45570 (44.5 KiB)
        TX errors 0  dropped 0 overruns 0  carrier 0  collisions 0

lo: flags=73<UP,LOOPBACK,RUNNING>  mtu 65536
        inet 127.0.0.1  netmask 255.0.0.0
        inet6 ::1  prefixlen 128  scopeid 0x10<host>
        loop  txqueuelen 1  (Local Loopback)
        RX packets 128  bytes 8178 (7.9 KiB)
        RX errors 0  dropped 0  overruns 0  frame 0
        TX packets 128  bytes 8178 (7.9 KiB)
        TX errors 0  dropped 0 overruns 0  carrier 0  collisions 0

veth24cfe15: flags=4163<UP,BROADCAST,RUNNING,MULTICAST>  mtu 1472
        inet6 fe80::7023:6ff:fe24:927d  prefixlen 64  scopeid 0x20<link>
        ether 72:23:06:24:92:7d  txqueuelen 0  (Ethernet)
        RX packets 8  bytes 648 (648.0 B)
        RX errors 0  dropped 0  overruns 0  frame 0
        TX packets 23  bytes 1818 (1.7 KiB)
        TX errors 0  dropped 0 overruns 0  carrier 0  collisions 0

vethedeed63: flags=4163<UP,BROADCAST,RUNNING,MULTICAST>  mtu 1472
        inet6 fe80::4cbd:12ff:fe71:9158  prefixlen 64  scopeid 0x20<link>
        ether 4e:bd:12:71:91:58  txqueuelen 0  (Ethernet)
        RX packets 13545  bytes 2859970 (2.7 MiB)
        RX errors 0  dropped 0  overruns 0  frame 0
        TX packets 12829  bytes 1760034 (1.6 MiB)
        TX errors 0  dropped 0 overruns 0  carrier 0  collisions 0

virbr0: flags=4099<UP,BROADCAST,MULTICAST>  mtu 1500
        inet 192.168.122.1  netmask 255.255.255.0  broadcast 192.168.122.255
        ether 52:54:00:a5:ef:23  txqueuelen 1000  (Ethernet)
        RX packets 0  bytes 0 (0.0 B)
        RX errors 0  dropped 0  overruns 0  frame 0
        TX packets 0  bytes 0 (0.0 B)
        TX errors 0  dropped 0 overruns 0  carrier 0  collisions 0
倘若不一致,在访问bashboard时会出现如下问题
Error: 'dial tcp 10.0.66.2:9090: getsockopt: connection timed out'
Trying to reach: 'http://10.0.66.2:9090/'
问题详情及解决办法,见:https://www.cnblogs.com/guyeshanrenshiwoshifu/p/9146915.html
至此,Fanneld安装及配置完成
2.5启动kubernetes集群
配置完成之后,启动kubernetes集群并设置开机自启动
在master上执行(注意启动顺序)
[root@MyCentos7 ~]# systemctl enable kube-apiserver.service
[root@MyCentos7 ~]# systemctl enable kube-controller-manager.service
[root@MyCentos7 ~]# systemctl enable kube-scheduler.service

[root@MyCentos7 ~]# systemctl start kube-apiserver.service
[root@MyCentos7 ~]# systemctl start kube-controller-manager.service
[root@MyCentos7 ~]# systemctl start kube-scheduler.service
在node上执行
[root@MyCentos7-1 ~]# systemctl enable kubelet.service
[root@MyCentos7-1 ~]# systemctl enable kube-proxy.service

[root@MyCentos7-1 ~]# systemctl start kubelet.service
[root@MyCentos7-1 ~]# systemctl start kube-proxy.service
启动集群之后,在master上查看集群中节点及节点状态
[root@MyCentos7 kubernetes]# kubectl -s http://MyCentos7:8080 get node
NAME          STATUS    AGE
mycentos7-1   Ready     1d
[root@MyCentos7 kubernetes]# kubectl get nodes
NAME          STATUS    AGE
mycentos7-1   Ready     1d
正常
2.6安装cadvosor
注:在新版的kubernetes中,cAdvisor被集成到kubelet中。通过netstat可以查看到kubelet新开了一个4194的端口,这就是cAdvisor监听的端口,现在我们然后可以通过http://<node-ip>:4194的方式访问到cAdvisor。
故cadvosor可以不用安装。。。
使用如下命令安装
docker run --volume=/:/rootfs:ro --volume=/var/run:/var/run:rw --privileged=true --volume=/sys:/sys:ro --volume=/var/lib/docker/:/var/lib/docker:ro --publish=9994:8088 --detach=true --name=cadvisor --restart=always google/cadvisor:v0.24.1
访问地址:http://ip_address:9994
至此,cadvosor安装及配置完成
2.7安装bashboard
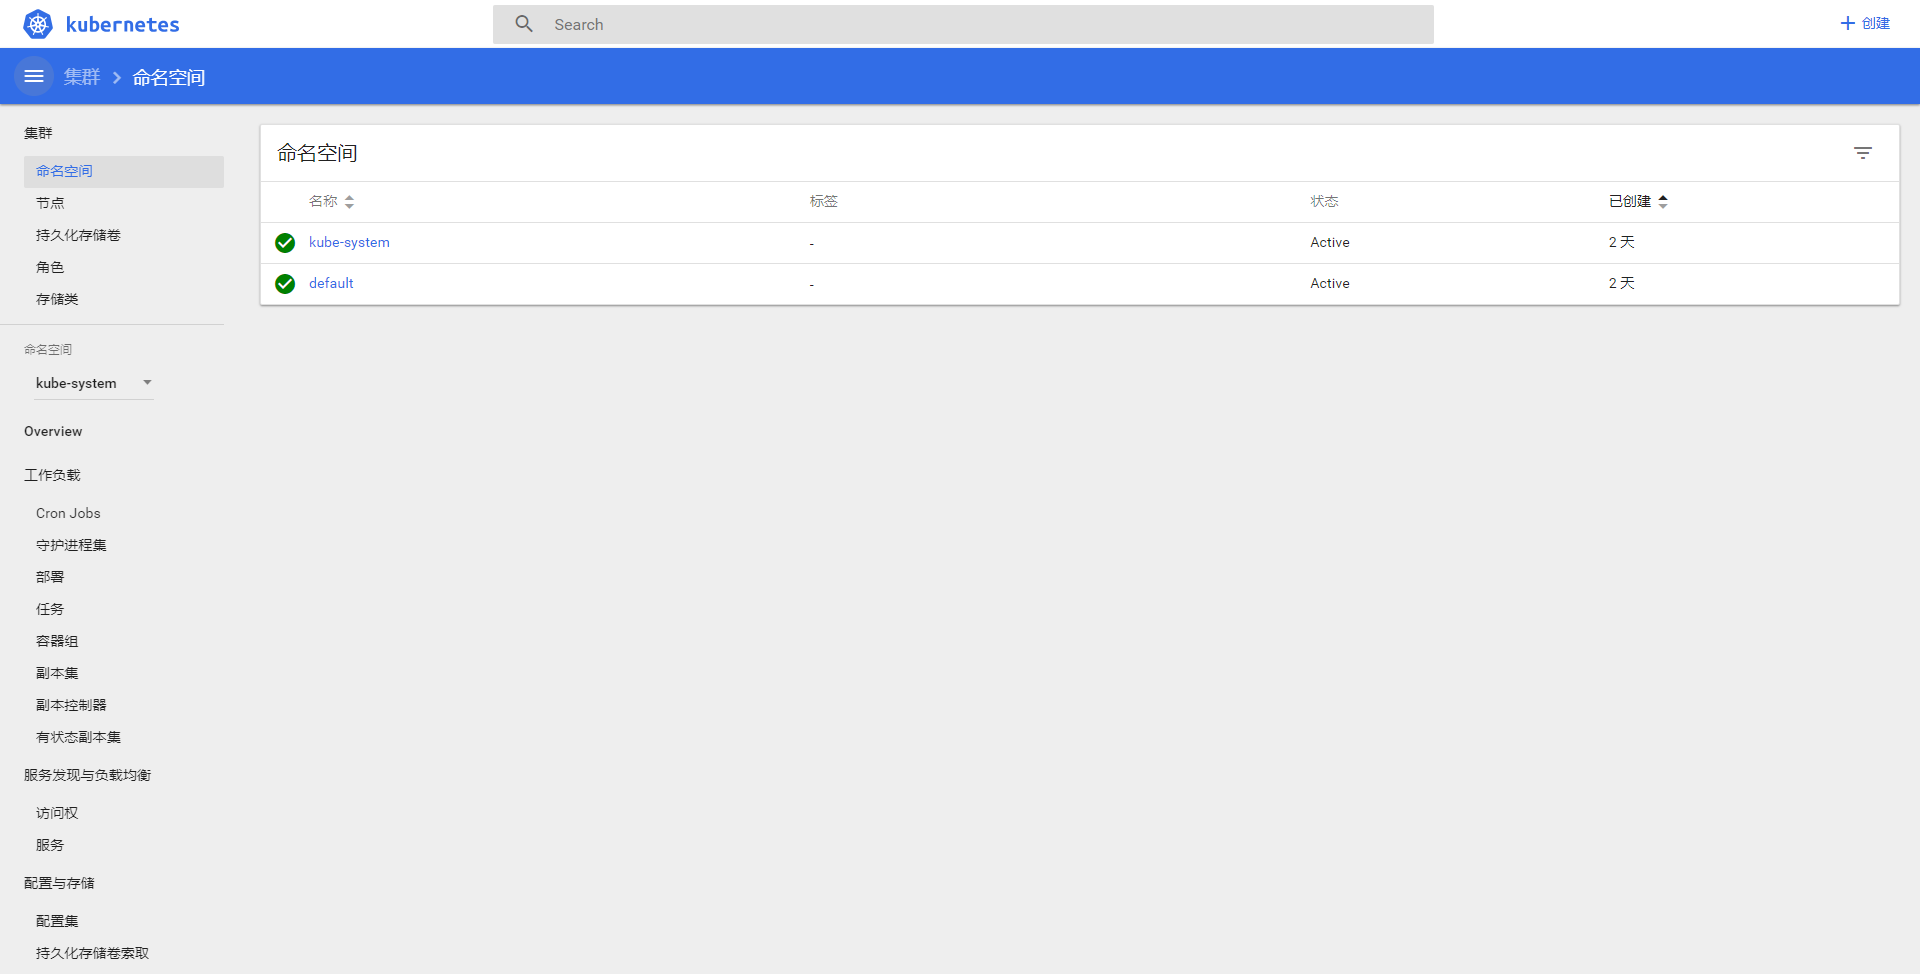
首先要确认是否有kube-system命名空间。
[root@MyCentos7 ~]# kubectl get namespace
NAME          STATUS    AGE
default       Active    2d
kube-system   Active    2d
若没有,则新建
在master指定位置新建kube-dashboard.yaml文件,我的建到了/service/docker/k8s目录下
wget http://docs.minunix.com/docker/kubernetes-dashboard.yaml -O /service/docker/k8s/kube-dashboard.yaml
对kube-dashboard.yaml做如下修改(红色字体为改动部分)
[root@MyCentos7 k8s]# vim kube-dashboard.yaml

# Copyright 2015 Google Inc. All Rights Reserved.
#
# Licensed under the Apache License, Version 2.0 (the "License");
# you may not use this file except in compliance with the License.
# You may obtain a copy of the License at
#
#     http://www.apache.org/licenses/LICENSE-2.0
#
# Unless required by applicable law or agreed to in writing, software
# distributed under the License is distributed on an "AS IS" BASIS,
# WITHOUT WARRANTIES OR CONDITIONS OF ANY KIND, either express or implied.
# See the License for the specific language governing permissions and
# limitations under the License.

# Configuration to deploy release version of the Dashboard UI.
#
# Example usage: kubectl create -f <this_file>

kind: Deployment
# Example usage: kubectl create -f <this_file>

kind: Deployment
apiVersion: extensions/v1beta1
metadata:
  labels:
    app: kubernetes-dashboard
    version: v1.1.1
  name: kubernetes-dashboard
  namespace: kube-system
spec:
  replicas: 1
  selector:
    matchLabels:
      app: kubernetes-dashboard
  template:
    metadata:
      labels:
        app: kubernetes-dashboard
    spec:
      containers:
      - name: kubernetes-dashboard
        image: daocloud.io/megvii/kubernetes-dashboard-amd64:v1.8.0
        imagePullPolicy: Always
        ports:
        - containerPort: 9090
          protocol: TCP
        args:
          # Uncomment the following line to manually specify Kubernetes API server Host
          # If not specified, Dashboard will attempt to auto discover the API server and connect
          # to it. Uncomment only if the default does not work.
        - --apiserver-host=http://192.168.126.130:8080  ## 请修改为自己的kebu-apiserver
        livenessProbe:
          httpGet:
            path: /
            port: 9090
          initialDelaySeconds: 30
          timeoutSeconds: 30
---
kind: Service
apiVersion: v1
metadata:
  labels:
    app: kubernetes-dashboard
  name: kubernetes-dashboard
  namespace: kube-system
spec:
  type: NodePort
  ports:
  - port: 80
    targetPort: 9090
  selector:
    app: kubernetes-dashboard
根据此yaml文件创建pods,命令如下:
[root@MyCentos7 k8s]# kubectl create -f kube-dashboard.yaml
查看是否创建成功,命令如下:
[root@MyCentos7 k8s]# kubectl get pods --namespace=kube-system
NAME READY STATUS RESTARTS AGE
kubernetes-dashboard-2094756401-k09kb 1/1 Running 2 22h
如果创建过程中有错误,也可以通过以下的方式查看错误原因:
[root@MyCentos7 k8s]# kubectl describe pods kubernetes-dashboard-2094756401-k09kb --namespace=kube-system
说明:在创建的过程中遇到了如下错误,且pod一直处于ContainerCreating状态
 FirstSeen    LastSeen    Count    From            SubObjectPath    Type        Reason        Message
  ---------    --------    -----    ----            -------------    --------    ------        -------
  1m        1m        1    {default-scheduler }            Normal        Scheduled    Successfully assigned kubernetes-dashboard-2094756401-kzhnx to mycentos7-1
  1m        27s        3    {kubelet mycentos7-1}            Warning        FailedSync    Error syncing pod, skipping: failed to "StartContainer" for "POD" with ErrImagePull: "image pull failed for registry.access.redhat.com/rhel7/pod-infrastructure:latest, this may be because there are no credentials on this request.  details: (open /etc/docker/certs.d/registry.access.redhat.com/redhat-ca.crt: no such file or directory)"

  40s    14s    2    {kubelet mycentos7-1}        Warning    FailedSync    Error syncing pod, skipping: failed to "StartContainer" for "POD" with ImagePullBackOff: "Back-off pulling image \"registry.access.redhat.com/rhel7/pod-infrastructure:latest\""
问题及解决方法详情见:https://www.cnblogs.com/guyeshanrenshiwoshifu/p/9147238.html
至此,bashboard安装及配置完成
四:访问dashboard ui查看集群状态
浏览器访问http://192.168.126.130:8080/ui
至此,全部完成
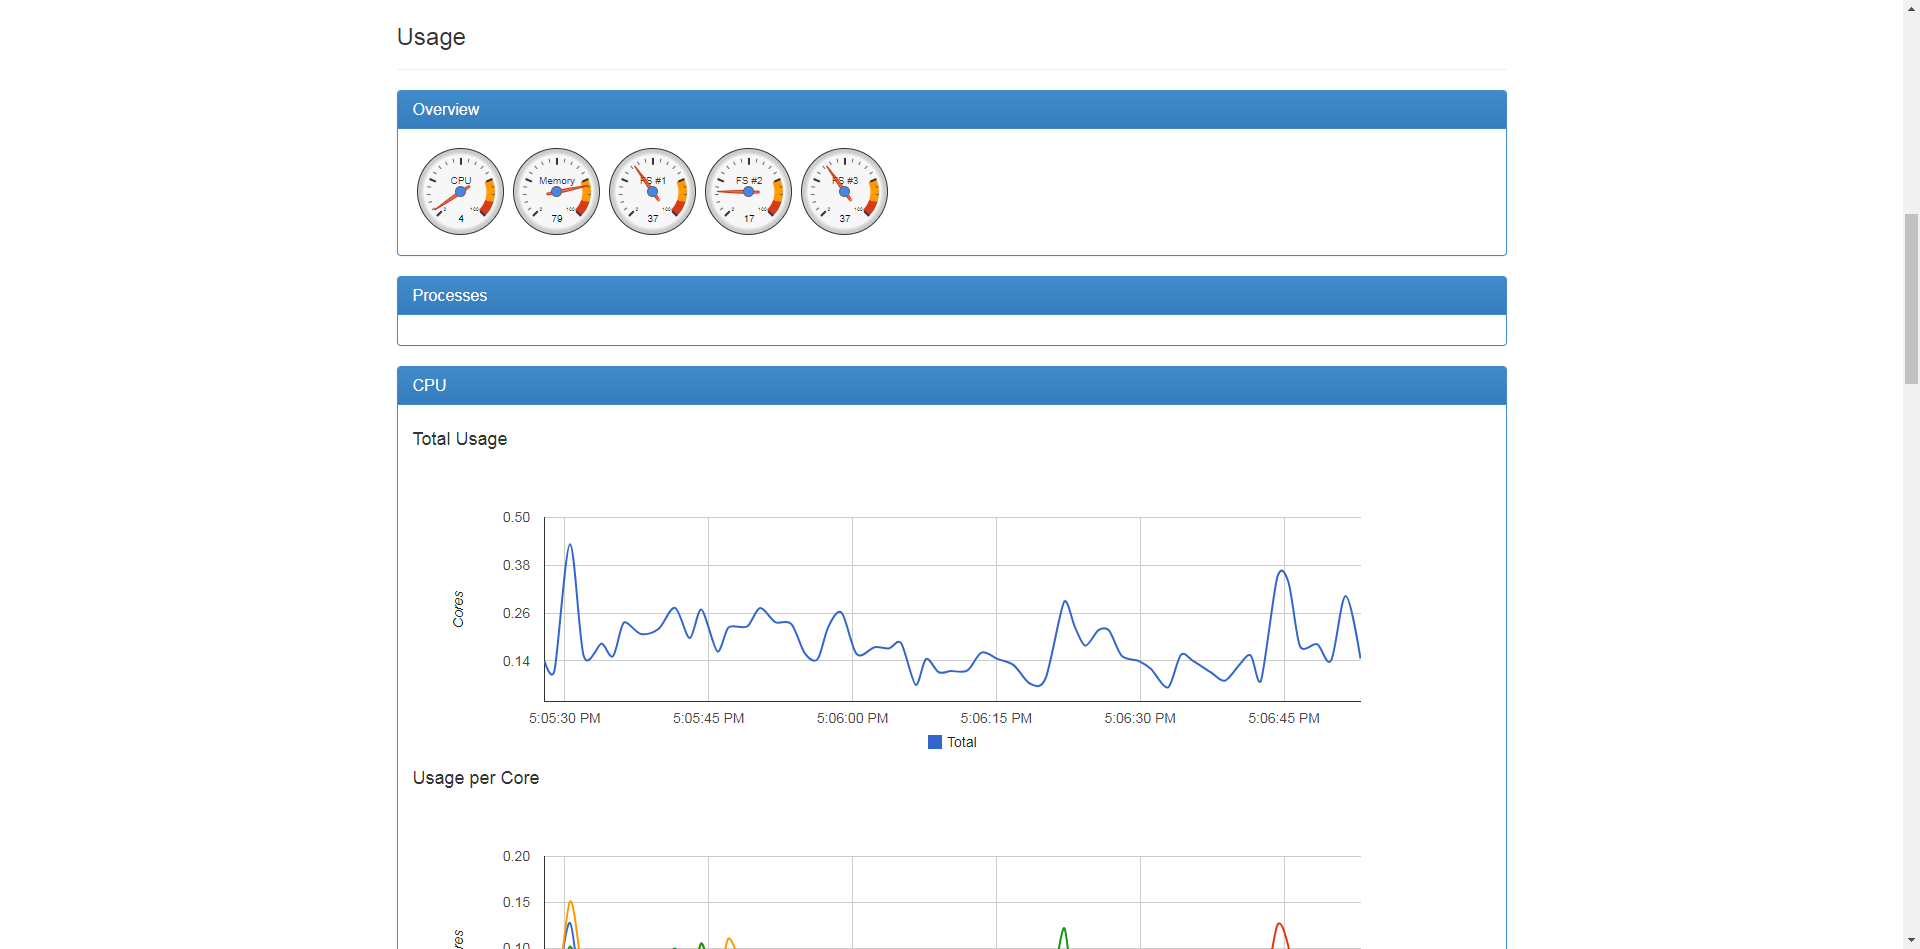
由于缺少 Heapster 插件,当前 dashboard 不能展示 Pod、Nodes 的 CPU、内存等 metric 图形
访问dashboard UI可能出现的问题:
getsockopt: connection timed out’问题
如果安装的docker版本为1.13及以上,并且网络畅通,flannel、etcd都正常,但还是会出现getsockopt: connection timed out'的错误,则可能是iptables配置问题。具体问题:
Error: 'dial tcp 10.233.50.3:8443: getsockopt: connection timed out
docker从1.13版本开始,可能将iptables FORWARD chain的默认策略设置为DROP,从而导致ping其他Node上的Pod IP失败,遇到这种问题时,需要手动设置策略为ACCEPT:
sudo iptables -P FORWARD ACCEPT
使用iptables -nL命令查看,发现Forward的策略还是drop,可是我们明明执行了iptables -P FORWARD ACCEPT。原来,docker是在这句话执行之后启动的,需要每次在docker之后再执行这句话。。。这么做有点太麻烦了,所以我们修改下docker的启动脚本:
vim /usr/lib/systemd/system/docker.service

[Service]
Type=notify
NotifyAccess=all
EnvironmentFile=-/run/containers/registries.conf
EnvironmentFile=-/etc/sysconfig/docker
EnvironmentFile=-/etc/sysconfig/docker-storage
EnvironmentFile=-/etc/sysconfig/docker-network
Environment=GOTRACEBACK=crash
Environment=DOCKER_HTTP_HOST_COMPAT=1
Environment=PATH=/usr/libexec/docker:/usr/bin:/usr/sbin
ExecStart=/usr/bin/dockerd-current \
          --add-runtime docker-runc=/usr/libexec/docker/docker-runc-current \
          --default-runtime=docker-runc \
          --exec-opt native.cgroupdriver=systemd \
          --userland-proxy-path=/usr/libexec/docker/docker-proxy-current \
          --seccomp-profile=/etc/docker/seccomp.json \
          $OPTIONS \
          $DOCKER_STORAGE_OPTIONS \
          $DOCKER_NETWORK_OPTIONS \
          $ADD_REGISTRY \
          $BLOCK_REGISTRY \
          $INSECURE_REGISTRY \
          $REGISTRIES
ExecStartPost=/sbin/iptables -I FORWARD -s 0.0.0.0/0 -j ACCEPT     ## 添加这行操作,在每次重启docker之前都会设置iptables策略为ACCEPT
ExecReload=/bin/kill -s HUP $MAINPID
LimitNOFILE=1048576
LimitNPROC=1048576
LimitCORE=infinity
TimeoutStartSec=0
Restart=on-abnormal
MountFlags=slave
KillMode=process
在启动文件中的 [Service] 下添加一行配置,即上面代码中的配置即可。
然后重启docker,再次查看dashboard网页。
dashboard集成heapster详见另一篇博客:
https://www.cnblogs.com/guyeshanrenshiwoshifu/p/9155939.html

 浙公网安备 33010602011771号