blazor与硬件通信实现案例
在网页接入硬件交互通信方案这篇博客中,曾经提到了网页中接入各种硬件操作的方法,即通过Windows Service作为指令的中转,并建立websocket通信连接,进而实现接入硬件的各种操作。这篇博客就以实际的案例来讲解具体怎么实现。
一、建立Windows Service项目
比如我就建立了一个windows服务项目,如下图所示:
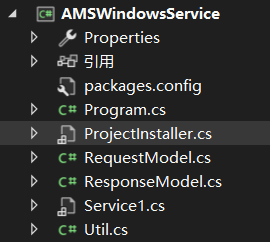
Service1.cs里面封装了服务的相关方法。
代码片段:
public Service1()
 {
     InitializeComponent();

     //海康发卡器读取
     link.Initialization();
     link.RadioInventory += new EventHandler<RadioInventoryEventArgs>(link_RadioInventory);
     radios = link.GetRadioEnumeration();
     if (radios == null)
     {
         return;
     }
     if (radios != null && radios.Count > 0)
     {
         result = link.Connect(radios[0].radioHandle);

         if (result == operResult.Ok)
         {
             AntennaPortConfiguration antennaPortConfiguration = new AntennaPortConfiguration();
             antennaPortConfiguration.powerLevel = 50;               //功率5db,每次重启之后会还原为23db
             antennaPortConfiguration.dwellTime = 2000;              //驻留时间
             antennaPortConfiguration.numberInventoryCycles = 8192;  //盘讯周期
             result = link.SetAntennaPortConfiguration(radios[0].radioHandle, 0, antennaPortConfiguration);
         }
     }

     //Sato RFID打印机
     SATOPrinter = new Printer();
     SATODriver = new Driver();

     //开启WebSocket服务
     Fleck.FleckLog.Level = Fleck.LogLevel.Debug;
     allSockets = new List<Fleck.IWebSocketConnection>();
     server = new Fleck.WebSocketServer("ws://127.0.0.1:9999");
 }
代码片段2:
protected override void OnStart(string[] args)
{
    server.Start(socket =>
    {
        socket.OnOpen = () =>
        {
            allSockets.Add(socket);
        };

        socket.OnClose = () =>
        {
            allSockets.Remove(socket);
        };

        socket.OnMessage = message =>
        {
            RequestModel requestModel = js.Deserialize<RequestModel>(message);

            if (requestModel.command.Equals("readEPC")) //readEPC为发送的读取EPC指令
            {
                List<string> epcList = ReadEPCs();
                if (epcList.Count == 0)
                {
                    ResponseModel messageModel = new ResponseModel()
                    {
                        Flag = 1,
                        Msg = "未读取到标签"
                    };
                    string str = js.Serialize(messageModel);
                    allSockets.ToList().ForEach(s => s.Send(str));
                }
                else
                {
                    string epc = epcList[0].Split(' ')[0];
                    ResponseModel messageModel = new ResponseModel()
                    {
                        Flag = 0,
                        Msg = epc
                    };
                    string str = js.Serialize(messageModel);
                    allSockets.ToList().ForEach(s => s.Send(str));
                }
            }
            else if (requestModel.command.Equals("writeEPC"))
            {
                string epc = Util.ID2EPC(requestModel.assertNo);

                int flag = WriteEPC(epc); //0表示ok,负数表示error
                ResponseModel messageModel = new ResponseModel()
                {
                    Flag = flag,
                    Msg = epc
                };
                string str = js.Serialize(messageModel);
                allSockets.ToList().ForEach(s => s.Send(str));
            }
            else if (requestModel.command.Equals("printWrite"))
            {
                int flag = PrintWrite(requestModel.assertNo); //0表示ok,负数表示error
                ResponseModel messageModel = new ResponseModel()
                {
                    Flag = flag,
                    Msg = "打印写码成功"
                };
                string str = js.Serialize(messageModel);
                //this.label1.BeginInvoke(new MethodInvoker(() =>
                //{
                //    this.label1.Text = str;
                //}));

                allSockets.ToList().ForEach(s => s.Send(str));
            }
            else if (requestModel.command.Equals("writeCode")) //Impinj R420 写码
            {
                try
                {
                    //前面的是读写器的IP地址,也要传入
                    R420WriteEPC(requestModel.ip, requestModel.assertNo, requestModel.user, requestModel.accessPassword, requestModel.killPassword);

                    ResponseModel messageModel = new ResponseModel()
                    {
                        Flag = 0,
                        Msg = this.tid //返回tid
                    };
                    string str = js.Serialize(messageModel);
                    allSockets.ToList().ForEach(s => s.Send(str));
                }
                catch (Exception ex)
                {
                    ResponseModel messageModel = new ResponseModel()
                    {
                        Flag = -1,
                        Msg = ex.Message //"write error"
                    };
                    string str = js.Serialize(messageModel);
                    allSockets.ToList().ForEach(s => s.Send(str));
                }
            }
            else
            {
                ResponseModel messageModel = new ResponseModel()
                {
                    Flag = 1,
                    Msg = "命令格式无效"
                };
                string str = js.Serialize(messageModel);
                allSockets.ToList().ForEach(s => s.Send(str));
            }
        };
    });
}
二、建立Windows Service安装向导
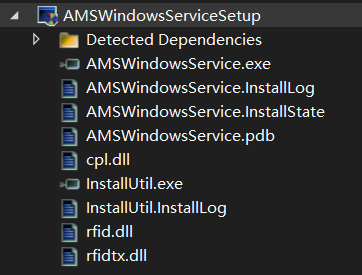
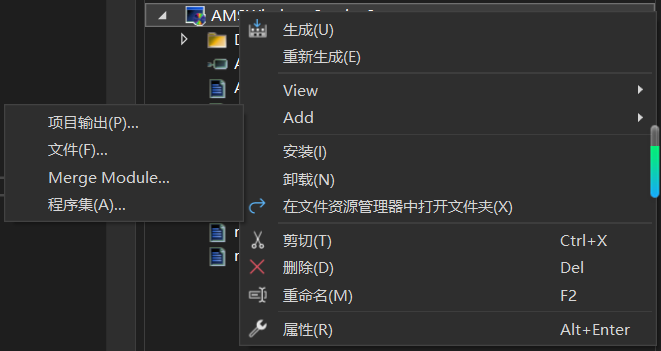
也就是将上述的Windows Service项目打包成Windows Service安装包。VS中建立一个Windows Service安装项目,然后添加生成的dll文件。
需要说明的是,VS中可以直接安装或卸载服务,方便我们进行测试。
三、使用websocket测试客户端
可以通过如下的html页面进行websocket指令的发送和接收,其中websocket的通信协议可以自行约定设计。
<!DOCTYPE html>
<html>
<head>
    <title>WebSocket客户端</title>
</head>
<body>
    <input type="text" id="messageInput" placeholder="输入消息">
    <button onclick="sendMessage()">发送</button>
    <div id="output"></div>

    <script>
        // 创建WebSocket连接(替换为你的WebSocket服务器地址)
        const socket = new WebSocket('ws://localhost:9999');

        // 连接建立时触发
        socket.addEventListener('open', (event) => {
            console.log('连接已建立');
            appendMessage('系统: 连接已建立');
        });

        // 接收消息时触发
        socket.addEventListener('message', (event) => {
            console.log('收到消息:', event.data);
            appendMessage(`服务器: ${event.data}`);
        });

        // 错误处理
        socket.addEventListener('error', (event) => {
            console.error('WebSocket错误:', event);
            appendMessage('系统: 发生错误');
        });

        // 连接关闭时触发
        socket.addEventListener('close', (event) => {
            console.log('连接已关闭');
            appendMessage('系统: 连接已关闭');
        });

        // 发送消息
        function sendMessage() {
            const input = document.getElementById('messageInput');
            const message = input.value;

            if (message.trim()) {
                socket.send(message);
                appendMessage(`你: ${message}`);
                input.value = '';
            }
        }

        // 在页面显示消息
        function appendMessage(message) {
            const output = document.getElementById('output');
            const p = document.createElement('p');
            p.textContent = message;
            output.appendChild(p);
        }
    </script>
</body>
</html>
四、blazor页面集成websocket
- 在blazor项目中的wwwroot文件夹中新建js文件:websocketInterop.js
// websocketInterop.js
export function createWebSocket(url) {
    const socket = new WebSocket(url);

    // 连接建立时触发
    socket.addEventListener('open', (event) => {
        console.log('连接已建立');
    });

    // 接收消息时触发
    socket.addEventListener('message', (event) => {
        console.log('收到消息:', event.data);
        DotNet.invokeMethodAsync('WMartUPC.Shared', 'OnMessageReceived', event.data);
    });

    // 错误处理
    socket.addEventListener('error', (event) => {
        console.error('WebSocket错误:', event);
    });

    // 连接关闭时触发
    socket.addEventListener('close', (event) => {
        console.log('连接已关闭');
    });
    return socket;
};

export function sendWebSocketMessage(socket, message) {
    socket.send(message);
};

export async function ss1(blazorObject, msg) {
    await blazorObject.invokeMethodAsync("ss2", msg);
}

export function showAlert(message) {
    alert(message);
}
- razor页面调用websocketInterop.js
@code {
	//websocket
	private static IJSObjectReference? module;
	private string wsUrl = "ws://127.0.0.1:9999";
	private static IJSObjectReference? socket;
	private static DotNetObjectReference<Index>? blazorObject;


	protected override async Task OnAfterRenderAsync(bool firstRender)
	{
		if (firstRender)
		{
			module = await JSRuntime.InvokeAsync<IJSObjectReference>("import", "./websocketInterop.js");
			socket = await module.InvokeAsync<IJSObjectReference>("createWebSocket", wsUrl);
			blazorObject = DotNetObjectReference.Create(this);
		}
	}

	/// <summary>
	/// 测试RFID写码按钮
	/// </summary>
	/// <param name="items"></param>
	/// <returns></returns>
	private async Task OnCreateClick2()
	{
		// blazorObject = DotNetObjectReference.Create(this);
		// await module.InvokeAsync<IJSObjectReference>("ss1", blazorObject);
		await module.InvokeVoidAsync("sendWebSocketMessage", socket, "{'ip':'192.168.0.101','command':'writeCode','assertNo':'123412341234000000000000'}");
	}

	[JSInvokable("ss2")]
	public async Task ss(string msg)
	{
		await ToastService?.Success("提示", msg);
	}

	[JSInvokable]
	public static async void OnMessageReceived(string msg)
	{
		//await module.InvokeVoidAsync("showAlert", msg);
		await module.InvokeAsync<IJSObjectReference>("ss1", blazorObject, msg);
	}
}
通过以上四步就可以实现网页与硬件的通信了。

 浙公网安备 33010602011771号