阿里云centOS7搭建Discuz论坛(Apache+PHP+MySQL)
在云主机上搭建Discuz
安装软件(Apache、PHP、MySQL)
[root@xiaoyingECS ~]# yum --disableexcludes=all install -y httpd php php-fpm php-mysql mysql
[root@xiaoyingECS ~]# rpm -Uvh http://repo.mysql.com/mysql-community-release-el7-5.noarch.rpm
[root@xiaoyingECS ~]# yum --disableexcludes=all install -y mysql-server
启动服务
[root@xiaoyingECS ~]# service httpd start
[root@xiaoyingECS ~]# systemctl enable httpd.service
Created symlink from /etc/systemd/system/multi-user.target.wants/httpd.service to /usr/lib/systemd/system/httpd.service.
[root@xiaoyingECS ~]# systemctl is-enabled httpd.service
Enabled
[root@xiaoyingECS ~]# firewall-cmd --zone=public --add-port=80/tcp --permanent
Warning: ALREADY_ENABLED: 80:tcp
Success
[root@xiaoyingECS ~]# firewall-cmd --reload
success
[root@xiaoyingECS ~]# systemctl restart httpd.service

[root@xiaoyingECS ~]# service php-fpm start
在my.cnf的最后面添加一句 skip-grant-tables.
[root@bogon baixiaoying]# vim /etc/my.cnf
配置MySQL密码
[root@bogon baixiaoying]# service mysql start
Redirecting to /bin/systemctl start mysql.service
[root@xiaoyingECS ~]# mysql -u root
Welcome to the MySQL monitor. Commands end with ; or \g.
Your MySQL connection id is 2
Server version: 5.6.51 MySQL Community Server (GPL)

Copyright (c) 2000, 2021, Oracle and/or its affiliates. All rights reserved.

Oracle is a registered trademark of Oracle Corporation and/or its
affiliates. Other names may be trademarks of their respective
owners.

Type 'help;' or '\h' for help. Type '\c' to clear the current input statement.

mysql> use mysql;
Reading table information for completion of table and column names
You can turn off this feature to get a quicker startup with -A

Database changed
mysql> update mysql.user set password=PASSWORD('root')where User='root' ;
Query OK, 4 rows affected (0.01 sec)
Rows matched: 4 Changed: 4 Warnings: 0
mysql> flush privileges;
Query OK, 0 rows affected (0.00 sec)
mysql> exit;
把之前添上的 skip-grant-tables删掉
[root@bogon baixiaoying]# vim /etc/my.cnf
启动MySQL服务
[root@bogon baixiaoying]# service mysql restart
Redirecting to /bin/systemctl start mysql.service
验证环境配置是否成功
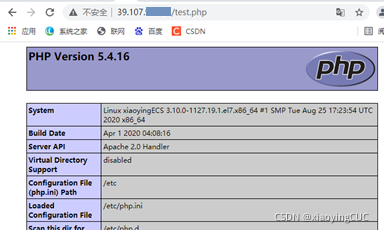
在Apache的默认目录下新建test.php文件进行测试
[root@xiaoyingECS ~]# vim /var/www/html/test.php
在文件中写
<?php echo "<title>Test Page</title>"; phpinfo() ?>
然后浏览器中输入http://xxx.xxx.xxx.xxx/test.php(地址即写阿里云服务器公网地址)。出现以下窗口说明配置成功
安装Discuz
下载X3.4版本的安装包,并解压
[root@xiaoyingECS ~]# wget http://download.comsenz.com/DiscuzX/3.4/Discuz_X3.4_SC_UTF8.zip
[root@xiaoyingECS ~]# unzip Discuz_X3.4_SC_UTF8.zip
把解压后的 “upload” 文件夹下的所有文件复制到 "/var/www/html/"目录下
[root@xiaoyingECS ~]# cp -r upload/* /var/www/html/
赋予该文件夹root读写权限
[root@xiaoyingECS ~]# chmod -R 777 /var/www/html
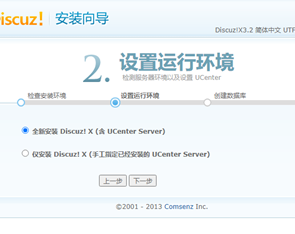
论坛环境搭建成功,开始安装
在浏览器输入http://xxx.xxx.xxx.xxx(地址即写阿里云服务器公网地址)

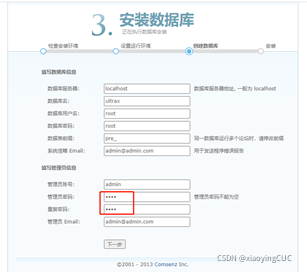
输入之前设置的密码root
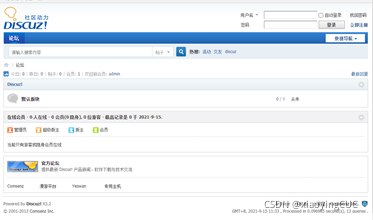
完成后可进入Discuz论坛界面
原文链接:https://blog.csdn.net/xiaoying1995/article/details/120308506

 浙公网安备 33010602011771号